You are using an out of date browser. It may not display this or other websites correctly.
You should upgrade or use an alternative browser.
You should upgrade or use an alternative browser.
rattle_snake
Fuckwits
Yes hence my absurd recommendations going in complete opposite direction of your goals and common sense.
You have put in so much effort to improve driving experience it will soon pay off.
You have put in so much effort to improve driving experience it will soon pay off.
Mad Max
Imagineer
- Joined
- May 19, 2020
- Member Number
- 325
- Messages
- 358
so I wasn't overly thrilled with the OE Dakota (and Durango) oil pan - instead of having a nice big deep sump to contain all the oil they instead have a smallish sump combined with a 'deep' middle section, which combined 'contain' the 5 quarts of oil. Strange concept but I guess it works if the engine is 'flat n level'.....but of course for me and everyone else that take their magnum engines off-road and experience fairly steep downhill angles...well that's no bueno. On any sort of downhill descent the majority of the oil would rush right towards the front, leaving the pickup tube nearly exposed almost immediately - not awesome. I don't remember it being a problem when I wheeled the truck before the buildup and others have not indicated there being a problem either, but, still, as I was pondering this 'issue' I naturally started checking around for an 'off-road' magnum 360 oil pan, and discovered something interesting.
First off, turns out the oil pans for the magnum 318 and 360 share the same 'fitment' and bolt pattern - meaning the bolt pattern up to the block(s) and the front/rear timing chain cover(s) and rear main(s) are all the same 'size' - essentially using the same oil pan from the 318 to the 360, which is not true for the LA-series engines (360 is its own animal). I also discovered that...while the Dakotas and Durangos (with a mag 318/360) share the same oil pan...the Rams and Jeeps with the 318/360 mags use a different oil pan...with a way better sump. Huh, that's cool- wait!
See, lately I've been looking for a running magnum 318 for eventual awesomeness under the hood of our 71 Demon, and I recently found/procured one still inside a derelict but complete 94 Grand Cherokee parts Jeep for the wife's own 94 GC off-road toy. When I discovered the Jeep pans were the same as the Ram pans with their nice big deep oil sump I quickly ran out to peek under the Jeep and hot diggity damn - there it is! (insert happy dance!).
Since the Jeep is going to get a car pan (LA 360) I rapidly unbolted the Jeep's pan, hit it with some cleaner and the pressure washer, and brought it into the shop for 'comparison and analysis'. This is what I found -
This pretty well sums up the differences between the Dakota/Durango vs Ram/Jeep Magnum v8 oil pans - note the 'depth' of the Dakota pan vs the Ram pan - this additional depth is 'part' of the overall oil sump -


Pulling it out of the Jeep - nose-to-nose with it's bigger and much more intimidating brother -

With the pans side-by-side, I wanted to 'see' where 5 quarts (of water) came up to in both pans -

Dakota pan, with the oil level marked on the outside (strange design) -


Ram/Jeep pan -

In order to use the other pan the respective pick up tube must also be used, and while the dipsticks can also be swapped the Dakota dipstick and tube can indeed be used with the Ram/Jeep pan, just have to make a new 'full' mark because they're not the same -


So - Ram/Jeep pan for me. But not to be outdone, I fabbed up a nice baffle and had Wayne TIG it in place, fully seam welded all the way around, so no seepage when aiming downhill. Now, with 5 quarts in the pan, tipping it forward retains about 75% of the oil in the sump vs over half of it rushing towards the front - even if I shut it off and park it for an hour, meaning less potential for air getting into the oil system, which is way more awesomer 👍. I used a bore scope to peek through the drain plug to see how much room there was between the pickup tube and baffle, and the baffle is as close as I deemed appropriate.
All cleaned up after a few days soaking in the tank at my machine shop, and a final clean with a scotch pad and WD-40, then rinse with brake cleaner -


Filled with 5 quarts of water - just at the baffle line -

and finally bolted on -


First off, turns out the oil pans for the magnum 318 and 360 share the same 'fitment' and bolt pattern - meaning the bolt pattern up to the block(s) and the front/rear timing chain cover(s) and rear main(s) are all the same 'size' - essentially using the same oil pan from the 318 to the 360, which is not true for the LA-series engines (360 is its own animal). I also discovered that...while the Dakotas and Durangos (with a mag 318/360) share the same oil pan...the Rams and Jeeps with the 318/360 mags use a different oil pan...with a way better sump. Huh, that's cool- wait!
See, lately I've been looking for a running magnum 318 for eventual awesomeness under the hood of our 71 Demon, and I recently found/procured one still inside a derelict but complete 94 Grand Cherokee parts Jeep for the wife's own 94 GC off-road toy. When I discovered the Jeep pans were the same as the Ram pans with their nice big deep oil sump I quickly ran out to peek under the Jeep and hot diggity damn - there it is! (insert happy dance!).
Since the Jeep is going to get a car pan (LA 360) I rapidly unbolted the Jeep's pan, hit it with some cleaner and the pressure washer, and brought it into the shop for 'comparison and analysis'. This is what I found -
This pretty well sums up the differences between the Dakota/Durango vs Ram/Jeep Magnum v8 oil pans - note the 'depth' of the Dakota pan vs the Ram pan - this additional depth is 'part' of the overall oil sump -
Pulling it out of the Jeep - nose-to-nose with it's bigger and much more intimidating brother -
With the pans side-by-side, I wanted to 'see' where 5 quarts (of water) came up to in both pans -
Dakota pan, with the oil level marked on the outside (strange design) -
Ram/Jeep pan -
In order to use the other pan the respective pick up tube must also be used, and while the dipsticks can also be swapped the Dakota dipstick and tube can indeed be used with the Ram/Jeep pan, just have to make a new 'full' mark because they're not the same -
So - Ram/Jeep pan for me. But not to be outdone, I fabbed up a nice baffle and had Wayne TIG it in place, fully seam welded all the way around, so no seepage when aiming downhill. Now, with 5 quarts in the pan, tipping it forward retains about 75% of the oil in the sump vs over half of it rushing towards the front - even if I shut it off and park it for an hour, meaning less potential for air getting into the oil system, which is way more awesomer 👍. I used a bore scope to peek through the drain plug to see how much room there was between the pickup tube and baffle, and the baffle is as close as I deemed appropriate.
All cleaned up after a few days soaking in the tank at my machine shop, and a final clean with a scotch pad and WD-40, then rinse with brake cleaner -
Filled with 5 quarts of water - just at the baffle line -
and finally bolted on -
Last edited:
rattle_snake
Fuckwits
Nice work figuring out the best plan for this baffling pan issue.
Mad Max
Imagineer
- Joined
- May 19, 2020
- Member Number
- 325
- Messages
- 358
outSTANding!  - filled the engine/filter with 5 quarts of Lucas 'Hot Rod & Classic' (high-zinc) 10w40 conventional (#10683), plumbed in an old oil pressure gauge, dropped in the driveshaft and spun it up with the drill, and after about a minute all 16 rockers were flowin' oil, with ~70 psi showing on the gauge 👍 . This confirms a magnum indeed does not need to spin the cam in order to get oil up to the rockers, instead it flows into the lifter galleys, through the lifters, out through the top into the pushrods, then out the tip, down onto the rocker pedestal, and ultimately, the valve tip. Cool design - fun to watch
Yah I know with a roller cam I don't technically 'need' the high-zinc oil, but I know it won't hurt, especially for a fresh break-in.


 - filled the engine/filter with 5 quarts of Lucas 'Hot Rod & Classic' (high-zinc) 10w40 conventional (#10683), plumbed in an old oil pressure gauge, dropped in the driveshaft and spun it up with the drill, and after about a minute all 16 rockers were flowin' oil, with ~70 psi showing on the gauge 👍 . This confirms a magnum indeed does not need to spin the cam in order to get oil up to the rockers, instead it flows into the lifter galleys, through the lifters, out through the top into the pushrods, then out the tip, down onto the rocker pedestal, and ultimately, the valve tip. Cool design - fun to watch
Yah I know with a roller cam I don't technically 'need' the high-zinc oil, but I know it won't hurt, especially for a fresh break-in.
Last edited:
Mr. Mindless
Well-known member
I absolutely DID have downhill oiling issues with the stock Dakota pan on my 318 Magnum. I do worry about return-to-sump with the baffle you put in while pointing downhill though, and whether that is creating another problem while solving the primary issue... More oil in the sump to supply to the pickup, but as it drains back to the pan you're keeping it out of the sump. Seems like a trap door would be the way to go there but it's a bit late now!
Mad Max
Imagineer
- Joined
- May 19, 2020
- Member Number
- 325
- Messages
- 358
yah I thought about several versions of baffles, and the one I made is similar to what is in the Dakota pan and I sort of copied it. Even without a baffle at a steep downhill angle over half of the 'returning' oil wouldn't go back into the pan. Hell I dunno, but I'll find out soon enough; if I don't lose oil pressure then it'll have been a good idea, and if I lose pressure all the time than I'll pull it and try something else 

350TacoZilla
Well-known member
Do you have room in the chassis to add small wing\wings to pan? Thought was to get extra capacity without increasing the level in pan so stock pickup and dipstick will still work correct.
Mad Max
Imagineer
- Joined
- May 19, 2020
- Member Number
- 325
- Messages
- 358
I thought about that, but there are off-road pans from Milodon and such I would look to first before further customizing this pan...but yep that would add nice capacity...but they're real spendy. I don't think adding the baffle will make things worse - guess I'll find out after the first trail ride :)
Last edited:
Mad Max
Imagineer
- Joined
- May 19, 2020
- Member Number
- 325
- Messages
- 358
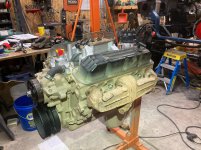
woot! Followed the Edelbrock instructions to the letter and used Gasgacinch and a front/rear bead of RTV to seal everything up, and torqued the bolts to a meager 12 lbs, but the intake is 'on' 👍 . Tomorrow I'm hoping to hoist it into the engine bay and bolt it up to the tranny to finish motor mount and exhaust mock-up -

And used these nifty devices to confirm TDC - a compression whistle and a simple gauge -

And used these nifty devices to confirm TDC - a compression whistle and a simple gauge -
Mad Max
Imagineer
- Joined
- May 19, 2020
- Member Number
- 325
- Messages
- 358
alright - got a set of 2wd engine mounts bolted up to the block, and the engine is in place 👍 . Now I can fab up the frame brackets, exhaust, and extend the shroud a couple inches, and it's pretty much ready for 'final assembly'.


Mad Max
Imagineer
- Joined
- May 19, 2020
- Member Number
- 325
- Messages
- 358
so this was kinda cool. I was checking out water pumps for my 360, and I noticed something interesting about the Gates replacement pumps for the magnum engines - they have a really nice, 'better' bypass nipple in their pumps...at least in the pictures of their pumps. The original nipples are 1" NPT (I think), and they have two slots in the edge...the edge that is supposed to seal the nipple to the hose...and I just thought what a stupid way to design a nipple. But the Gates pumps have a nipple that is solid all the way around...and so I picked up the phone. Talking with the tech guy at Gates, I asked...hey can I order just the nipple? Long story short, he took my info and a few weeks later I found a small box with 4 of their full-ring nipples at my doorstep - they didn't even charge me which was just extra cool. In case anyone would like to upgrade their magnum bypass nipples, the pn is #43034.
Hat's off to Gates - I sent this schematic...and they did the rest 👍

...I don't know how a nipple with two giant slots in it is supposed to seal to a hose...but the full-seal Gates nipples should definitely seal 'better'. Note the internal hex slots to install them -

and speaking of 'how to install them', I used a 1/2" bolt with a nut that fits perfect, and just crank it in -


oh yeah, it's painted :)


Hat's off to Gates - I sent this schematic...and they did the rest 👍
...I don't know how a nipple with two giant slots in it is supposed to seal to a hose...but the full-seal Gates nipples should definitely seal 'better'. Note the internal hex slots to install them -
and speaking of 'how to install them', I used a 1/2" bolt with a nut that fits perfect, and just crank it in -
oh yeah, it's painted :)
arse_sidewards
Red Skull Member
- Joined
- May 19, 2020
- Member Number
- 71
- Messages
- 8,555
The connection is so close I'd have just done some sort of bent tube with a compression fitting but I guess not having to F-with designing something is nice.
Mad Max
Imagineer
- Joined
- May 19, 2020
- Member Number
- 325
- Messages
- 358
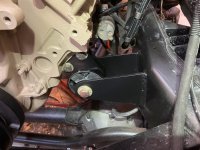
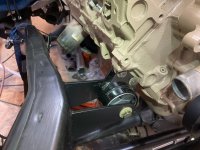
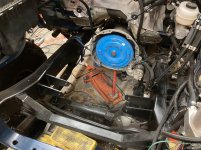
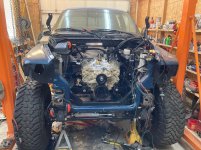
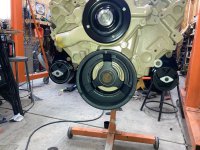
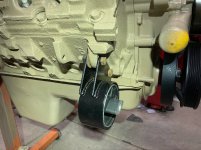
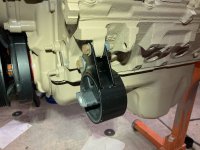
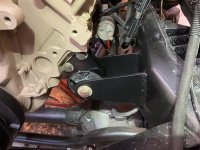
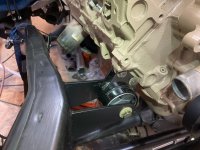
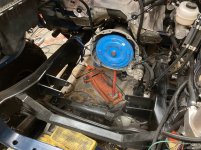
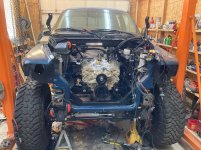
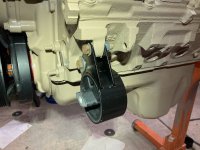
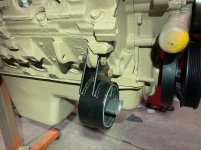
horray - it's in...I think for good this time. Ultimately went with a pair of nice simple p-side motor mounts from a 94-98 Grand Cherokee (same # for each side), which gave me plenty of room for center dump manifolds 👍 . BTW, the Wix 51515 is the 'longer' oil filer, which according to my research and talking with Wix is the same filter spec for the magnum...just longer, and hence 'more better filterage'...


Pics of the motor mounts and frame plates -


Pics of the motor mounts and frame plates -
Attachments
-
 zCy05tZ.jpg210.9 KB · Views: 3
 -
 abdfmIY.jpg187.3 KB · Views: 3
 -
 BtLYeWa.jpg291.5 KB · Views: 3
 -
 cNtOYkL.jpg329 KB · Views: 3
 -
 WL3n2pD.jpg321.5 KB · Views: 2
 -
 BYFZwGg.jpg215.4 KB · Views: 3
 -
 4MQUyPJ.jpg227.7 KB · Views: 3
 -
 zCy05tZ.jpg210.9 KB · Views: 4
 -
 abdfmIY.jpg187.3 KB · Views: 4
 -
 BtLYeWa.jpg291.5 KB · Views: 5
 -
 cNtOYkL.jpg329 KB · Views: 5
 -
 4MQUyPJ.jpg227.7 KB · Views: 5
 -
 BYFZwGg.jpg215.4 KB · Views: 4
 -
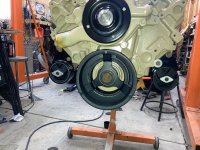 WL3n2pD.jpg321.5 KB · Views: 5
Last edited:
Mad Max
Imagineer
- Joined
- May 19, 2020
- Member Number
- 325
- Messages
- 358
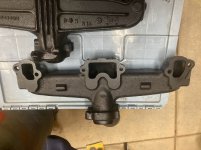
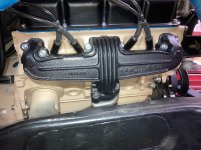
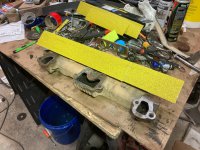
alright - in order to 'match' the exhaust configuration I had with the 440 I settled on a nice set of mid-late 70's pre-smog center dump truck manifolds, #4041466, that I got from a friend in my local Mopar club. These were used on the mid-late 70's truck 318s and 360s, including the Lil Red Express trucks, with the same 1-7/8" collector exit port size that are on the 71 340 center dump manifolds and...the 02 magnum manifolds, and should work perfect for the truck. I have a pair of the 71 340 p-side center dump manifolds, but I decided on these because they have smaller port sizes (still bigger than the magnum cylinder head exhaust ports but smaller than the giant 340 inlets) have a bigger 'interior' and should flow every bit as good as the 340's, and have more cooling fins. I removed the p-side heat riser hardware, will have the holes welded closed, and just like the 440 manifolds the center sections had both warped 'away' from the head face, so also just like the 440 manifolds I flat-planed the head face to get everything nice n flush, and clean. Then I'll have them sand-blasted and I'll coat them with POR-15 Manifold Gray paint - should make for a long-lasting and leak-free seal for another 100,000 miles.
Meanwhile, the radiator is at C-fab (with my local TIG guru Wayne) getting a couple mods, and I'm whittling away on the remaining items before firing it back up including: ram-assist hoses, pwr steering pump mounts and plumbing, fuel lines and Sniper linkage, trans cooler lines, alternator wiring, air cleaner...and of course, exhaust.


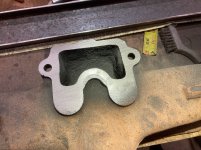
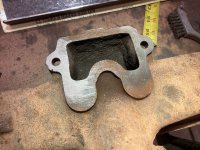
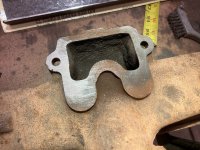
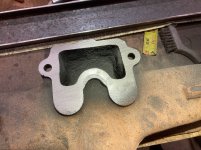
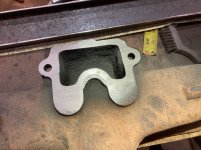
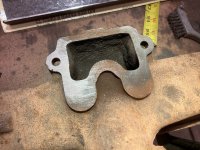
using a nice flat steel plane and 36 grit paper and the majority of the elbow grease focused on the outer ports, after several hundred 'back n fourths'...the center section(s) went from no contact at all...to this -

...and ultimately to this -

Meanwhile, the radiator is at C-fab (with my local TIG guru Wayne) getting a couple mods, and I'm whittling away on the remaining items before firing it back up including: ram-assist hoses, pwr steering pump mounts and plumbing, fuel lines and Sniper linkage, trans cooler lines, alternator wiring, air cleaner...and of course, exhaust.
using a nice flat steel plane and 36 grit paper and the majority of the elbow grease focused on the outer ports, after several hundred 'back n fourths'...the center section(s) went from no contact at all...to this -
...and ultimately to this -
Attachments
-
 jp5iLgC.jpg373.1 KB · Views: 4
 -
 WZLYITp.jpg335.1 KB · Views: 3
 -
 4f1DMxC.jpg311.9 KB · Views: 3
 -
 JBErELY.jpg305.1 KB · Views: 3
 -
 JBErELY.jpg305.1 KB · Views: 3
 -
 4f1DMxC.jpg311.9 KB · Views: 3
 -
 WZLYITp.jpg335.1 KB · Views: 4
 -
 jp5iLgC.jpg373.1 KB · Views: 4
 -
 jp5iLgC.jpg373.1 KB · Views: 3
 -
 WZLYITp.jpg335.1 KB · Views: 3
 -
 4f1DMxC.jpg311.9 KB · Views: 3
 -
 JBErELY.jpg305.1 KB · Views: 3
Last edited:
Mad Max
Imagineer
- Joined
- May 19, 2020
- Member Number
- 325
- Messages
- 358
...crossing off the list of small stuff. Bolted on the Jegs "Magnum" thermostat housing (#53251), sensors installed in the intake, and got a 45* heater hose fitting to make connecting to the heater hose a cinch. Have a nice HVH "Super Sucker" 2bbl carb adapter ready to bolt on, and used a children's Tylenol syringe to pre-fill the ram and ram hoses - worked awesome, very little mess, exhaust is nearly done, fuel lines done. Getting close to plugging in the EFI wiring...and firing it up.
45* heater hose fitting from Discount Hydraulic Hose (3/8 npt x 5/8 hose) - 4503-10-06 | 5/8" Hose Barb x 3/8" NPTF Male 45°
Jegs Magnum t-stat housing - JEGS 53251: Magnum Thermostat Housing For 1-1/2" Upper Radiator Hose - JEGS High Performance


45* heater hose fitting from Discount Hydraulic Hose (3/8 npt x 5/8 hose) - 4503-10-06 | 5/8" Hose Barb x 3/8" NPTF Male 45°
Jegs Magnum t-stat housing - JEGS 53251: Magnum Thermostat Housing For 1-1/2" Upper Radiator Hose - JEGS High Performance
Last edited:
rattle_snake
Fuckwits
If your engine whistles or squeals at certain throttle positions it may be due to the intake's plenum divider being exposed to air flow due to the 2bbl adapter. You can round off edges to change the dynamics. or add a nitrous plate (or two).
I understand the 4bbl Sniper went with the 440, but why the 2bbl w/ adapter given EFI doesn't care about velocity through the throttle bores?
I understand the 4bbl Sniper went with the 440, but why the 2bbl w/ adapter given EFI doesn't care about velocity through the throttle bores?
Last edited:
Mad Max
Imagineer
- Joined
- May 19, 2020
- Member Number
- 325
- Messages
- 358
biggest reason for the 2bbl is 'two less barrels to manage'. The 4bbl Sniper was 'great' but it (and the 440 itself) were just way too 'much' for what I needed, and trying to tune the 4bbl progressive linkage was a real pain. I just need enough throttle body to do the job, and a 570 2bbl is more than plenty, even if I stroke it down the road, and all the tuning just gets so much simpler.
I thought about hogging out the plenum divider completely (still could, even on the engine), and removing the 2bbl center divider as well, but I guess I'll figure that out later. I'll send a query to Scott at EFI Sys Pro to ask his thoughts. I can pack the intake runners and remove the plenum divider if needs be, and removing the 2bbl divider is a cinch.
I thought about hogging out the plenum divider completely (still could, even on the engine), and removing the 2bbl center divider as well, but I guess I'll figure that out later. I'll send a query to Scott at EFI Sys Pro to ask his thoughts. I can pack the intake runners and remove the plenum divider if needs be, and removing the 2bbl divider is a cinch.
rattle_snake
Fuckwits
Great success!

Thornbird1
Well-known member
This thing is turning out sweet , as i expected! I would think about boxing and gusseting the frame side engine mounts. I know that v8 is going to be doing some twisting.horray - it's in...I think for good this time. Ultimately went with a pair of nice simple p-side motor mounts from a 94-98 Grand Cherokee (same # for each side), which gave me plenty of room for center dump manifolds 👍 . BTW, the Wix 51515 is the 'longer' oil filer, which according to my research and talking with Wix is the same filter spec for the magnum...just longer, and hence 'more better filterage'...

]
Mad Max
Imagineer
- Joined
- May 19, 2020
- Member Number
- 325
- Messages
- 358
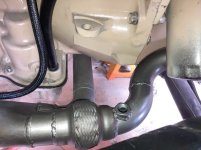
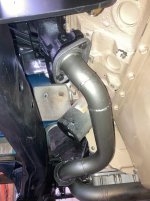
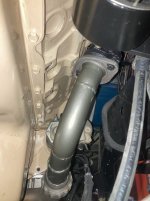
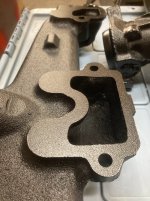
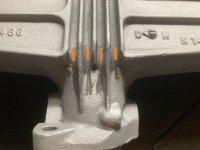
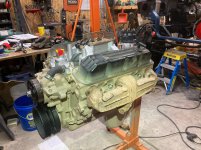
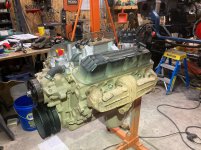
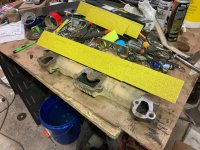
...had the manifolds sandblasted locally for $60, and not surprisingly upon close inspection noticed some minor cracks in the outer fins. Didn't appear to be too deep, at least not that I could see naked eye, and in light of trying to prevent further damage I ground out the cracks and cleaned up the channels. I was going to use POR-15 High-Temp exhaust paint, but the same place that blasted also does power coating, including Cerakote (essentially very high temp powder coat), and for just another $60 I opted to give that a try.
Modified the 440's y-pipe with 2" mains to match the manifolds (also the same OE size for a magnum 360). Considering the 'low-rpm' nature of this engine I can't imagine the design of these manifolds will induce any realistic performance limitations, and being center-dump I gain all the clearance I wanted 👍 . All torqued to spec and ready to go -
blasted, showing where the cracks were in the fins -
Attachments
Last edited:
Mad Max
Imagineer
- Joined
- May 19, 2020
- Member Number
- 325
- Messages
- 358
went through several iterations of front leafs but I ended up with 48" Skyjackers with a 4" lift, #C140S (70's-80's Chevy half ton front leafs). As far as how it handles...I haven't really had a chance to really get it 'out n about' yet - just slow speed jaunts around the neighborhood, but so far having the shackle up front has not induced any strange handling problems. The rears are 63" Chevy ProComp rears, #13211.
Mad Max
Imagineer
- Joined
- May 19, 2020
- Member Number
- 325
- Messages
- 358
yah I like leafs because they are simple, effective, inexpensive (comparatively), and off-the-shelf...the only initial issue(s) being setting up the chassis to 'accommodate' them, and once that's done the truck operates forever with a solid and easily maintainable suspension 👍 . Hopefully I measured right!
- Sam
- Sam
Mad Max
Imagineer
- Joined
- May 19, 2020
- Member Number
- 325
- Messages
- 358
trans cooler brackets and fan shroud extension are figured out and ready for paint 👍 . Trans cooler brackets keep the lines away from the exhaust and engine pulleys, and the shroud is a 2-part unit that extends the tunnel to the now-further-back fan. I still need to trim the back edge of the tunnel extension to allow about 1/4 of the fan to be 'exposed' to allow the fan to 'expel' the air and not force all of it onto the front of the engine and accessories (alternator, pumps, etc) - should work great.


Also relocated the radiator outlet port down a bit - should allow for cooler coolant back into the engine -

Also relocated the radiator outlet port down a bit - should allow for cooler coolant back into the engine -
Last edited:
Mad Max
Imagineer
- Joined
- May 19, 2020
- Member Number
- 325
- Messages
- 358
well shoot. Started to refill my cooling system this morning only to discover that despite my best efforts to keep it safe the radiator somehow got a small pinhole...and coolant is leaking out (bottom pic). I've decided to go back to a stock off-the-shelf radiator and make this one available for $200 (normally an $800 radiator). I figure there may be someone out there who can use a super-high-capacity Dakota/Durango radiator and knows a good radiator repair place to fix the small hole and can take advantage of this one.


- Sam
- Sam
