What's new
  • Check out our new Group Buy Program! We're kicking it off with Baja Designs! $10 Flat rate shipping no matter how much you order!

Build Thread - 1978 F150 1-tons and 40s

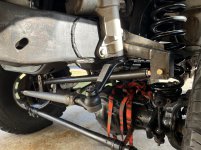
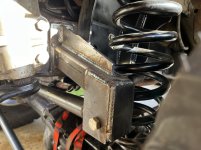
Okay, I finally figured out a trackbar bracket. It isn't pretty but it should be plenty sturdy.

IMG_4780.jpg

IMG_4779.jpg

After spending all damn day making this chunky thing, I now believe a plasma table is worth it. I used my SWAG bandsaw table, bench grinder, and my Milwaukee cold cut saw to make this and it was still just a lot of work and clean up.

I had designed one in CAD a couple of weeks ago, mocked everything up and realized my design was off in several ways which led me down the path of just building it with 2x2x.250 square tube and .250 plate so I could build it as I go.

I need to pull the steering box and driver's coil bucket to finish welding up the sides of the trackbar bracket.

One problem I've chosen to deal with later: the trackbar will hit the diff at some point when stuffing the axle, so I'll need to find someone who can bend 1.75x.250 tube :homer:. There was no room to move the trackbar bracket further forward by my much on the frame side, and on the axle side it's already offset.
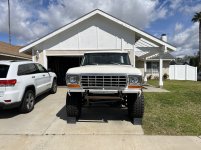
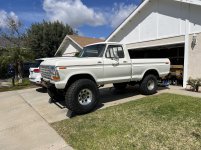
My next tasks: install the calipers, make brake lines, bleed the brakes, and turn this thing around.

Got some work-travel and whatnot but this was a big mind-hurdle for me and hopefully I can keep the momentum going.
 
If I had a way to easily get 1-3/4x0.250 tube, i'd bend it for you :rasta:

since you have all the good plate working stuff, where can you add more bracing? with as far out of the frame as your mount is, i'd be concerned about it trying to tear away the relatively small mounting pad at the frame. Going forward or under or back or anywhere to add some brace in another direction might be worthwhile.

or it might be a waste of metal, i dunno. Keep an eye on it though
 
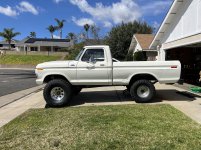
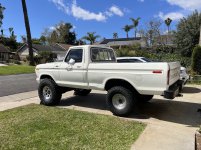
Got the brake hoses bolted up, bled the brakes, tightened all the radius arm/drag-link/track bar bolts, removed the front driveshaft (won't work with the current exhaust routing), and drove it around the cul-de-sac to turn it around in the driveway.

I have to order some u-bolts and center pins but I can now get started on installing the shackle flip and then the Sterling 10.5 in the rear.

Going to be a little delay due to work I have to do on the Bronco and a weekend in Vegas but super motivated to get this thing on the road.

Some boring pictures:

IMG_4881.jpg

IMG_4880.jpg

IMG_4885.jpg

IMG_4884.jpg
 
is the exhaust/driveshaft just a temporary issue or is it all going to have to get redone after the flip/reverse/suspension is all done?
 
is the exhaust/driveshaft just a temporary issue or is it all going to have to get redone after the flip/reverse/suspension is all done?
I could be ghetto and just fix the offending driver’s side but I actually have stock manifolds to replace the low hanging headers that are on the truck now. I hate em, I’ve bashed them on rocks before doing easy trails, also someone welded them at the collectors.

The current exhaust is loud with a couple of flowmasters that sound like someone gutted them. I also have to pass smog so stock manifolds (with the heat riser tube) 2:1 with a magnaflow muffler is the plan once this thing is on the road.
 
Nice, I considered a similar route but thought I would try and extend it outboard.

If I need to give it more support I’m thinking of coming off the front of the trackbar mount with some tube and tying it into the frame rail forward of the steering box where I have that reinforcement plate.
 
Nice, I considered a similar route but thought I would try and extend it outboard.

If I need to give it more support I’m thinking of coming off the front of the trackbar mount with some tube and tying it into the frame rail forward of the steering box where I have that reinforcement plate.

That would work great too, being way outboard of the usual box/pitman being in the way, for something like that.
 
Got the rear axle in this past week. Trimmed the bent up dust-shields but I'm going to have to take it apart and completely remove them.. just wanted to get the axle under the truck and out of the way. Also, needed to get some money back from the 1/2 ton axles, tires/wheels, etc to keep funding this project! The stock leaf spring perches worked perfectly. I have replacement weld-on perches if I need to go that route but I'm hoping to get away with wedges on the leaf-packs (looks like I might need a little more downward angle but will figure that out later).


Next up:
  • rear brake lines/hoses
  • shorten rear drive shaft (will have to have exhaust re-done before I address front drive shaft)
  • measure for, buy, and install shocks
  • weld on shock mounts to the rear (front coil buckets were designed to work with stock lower shock mount on axle)
  • Tesla/iBooster electric brake booster install (just purchased this, should be here in the next week or so)
 

Attachments

  • IMG_4945.jpg
    IMG_4945.jpg
    1.6 MB · Views: 31
  • IMG_4944.jpg
    IMG_4944.jpg
    1.3 MB · Views: 29
  • IMG_4943.jpg
    IMG_4943.jpg
    1.3 MB · Views: 31
  • IMG_4934.jpg
    IMG_4934.jpg
    1.3 MB · Views: 28
  • IMG_4935.jpg
    IMG_4935.jpg
    1.2 MB · Views: 30
  • IMG_4941.jpg
    IMG_4941.jpg
    1.4 MB · Views: 29
  • IMG_4942.jpg
    IMG_4942.jpg
    1.2 MB · Views: 32
  • IMG_4946.jpg
    IMG_4946.jpg
    1.3 MB · Views: 30
What wheels are you running?

I was catching up on this thread and noticed you needed some .25 wall tube bent. When I needed to bend my panhard bar I bought one of the notorious pipe benders from Harbor Freight, bent my single 1.5 tube, packaged the bender back up, and returned it. It worked in a pinch on the heavy wall tubing as long as there is no severe bend angles. I have since upgraded to bender that can do up to 2'' solid bar lol.

Truck is looking great man
I’m running this wheel:

Since I’ll drive this thing on the road a lot I tried to find the lightest weight wheel/tire that could still handle wheeling for now. When Im ready to build this all on my smog exempt frame and use a modern drivetrain I’ll go “all out” with beadlocks and 4-link etc.. but my skillset needs to be up to the task as well.

I think I’ll do the same with the Harbor Freight bender, great idea.

Thanks
 
Last edited:
With the 2.5" lift coil how much is the springs compressed length? From coil bucket to coil bucket.
 
Slowly getting this thing closer to driving on the road...


Since the last update I finished the rear brakes, got my rear driveshaft from Tom Wood's, and put shocks on the front. There was a lot of non-sense in between all of that but nothing exciting.

Anyway, I moved it for the first time with the new axles/tires under it today. Just had to turn it around in the driveway so I can work on the front:

- I need to adjust the upper-link on the radius arms because I set my caster wrong.

- That means I need to rotate the track-bar mount on the axle forward a bit (maybe that will help with diff-clearance so I don't have to bend the track-bar)..good thing I only ran a couple short beads on it for now.

- Start working on adapting the Tesla/iBooster electric brake booster. Haven't decided which master cylinder to run yet.


Once the above is done I need to finish welding the rear radius arm mounts to the frame, weld on rear shocks mounts and get some shocks, get the gears and front e-locker installed, and the final part will be a new exhaust so I can put a front driveshaft in this thing (zero-clearance with the hi-pinion D60 and the current long tube header exhaust).
 
Looks great!

At about the 40 second mark it looks like the caster is funky, like mucho negative caster, or optical illusion... what's it set at?
 
Looks great!

At about the 40 second mark it looks like the caster is funky, like mucho negative caster, or optical illusion... what's it set at?
Yeah I.. set my caster negative and probably too much even if I were to get the direction correct. :homer:
Not enough adjustment in the upper link so I'll grind the tacks off and move the mount back for the upper-links.
 
Screwing up the radius arm lengths because of my stupid blunder setting the caster the wrong direction really took the wind out of my sails on this project so I spent time on the 67 Bronco. But I got the arms sorted out this past weekend (cut the new lower links of the radius arms to the right length) and will weld the rear joints on tonight after work.

Next up I plan to get the following done this week:
  • I need to install the arms, figure out where the upper link needs to be welded, tack that on and I can move on from that.
  • I have to cut the tacks off the trackbar mount on the axle side and rotate that forward. Good news is I probably won't have to bend the trackbar to get it out of the way of the diff anymore.

What remains after that to make it at least road-worthy:
  • iBooster install
  • rear shock mounts
 
No pictures because I haven't made a lot of forward progress but I did fix a lot of issues with my first attempt at the radius arms/caster/etc.

This past week I re-did the radius arms to make them the right length, set the caster today and welded the upper links, cut off the trackbar mount on the axle side and rotated it forward just a bit.

For this week: I have the iBooster electric brake booster out of a 2018 Accord and the master cylinder is on the way (just the stock Accord one for now). Will have to drill new holes in the firewall to mount the booster, might have to weld up some or all of the stock ones. Once that is mounted and plumbed just have to wire it up..

iBooster thread here on the forums: iBooster Electric Brake Booster
Wiring kit: Bosch iBooster Gen-2 Universal Wire Harness – Tulay's Wire Werks

After that to get this on the road:
  • finish welding everything (radius arm upper-link mounts and rear radius arm mounts/brackets on frame)
  • rear shock mounts
  • test drive (might do this with the Super Duty stock take off wheels/tires since I still have 3.73 gears)

To get it trail ready:
  • gears (4.88's because I have a 2011+ 10.5 Sterling w/e-locker and can't go lower)
  • front e-locker
  • front drive-shaft
  • wire up the lockers/switches
  • relace a leaky AC hose

The trail-ready stuff might have to wait because it's $$$ and I might be moving out of state at the end of November with the intention to buy a house.
 
Last edited:
4.88 should be enough?

I run 4.10s on 40s and they are a good balance for how I use my truck, even when I ran the C6. The 6R80 4.20 1st gear and 6th overdrive make it even better. For creeping, I would go doubler instead of lower R&P.
 
4.88 on 40s is damn near identical to 5.13s on 42s, which IMO works well.

4.10 works well with the 6R80 because of the obnoxious gear spread. (Yes I'm jealous). I'm running 5.13s for 42s and it's the right ratio for the trail, but 3k rpm at 70 gets old quick. One day I'll get an OD trans in mine, whether it's a ZF or 6R80.
 
Top Back Refresh