How to install the app on iOS
Follow along with the video below to see how to install our site as a web app on your home screen.
Note: This feature may not be available in some browsers.
You are using an out of date browser. It may not display this or other websites correctly.
You should upgrade or use an alternative browser.
You should upgrade or use an alternative browser.
Today is the day
Will Scarlet
The universe is vast...
- Joined
- May 20, 2020
- Member Number
- 766
- Messages
- 1,661
gt1guy
Apparently a racist
We're rooting for ya.
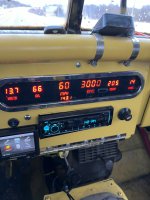
Dyno tuned — numbers are unimpressive at 7lbs boost 380 hp / 375 tq at the wheels, drivetrain loss the tuner thought was quite a bit, but it is what it is and it it sounds great and runs good and at this point it’s not a drag racer and never was and I can now do some shake- down runs.
Missing speed sensor is why the tranny shifts like it does so I’ll have to figure if I can add something to my gps speedometer and tie it into the tranny wiring to six that issue or I live with it.
Missing speed sensor is why the tranny shifts like it does so I’ll have to figure if I can add something to my gps speedometer and tie it into the tranny wiring to six that issue or I live with it.
Attachments
WaterH
Well-known member
380/375 sounds pretty impressive to me. I’m sure it moves along real nice. How much did it improve from tuning?
gt1guy
Apparently a racist
I'd be willing to bet that's close to 500 at the flywheel.
Will Scarlet
The universe is vast...
- Joined
- May 20, 2020
- Member Number
- 766
- Messages
- 1,661
You're coming along great. The numbers of 380/375 are great too, so don't be disappointed there.
The important thing is everything is moving forward...
The important thing is everything is moving forward...
Well for a while I've been thinking that my t-case has been puking oil out of my fill tube which is in the bed and about 30" or so above the t-case. I never saw it do it, but the hose was oily and once in a while a puddle would show up, so Sunday I slapped a tee in it and an elbow turned down as an open port ( I should've put a catch bottle on it ) to easily check if it was puking. Yesterday I drove it to pick up the kid from school and when we got back home it was putting out a nice stream for a good minute. So the next move is a catch bottle to see if it keeps doing it. I may have way too much oil in it, so I'll drive it and keep checking the catch bottle and when it stops doing it I'll check the level. I have a clear hose to see the level, but I'm not sure I can see the level cuz it's dirty. I remember when filling it and then checking it the next day the level was high and then another day, when it was hot, out it was really high, but that was way before I started driving it, so I just left it on the back burner.
My tires are an issue also as 4 out of the 5 lose air and I was going to take them to a tire shop and just have them attack them if they would, but I just can't bring myself to do it, but on the other hand I've got sidewall leaks and leaks in small cracks in the tread area and I do have one of those killer sidewall patch kits and your basic plug kit and I'm thinking I'll just go for it and if I can get one or two or more to hold air then I'll be ahead of the game if I do have to fall back on taking them to the tire shop. I keep looking for tires, but to be honest the budget is not there, hell I don't even know where the budget is, but I know tires are out for some time.
) to easily check if it was puking. Yesterday I drove it to pick up the kid from school and when we got back home it was putting out a nice stream for a good minute. So the next move is a catch bottle to see if it keeps doing it. I may have way too much oil in it, so I'll drive it and keep checking the catch bottle and when it stops doing it I'll check the level. I have a clear hose to see the level, but I'm not sure I can see the level cuz it's dirty. I remember when filling it and then checking it the next day the level was high and then another day, when it was hot, out it was really high, but that was way before I started driving it, so I just left it on the back burner.My tires are an issue also as 4 out of the 5 lose air and I was going to take them to a tire shop and just have them attack them if they would, but I just can't bring myself to do it, but on the other hand I've got sidewall leaks and leaks in small cracks in the tread area and I do have one of those killer sidewall patch kits and your basic plug kit and I'm thinking I'll just go for it and if I can get one or two or more to hold air then I'll be ahead of the game if I do have to fall back on taking them to the tire shop. I keep looking for tires, but to be honest the budget is not there, hell I don't even know where the budget is, but I know tires are out for some time.
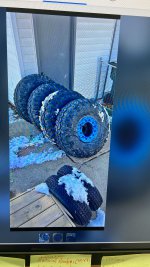
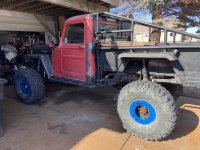
I found some 42” IROKS on hummer headlocks and my wife said go get them. I don’t deserve her. Anyway I drove 4 hrs one way to go get them. I aired them up to 24psi and put them on and went for drive. Drove it 20 miles to one of my brothers and then back. Besides it being loud and the shifting at 3800rpms it drove fine. Really satisfied with the handling and had it up to 65mph.
So I’ll be selling the other rims and tires.
So I’ll be selling the other rims and tires.
Attachments
WaterH
Well-known member
Pic with tires on?
I will take a pic tomorrow. I'll probably paint the rims red if that's the color I decide on although my old cj2a was the color of the rims, so I could always do blue, but I'm leaning red.
I was concerned with my front driveshaft cuz it was so close to the transmission plugs and really the guy built it too short for comfort somehow or I mismeasured it. So this morning I was cruising the Marketplace and a guy was selling one so I went and got it as it was 10 minutes from my place and I got it for $100. It's off an F250 with a carrier-bearing and supposedly rebuilt (the carrier-bearing sure looks pretty new) because that's what I really need. I started modifying the t-case to carrier bearing shaft this afternoon. It's not 1/4" wall(wont matter for the carrier bearing section) and slip joint isn't long travel, but if the slip joint works and I think it will I'll probably run with it for now, but we shall see how much I have to shorten the main section before I make a decision. I'll keep the old new one for a spare for now I think as it's a 2" x 1/4" wall, but it may become sacrificial as my hack attack moves forward.
I was concerned with my front driveshaft cuz it was so close to the transmission plugs and really the guy built it too short for comfort somehow or I mismeasured it. So this morning I was cruising the Marketplace and a guy was selling one so I went and got it as it was 10 minutes from my place and I got it for $100. It's off an F250 with a carrier-bearing and supposedly rebuilt (the carrier-bearing sure looks pretty new) because that's what I really need. I started modifying the t-case to carrier bearing shaft this afternoon. It's not 1/4" wall(wont matter for the carrier bearing section) and slip joint isn't long travel, but if the slip joint works and I think it will I'll probably run with it for now, but we shall see how much I have to shorten the main section before I make a decision. I'll keep the old new one for a spare for now I think as it's a 2" x 1/4" wall, but it may become sacrificial as my hack attack moves forward.
gt1guy
Apparently a racist
Put this guy onto the t-case to figure out a mount and then to see if the other part of the driveshaft will work or not. My confidence isn’t beaming for a couple of reasons:
1) I wasn’t able to get the drop I wanted with this stubby carrier bearing shaft and to get more would mean either clocking the t-case down which would kill my flat belly pan, so that’s out or a double cardan joint and I’m not into buying one although my old shaft has one, but I don’t have a carrier bearing for it. So we shall see what happens once I get it mounted and can look how the main shaft fits.
2) since the main shaft is bigger tube I’m not sure if will actually work until I get the carrier bearing mounted so that I can do some checking, but it’s got me nervous because not getting the carrier bearing shaft lower could have knee-capped me and then I’ll have to re-think what to do.
I checked the old new shaft and I have about 1 1//2” of engagement at ride height so at full droop it may be somewhere between ½” to and 1” which seems like trouble to me and that’s why I’m trying to do the carrier bearing setup to hopefully give me clearance at full stuff and not have a driveshaft that will come apart on the trail.
Attachments
Last edited:
Ok, tomorrow I hope to be done with the new front 2 piece drive shaft set up. I need to finish the mount which consists of drilling a hole, welding nuts to the carrier-bearing hoop, bolting up the mount and changing out the u-joint at the pumpkin to the non-greasable type. The u-joint at the slip joint is the strap style and for now I plan to run it. I now have a 1 1/8" of slip left for full compression and around 5" for full droop and it looks like the 3 1/2" tube will miss everything. Still need to either get on a ramp or drive over something to get some flex to be for sure. I have around 1/2" clearance around the carrier-bearing u-joint from the transmission plug, exhaust pipe and front lower link mount. Of course how it spins still needs to be determined, but turning it by hand didn't show any wobble, but a test drive will let me know!!
Lessons for the day or I believe there's a couple of lessons from today. Yesterday when I was pre-assembling the driveshaft I didn't fully tighten down the carrier-bearing hoop and today when I did the driveshaft got harder to rotate and there was a grinding noise. So I decided to see what would happen if I drove it and I only backed up and then pulled back in and parked it because the noise is really noticeable. So lesson learned is fully tighten mounts(I know this, but thought I had it close enough, but I didn't) when pre-assembling and what I believe is the other lesson here is that the carrier-bearing has to be perpendicularly mounted to the slope of the driveshaft and not plumb. I just figured that there was play in the carrier-bearing to pretty much mount it how you wanted, but it is definitely not the case, although there's probably some play in how you mount it you have to be close to perpendicular to the driveshaft coming off the t-case. So next up is remedying this by angling the mount.
I was able to work on the carrier bearing mount and got it worked out. I basically added a 3/16" lip under the rear side of the 3/8" plate that the carrier bearing bolts to and when that gets bolted in the mount is more perpendicular to the driveshaft and no more grinding, so test drive time. So lock in the Yukon hubs, drop in 4hi and back out and hear a clunk, but it keeps moving so I keep going. If I left off the gas, which isn't but around 1700 or so rpms, ehe comes to a halt. Umm I think, so I drop it in D and pull forward and it wants to pull left, umm again. Keep driving and the pull disappears and I make a right-hand turn and something feels amiss. I'm not sure what it is, but the steering feels tight if I was to describe it. Keep driving into the empty church parking lot and decide to take it out of 4hi. Well it won't come out, so I just drive it home and try to bump it out and try more once I get home and it's stuck, so I turn it off and left it. So the only thing in the drivetrain that's not new or rebuilt is my np205 case, so maybe it decided to say "fuck you homie"! Tomorrow I'll crawl under and see if I can find something. I have no clue what it may be as the t-case shifted fine before and so did the NWF eco box but right now neither will budge. Stay tuned to how my luck runneth over tunes back in. Guess I better pull my spare np205 out and get to tearing it apart and rebuild it. I need to tear it apart no matter what as I wanted the tail piece and to check the output shaft to see if it had the ability to accept the speedo setup, so that I could adapt it to get a signal to the Holley Terminator x Max box so that the tranny would shift normal, plus it has been through a flood so it needed rebuilt no matter what.
T-case is just a finicky bitch--I don't like it but it works, I just need to be rolling with the tranny in N to get it to shift out of and sometimes into whatever gear I want. It will take some more driving to dial in that roll speed, because it will only shift at a certain speed. My shifters are JB Custom cable shifters and they're not in any bind. I'm still going to rebuild the other one is the plan. Now it's time to change oil and I have a small coolant leak somewhere that I need to see if I can find it. It never leaves a drip on the ground, but there's drips on the passenger side of the motor towards the front and above the oil pan.
New tires are holding air, so that's a good thing!!
New tires are holding air, so that's a good thing!!
Last edited:
Gear to gear cases are generally like that. They like a little movement to engage and disengage. I would consider it normal.T-case is just a finicky bitch--I don't like it but it works, I just need to be rolling with the tranny in N to get it shift out of and sometimes into what ever gear I want. It will take some more driving to dial in that roll speed, because it will only shift at a certain speed. My shifters are JB Custom cable shifters and they're not in any bind. I'm still going to rebuild the other one is the plan. Now it's time to change oil and I have a small coolant leak somewhere that I need to see if I can find it. It never leaves a drip on the ground, but there's drips on the passenger side of the motor towards the front and above the oil pan.
New tires are holding air, so that's a good thing!!
Yea, finding that out. I'm guessing since so many guys use these and twin-stick them I need to just find the sweet spots, cuz if I can't pop the front or rear out then twin-sticking it was useless and that's my real gripe, becuz right now I don't see how I can shift it if I'm sitting still and can't move and need to do a front dig or rear dig. But with that being said and since tons of guys have twin-sticked these things and you really don't hear much about guys being unhappy I have to keep that in mind. Time will tell as I get some wheeling time with it and the things are strong, which was one of its major selling points. I just need to get out and get more driving time with it and figure things out.
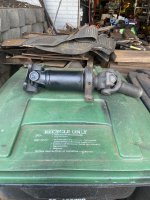
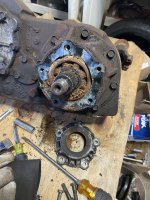
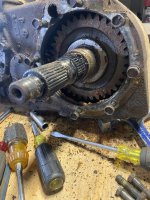
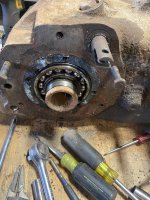
Yesterday I popped the inspection cover off my spare NP205 and there's one gear that's rusted and parts of the other gears, but it's not even close to what I thought I was going to find(wasn't packed full of mud and it was empty of gear oil and really no mud to speak of, some on the inspection cover from what I've seen so far), so that was nice. It won't shift and the outputs won't move, so I PB blasted the inside and all the bolts and nuts. I need do some garage arranging somehow to have a space to work on this thing once I get it all torn apart, so I'm not sure how soon I'll get it rebuilt, but I do need to tear into it to see if it has the gear on the rear output shaft and that will determine the speed of things, because if it doesn't have the gear I'll need to find an output shaft that has it for the rear speed sensor I need for the Holley Terminator x Max. Plus I need to see if the output shaft that's in the Willys has the gear on it, but right now I'm not excited about tearing things apart, since I've got it in a state of drivability.
Yesterday I popped the inspection cover off my spare NP205 and there's one gear that's rusted and parts of the other gears, but it's not even close to what I thought I was going to find(wasn't packed full of mud and it was empty of gear oil and really no mud to speak of, some on the inspection cover from what I've seen so far), so that was nice. It won't shift and the outputs won't move, so I PB blasted the inside and all the bolts and nuts. I need do some garage arranging somehow to have a space to work on this thing once I get it all torn apart, so I'm not sure how soon I'll get it rebuilt, but I do need to tear into it to see if it has the gear on the rear output shaft and that will determine the speed of things, because if it doesn't have the gear I'll need to find an output shaft that has it for the rear speed sensor I need for the Holley Terminator x Max. Plus I need to see if the output shaft that's in the Willys has the gear on it, but right now I'm not excited about tearing things apart, since I've got it in a state of drivability.
This is from Offroad Design's Web site and you can see the one shaft has the extra gear splines cut into it and that's what I need to machine the tail housing to receive the kit for the rear speed sensor for the Holley Terminator x Max:
With modern drivetrain swaps becoming ever more popular, we've come up with a way to modify the bulletproof NP205 to support the electronic vehicle speed sensor that modern computers require.
This modification gives the 40 pulse-per-revolution output that 1988 and newer GM computers look for to drive the speedometer and control shift timing on automatic transmissions.
This is also an important feature on Gen III+ motor swaps (even with a manual transmission), as they can be tempermental without a VSS.
Basically, you send your speedometer housing to us and we'll machine it flat and at the correct depth and tap it for the VSS. We also supply a new tone wheel that replaces the plastic speedometer gear on the 205 output shaft (you will lose the cable speedometer drive). We also supply a new speed sensor and pigtail.
There are two versions of NP205 fixed yoke style rear outputs, you will need the later (and far more common) version that is splined for the speedometer drive gear, pictured at the right below. Note the two shafts in this picture, the one on the left is the early (rare) version that only has one row of splines and doesn't work.

Includes machine work on speedometer housing, new 40 pulse tone wheel, plug for OE speedo hole, new sensor with pigtail and required gaskets
With modern drivetrain swaps becoming ever more popular, we've come up with a way to modify the bulletproof NP205 to support the electronic vehicle speed sensor that modern computers require.
This modification gives the 40 pulse-per-revolution output that 1988 and newer GM computers look for to drive the speedometer and control shift timing on automatic transmissions.
This is also an important feature on Gen III+ motor swaps (even with a manual transmission), as they can be tempermental without a VSS.
Basically, you send your speedometer housing to us and we'll machine it flat and at the correct depth and tap it for the VSS. We also supply a new tone wheel that replaces the plastic speedometer gear on the 205 output shaft (you will lose the cable speedometer drive). We also supply a new speed sensor and pigtail.
There are two versions of NP205 fixed yoke style rear outputs, you will need the later (and far more common) version that is splined for the speedometer drive gear, pictured at the right below. Note the two shafts in this picture, the one on the left is the early (rare) version that only has one row of splines and doesn't work.
Includes machine work on speedometer housing, new 40 pulse tone wheel, plug for OE speedo hole, new sensor with pigtail and required gaskets
And then there is this, which has me drooling.
 behemothdrivetrain.com
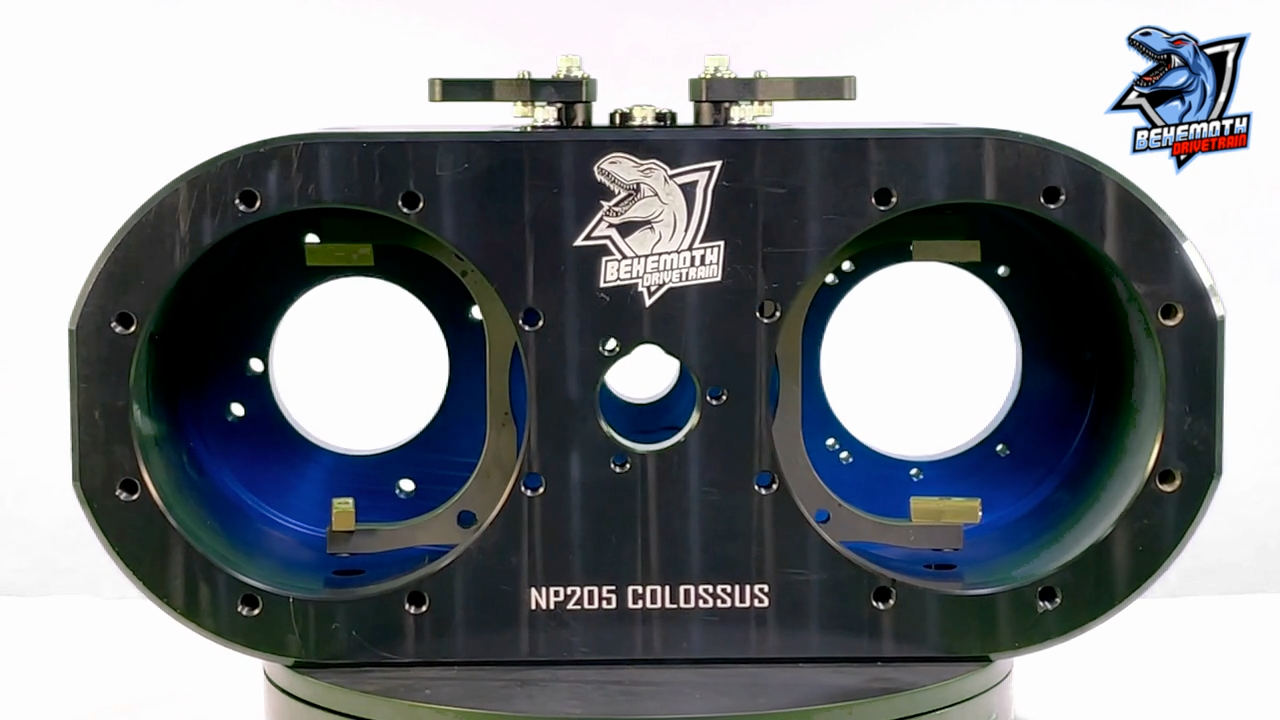
NP205 Colossus - Billet NP205 Replacement Case (no gears)
The DIY Colossus Billet NP205 replacement case by Behemoth Drivetrain is engineered for extreme strength, low weight, and incredible performance. This DIY model is case only - allowing you to choose and install your own gears. Front Digs in High and Low: Fully clockable, the Colossus allows...
My spare case has the extra splines on the output shaft, but I now see there’s an updated output shaft that’s stronger because of the oiling slots. Need to think about that.
Attachments
And there's this one:


 midnightmetalworks.com
M.O.A.B Rock Box NP 205 replacement case
Machined from a solid block of aircraft grade 6061-T651 aluminum and at 7/8" thick in the cross section, The Rock Box was built for abuse! Clock-able in 7 degree increments from stock to flat, Common Jeep, Chevy, Ford 6 bolt mounting pattern , Twin stick design allows independent selection of...
midnightmetalworks.com