What's new
  • Forums will go offline Wednesday Dec 4th at 10AM CST for updates. It's a big update, so the site may be offline for a few hours.

1980 F350 Farm Truck Re-Build

It's really dramatic thebdifference between the stock 2v and the 4v intake carb swap on the 400. It used to roll over and die about 3k rpm, with the 4v it can cruise and live at 3500 rpm.

Yeah the cam is tiny and compression is low and all that jazz so there isn't a bunch of "hp" actually gained and it probably now rolls over on itself at 4k rpm, but 4k is above 90mph and I'm just not getting there in a meaningful way to care.

Anyways, the point is those few hundred rpm really do suck and ideally this won't be a 70 mph truck anyways.

Absolutely! On my '79 F350 I tossed the heavy iron 2bbl intake for a swap meet 4bbl and q-jet. Was a whole new truck.

I use to daily it with 36" swampers, 4.10s, and np435. No tach, so no idea on RPM but that 400m ran 70mph with traffic just fine. Hell, I started off in 2nd most the time
 
Absolutely! On my '79 F350 I tossed the heavy iron 2bbl intake for a swap meet 4bbl and q-jet. Was a whole new truck.

I use to daily it with 36" swampers, 4.10s, and np435. No tach, so no idea on RPM but that 400m ran 70mph with traffic just fine. Hell, I started off in 2nd most the time.
Yeah the tach is aftermarket not mounted and sitting on my floor. When the speedo is all the way over, it's about 36 or 3700 rpm :laughing:
 
Alright, last I'm touching it this weekend and I swear I'll do my damned homework now.

Doors were bulging, assumed it was from aftermarket speakers installed poorly. Kinda sorta not really. Turns out the wires hanging out go to the window regulator.

20221002_150204.jpg


Which really likes 20v

20221002_151307.jpg


One of the silver tape connections had failed, so it gets a wire nut now.

20221002_153607.jpg


Door speaker mounting is 5-1/2"

20221002_150350.jpg


And the dash is about over 5x7 opening with 5x4-1/4" mounting holes

20221002_152433.jpg


edit: going to try out some cheap chinese stereo :laughing:


DOVOX brand $30 digital media. it was about the cheapest thing that claims AM/FM, for some reason there were many cheaper ones but they were FM/MP3 only. seems odd, but AM is important.


and going to toss a pair of Kenwood SFC-S1066 4" 2 way speaker into the dash. For $37, they should be solid :rasta:
 
Last edited:
Good thing you are prioritizing the stereo system. Suggest building the biggest box that will fit behind seat for subwoofers. Don't worry about the engine, you can run stereo on bat charger in driveway.
Wanted to see if the door windows worked, assumed the wires hanging out and bugging the panel were for fucked up speakers, was only half right :laughing:

So yeah, stereo is important. Engine is going to take a full day which I may have Friday to finish tearing it apart :rasta:
 
alright, making a list of things to order to put back together.

stock size Cam bearings, Rod bearings, Main bearings, full gasket set, water pump, stock piston rings, timing gear set looks like nylon teeth on the cam side and have some wear, pressure plate and throwout bearing and pilot bearing.

pictures: Flywheel looks decent, very few heat spots and they don't look very hot, going to just block sand it and call it a day

20221007_115151.jpg


disk itself looks fine enough

20221007_115158.jpg


Pressure plate fingers are not even though, probably doesn't matter, probably going to replace anyways

20221007_115226.jpg


snap ring pliers were the easiest thing I could grab quickly to pop out all the lifters, they all came out looking pretty decent

20221007_120347.jpg


this picture of the cam retainer/thrust whatever orientation may come in handy later

20221007_123959.jpg


oil pan cam off with a bunch of gunk in it, not sure if it was from cleaning it earlier but i'd also imagine a bunch was there before.

20221007_125422.jpg


oil pickup had some gunk and milkshake color, so i'm leaning towards this having had issues before I got it

20221007_125434.jpg


same story inside the pump itself, doesn't look like any very significant wear so i'll just add some grease to the inside and call it a day here

20221007_125725.jpg


I really appreciate that Ford labeled all the pistons and caps properly with where they go, this is a nice change compared to the Toyota stuff I'm used too which just uses the same number to indicate the tolerance off the factory floor :rasta:

20221007_131142.jpg


For better or worse, sprinkled a bit of dawn dish soap onto all these before firing up the pressure washer

20221007_142629.jpg
 
and a pile of more clean parts.

20221007_144934.jpg


tons of debris on the lifters, so rolled them around in some acetone first, then pourd a bit of oil over them, then brushed them and put them back into oil to soak upside down, hopefully it clears everything out of them.

20221007_160801.jpg


3 rings in total refused to release after soaking them in some rust breaker for a bit, kind of strange just how many of the pistons came out of the block with the rings at or nearly aligned :confused: just a time and use thing perhaps? This one is now also soaking in the oil to see if it will free up.


20221007_160811.jpg


Some pretty fun colors on the bearings but nothing that stands out as exceptional or extreme wear, so that's nice to see. going to toss in some new ones and call it a day.

20221007_160822.jpg


ran the pressure washer through the plugs and water holes until the water quit coming out super brown, looks MUCH better inside. Just a chance that it won't run so hot anymore :smokin:

20221007_160932.jpg


20221007_160943.jpg


and you can certainly feel some taper in the top 1/3 of the cylinders as well as along the very top. it doesn't feel like enough for to bother measuring, so a quick bottle home it will be.

20221007_161024.jpg


8/79 on the main bearings and 11/79 on the rod bearings, pretty neat they put the date on there :smokin: also means i'm not going to bother measuring and just stick with "stock" sized bearings :rasta:

20221007_161713.jpg


Beer-thirty now that the garage is full of parts and random piles of bolts. Hopefully I can remember where they all go :rasta:

20221007_172453.jpg
 
Ridge ream before hone unless you want a bore that's oddly shaped and still has most of a ridge at the top.
 
Ridge ream before hone unless you want a bore that's oddly shaped and still has most of a ridge at the top.
Never been a fan of ridge reaming. just doesn't make any sense to me. Done many engines recutting new bore, sleeves, machine hone, plates, etc, but figuring this one feels straight enough that it should be good with just the dingle balls.

it certainly does have some taper to it, i'm just concerned that IF i measure it, it might end up being close enough to 0.010" over that i'd want to just take it in and get it done, since i don't have access to the machines anymore. without measuring it, i can tell myself it will be fine and it will be fine :flipoff2:

as for the ridge, it will be there regardless and the new rings still won't touch 'em. so it's pretty whatever if the taper kicks back in at the top or not


edit: in the interest of mostly keeping track of costs, there goes another $225 for parts, which puts me close to $2500 or so :confused: i think?
 
as for the ridge, it will be there regardless and the new rings still won't touch 'em. so it's pretty whatever if the taper kicks back in at the top or not
The corner of the new rings won't have the same fat radius as the old worn ones and the ridge on the bore will so you're basically gonna be cramming a hard radius corner into a big radius edge.

It's not a hard thing to DIY. Ridge reamers are $50ish.
 
The corner of the new rings won't have the same fat radius as the old worn ones and the ridge on the bore will so you're basically gonna be cramming a hard radius corner into a big radius edge.

It's not a hard thing to DIY. Ridge reamers are $50ish.
well, i'll ponder that for a bit then. rock auto parts and a mix of some dealer closeout, so stuff will be in over the next week.
 
well, i'll ponder that for a bit then. rock auto parts and a mix of some dealer closeout, so stuff will be in over the next week.
At the very least measure it so you know what kind of ridge you're working with.

If this were an engine from 1999 that only ever lived in an age of modern low tension rings and high performance oils I'd say full send but that's not the case.
 
At the very least measure it so you know what kind of ridge you're working with.

If this were an engine from 1999 that only ever lived in an age of modern low tension rings and high performance oils I'd say full send but that's not the case.
it's certainly not as bad as many of the other 70/80's engines i've had apart (but those all got bored out as required). the bearing wear is more than i expected, but this has also been registered as farm use only since 1994, so frequent starts after sitting for a while are probably likely.

i dunno, maybe i'll measure it after doing the ball hone, that way i can be sure i've not getting any of the glazing along the top
 
Short bit of stuff this morning. Won't do this this way again :laughing:

20221008_103602.jpg


Speaker box came with lots of info and a template which was nice

20221008_090321.jpg


Grabbed some 1/8 wood like stuff and made a pattern to fit the center space thing.

20221008_093852.jpg


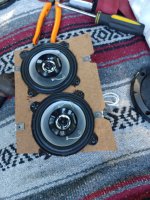
These 4" are just a hair too tight and fall of the edge of the tray :homer:


20221008_101318.jpg


20221008_102649.jpg


Either don't use 4" speakers or cut out the metal piece or both:laughing: should clear and work, going to find out eventually.

20221008_102656.jpg
 

Attachments

  • 20221008_101318.jpg
    20221008_101318.jpg
    1.2 MB · Views: 3
I hate to be "that guy", but if you don't keep lifters sorted and install them on the same lobe they were on, they will fail.
Unfortunately, the new lifters you buy today are poorly made and prone to failure.
 
I hate to be "that guy", but if you don't keep lifters sorted and install them on the same lobe they were on, they will fail.
Unfortunately, the new lifters you buy today are poorly made and prone to failure.

By all means, be that guy. I pulled them out and put them in order, then just tumbled them together :rasta: oh well.

I also priced out pressure plates, those things are expensive, so I'm highly likely going to run the old stuff as well there. Way more than I expected to see
 
feel the lifters, if they're concave they're bad (and the lobe they match up with is toast) if they're all slightly convex or flat, then you're still okay

if you do get one with sharp edges then make sure to look for the rounded over lobe and drop it in that hole
 
feel the lifters, if they're concave they're bad (and the lobe they match up with is toast) if they're all slightly convex or flat, then you're still okay

if you do get one with sharp edges then make sure to look for the rounded over lobe and drop it in that hole
they probably look worse in the picture because i was drizzling oil all over them, but they didn't feel obviously bad and the cam doesn't look tore up. didn't measure anything, so maybe i'll do that and then know for sure :homer:
 
they probably look worse in the picture because i was drizzling oil all over them, but they didn't feel obviously bad and the cam doesn't look tore up. didn't measure anything, so maybe i'll do that and then know for sure :homer:
it really isn't a measurement thing, it is an eyeball and finger thing
look up all about how the cam lobe geometry works and you'll find yourself better versed in how to look for the wear
the lobes are slightly angled so they'll spin the lifters
 
it really isn't a measurement thing, it is an eyeball and finger thing
look up all about how the cam lobe geometry works and you'll find yourself better versed in how to look for the wear
the lobes are slightly angled so they'll spin the lifters

figured i'd toss a square across the lifter and as long as it wasn't offensive let it ride. Cam lobe is easy enough to measure but they didn't look worn in any weird way. Yeah, they are designed to rotate the lifter about in an attempt to minimize wear. Measuring height of the lobe, then measuring 90 degrees from the peak is a fairly quick and easy way to verify close enough to stock spec
 
A rock auto cheapie clutch kit is like $65 complete.
meh, only worth doing if it gets you a diaphragm spring clutch cover
the one pictured a bit back looked brand new

ETA: wrong thread
this one is already a diaphragm spring one, and it looks like a couple of the fingers are bent, gonna make the TO bearing rattly
 
meh, only worth doing if it gets you a diaphragm spring clutch cover
the one pictured a bit back looked brand new

ETA: wrong thread
this one is already a diaphragm spring one, and it looks like a couple of the fingers are bent, gonna make the TO bearing rattly
Other than the fingers in that one span and evidence of dis use, it's in decent shape. Which is what makes tossing $30 an easy call, but $100 more questionable.
 
Years ago you could have got the pressure plate for $30 maybe and friction disk for another $25 etc but for some odd reason now just the pressure plate is more than the clutch kit that includes both and comes with throwout bearing and alignment tool.

I'm not made of money so I don't just throw money at every problem till its fixed but I would be hard pressed to stick the engine back in with that old clutch looking the way the fingers do when I could have a replacement for near $80 delivered. It's worth me not having to pull either the engine or trans again to just know the clutch is going to work.
 
After soaking in oil/solvent mix for a few weeks, still had rings on 2 pistons seized into the lands :shaking:

20221105_125401.jpg


So out comes the hammer and a dowl and some chisel and all kinds of other jazz to force them into compliance

20221105_130046.jpg


20221105_135828.jpg


with the rings out, here is a before of an average piston

20221105_143201.jpg


and here is an "after". used a decent bit of old ring to clear out all the debris in the lands and scrub off the heavy carbon everywhere I could find it, then used some 00 steel wool on everything else. much more fresh

20221105_143556.jpg


you can see some of the deformation caused by using not the right size of stuff to force the old rings out. Probably should've just replaced those 2 pistons. Instead, hit them with some 400 grit sand paper to smooth out the sharp edges until a ring would move around with no drag

20221105_151829.jpg

and this is measuring the cylinder diameter at the very top, 3.998" without touching anything

20221105_154027.jpg
 
Top Back Refresh