What's new

Random stuff you made.

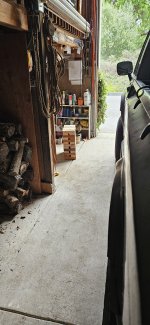
1 more door panel done and 1 to go. I had planned on using screws to hold it in place but after seeing it I want to use a hidden fastener. I may try to use the plastic trim pins if I can cut the holes in the backing board without fucking the fabric up. After the door panels are done this fucker is coming out of the shop under its own power after to many years.

IMG-1952.jpg
IMG-1957.jpg
remove duplicate text
What are those screw/washer combos called? Is there a common name or trade name for them?
 
Replaced some of those captured push pins on my 96 Burb. like the big white one above. The door panels are pretty thick. Can't remember where I bought them tho.
 
What are those screw/washer combos called? Is there a common name or trade name for them?
Oval head trim screw with captive washer generally works. Those are # 8, these are #10. #10 Phillips Oval Head SEMS Tapping Screws With Countersunk Washer | Upholstery Supply USA

These are a nice option if you are keeping the overall size down. They have a #6 head on a #8 screw thread.
#8 X 1-1/2'' Phillips Oval #6 Head Sems Countersunk Washer Chrome

The washer is flattened at the perimeter so it doesn't cut through fabric as easily. The common trim or countersunk finish washer for oval or flat head screws are open on the back since they are a thin stamped piece. That will cut through fabric pretty easily.

1713839651001.png
 
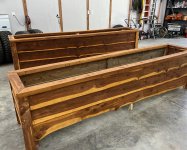
Milled a bunch of Ceder about 12 months ago... Finally got around to building planter boxes... 10'x2'x36" and 10'x2'x28"... will be installed on a slope at ground level so the "feet" will be pointed to be pinned into the ground... 2 coats of transparent stain...
 

Attachments

  • 20240421_200004466_iOS.jpg
    20240421_200004466_iOS.jpg
    2.3 MB · Views: 3
Milled a bunch of Ceder about 12 months ago... Finally got around to building planter boxes... 10'x2'x36" and 10'x2'x28"... will be installed on a slope at ground level so the "feet" will be pointed to be pinned into the ground... 2 coats of transparent stain...
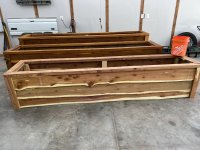
took a long lunch today and knocked out a third one. Stain tomorrow.
 

Attachments

  • 20240424_191656390_iOS.jpg
    20240424_191656390_iOS.jpg
    3.7 MB · Views: 3
Your idea of “tinkering” is waaaaay more skillful than my idea of tinkering
pfft. retention wedges are 90deg off. Such shoddy work. Pathetic.


:flipoff2:

I wish I had the puttering time to invest in making stuff that nice. I usually have just enough time to grab a chunk of something kinda heavy and weld a pipe to it before wading into a situation requiring a such a "tool".


I can’t cut a straight line in wood to save my life….
 
After careful consideration and the recommendations from Irates, I built a frame for the underside of my homemade dump trailer. I feel a bit better about it now. It nests inside of the truck frame, so the height of the bed is unchanged. Can't wait to overload the fawk out out of it with busted up concrete and see if it will dump or just fold in half (way more hydraulics than necessary).

IMG_20240504_171712910_HDR.jpg
 
Had a 25% off Hazard Fraught coopin, decided their $400 trailer was worth $300 as a foundation for an oddball project.

Brought kit home, discarded the lighting kit, assembled the trailer, partially disassembled it, modified to flip axle to lower the deck a couple inches, reassembled:
1715227319987.png


Made deck & 3 walls from second-hand 3/4" plywood & reinforced deck w/ salvaged 3rd world tread plate + angle-iron lip:
1715227410684.png


Made a flippy-grabby arm thingamajig from 5/8" threaded rod, 1" galv. pipe, and some 1/2" x 2" C-channel:
1715227613975.png

Pivot washers^ are 1/8" UHMW (made with super-advanced, NASA-inspired . . . hole saw + Unibit technology :flipoff2:)

That fine piece of Appalachian American engineering® allowed me to load bigass walnut logs solo using the trailer as a tool:
1715227752590.png

1/2" x 2" C-channel ties pivot point vertically to frame rail; 1/8" x 2" aluminum flat bar in tension braces pivot forward to frame.

1715227801609.png

Short scraps of PEX slit lengthwise & snapped over the channel edge prevent metal-to-metal contact when the bar arms crash down onto the angle iron. :emb: - I shot hot-melt glue into the PEX to keep it from sliding around on the channel (yes, I feel like a dirty fuckin' hack for doing that :lmao:)

Added bonus: I was able to back the trailer up to the destination pile & get some big logs on the 2nd level w/o blowing out a knee:
1715227947290.png


After a second life moving large rocks smaller than the biggest logs, the arm-thing will likely get hung in the rafters.

It may not be interesting stuff I made, but you can't argue that it's not random :laughing:
 
Last edited:
Top Back Refresh