What's new

Junkyard 609 axles

Dan

Registered User
Joined
Jun 1, 2020
Member Number
1750
Messages
680
Loc
N/A
I built a set of junkyard 609 housings recently and couldn’t find much info on the topic before hand. In general and on the combo of parts I wanted to use in particular. So this is my attempt to add tech for anyone out there wanting to do something like this on their own.

Just a quick disclaimer these are going to be low budget, low pinion axles for a trail truck. No fancy parts, just a way to get a nice gear set under your rig with a lot of gear selection and not a lot of $$$.

I used a D50 straight axle for the front donor, E350 Dana 60 for the rear donor, and 2 large web ford 9 inch housings. Third members and front shafts are not from the junkyard.

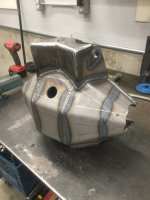
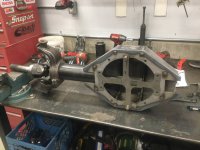
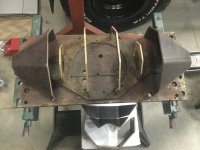
Here is a rendering of what the housings will look like when they are finished (top truss, backbone truss, and tabs will be fabricated once they are under the project vehicle).

IMG_0791.jpeg


IMG_0664.jpeg


These are the housings I started with; better one was used for the rear and it’s from an econoline van. Crappier one is from a ‘79 f150
IMG_5136.jpeg


I’ll start with the rear housing first since that’s the easier one.

2001ish Dana 60 rear was used for the outers. The E350 rear axles are nice because of their large bore spindles, smooth bottom chunk, disc brakes, and 3.5” axle tubes. Almost a shame to cut it up.
IMG_0018.jpeg


Here are the outers, 8x6.5 wheel bolt pattern with 9/16” lug studs. The axle mounting bolt pattern on the hub is the same as Dana 70/80 so if you want to mix and match axle shafts with OE lengths that’s an easy option.
IMG_0193.jpeg


Pretty decent brake set up here. 13”x1.25” slide over rotors with in hat parking brakes. Probably swap the calipers to some Wilwood 4 piston.
IMG_0194.jpeg


Spindles looked good after a little cleaning.
IMG_0206.jpeg


Measured stuff then cut the ford tubes. I don’t know if they’re all the same but these ones are 3.25”x.25” tube.
IMG_0250.jpeg


Cleaned up the rear housing.
IMG_0249.jpeg


Prepped the tube with a nice bevel and got the snouts ready to weld.
IMG_0363.jpeg
 
Got the rear spindles tacked into place and then slid the alignment bar out to start welding.
IMG_0364.jpeg


Just butt welded with no land on the tube and a very small gap, less than 1/16”
Since the parts were all clean and I was almost out of C25 gas I tig welded as much as I could.
Root
IMG_0367.jpeg


Fill
IMG_0370.jpeg


Cap
IMG_0372.jpeg


The rear axle has a 4 inch pinion offset to the passenger side because I chose to use equal length shafts. I happened to have a pair of junkyard Dana 70 shafts that are 35 spline and equal length. The shafts match the flange bolt pattern on the hubs and it gives me the wms I am after.
IMG_0875.jpeg


Testing out the new laser level, my only black Friday purchase.
IMG_0252.jpeg


Cut a big ass hole.
IMG_0427.jpeg


Got the old girl clamped into my home made axle stands and pre loaded the housing opposite the shave in preparation for welding. Not much pressure here, enough to keep it in place but not warp it the other way once it heats up.
IMG_0429.jpeg

Worth noting I also had an empty case bolted on with all 10 nuts tightened to prevent warpage.

I had 3 of those aluminum blocks I was alternating on the shave plate for heat sinks.
IMG_0431.jpeg


Tig welded outside, mig welded inside.
IMG_0433.jpeg
 
Last edited:
After shuffling around junk trying to organize, these parts found themselves together. Seeing the parts like this is what kicked off the build. I had been wanting to build these for a while and I could reduce my axle junk pile slightly by combining a few.
IMG_9932.jpeg


Sweet D50 parts, I cut the axle tubes off right at the cast chunk and scrapped the center to make moving parts around easier.
IMG_9933.jpeg


Stripped the parts and getting things in the same spot to clean.
IMG_9944.jpeg


Marked the ford housing where it tapers up enough to work with. That stayed the cut line, about 3” in from the factory weld joint.
IMG_9947.jpeg


Cut the housing. Tubes were just stuck in there and welded with a somewhat tight fit. Easy to remove.
IMG_9966.jpeg


Stuff I’m not using.
IMG_9949.jpeg


Stuff I am using.
IMG_0027.jpeg


Starting to get fun with these used parts. I spent some time with the project vehicle mocking things up. Kind of a pain doing that part but I know the pinion offset and approximate pinion angle I need to build into the axle. The main issue at this point was the short side axle tube being too short.
IMG_0116.jpeg


No problem because remember that really cool Dana 60 rear axle I cut apart? It has the same 3.5”x.350” wall axle tubes as the Dana 50/60 front! So now it looks like this.
IMG_0049.jpeg


Problem solved now time to start stripping brackets and prepping metal.
IMG_0117.jpeg
 
Last edited:
Retubing the C, old one was tight as fawk.
IMG_0140.jpeg


Cleaned up the new short side tube and got it installed.
IMG_0163.jpeg


New tube on and root welded.
IMG_0173.jpeg


Another pass with the mig.
IMG_0181.jpeg


Almost forgot to measure for wms location, doing that here.
IMG_0254.jpeg


The old E350 rear Dana 60 BOM is now on the front driver side axle tube. Most of it eventually got removed or welded over.
IMG_0183.jpeg


Leaving plenty of excess to be cut down to size.
IMG_0256.jpeg
 
Last edited:
Axle seals. I don’t have a lathe and my closest machine shop is about an hour away and time is expensive.

So I ordered some parts from send cut send. Larger ring that houses the seal is 3/8” and the smaller ring (.100) is the seat.
IMG_0264.jpeg


IMG_0265.jpeg


When the parts showed up I used a round file to deburr the inside. Then smoothed it slightly with a flip wheel on a die grinder.
IMG_0262.jpeg


I had them made with a slightly smaller inside diameter than I needed so that I could open them up if necessary. Not much only about .005” undersized. After 1 or 3 revolutions with the flapper the seal fit great. It’s in about 2/3rds of the way here with some tapping.
IMG_0266.jpeg

Factory Dana 60 seal.

I also bought some 3/8” thick 6061 washers with a 1.5” bore to align the seal housings on the tubes, they also worked great as a heat sink and way to keep the parts true while welding.
IMG_0298.jpeg


Clamped flat to weld the seats.
IMG_0297.jpeg


Just parts piling up, ready to throw the alignment bar through each tube and align the seal housings for welding.
IMG_0301.jpeg


One more round of measuring to confirm pinion offset and wms then I cut the tubes to size and started welding.
IMG_0310.jpeg


IMG_0306.jpeg


Tubes are prepped and ready to test fit.
IMG_0313.jpeg
 
Last edited:
Started making room for the larger tubes by cutting the welds out and adding a slot.
IMG_0279.jpeg


I knew cutting the center housing alone wasn’t going to be enough so I put the bar back in and checked to see what needed to happen.
IMG_0285.jpeg


Alignment pucks on both sides of this excess axle tube.
IMG_0286.jpeg


Pretty close but no cigar.
IMG_0288.jpeg

Since what’s left of the ford housing is the thinnest material in the equation I wanted to remove as little material as possible.

So I pulled out the oxy/acetylene torch added a little bit of heat, spare case is bolted in again with all the fasteners nice and tight. Basically just needed to round the hole a little bit. First little corner part opened up, 7 more to go.
IMG_0292.jpeg


Eventually it looked like this.
IMG_0294.jpeg


But opening up the housing still wasn’t enough. Before grinding these flat spots I set the axle up where the caster and pinion angle needed to be and marked the tubes. Then when I hammered in the tubes the caster was in the correct position in relation to pinion dangle.
IMG_0315.jpeg


Beat the tubes in with a 4lb mallet, this was the first time seeing it with the new tubes. I just went to bed after that.
IMG_0316.jpeg


It was a very close fit the first time. I just needed to massage a couple spots like the housing not being cut straight and hitting the notch.
IMG_0318.jpeg


Which allowed the tube to stop short about 1/4”, the welded part of the tube needed to be in so you couldn’t see it. You can see I didn’t bring the tube all the way to the mounting flange to avoid too much heat input in that area.
IMG_0319.jpeg
 
Last edited:
After everything was good I tacked a couple spots then started on some finish welding, doing these 4 horizontal joints first.
IMG_0443.jpeg


Then strapping it to the table as it cooled.
IMG_0444.jpeg


Which seems kind of stupid but gives me a more desirable weld position.
IMG_0446.jpeg


Shaved the front axle.
IMG_0481.jpeg


IMG_0668.jpeg


Bolted one of my thirds in to measure where the splines landed, I did this with the rear too.
IMG_0472.jpeg


I measured where the splines terminated so I could reference them to this template I’ve been using. If you look closely you can see where I scribed marks for the new location I want to cut the shafts.
IMG_0823.jpeg


Putting these on the parts shelf for now, bulk of the fabrication is done short of trusses and tabs. I’ll spend money on parts and get back to these in a year or two when the project vehicle is ready.
IMG_0774.jpeg

IMG_0801.jpeg
 
Last edited:
Awesome, glad you posted this. I think the myth that 609s are all expensive needs to be dispelled more. It's only as expensive as you make it.

In areas where any decent front 60 is $1500+, you could almost do one cheaper or break even if you're doing gears, locker and chromo shafts.

But you'd have to build them from scratch and that's elitist and gate keeping.

Dan : This is looking promising ! Keep it coming !
 
Great timing on the thread. I am building a FF 69 for my wheeling buddies daughters YJ. We have some Dana 50TTB spindles and hubs available. We planned to fab up some spindle cup to weld onto the rear housing. RuffStuff used to offer a cup to do this but no longer on the site.
I think it would be easier to just weld on the salvaged spindle like you did above, the use rear hubs and shafts.
 
  • Like
Reactions: Dan
Top Back Refresh