What's new

4runner refresh

so after this i punched a little hole into my header form the shackle bolt, i tried to just shoot some rod over it and booger weld it up to no avail

so pulled it off made a little patch plate and smoothed it down, now my exhaust has a little skid plate :laughing:

"hmm why did this happen all of a sudden" you say, welp the motor mounts gave out

picked up some from 4x innovations and those things are ridiculous, i could get a whorehouse to cum off the vibrations from this thing!

like i could charge people to sit on the front bumper :laughing:

so i pulled one out- nope still pretty rough


i tried to do the marlin thru bolt thing, but needed some extra hardware to make it legit and just said fawk it and picked up some new OE ones from 22re performance, they were a little pricey but worth it

51147714568_81b75f04f5_o.jpg
51148283014_81ac405bd9_o.jpg
51148282369_6fa7afec35_o.jpg
51147501671_b777861ed4_o.jpg
51148282484_dd02e7deeb_o.jpg
51147725248_1977fa5433_o.jpg
51146820007_78d7f98efe_o.jpg
51147496546_fcbbc617a3_o.jpg
 
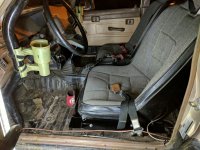
oh ya you can see some of the heat shielding stuff i put on the bottom side of the floor to help with the whole shoe melting thing

51147714568_81b75f04f5_o.jpg
 
so in july i went to the rubicon with a buddy and right before we left i saw some cracks where the frame meets the front cross member, so i threw some quick and dirty welds on it

my buddy destroyed his trans output adapter at buck island, so i went on a midnight parts run, brought the wrong part, drove him home and went back out on monday with the right part

during all that the pig welds broke and i bent the front axle housing :homer: :homer:
51146839812_cbe0de1999_o.jpg
51147515821_6b3fd04621_o.jpg
51148297379_0a4582e3c4_o.jpg
 
of course when the housing bent, it wrecked the inner axle seal and washed out the birf with gear oil and wrecked the cradle and ball bearings :homer:

ordered up a new one from yota masters and hooked up my rcv outers to the new longfields that came with the rock assault housing

oh i got a rock assault housing for the front too :laughing: went with the +5 tacoma width

say good bye to the last of the early 2000's flame diff guards!

the suspension setup on this likes a +3" axle push and the 44044 leafs only give you a +2" push so i cut part of the ol leaf perch off of the old housing and added it to the new perches and got an extra 1" ghetto hack style :smokin:
50643063682_7e2645f640_o.jpg
51147607733_61bd207166_o.jpg
51146693392_6513f8412d_o.jpg
51148152534_f9b03f11ca_o.jpg
 
after that i was getting a little bored again and started to pick at the bed liner that was still all in the back half of the 4runner

that stuff did not want to come up, the stuff in the front pulled up in big sheets and this stuff was a fight for every inch!

tried the grinder but that just melted the stuff and didnt work well, so scrape and heat and peel and scrape and chisel :mad3:

finally got it all out and just blasted it with some spray paint, WAY better :smokin:
51146700822_f92b62955c_o.jpg
51147377331_6bac537e76_o.jpg
51147377726_abeb894a99_o.jpg
 
Been there done that on the cracked front crossmember thang. Right before the rubicon as well. Just glad I saw it before we headed out. Went to the rock assaults too. I really need to do a build thread..
 
Been there done that on the cracked front crossmember thang. Right before the rubicon as well. Just glad I saw it before we headed out. Went to the rock assaults too. I really need to do a build thread..
do eeeeet!

hard part is taking pics of what gets done, i know i dont have pics of my shock hoops, swapping leaf springs front and rear, im just now remembering the rear brake rebuild that i did the day of leaving for a trip :laughing:

i'll have to make a list of things i forgot i did and dont have pics of
 
after i got all the bed liner removed i went back to the front and added some stealth heat shield material to the driver side floor (exhaust runs under there) and then went for maximum insulation on the shifter to keep the hot air from blowing up

51146703957_fd86f8e25f_o.jpg
51146704027_3e6befa65d_o.jpg
51147609323_0c551e973b_o.jpg
 
took apart the shark cage and added rubber flooring material to that too to try and seal it up from dust 🤷 its better that nothing :laughing:


i didnt take a pic of it but i did rubber sections that matched each sheet metal panel and then side skirts, you can see the side skirts in the pic below

51146702017_2d8b809752_o.jpg
 
im getting a little out of order now, i think i actually picked up a tailgate before i "sealed" up the shark cage

so over the phone i was told the tailgate had a dent, and in my head i figured how hard could that be to pull out

well the tailgate looks like a forklift ran into it and someone had done some booger welds to close the hole :lmao: whatever it was $100 bucks and had glass, motor all the things (no key tho)
got it on and plugged in and no go! :mad3: checked the motor, checked the safeties, fuses, now im just down to the relay, gotta be the relay

slept on it for a bit and decided to start at the motor and power test my way to the relay and what do you know, a bunch of cut wires at the tailgate 🤦

now it all works, hotwire in a hidden switch to take over for not having a key, run the window and the last couple teeth are broken, so take it all apart again and weld and grind some 5 minute ghetto hack teeth
51147377496_eec1fd4c19_o.jpg
51151449478_933e0cb644_o.jpg
51148488070_b8c1ec4a0f_o.jpg
51147608728_b8c1ec4a0f_o.jpg
 
now that im going for full on comfort in the luxury runner, i decided i needed some new seats BUT my current seat mounting situation sucks

originally i had flat sliding tracks mounted to a flat piece of metal that i bolted to the floor to try and keep my head away from the roll cage (im 6'-2") which made for a very upright seating position

so before i spend $1400 on new prp recliners let me mess with the mounts so that the current problem doesnt transfer over to the new seats

problem is i cant change the mounts without my head being in the cage..... well fawk i guess i could just move the cage


i wouldnt advise anyone to do this and im going to catch some shit here for this but whatever :laughing:

seat mounts below
 

Attachments

  • seat mounts.jpg
    seat mounts.jpg
    2.5 MB · Views: 71
soooooo i cut the cage and patched it back together

+3" to the A-B bars and -3" from the B-C bars

how the cage was (see how the B pillar of the cage is centered on the B pillar of the truck)
51152009669_e8bb696c33_o.jpg
51152027284_f217997cab_o.jpg
51152346360_6beaccb1bc_o.jpg
51151241156_0fc508450b_o.jpg
 
at this point i was regretting my life choices but decided to continue anyways :laughing:

2 plugs welds on either side of the butt weld and 6"s of 1/4 wall 1.5" dom to splice it back together.... should.... be.... alright....

remounted the harness bar as it sat a little lower than it should have while i was at it

51152010929_a49f3ee9ae_o.jpg
51152011469_128110e887_o.jpg
51152011089_3cece57181_o (1).jpg
 
there was a little tube misalignment from the bend angles but nothing crazy, just added some miter cuts to the splice tubes and used a ratchet strap to to draw them together

added some grab handle bars that originally came with the cage, redid a couple of the original cage welds (see second pic,that was an original weld i wasnt happy with)

before and after cage and seat mounts

51152009669_e8bb696c33_o.jpg
51152056389_421b358c13_o.jpg
 
it was alot of work for 3"s but every inch counts sometimes :laughing:

seating position is way better now and head clearance is similar if not better than before

the backseat that was already hard to get into is even harder to get into now but i never really use it so thats fine
 
now that i have a tailgate, i had to figure out how to re-pack for trips

i used to let the ice chests sit sideways and hang out the back but now i cant even fit one facing the right way :homer:

but wait! i have an ice chest rack!.......... but that doesnt work with the roof, and who wants all that weight way up there?

some blurryness cuz the internet is forever

51151519328_f9ef19b483_o.jpg
51151452363_534d4d9f2c_o.jpg
 
the main ice chest fitting problem is that at the C pillar theres a crossbar at the bed line, and the ice chests cant slide under it

i originally mounted it that low because i didnt want to see it

but since i already hacked into my cage, whats the difference if i hack into it a little more

so i cut it out, added a plate over the old spot, raised the bar, and added some triangulation bars

51147377726_abeb894a99_o.jpg
51146705122_680964c5b7_o.jpg
51147381101_75bf116235_o.jpg
51152406800_37533a5707_o.jpg
51151303856_0ca02aeb26_o.jpg
 
alright i've got a little free time, lets continue

so this past winter i had put the top back on for the 1st time in a long time and could finally hear that the 4runner didnt run so hot at about 2500rpm

i checked out the faq sheet over at 22re performance and saw how to do a quickie egr blockoff to help trouble shoot, turned out to be one vacuum line on the bottom side of the egr valve :homer:
51241440643_a61e3f6bd5_o.jpg
51240530367_f39963b6b1_o.jpg
 
after doing all the cage reworking, my head was still a little too close to the bars for comfort so i found some snazzy roll bar padding from BSCI

dual layer, fire resistant :smokin:

51240531782_500bbbcc34_o.jpg
51241241911_4d5451ec0a_o.jpg
51242295735_fc09d958c9_o.jpg
51242320030_e5d9dc954f_o.jpg
 
held a chunk on the front bumper and gave it a good head butt and that shit works! :lmao:
 
Last edited:
oh i think i skipped ahead a little too far, i passed over my steering box leaking, no big deal, but when i removed the air box and intake boots i found a big ol tear in one of them! :eek:

i think my motor has been sucking dust for a couple years :homer:
51241243646_794cc09f89_o.jpg
 
got replacement boots and painted things gold cuz... well its too late to change colors now :flipoff2:


51300523087_fc4702db7a_o.jpg
51301455808_5987d9bb90_o.jpg
 
got a tapped steering from yotamasters for probable future hydro assist

took it out to fordyce for memorial day and killed the alternator, got that replaced with one from LCE and i think they just resell someone elses alternator? anybody know?

anyways i got the 140amp one
51300529137_49b97b5233_o.jpg
 
i also finally put on a 4x innovations transfer case mount on the rear case, im not seeing any pics of it on my phone but i did do it :laughing:

and it added some vibrations but i could live with it... then i read the dual case strengths thread on here and it got me all worried about having a stiff poly bushing tcase mount and soft rubber engine mounts :eek:

so i put the 4x innovations driver side engine mount back on

which added way more vibrations, but hey its a crawler

did a couple shake down laps around town, chased down a couple annoying vibrations, took the top back off for easier camping, moved the cheapy boat speakers to a better spot and i'm ready for the 4th of july out at the rubicon :smokin:


well until that thursday when i went to leave and had a big clu-clunk sound coming from my rear end :eek:

did some checks and tightening and figured it had to be the rear end, not much i could do at that point so i took the daily up to meet my buddies, we were just staying at loon lake the whole weekend anyways

got back on monday and pulled the third member and gawd dayum it was definately that :lmao:
51301291336_d799351f06_o.jpg
51301291776_bd328d36b5_o.jpg
51301477388_3111cc2aac_o.jpg
 
i just dont get how everything felt fine the weekend before :homer:

i also dont get how i was able to drive to three different gas stations looking for ice on that diff :lmao:
 
welp thats up to current day, anyone know anything about cryo treating toyota gears?

also if theres anyone even localish that does cryo treating??
 
time for a little update

i got the the rear axle pulled apart awhile ago and played with my new plasma cutter, probably not the best thing to practice on but oh well :laughing:

plasma cut 1.jpg

plasma cut 2.jpg
plasma cut 3.jpg
bung welded.jpg
 
after i almost ruined a whole axle housing playing with my new toy, i saw that the stock axle shafts had just the slightest twist on the splines

i was thinking it would be fine but when i told some people they said replace them, no one else ever looked but peer pressure got the better of me so i got some yukon chromoly replacements

axle spline twist.jpg

axle spline twist 2.jpg
 
and now if im replacing the shafts its basically a full on rebuild, so new wheel bearing, cleaned up the brakes, new shoes but couldnt get new cylinders in time so oh well :homer:

dirty drums.jpg

clean drums.jpg

assembled rear.jpg
 
Top Back Refresh