What's new

Rock Lizard/Weekend Ultra4(?); blown LS, 40s, tons, bypasses, etc.

snivilous

Well-known member
Joined
Jun 14, 2020
Member Number
2003
Messages
316
Loc
Southern UT
Some cherry picked photos from the last 2 years, if you want to see more there's threads on other sites. Heads up, I have no fucking idea what I'm doing.

cNZ0kBDh.jpg


3MqKNMPh.jpg


15wqQc9h.jpg


PJwdtZph.jpg


ZSiR8Krh.jpg


yPIiQ7Ah.jpg


OYUlNJZh.jpg


6hhHm4Mh.jpg
 
Last edited:
And now to start posting from today's progress onward:

Today got my Nick Williams 92mm billet throttle body in

PpMVAZkh.jpg


Also, passenger side accessories are mounted and lined up perfect right out the gate! I might make billet brackets in the future, but for a test run making them on the plasma table was a lot faster. The drivers side which only holds an idler pulley and the full hydro pump did not line up AT ALL. Not sure what happened, they're a solid 3/4" out of plane with the rest of the pulleys. Somehow the CAD model lined up dead nuts for passenger side and is way off on drivers side.... No worries though! I also found out I'm gonna have to revamp a couple tubes up front since I can't get the serpentine belt to clear the chassis due to the limited mounting options for the pump due to the supercharger inlet being on the driver's side. No pictures of all that, but I'll start cutting it up soon and since I have the throttle body now I know exactly where everything is up front to redo the driver accessory bracket.

X5ZpdGeh.jpg


iCwommyh.jpg


HWISfiCh.jpg


For other progress, I'm wrapping up the interior tubing. First step was to throw it on the lift and get the axles out so I can actually crawl around the chassis to weld everything.

tsGDDp4h.jpg


xxCwHBzh.jpg


This morning I "finished" welding the interior tubes. There are 6 tubes, and... 12 tube disconnects. Each seat bar can disconnect from the chassis, and then the whole center console/dash piece can pull out. I'm hoping I tacked it enough and with everything bolted up it didn't warp out the ass, I haven't tried removing anything since welding it up this morning. There's a few sides left I couldn't reach and I'll need to pull the drivetrain to get to, but everything is welded enough to hold. Next step is the front seat mounting tabs, after that I can start plumbing stuff to the back. I got 21ft of 1.75" aluminum tubing to bend hard lines for the radiator, everything else is stainless AN lines. I have a bunch of hardware showing up from McMaster tomorrow too so I can mount the trans and oil coolers out back. Once those two are up, the driver accessory bracket is done, and the drivetrain is plumbed she'll be ready to fire
clear.png


t7i4ZKph.jpg


DhyIxBgh.jpg


ivLHZeah.jpg


KTwjuNOh.jpg
 
Made a lot of progress lately. First thing I'm stoked about is I pulled the interior bars and finished welding up any areas I couldn't see, and then reinstalled it and nothing had warped more than a hair which I find miraculous. The next task was install the tranny and oil coolers.

I made some L shaped brackets that came off the bar supporting the radiator, and then added a plate on the top between the V brace and had some tabs come off it too.

AKQg09Dh.jpg


lw53lRGh.jpg


HiNUghTh.jpg


The radiator has a little movement in all directions with its mounts, and with it pushed all the way down there's like 1/8" of room. I think it's perfect!

cgWsJSPh.jpg


OctDzVfh.jpg


With the rear radiators all mounted, I started making some seat tabs since the front of the seats aren't mounted yet. I have those cut and prepped but not welded in yet. Today I decided I would cut out the front chassis tubes that were making the accessory mounts a bitch and fix them. I took a bunch of photos, but somehow my phone decided those weren't worth saving. Initially the front looked like this, with the tubes off the engine cradle at 45deg. This was to help clear the upper link mounts at full flex; not sure if that will be an issue now, but it's less of an issue than making the hydro pump fit.

Removed accessories, water pump, crank pulley, plasma cut the tubes out, grinder, flappy wheel, measure, new tubes, notch, flappy, scotch brite, acetone, tack, voila:

yQQQnSAh.jpg


It makes more sense now too, I wasn't a fan of the 45deg angle before and now the load paths aren't as retarded. The driver side accessory bracket was way out of plane (like 3/4") somehow, so for mock up I just spaced it off the head to test everything and also threw on the new throttle body. And holy fucking shit, it all fits 😱

Ch1poIMh.jpg


hpFWo9lh.jpg


Don't get me wrong, driver's side is still tight as fuck. But the hydro pump clears the throttle body by quite a bit, and the serpentine will clear the chassis by like 1/4"---which isn't a lot, but that means it nominally won't be rubbing and if it occasionally touches I really don't care. Worst case I notch that tube a bit.

The belt is 91.5", so I bought a 91" belt off Summit. I am so excited, I am about to get to the plumbing phase and the amount of fucking work I've done in the last few weeks to make the engine work and now everything appears to fit and line up is mind boggling. Measuring everything a ton, making custom accessory brackets, using a weird race pump that spins backwards, cutting up the fancy water pump and milling it and the thermostat housing to clear the supercharger and then welding them together, the hydro pump not fitting, the chassis in the way, etc. etc. So much time and research and trial and error and I now have an engine that at the moment seems like it's ready to run and actually fits and is crammed into this tiny chassis.

Next up, welding the front seat mounts on, building a new driver side accessory bracket that has the right spacing, and then time to start playing with the boxes of plumbing and AN fittings and fuel toys that have sat around for months.
 
So I remember on other sites there were a bunch of comments on how this wasn't the chassis to be using for your purpose and for all that had to be changed you would be better off starting from scratch or with a totally different chassis. How do you feel at this point about those comments?
 
What type of engine mounts are you running? From the look of how tight everything is, hopefully something with very little movement.

I think I would have hung myself before getting as far as you have. Nice work.
 
So I remember on other sites there were a bunch of comments on how this wasn't the chassis to be using for your purpose and for all that had to be changed you would be better off starting from scratch or with a totally different chassis. How do you feel at this point about those comments?

Oh completely, no doubt. I knew going into this it would get tweaked a lot (maybe not THIS much though haha) and mainly I just wanted a baseline to build off of, since I wasn't sure what I wanted or what proportions would be good. In retrospect, I probably would've saved time just winging it and designing it in CAD and making it 100% from scratch, but originally my plan was to recycle Toyota components too, so a lot has changed since I started this. Thomas (Fabn801) now makes a lot of chassis variants that will fit a LS and would be "more" suited for doing what I'm doing. With that said, the only part of the chassis that is actually from the Rock Lizard kit is from the door bar down. The roof, tail, nose, and even width are all massively different.

What type of engine mounts are you running? From the look of how tight everything is, hopefully something with very little movement.

I think I would have hung myself before getting as far as you have. Nice work.

The whole drivetrain is on bushings. There's some super low profile ones for the engine, then a removable cross bar for the trans, and then the atlas has a TMR tail support. I am worried that I'll get too much movement in everything, there are other places like interior components that have less than an inch of clearance from the drivetrain. The people I've talked to said that should not be an issue, and the bushings will flex but hardly at all. I only have it on bushings to try and isolate some vibration from dumping into the chassis, but worst case it's easy to convert it to solid mounts.

This whole thing has definitely be a learning experience. No doubt getting a Bomber or Goat Built would've been a lot easier. But I think it adds a cool factor doing it all myself, and even though parts of it are a bitch it will be very unique and will be a cool combination of big tires, big travel, big horsepower, and be very low and compact.
 
Haven't had a chance to work on the buggy in a week, but made a little progress yesterday and this morning. First up I watched some videos on welding aluminum and then started making coolant lines.

FCpZCnY.jpg


xNgG1iU.jpg


I cut some brackets out of 1/4" aluminum and tacked them onto the tubes, and then made corresponding brackets that I need to tack to the chassis. I've only done the lower coolant line, but it's broken into two sections so it can be easily removed.

0FSFpYd.jpg


I also made a new drivers side accessory bracket, which somehow turned out to be 1/2" too tall (vs 1/2" too short last time??) so today I trimmed that down and everything lines up great.

x3diVwK.jpg


r2tu4TT.jpg


I also welded up the passenger accessory bracket and added some additional gussets. This was my favorite weld of the day:

bVG2evt.jpg


And lastly to wrap it all up, I bolted everything together and threw on a serpentine belt (actually my second one, the first was a bit too long) and everything seems to line up great!

J8rlDwl.jpg


I had been hopeful I could fire the engine up this weekend, but I highly doubt that will happen. I still need to make the second coolant line, plus oil, trans, and fuel lines plus hooking up the wiring and getting the ECU setup--and that's assuming I use the eBay ball blaster headers for an O2 sensor hookup. So it's getting very close, but as everyone knows, each of those tasks by themselves is a days worth of work.

With that said, I'm still hopeful of making Trail Hero even though it's only 5 weeks away. Once the engine fires up I just need to make a rear driveshaft and plumb brakes to at least scoot around.
 
This builds coming along great. Was hoping to have mine done by Trail Hero so I could get up there to check it out in person, but don't think that's going to happen.
 
This builds coming along great. Was hoping to have mine done by Trail Hero so I could get up there to check it out in person, but don't think that's going to happen.

Thanks man! Well if you do make it, or are ever in southern utah regardless, let me know. I'm 45 minutes from Sand Hollow up the hill (bike ride from the last WE Rock competition). Can always use more friends to go wheeling 😁 even if I have to take the FJ out to do it
 
Build looks good man! Keep it up!

What fuel are you going to be running?

Thanks man! Maybe with some luck I'll be in line at KOH with you lol. I'm shooting to just run 91, maybe have a tune for race gas but I doubt it; course, I put the highest compression stock LS heads made on it which was before I decided to go with the blower, so I may be at a cross roads in the next few weeks of race gas or different heads. I think inevitably I'll go to a top end optimized for the blower and at that point I'll keep it with 91 probably.

Pretty fuckin sweet considering what you've done with what you have.

Thanks man! This build is such a cluster, as time goes on the budget seems to keep increasing. Was supposed to be super cheap initially and that's why I went with the lizard chassis, and now it's turned into anything but cheap and it's all crammed into the little chassis lol. Nothing against Thomas and I love the lizard, but a bomber or something would've rid me of a lot of growing pains.
 
Got the first (lower outlet) cooling lines hung today.

RXA9V3S.jpg


dhzFPZu.jpg


hs1zGUZ.jpg


Got the second set of cooling lines bent and welded.

8yF6mzA.jpg


Another aluminum weld photo, I'm sure to an actual welder my welds are horrible, but I'm wickedly excited about being able to weld aluminum.

ksFAT5Z.jpg


And that wraps up todays progress.

1FlnmXm.jpg
 
  • Like
Reactions: IGT
Thanks man! Well if you do make it, or are ever in southern utah regardless, let me know. I'm 45 minutes from Sand Hollow up the hill (bike ride from the last WE Rock competition). Can always use more friends to go wheeling 😁 even if I have to take the FJ out to do it

I've been trying to get up there for a bit now to ride bikes at Brianhead also. Might just have to come up and roll around looking for spare seats if I don't get it done by then. Always need more wheeling friends:smokin:
 
Thanks man! Maybe with some luck I'll be in line at KOH with you lol. I'm shooting to just run 91, maybe have a tune for race gas but I doubt it; course, I put the highest compression stock LS heads made on it which was before I decided to go with the blower, so I may be at a cross roads in the next few weeks of race gas or different heads. I think inevitably I'll go to a top end optimized for the blower and at that point I'll keep it with 91 probably.


Thanks man! This build is such a cluster, as time goes on the budget seems to keep increasing. Was supposed to be super cheap initially and that's why I went with the lizard chassis, and now it's turned into anything but cheap and it's all crammed into the little chassis lol. Nothing against Thomas and I love the lizard, but a bomber or something would've rid me of a lot of growing pains.

We have been on E85 for several boosted builds now. works amazing if setup and tuned for it. Whats your current compression ratio now?
 
We have been on E85 for several boosted builds now. works amazing if setup and tuned for it. Whats your current compression ratio now?

I hadn't thought seriously about E85 due to the inconvenience factor, but a guy I knew also swore by it for boost, especially turbos. He said the whole engine ran considerably cooler on E85 plus could get more power of it, and I thought he was said it was $4-5/gallon in barrel form which isnt bad. I think I'm around 10.6:1, a stock LSA is 9.1:1 though I've read quite a few people with a LSA on a LS3 which is 10.7:1 and they apparently (or lack of saying otherwise) can run pump gas.
 
I hadn't thought seriously about E85 due to the inconvenience factor, but a guy I knew also swore by it for boost, especially turbos. He said the whole engine ran considerably cooler on E85 plus could get more power of it, and I thought he was said it was $4-5/gallon in barrel form which isnt bad. I think I'm around 10.6:1, a stock LSA is 9.1:1 though I've read quite a few people with a LSA on a LS3 which is 10.7:1 and they apparently (or lack of saying otherwise) can run pump gas.

yikes... thats not pump gas territory. I run pump E85 at around $2 a gallon. I'm a hair shy of 1200 HP at 15 lbs of boost. E85 downfall is consumption. I really need to design a larger custom fuel cell.
 
Now that the weather is cooling off and Trail Hero motivated me, I've been chipping away at stuff. The accessories are fully mounted and ready to rock. Had to get some socket head cap screws but she's ready to boogie and everything is turning over fine. I'm worried the idler pulleys aren't parallel enough to everything else but we'll see when it fires up.

YSBnkF3h.jpg


fBjE91dh.jpg


All the coolant soft hoses are routed and in place. I also removed the LSA boost bypass actuator and will do something to keep it permanently closed off. From my reading the only down side is the engine will get "more wear" since it will constantly be making boost, where as normally boost is bypassed from the intake at idle and low throttle. The actuator is in the way of my top coolant line, and I really don't give a shit about engine wear since this isn't going for 200k miles, so delete and block everything off.

In my quest to get it running "soon", I need to plumb the hydro pump somehow so it doesn't burn up. Well may as well just fully mount the steering. Welded up the high steer that I've had laying around for 6 months.

rXsTnaxh.jpg


I will be mounting the ram soon, but the Howe kit just comes with some short clamps that aren't tall enough to clear the gussets inside the hydro skid, so I ordered some steel billet and will machine new bottom sections of the clamps that are the correct height and then tap some bolt holes and weld them straight to the hydro skid. The stock ram clamps, and from the sounds of it most ram clamps, have the bolts in shear so by welding the bottom of the clamps the load path will be directly through the clamp into the skid. Additionally I have new ball joints that showed up, and will be ordering new 35 spline unit bearings and axles and all the other shit in the near future.

Moving on, I finished some welds on the front of the chassis and added the outer plates to the motor mounts and welded them in. Everything is first pass still, but I think it'll be good enough for mild partying before I tear the chassis down for final welding/sand blast/painting in the far future.

26a2kyIh.jpg


I started plumbing the fuel system today. I had bought a bunch of hose, and then realized that the reusable AN fittings I have need SPECIAL hose that of course costs a metric ass load. But I already have Fragolas fittings on literally everything, so I had to buy their special hose ($750 for 40ft of -10 and 20ft of -6). Lesson learned that the cool fittings lock you into using the special hose, not that it isn't nice, and I've already had a few spots where disassembling the fitting and trimming the hose back was nice, but in the future I think I'll go with crimped lines or premade stuff. Anyways, now that I have the special line for the special fittings, time to plumb stuff. A week or two ago I made brackets for the fuel filters, fuel pump, Y splitter, and regulator.

puGx5u7h.jpg


ASJPuVth.jpg


NyFiN33h.jpg


i77eWE0h.jpg


tXo9jEnh.jpg


UZG3dY8.jpg


I've been looking for a nice way to route the hoses, right now it looks like I'll be machining some brackets I can weld straight to the chassis and have a little retainer plate and bolt to hold everything neatly in place.

uss79zEh.jpg


I have a few more lines to run, and after that will plumb/install the steering and then she'll be ready to fire up. I have some ebay headers I'll use to fire the engine up, but they won't fit once I get the firewall in place but good enough to test everything.
 
The fuel, oil, and trans are all plumbed. I still haven't decided on a permanent way to mount the hoses since I'm pushing to get the engine fired up more than anything right now. I also haven't installed the fuel system check valve, but I have fittings showing up today to install that inside the fuel cell, this will maintain fuel in the pump after the engine is turned off so the system doesn't lose priming essentially. I might leave that off for now just in the event I need to pull the fuel lines that they're easy to dump back into the tank...

1jcvFBDh.jpg


AKC3M9xh.jpg


MNXf9LOh.jpg


Another step to get the engine ready to fire is exhaust, I had ordered some cheap ebay headers awhile back which I'll use until I build the firewall and can build custom headers. Originally the ebay ones fit, but after making the cooling lines the passenger side doesn't fit so I janked this extended header together lol. I'll weld a 90deg dump off the collector and then add an O2 bung to one of them for the Holley to read. Those parts should be showing up today so exhaust will be ready.

SkuaoDih.jpg


I've been working on the steering quite a bit. The biggest limitation to starting the engine is the steering pump needs to be hooked up, since I have a serpentine belt I can't disconnect it and need fluid flowing into it to avoid burning it up. So at that point, may as well just hook all the steering up permanently since I can do that now (versus the final headers that need a lot of prerequisites). I ordered the aeroquip hose and fittings which show up Friday. In the mean time I've been mounting everything else. I went through a lot of mounting ideas for the ram, but ultimately decided to use the stock Howe clamps because they got the geometry correct with the Artec hydro skid and Artec high steer arms (which don't seem to line up together really which seems weird...). I chamfered the shit out of the clamps and also tapped them out to 9/16" and welded them straight to the skid.

Xsaru7Eh.jpg


This way the bolts are not in shear like the stock clamps are designed to be (apparently). So the bottom of the clamp will load up the skid through the welds, and then the clamp caps just bolt directly to the clamp.

ZVMP0Blh.jpg


Also on a fun note, a couple weeks ago I bought a lathe in Colorado. I've wanted a big lathe for a long time, and it's already amazing how useful it is! For instance it was faster and the most perfect finish to chamfer and clean these tubes on the lathe versus the normal way with a grinder.

AOHDZjSh.jpg


Z9XFlkzh.jpg


7/8" heims from Ruffstuff, I turned the misalignments down on the lathe to fit the high steer and ram mounting widths. I considered making aluminum tie rods, but considering how small they are the weight savings/strength loss ratio didn't seem worth it.

VA1FUhdh.jpg


Tie rods in. The skid of course needs to be clearanced (like I said, the high steer doesn't seem to align with the ram at all and they're both from Artec). I'll have to trim the skid, and then also the internal gussets for the skid don't fit the low profile ram mounts, so I'll have to cut out some custom gussets too.

6DDPfTTh.jpg


t7QlfYhh.jpg


But either way I'm stoked, the steering on the axle side is essentially done and now I don't need ratchet straps and janky makeshift tie rods to move the buggy around the shop. I'm hoping to mount the orbital and hydro reservoir this week, then just need to make the steering lines and put the harness in and it should be ready to start! I have break in and racing oil from Amsoil on the way too. I think stuff will start going faster once it's running, plus I want to know it works before it goes through another thermal cycle this winter and can occasionally start it and keep everything moving while it's cold out.
 
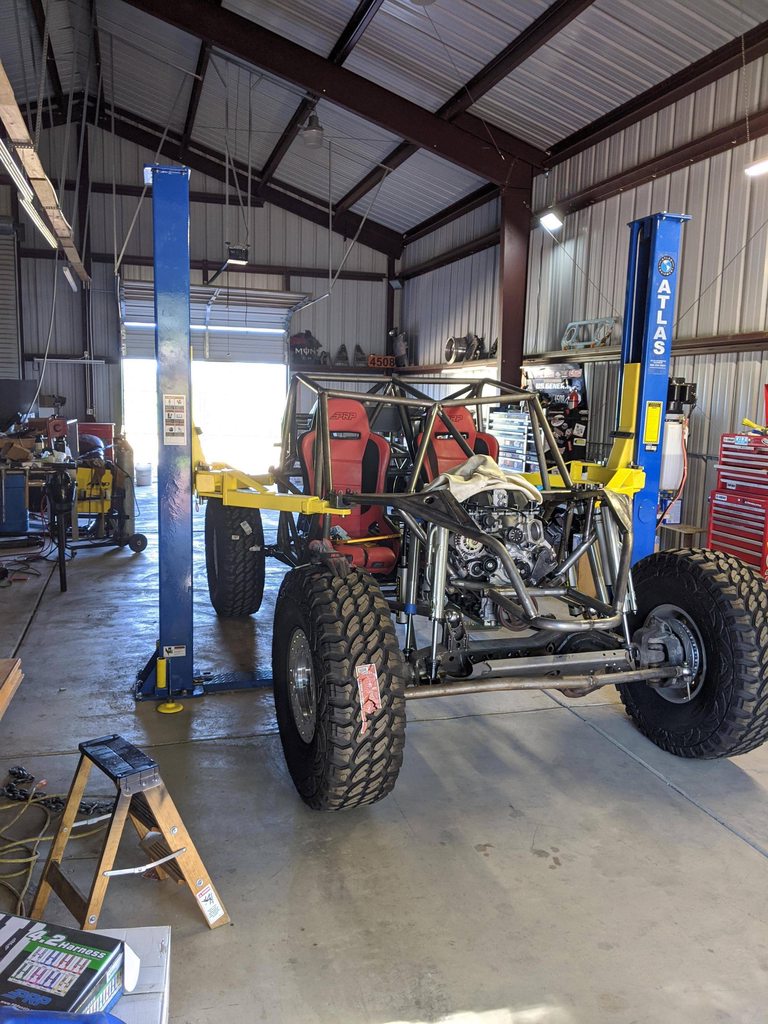
Couple photos and notes from the past week; I'm going to the 1000 so won't be working on the buggy for a week and don't want to forget anything.

Got some 97 octane gas, which I put 10 gallons in the fuel cell. I'm not sure I need 97, I should have around 10.7-10.8 compression which is around LS3 levels and people run those with LSAs on pump gas, but I figured better to be safe and eliminate that variable for when I first start it.

l6WXI6Ah.jpg


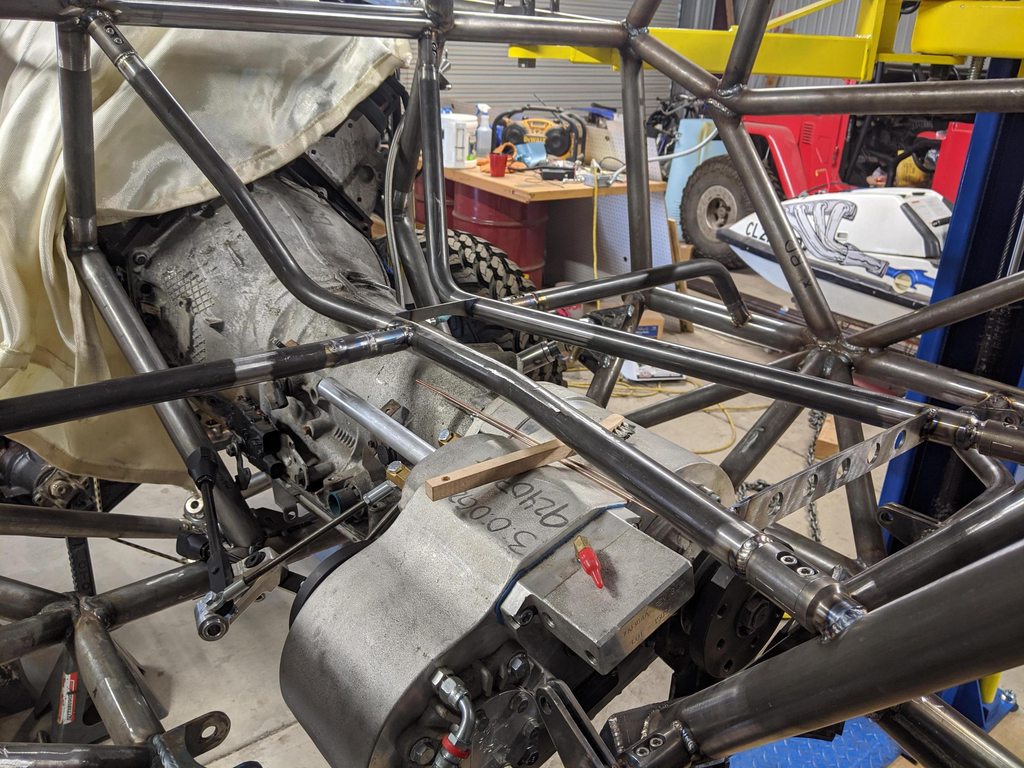
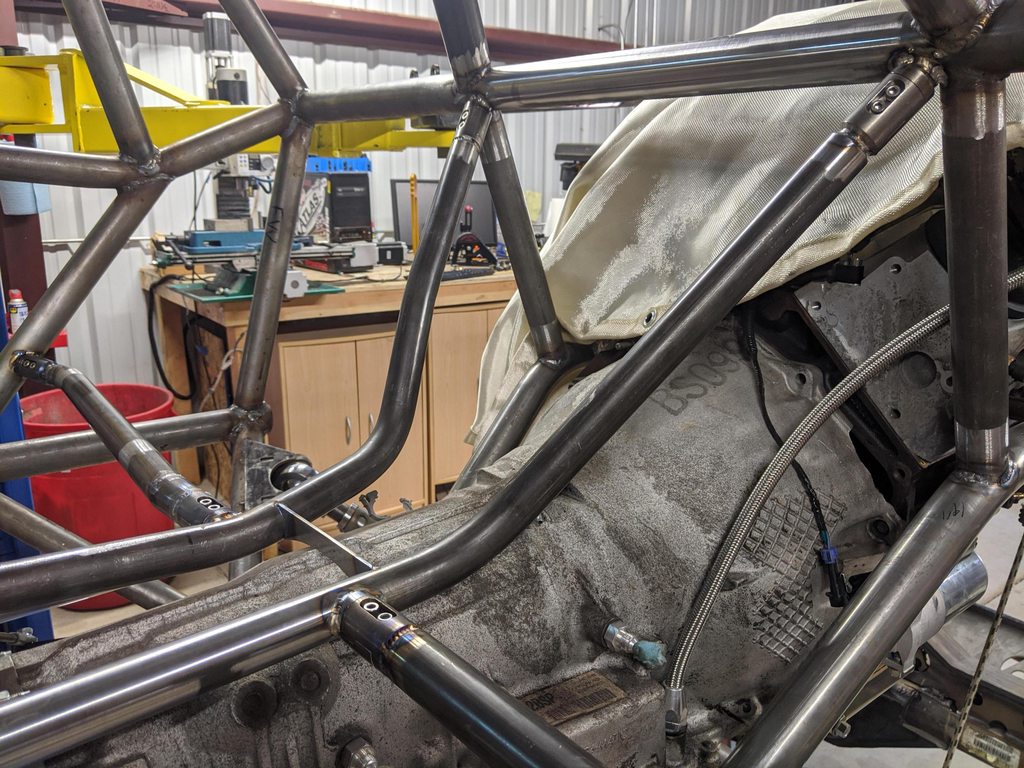
This is what my janky exhaust on both sides looks like. Drivers side has the O2 sensor. In the gauge setup there's a selection for left and right afr, I'm not sure if I can add another O2 sensor, I thought that was limited to the Holley Dominator and not the Terminator X that I have but the software seems to think I can. Might do that down the line. Once I get the firewall built obviously I'll have to make custom headers. These are actually a lot quieter than I thought they'd be, I've only taken the engine to 4000rpm once and she was definitely screaming but with helmets/headsets and behind a firewall it'd definitely be okay. I got a video of revving it up and of course the audio was flattened out so it sounds the same the whole time -_-

xtkAP9bh.jpg


I'm running Amsoil Break-In oil and have 10w-30 dominator racing oil ready to replace it. Their literature is slightly confusing, sounds like it can break the engine in within 30 minutes but they advertise to run it for a few thousand miles? I'm thinking I'll leave it in until I tune the engine and then swap it out. The transmission just has cheap valvoline atf since it's essentially stock and I expect to replace it eventually. The atlas has Redline extreme shock which came with it.

9MZDCbah.jpg


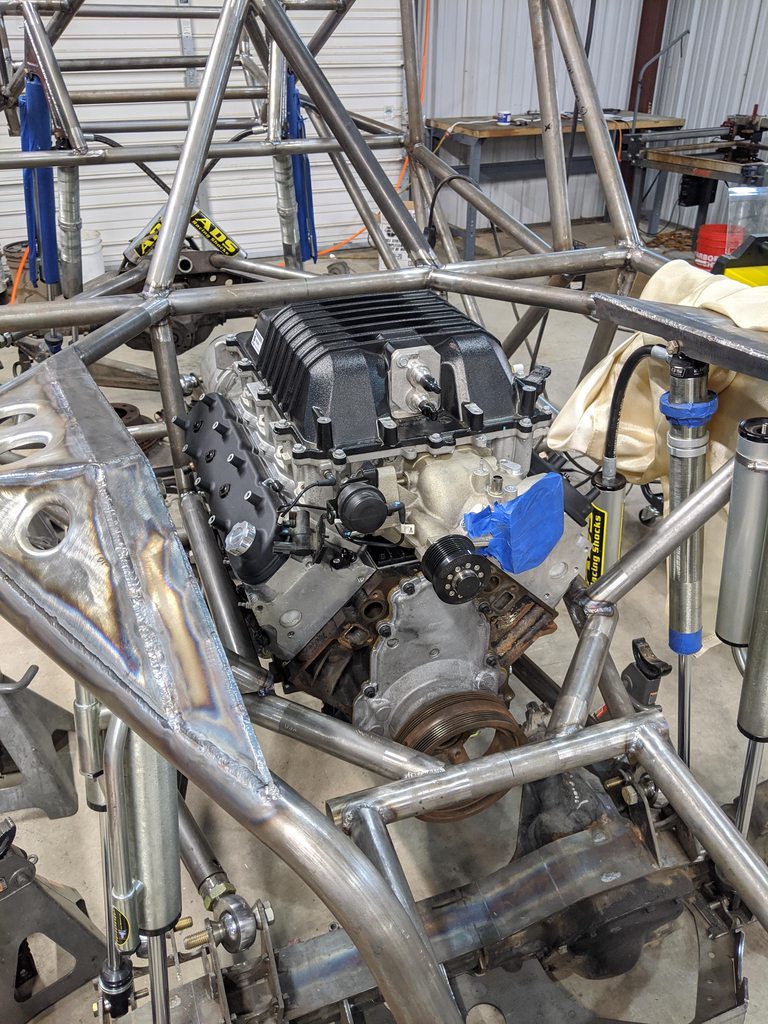
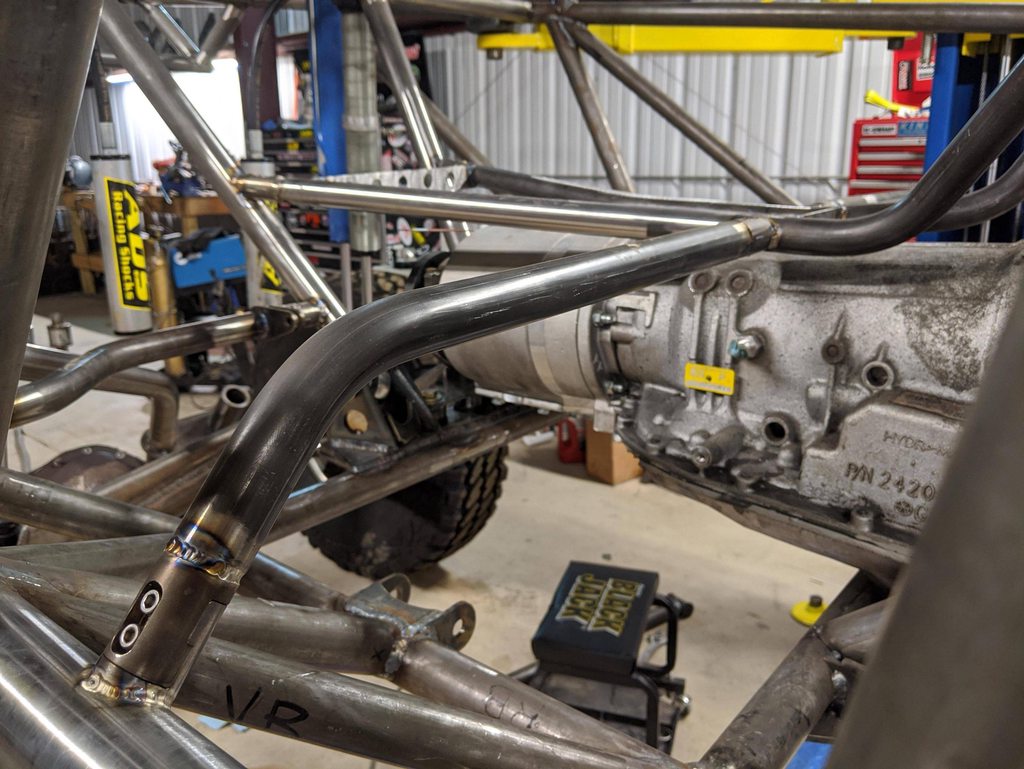
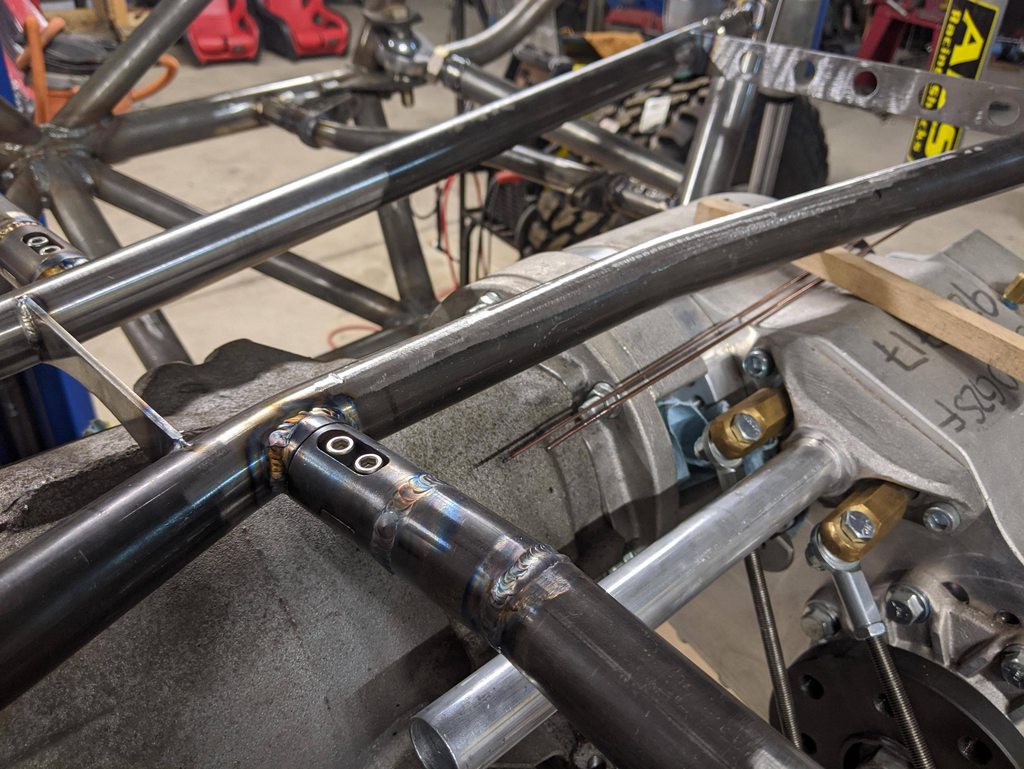
Obviously the wiring is a complete cluster. To make matters worse some of the plugs are on the wrong side of the engine since the LSA has different locations than the stock intake obviously. The fuel pressure plug flat out can't reach unless I unplug four other sensors. I ordered extensions for the fuel pressure and MAP which is hopefully all I need. I think it should be easy to pretty it up. Biggest concern is the VSS off the atlas is literally right below the shifters and above the output flange, so that will need some creativity to keep the harness safe.

FsLg4ITh.jpg


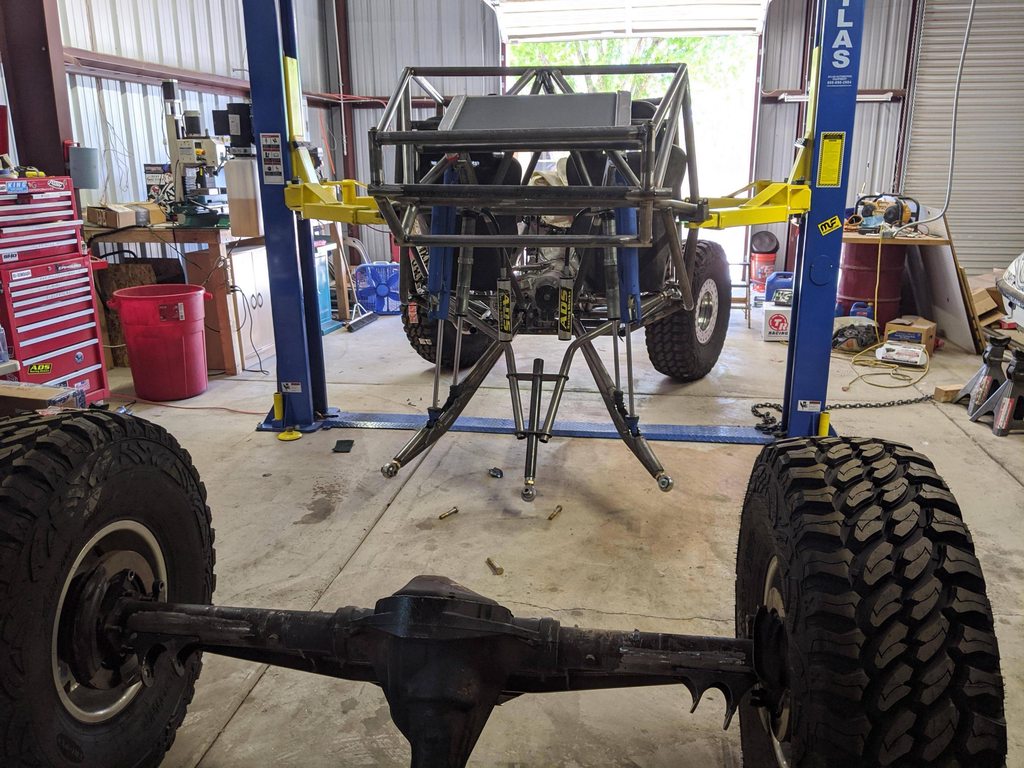
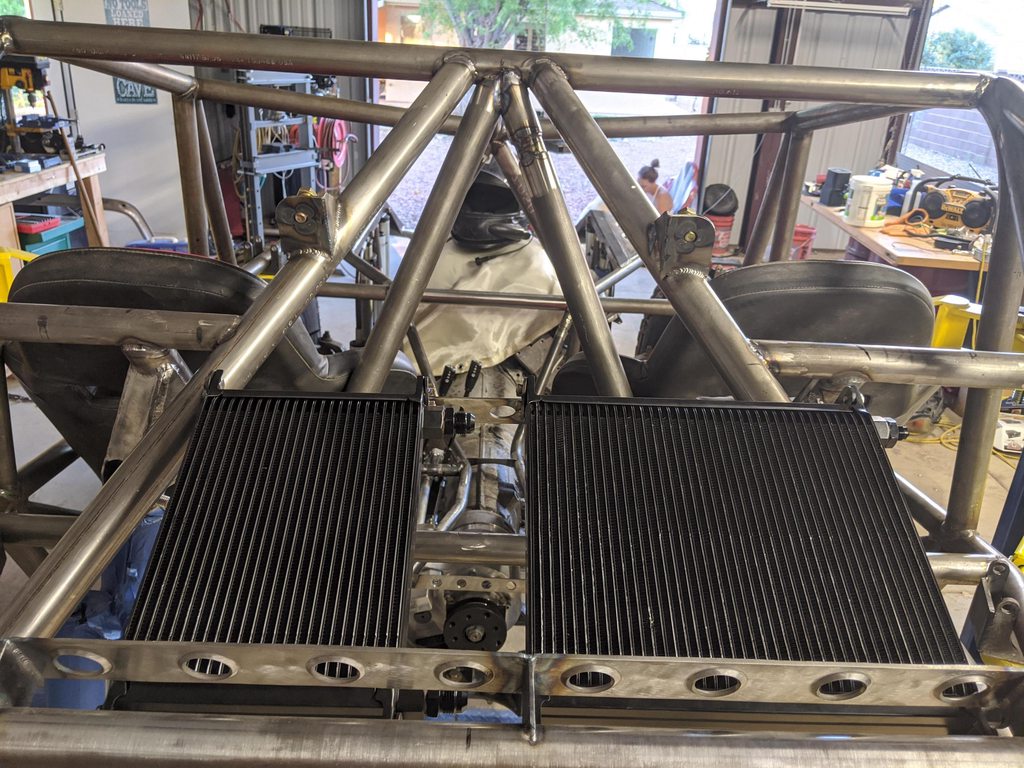
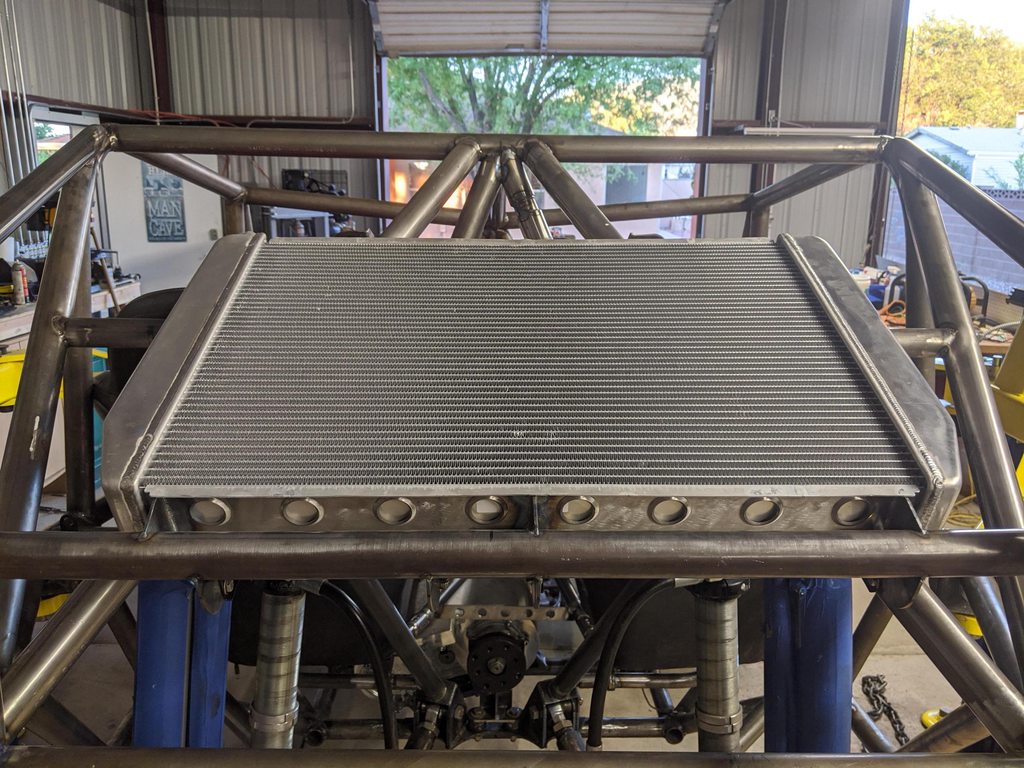
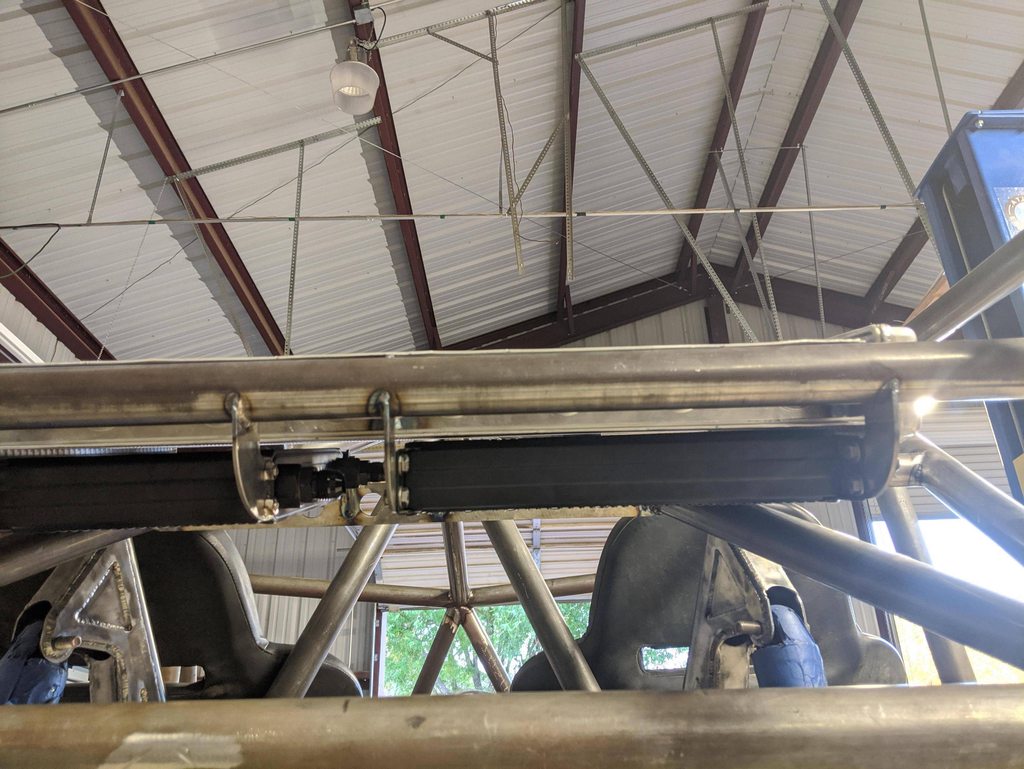
Mockup location for the steering reservoir. Not a fan of having it here, but it needs to at least be this height and since the chassis dips at the windshield this is arguably the most protected location since it's the highest point of the hood. Also best routing of the hoses. I'll have the fluid cooler and the supercharger intercooler mounted above the winch. Probably add a little bar or just the shock cross brace to protect it in a rollover. The reservoir didn't come with any mounting hardware, and I drew up both a plate and a billet mount in CAD but have yet to really decide which route to go, probably do the billet mount since a plate mount sounds ugly but that's a lot more work so I didn't do it yet. I have all the hoses and most of the correct fittings (couple I want to change out) for the steering. I ended up just ghettoing it together with the orbital looping back on itself and the reservoir hooked up the pump wouldnt starve. Next step is mount the reservoir and orbital and then the steering will be done though.

h4XrqpAh.jpg


Here's my janked battery setup. I have a starter switch, a trans switch, and ignition. It's actually simpler than I thought it'd be so it should be easy to simplify everything into the chassis. ECU will be mounted behind the dash I'm thinking and the battery will be behind the seats.

fuTvyOjh.jpg


Finally engine notes and observations. First I about had a heart attack since I couldn't build oil pressure. I wanted oil pressure, then move the harness so I could read fuel pressure and make sure I had both, then hook up the coil packs. I cranked the engine for like a minute and no oil pressure. I read stuff and watched videos, pulled the oil cooler lines, pulled the filter, added another 3 quarts of oil (it had 6 quarts since it's a 6quart pan, but then has a rear mounted oil cooler, the pan is aftermarket, the dip stick is aftermarket, I had no idea how much it really needed), pumped as much oil into the pump priming port as possible, etc. and FINALLY I cracked the oil cooler line at the base and it was starting to get oil. Turns out to get oil pressure it has to pump oil through the entire 20ft of oil cooler lines. Of course I had lubed the shit out of it with assembly lube when I built it, but that was like 7-9 months ago. Huge relief when it started showing pressure.

Like I said I put 10 gallons of 97 octane in, I didn't touch the regulator but the system primed to 45psi right away. I've had lots of fuel issues in the past, so that was a big relief. No leaks anywhere.

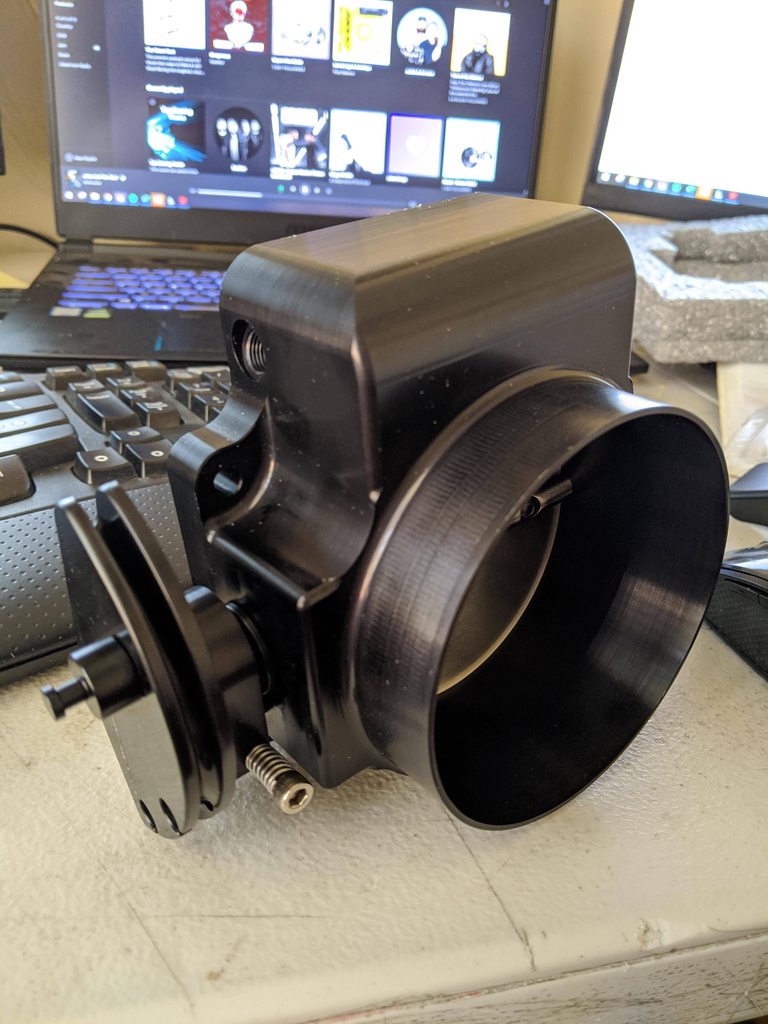
Put the spark plugs in and plugged everything in and she fired right up without hesitation! I'm using one of the base tunes on the Holley handheld, no idea how close it is but it's close enough to fire up. Subsequently it had issues going, I ultimately set the throttle body to 5% open and it seems to consistently fire up now. I'm not sure if that's what I should leave it at in the future, or I can tune it to have the butterfly totally closed (I mean it did start the first time totally closed).

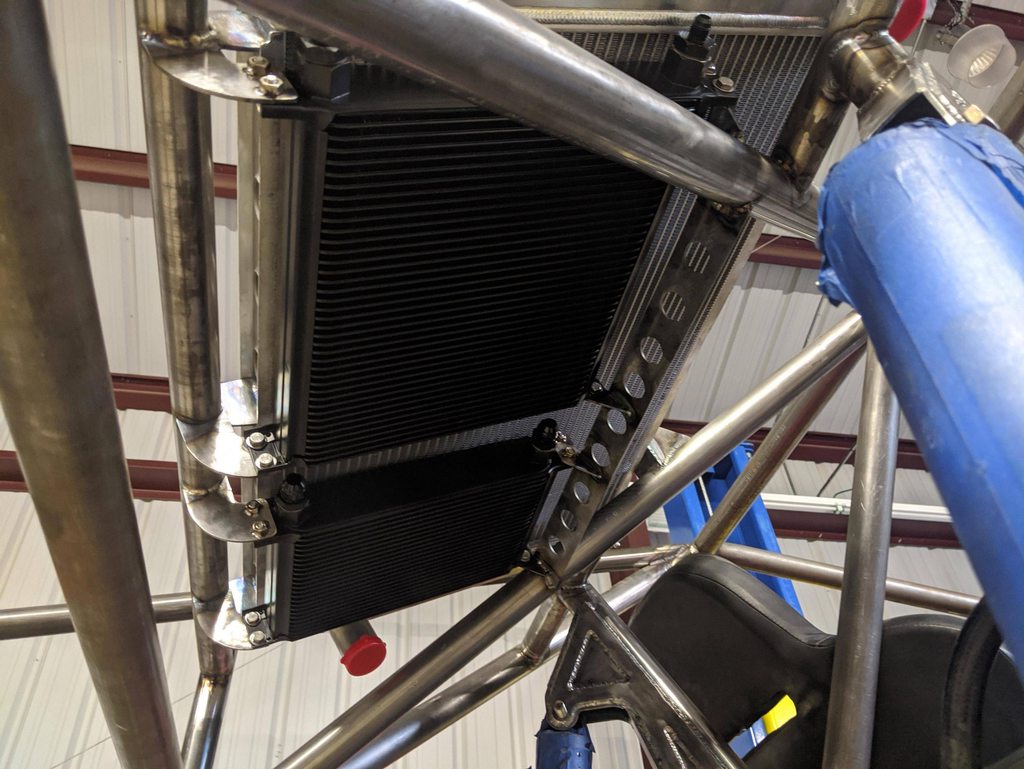
Now onto "issues". There were a handful of coolant leaks. Amazingly all but one of the 14 hose clamp connections held fine. The one straight off the pressure side of the water pump eventually burst. I ended up double clamping it since I didn't have any tighter fancy hose clamps. The radiator drain valve leaked and needed to be tightened down. And then a fitting for the vent line that I welded to one of the cooling tubes has a pin hole leak. The steam vent lines actually work out well since they're the highest point on the engine so I can crack those to get air bubbles out at the engine.

The engine warms right up, I added a thermostat by welding a housing to the first cooling tube, so it's water pump, rubber hose, then into thermostat housing and first aluminum tube. It appears (feels) to be working correctly. I have a 160 and a 180 degree thermostat, for now I just have the 180 in. Though this leads to the next issue, at idle the engine gets pretty hot. There's lots of possible reasons for this (and by hot, I mean it hits 220 and then I shut it down). If I rev the engine the temperature seems to fall too. I had a shop fan sitting on the radiator pulling air through, so that's not a lot of airflow but the cool side of the radiator is also considerably cooler than the hot side so it's doing a lot of work however more airflow could help. I'm also not sure all the air is removed from the engine, seems like every time I crack the vent line there's some air let out for a few seconds before coolant comes out. We also know the cooling system isn't holding pressure since that one weld isn't fully sealed. I could also remove the thermostat, though I think that's as likely the issue as the radiator not having airflow since the thermostat is obviously open.

Other issues, the oil cooler lines to the oil pan don't seem to be sealing. It's a lingenfelter oil cooler adapter and all new AN-10 fittings so not sure what the deal is there. I tightened the shit out of them and it's still dripping a bit.

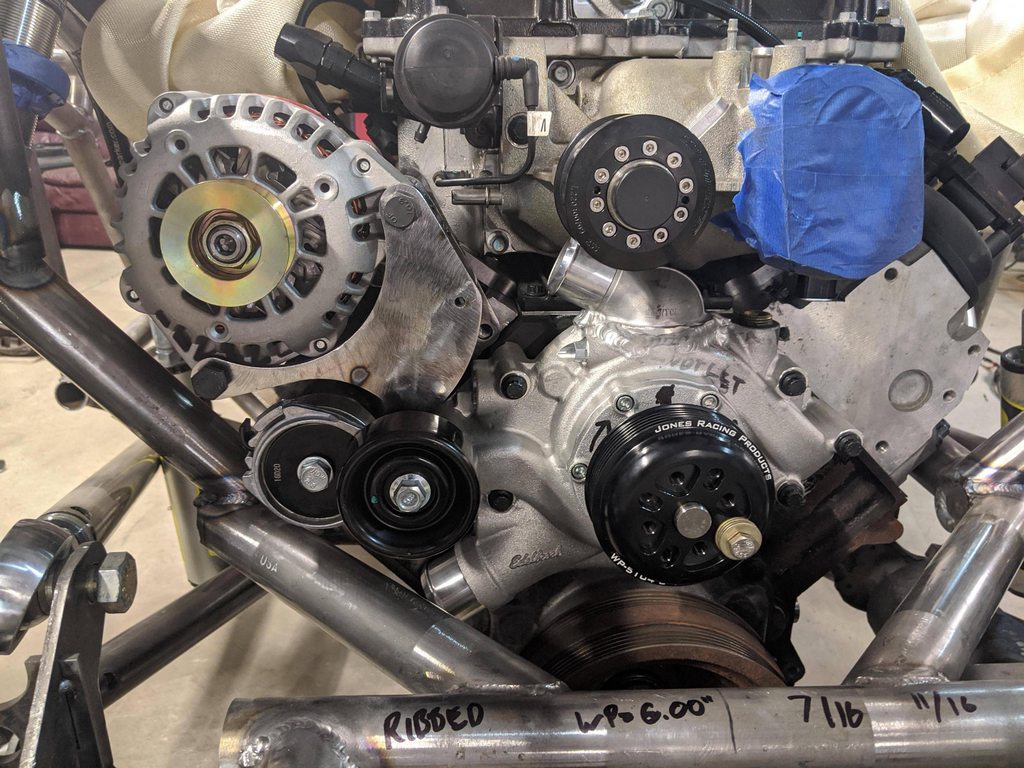
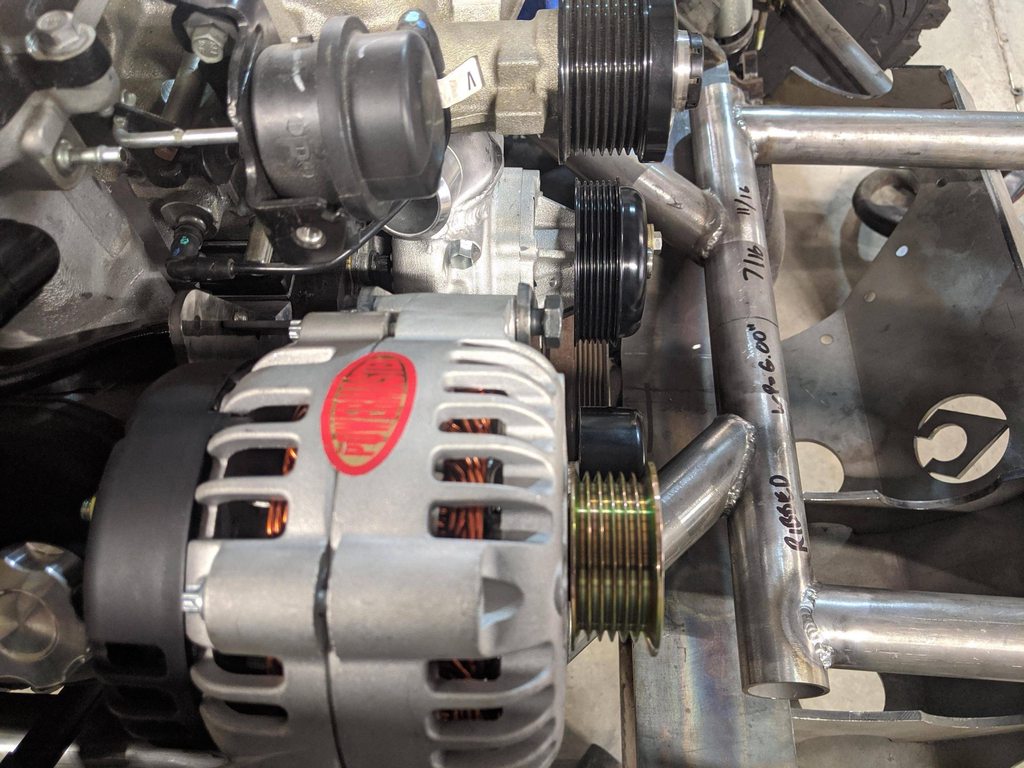
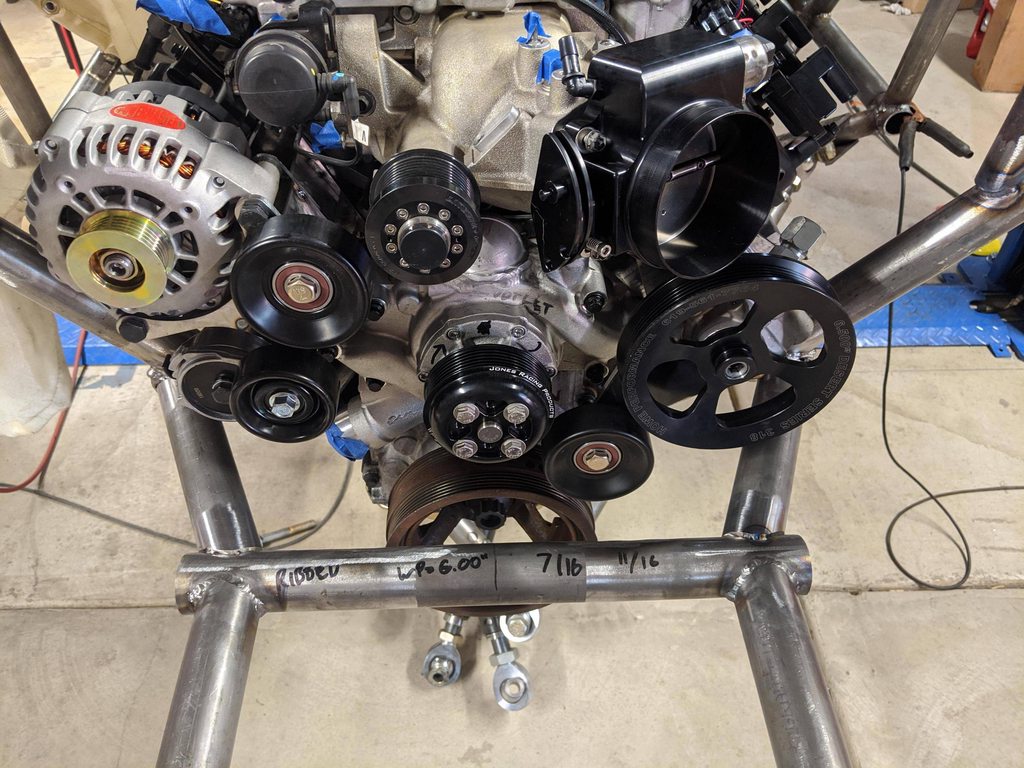
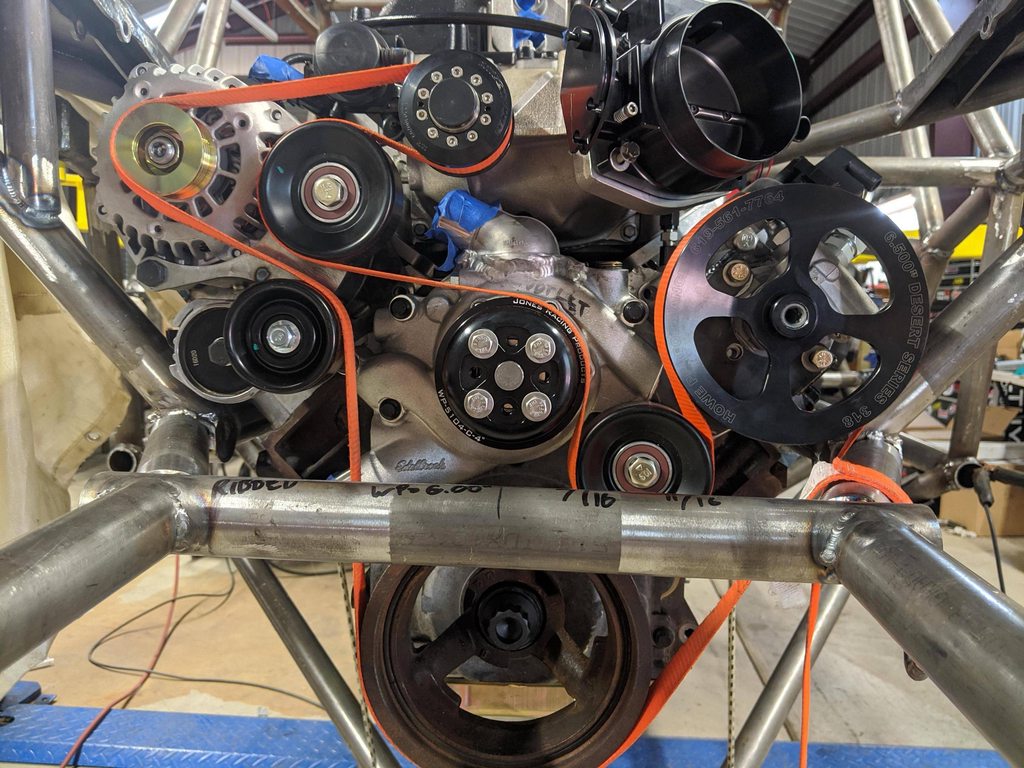
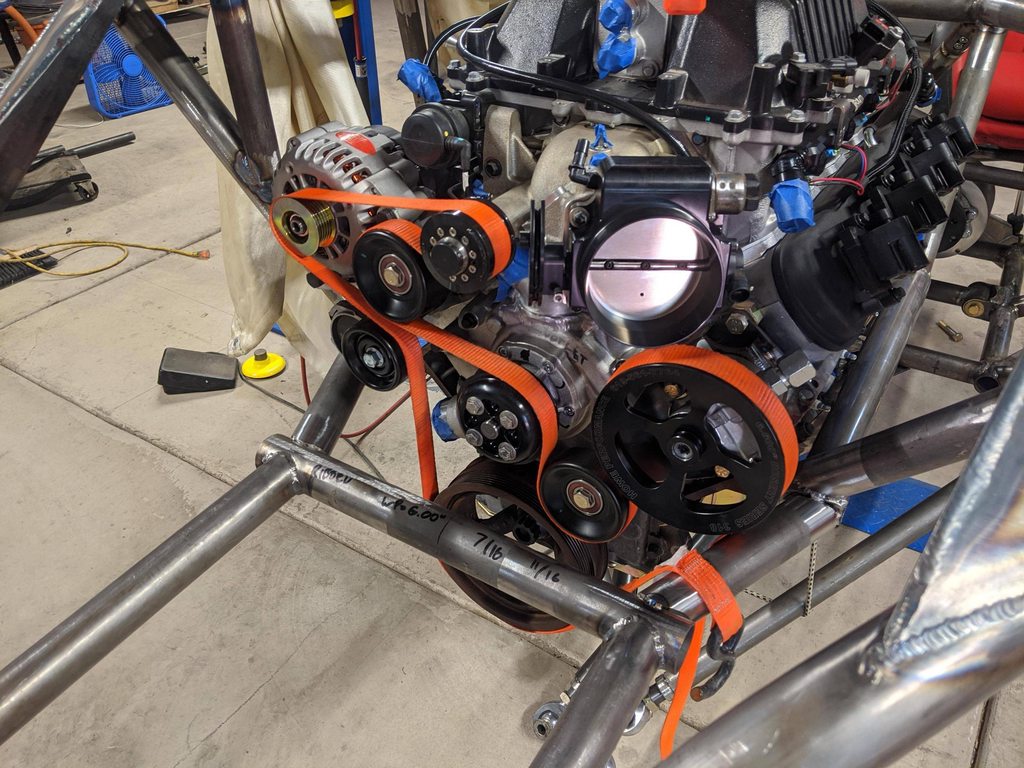
I had the serpentine come off twice, but I moved the belt to the rear grooves on the supercharger pulley (it's a 6 groove belt but an 8 groove pulley) and it hasn't come off since. I'm actually amazed it worked at all, and now more amazed it's still working at all considering all the accessory hook ups I made and welded and I'm sure are a few degrees off of parallel with each other. Time will tell if the rear groove solves everything.

The ecu is obviously trying to learn and I've only run the engine for maybe 15 minutes total, but it wont hold idle so far. I'm not sure if it's getting blower surge or its a combination the cam. The rev up frequency is probably every 3 seconds or so it'll rev up to like 1100rpm and then the ecu tries to compensate and it drops to like 600rpm and then revs back up. I'm sure I can correct this in the tuning but not sure how to do that yet.


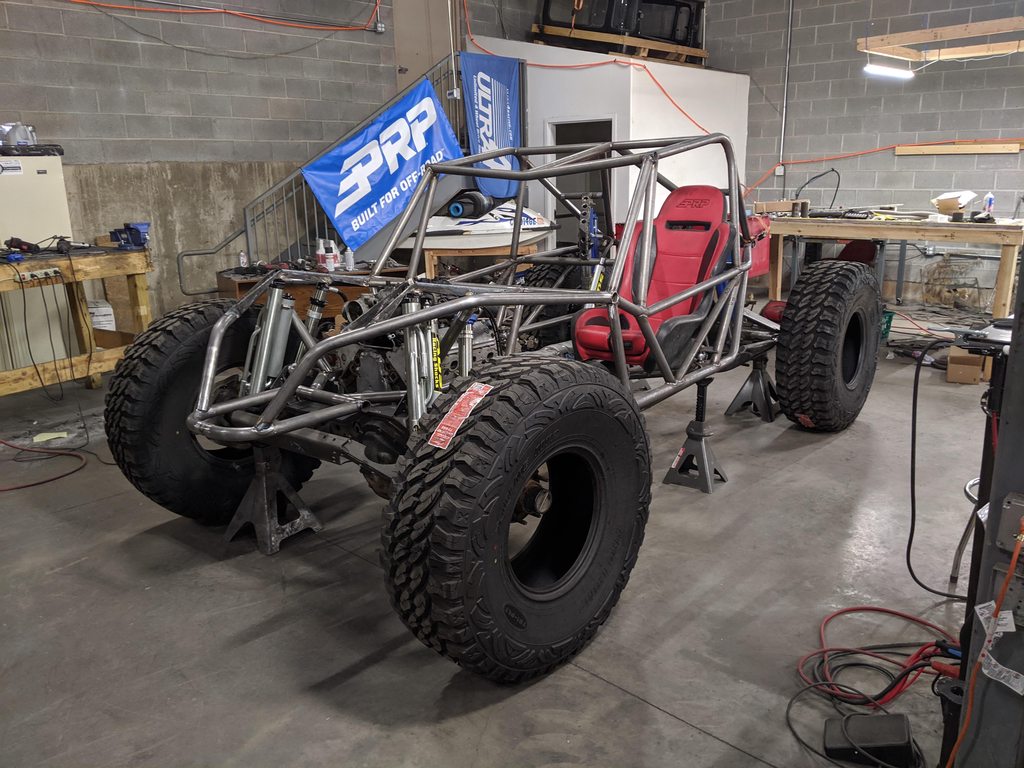
I think that covers all my mental notes from yesterday of things that need to be addressed or concerned about. I've taken the engine to 4000rpm and she sang the whole way. I'm really stoked how well it seems to be working. This was the first v8 I've really delved into, and I tore it completely down to the crank and everything besides the rotating assembly and block is new so it was an adrenaline rush the first time it roared to life. Hopefully it stays together!

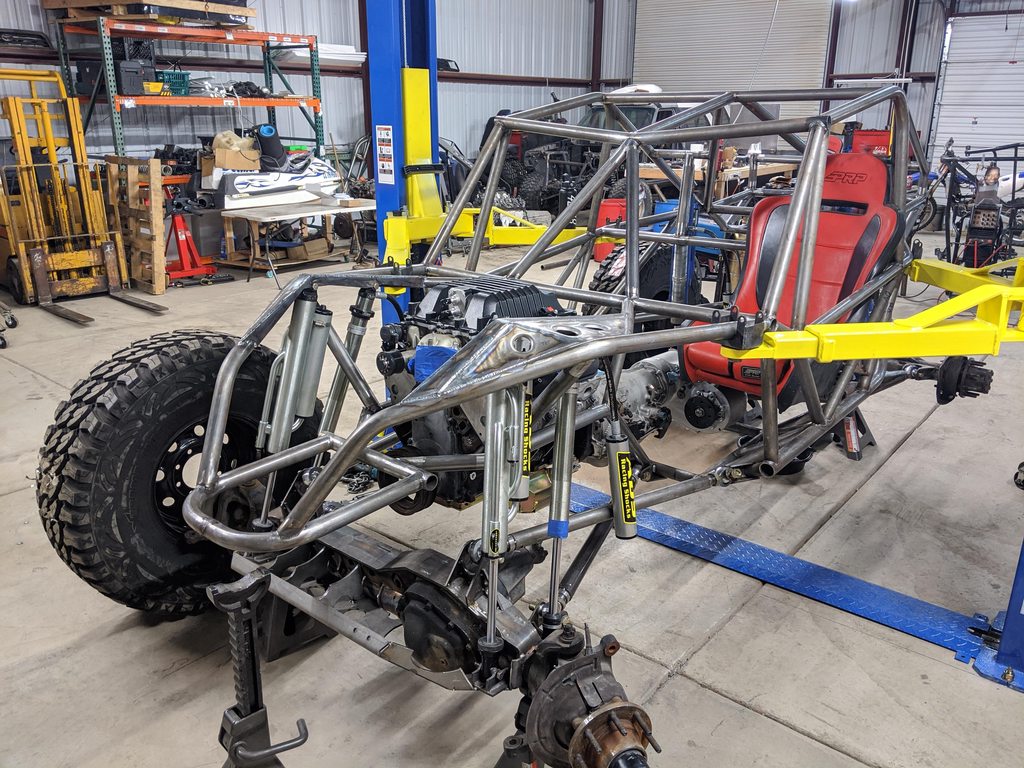
Next up is dialing in the engine a bit more so it's happy and I can let it run for a long time without issue, then finalize steering, then it's onto interior, brakes, and driveshafts and she'll be ready for some test drives! Lots to do, but they all feel easy compared to getting this done!

yjxdj5Oh.jpg
 
It's possible your AN fittings cracked. They don't need to be tight at all, just snug. I've cracked the flare part on a JIC fitting from overtightening before, that's why I bring this up. ;) Should be pretty easy to tell once you take the cooler lines back off and inspect.
 
- if you are serious about your HP numbers. i suspect you will have cavitation issues at the pump
- attaching your fuel lined to the trans bell housing makes me nervous
- your regular should have a port of the pressure transmitter, that would be a better spot for it
 
It's possible your AN fittings cracked. They don't need to be tight at all, just snug. I've cracked the flare part on a JIC fitting from overtightening before, that's why I bring this up. ;) Should be pretty easy to tell once you take the cooler lines back off and inspect.

Well shiiiiit, that would not surprise me at all. I knew they needed snug but in my rage of taking everything apart trying to find oil I definitely monkey wrenched them. I bet that's it. Thanks for the heads up, hopefully some welding can fix it if I can't outright replace the threaded area.

- if you are serious about your HP numbers. i suspect you will have cavitation issues at the pump
- attaching your fuel lined to the trans bell housing makes me nervous
- your regular should have a port of the pressure transmitter, that would be a better spot for it

I assume you're talking water pump? Is there a way to tell if it's cavitating? I have warmth all the way to the radiator and feel it pulling heat out. Seems weird it could be cavitating when lots of people run rear radiator without that issue (this is my second one and the first cooled really well though was a totally different setup). I'm also using an Edelbrock water pump (https://www.edelbrock.com/water-pump-for-gm-ls-victor-pro-clockwise-rotation-8895.html) so I'd think it'd at least be an upgrade over a stock unit.

Yea I'm not super hip on the fuel lines following the bellhousing down, but I couldn't really find a more elegant routing. The Y block bracket bolts to the bellhousing, so if need be I can add a scattershield under it, which is what I was planning to do all around the lines where they cross over the driveshaft (besides the normal shield to protect myself, but fully encase the line specifically).

That is a great observation about the fuel sender! I feel like an idiot since there's a big brass plug coming straight out of the regulator too! Thanks for pointing that out.
 
you are asking for trouble with your fuel pump cavitating, not the water pump.

id highly suggest looking into rigid stainless line. rigid SS is a great application of getting fuel from the rear to the front through the passenger compartment. using a small jumper at each end to the device and minimizing vibration transmission.

you got it running and if you are not careful you will get sloppy with plumbing and wiring and it will be a PITA to undo later.

Ahhhh fuel pump. Any reason it would start cavitating? I hadn't thought about running hard line for fuel ever. I think my plumbing so far has actually turned out really nice, granted none of it besides cooling is fully mounted. If I was gonna be sloppy about it, this thing would've been done a year ago lol
 
Top Back Refresh