What's new

My burnt 97 tow rig.

JDNobodi

Well-known member
Joined
Aug 13, 2023
Member Number
6808
Messages
52
Originally posted on CK5.com forums on May 13, 2013 as

Another Dodge Cummins in a Chevy forum. My rescued tow rig.​

It is also posted on Cummins forum but that thread got locked due to inactivity.
From here on, I going to copy and paste till I catch up.

Well, work on my blazer is on hold due to me buying another project which will be my tow rig.

A 97 Dodge ram 2500 extended cab that belonged to my uncle. The only problem with it is that it SUFFERED A UNDER HOOD FIRE. So I got it for $500, but I got to replace the wiring, plumbing, radiator, and hood. I'm hoping the motor is good.
97 dodge.jpg

burnt motor.jpg


burnt dodge.jpg
 

Attachments

  • 20240714_092914.jpg
    20240714_092914.jpg
    4.7 MB · Views: 4
Last edited:
Originally posted on CK5.com forums on Jul 23, 2013.

I got the motor to fire up. But to so, I had to patch up the fuel system. The water drain on the fuel filter housing was burnt and the part is discontinued. To plug up the holes left by the missing drain, I tapped the holes with 1/16 npt and plugged the holes with pipe plugs. After that, I replaced the burnt fuel lines.
dodge fuel filter2.jpg
dodge fuel filter.jpg
dodge fuel filter fix.jpg


Update, I like to note at the time I think both the drain and WIF sensor have been discontinued. The drain is now available.
 
Originally posted on CK5.com forums on Jan 31, 2014 as

Rant- why the ** Dodge had to use Yazaki ** during the nineties? thread​


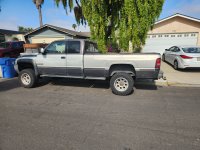
For those of you who don't know I'm fixing up my uncle 97 Dodge Cummins for a tow vehicle. The problem is it has been in a fire. I bought it $500 because it is worth more than that in parts.

The truck has some history with my uncle since it was his late best friend's truck so he wants me to save it.

Since it was a mechanical Cummins, I rigged it up to see if it runs. It does. the engine and injection pump was not hurt in the fire.

Getting the hard parts is the easy part. Somebody next door had a hood and radiator. Picked up a core support, grill and cowl some place else. The rest bought online.

The wiring is the hard part. At first, I looked in building a new harness but finding the connectors and terminals proved too difficult and some of the stuff was discontinued. It is a 15 year truck but damn, I can find Delphi/P.E.D stuff for a 40 year old blazer. Another thing was cost. Dodge use a lot of wires with tracers (the stripe). Not easy to find and cost a fortune to have made. 1000' min per wire from Waytech and Terminal Supply.

Somebody suggested buying a used harness from eBay. Okay, I'm not an eBay fanatic it requires discipline to check every day, but I started checking eBay. Months have gone by till one of the harnesses came up. It was the chassis harness but it was for a manual transmission truck. I have an auto, but not only that, 97 was the second year of the electronic transmission. The harness may not have every thing in it for the transmission. I took the chance and bought it and got lucky. It is interchangeable, but it could of easily not have been. The harness I bought has a relay for my transmission which could have easily been omitted. I did have to add the jumper wire from my old harness to be used in place of the clutch safety switch.

Search for the second harness starts. Another month goes by and a 96 engine harness with automatic comes up. For those of you who actually take the time to read my long post should have figure out the 96 should the first year of electronic transmission and the harness should interchange. That was not my worry because I wanted to know if the harness was out of 4x4. Email the guy and didn't get an answer. **** it. I bought it anyway.

The good news, it looks like should work in a 4x4.
The bad news, it doesn't interchange with the 97 harness.
One of the three mating plugs between the chassis harness is different. What else is different? After a half day with a multimeter checking ohms on the wires and checking the 97 tech manual, I find out I'm missing the EGR solenoid wires, I'm missing the coolant temp sensor wires for the EGR and the alternator field wire is on a different circuit. Not only that, that different circuit is also missing and it activates the transmission relay. All the other wires are there for the transmission, but one wire from the PCM to the transmission relay is missing. ***************************** **** it.

I should have just started looking on eBay again but I decided to try to make this 96 harness work. The one plug that is different is probably an upgraded update an the should still be active. And what luck, it is!
It made by FCI Apex and I think they just merged with Delphi! **** yeah, Delphi stuff is much easier to find.
One problem solved.

In my previous search for making a harness, I found out the terminals going to the PCM is made by Tyco now TE Connectivity.
Two problems solved.

Now I just need a terminal going to the existing connector at the other end of the harness. After months of searching Moser website, I found nothing. I decided to check out another web site because I have a feeling some of this stuff is made over seas.

Bingo.

The Yazaki looked familiar. Checked their site and found a bunch stuff that is on the dodge, not all but some.

Called two US distributors today and I had to place a 10000 min order get any thing. ********* YOOOOUUUUU!!!!!!!!!!!!!!
 
Originally posted on CK5.com forums on Jul 26, 2014 as the

Rant- why the ** Dodge had to use Yazaki ** during the nineties? thread​


Belated update.
The Kent Moore kits had the terminals and seals I was looking for. I rewire the one wire which goes to the alternator and spiced it to go to the transmission relay. I got the harnesses installed on the Dodge months ago.

Here are some pictures of the terminals and spices.
01.jpg

0209141841.jpg

0210141911.jpg
0210141915.jpg
0210141920.jpg
 
Last edited:
The terminals for the PCU. The harness pulled apart and testing the circuit.
0127141830.jpg

0209141702.jpg
0225142003.jpg


Update, Yazaki stuff has become more available over time, the terminal I was searching for is still hard to find. If I would to do all over again, I would use Eastern Beaver
 
Last edited:
Originally posted on CK5.com forums on Aug 27, 2014 as the...

For those of you who hate electrical, how would u like to have these problems come up​

thread.

I was planning to write this earlier, but I didn't feel like typing a novel. So here we go.

After buying a few harnesses from eBay and making those work together.

I plug everything together and hook up the battery and only half the stuff in the cab works.

****
Okay, here is a list of things that don't work.
Instrument cluster,
Rear brake lights,
Turn signals,
Hazard Lights,
Radio,
Blower motor, Hell, it could be the whole HVAC system,
Dome lights,
and most of the buzzers except the seat belt buzzer.

I know some of you treat electricity like it is some creature of the night and you cross your fingers at it screaming "Back thou foul spawn of Satan."

I'm not like that and I some what enjoy making something electrical work, but even this would deflate my sails.

Oh, one thing does work, that is the third brake light, but it is on full time. ****ing great.


I've got some things going, but I write about that later.
 
Originally posted on CK5.com forums on Aug 30, 2014 as the...

For those of you who hate electrical, how would u like to have these problems come up​

thread.


Part two of the novel.

When trouble shooting, start with the simple stuff first. As Fordum said, it may be a duel feed system. There was one wire I did not hook up to, so I hooked it up. Nothing.

Okay, let check fuses. I start probing fuses and the hazard light fuse was blown. Replace the fuse and only the front lights and the right turn indicator flashed. That is good and bad. It shows I have connection between the original cab harness and the replacement under hood harness for the front lights. Since the indicator lights are wired to the front lights, It probably means the left indicator bulb is burned out. Going to have tear the dash apart for that one.
The rear lights not flashing is still a concern. The rear tail lights work but are dim, and sometimes the lights stay on when the headlight switch is off. Did the the 97 have that annoying feature that new cars do where the lights stay on for a about a minute?

Blower, radio, and turn signal fuses are good. I'm not sure about about which fuse does the dash though. I checked the book and it suppose to be fuse 12 in the cab. I don't recall there being a fuse there. Checked and yep, no fuse. What does the panel says it suppose to be? It reads
AIRBAG
CLUSTER
Well that makes me feel smarter, because when I looked at it earlier, I thought it was for the "AIRBAG CLUSTER" not "AIRBAG and CLUSTER". DUH.

I put a new fuse in and the dash works. Awesome. The idiots lights that is controlled by the PCM work too. Thank God. For a while there I thought the PCM may of got fried in the fire, but it seems to working. In fact the Check engine light is on also.
Fix that later.

Now all this have taken place over a few weeks when I had time to work on it. Now that the truck is mobile, I have been driving the truck to the back of the shop to work on it and back to the back parking lot when I'm done. makes much easier instead of walking 300 ft one way to get a to tool or part.

One the times when I was moving it, I notice the right turn indicator turned on when I put the truck in reverse.
I may have a ground problem.
 
Part II continue.

Okay, I took off the lower dash panel off to see what is back there. Nothing obvious. Crawl under the dash and happen to look at the brake light switch. The button is not touching the pedal, so the switch is on. That is why the third brake light is on. The back brake light wire must be open somehow.
Turns out the brake light switch has a quick adjust on its button. You pull the button all the way out and install it. (or push the brake pedal and pull the button out at the same time) as the pedal push against the button it bottoms out and adjusts itself to the farthest the pedal goes back. As the pedal goes away from the button, the button act like a regular switch. I must have pushed the button in too far when I changed the hydro-boost.

Next is turn signals. With the lower dash panel out of the way, I could check on the back side the fuse panel. Checked the wire coming off the flasher, 12.8 volts. That is about what my battery has been reading. It has not been getting a full charge. Okay the next connection is the "Multifunction switch" (turn, hazards, high beams, wipers). To get to it, I have to get the column covering off. Not really hard if you have a 20# torx bit that could go into 1/4" counter bore. I had only had at the shop torx bits that fit on 1/4" ratchet. The shank is to big it fit into 1/4" hole. I have 20# torx driver at home across town. That's it for one day.
I bring my whole torx driver set the next day and got one screw out okay, but the other hole had a wasp made mud nest. The truck sat around for a few months after the fire with the windows down. That must of been when the nest was made. It took ten minutes knocking the mud and wax out to get a good enough grip on the screw. I get the coverings off and can't get the connector off the switch. Try to to take off the switch so could get a good look at the connector, the switch is held on by a 20# tamper resistance torx. I have one at work and it is Saturday. I have something to do Sunday anyway. Monday, I bring the #20 tamper resistance torx bit from work and get the switch off the column. Turns out the connector is held on by a screw. Get the connector off and test the wire that is coming from the flasher. I have voltage. I test the wire from the brake light switch (with the brake pedal depressed), and I have voltage.

I decided to send voltage down the wire for the left rear turn signal wire to see if that circuit is working. The tail lights turned on. WTF.
I do the same for right side and the same thing happened.
I have ground problem.
So for recap. That one time I thought may of had a time delay lights, was the few times the rear brakes light circuit was working due to the always on brake light switch, but due to bad grounds, it was back feeding into the tail light circuit.
 
Finding that bad ground turned out to be an adventure. First, I take off the tail lamp thinking it be like a square body Chevy where the ground is under the tail lamp. There is no ground there. Next I look underneath. Don't see anything but the harness goes on between the frame and the spare tire. I look around the truck for the handle for the spare tire. I don't find it. Changing the spare is going to be fun in the future. I buy one those long 1/2" nuts (I think, it could have been 7/16"). The hex fits into the where the handle suppose to go, and I put a socket on the nut. I lower the spare tire and there is no ground.

Okay, I get out the book and read it a bit. As far I could tell, the ground goes all the way to the front of the truck into the harness under the hood.:screwy: The harness I had installed.

I don't know if I read the book right but is said the ground location is suppose to be by the horns where the battery to chassis ground goes. There is no ground there coming out of the harness. Whoever wrote the book screwed up. Okay, the ground wire in the chassis harness is a 12 gauge black wire with a blue tracer. There are two wires of that size between the fuse box and firewall. I pull the screws and clean the metal and re install the screws. I striped one of the sheet metal screws. Damn. I get out the drill, drilled it out, and install a rivet nut. With that taken care of. I went to pull apart one of the "under-hood" to "chassis" harness connectors apart and it came apart too easy.:eek1: It wasn't fully connected. So that was my problem. I checked to see if the blk/b wire has continuity to ground. It does. I spray contact cleaner on the connector and put back together making sure it was connected. I check my lights and tail, turn, and stop lights work.:woot:

I was fine with getting that fix and could get the rest fixed after the DOT inspection, but there where a couple of quick checks for I could do before I dig too deep.

In my research into HVAC, I learned there is relay in the system, and that relay is by the brake switch. It is easy to get to. I pull the relay connector off and I have voltage on the 30 and 86 sockets with the key on. 85 had continuity to ground. The same with 87 which should goes to the blower. Hmm, everything on the connector is good. What about the relay? It does not want come off the bracket easy, but to check to see if everything else works, a new relay should work and I have one. I plug the relay into the connector, turn the key, and the fan on. It works. I tied to run the AC but only the defrost works then I remembered I have non of the vacuum lines hooked up. Now I have to hook up the vacuum lines and get a relay that attach to the bracket.

Now one last fuse to check is the IOD (Ignition off Draw, I had to look it up.) fuse. I never was able to fully check this fuse before because it is little different. First, the fuse block had special plastic guard which makes removing the fuse difficult. Second, it has round edges doesn't have the "contacts" to check the fuse with a probe. Well, the reason it is different is because it is one those LED fuse my uncle had installed. Wrong amperage too. He had installed a higher fuse. In my earlier checks, I've noticed this fuse would have the LED glowing meaning it was blown. I just had too many other problems to concentrate on to justify spending 10 minutes trying to figure out how to get this fuse out of its guard. Well, it is now the last problem to solve. I finally figure out the trick on getting the fuse out of the guard and put in a regular, correct amp fuse in. As I pushed the fuse in, the rest of the buzzers started to work. I checked the radio and the incorrect time is showing. I turn it on and turned up the volume. It works. The dome works also.
I have have solved most of the problems with out tearing out the dash. Too bad I'm going have to do it anyway just to replace one turn indicator bulb. :doah:
So, to recap, I have replaced
3 fuses,
1 relay,
2 light bulbs, One of the third brake lights bulbs is burned out.
1 Multi-functional switch. I inadvertently replaced it before I fully got the rear lights to work. I thought it was bad because I could not get any of the flashers to work. This was the most expensive item.
 
Originally posted on CK5.com forums on Jul 26, 2014 as the...

Sometimes; things just don't go right. Power steering reservoir leak.​

thread


Working on my Dodge Cummins and installed the PSC remote reservoir kit.
Poured a quart and a half fluid in and have it leak on the ground.:angry1:

Turns out there was a gap between the pump body and reservoir housing - right at the bottom.

Turns out one the bolts hole on the back of housing didn't line up. When the bolts where installed, it forced the reservoir down therefore causing the gap. I found this out after I hammered on the reservoir for a half hour trying to close the gap.

I slotted the hole with dremel tool assemble the pump and reservoir again and pressure tested it.

Removing and installing the power steering pump is a PIA on a Dodge Cummins.

0726141926.jpg
0726141927.jpg
0726141942.jpg
 
Well, apparently 20 psi is not enough to test for leaks because as soon as installed the pump on the truck put fluid in it, it leaked. I think when I tighten the bolts on back of pump after I mounted it, I disturbed the canister. On top of that, I couldn't get it pump fluid.
******* **** it. On top of all that, I strained my left shoulder doing the job. I didn't feel like embracing the suck when I'm hurting.
I figure I either have
A) bad parts
Or
B) I'm a dumb ass

So I waited till today to work on the truck even though I'm not 100 percent. This time before pulled off the canister, I pressure tested and ducked the pump in a bucket of water. Yep it's leaked around front like last time. I pulled the canister off and noticed I installed the pressure relief valve wrong and in the wrong order. The pump was basically pumping fluid back into itself.
Okay now to figure why it is leaking around the front. I pulled off the o-ring off the pump and the new o-ring out its package that came with the canister. Well there is a difference. The o-ring that I was supposed to use is thicker. I didn't use it because the one that came with the pump was new too. I didn't realize the o-rings were different. I installed the correct o-ring and correctly install the pressure relief valve.
I pressure tested it at 50 psi in a bucket of water and no leaks.
I reinstalled the pump again and finally no leaks and it pumps fluid. So to answer my earlier question, the answer is B) I'm a dumb ass.
 
Originally posted on CK5.com forums on Aug 24, 2014 as the...

Another Dodge Cummins in a Chevy forum. My rescued tow rig.​


Another problem I ran into when I replaced the hydro-boost I didn't pull out the push rod, spring, and retainer out of the old unit. Guess which items didn't come with with the reman? And I didn't find out till later.
Well with all those problems, I was able to get it running, but still have more problems to fix before it is road worthy.

20140824_124237.jpg
 
Originally posted on CK5.com forums on Mar 20, 2015

I haven't updated this thread in a while. After trying everything under the sun to get rid of trouble code and get governor pressure in the transmission up. I finally sent the PCM in to get fixed. I was warned at the auto parts store that the PCM may not be the problem. I told him I've checked everything else out and everything pointed to the PCM. He me told it was going to be a month since they going to have send my unit out because it is not in stock anywhere. That was October and I worked on my blazer instead.
I got the computer back at the end of October , installed it and my transmission now shifts.

I had an other check engine light and it was the IAT saying the EGR isn't working which it isn't because I haven't hooked any vacuum lines. I know a way to bypass that, but I do it after the dot check.
ABS light is on and my code reader won't pull the code.

There is few things left to get done. I have to finish my battery tray to mount the battery temp sensor and cruise control module. I can't get new vacuum lines for the HVAC which melted in the fire so I got to find some used ones.
Here is a picture of the bracket for the battery tray to mount the cruise control.

20150320_162235.jpg
 
Last edited:
Originally posted on CK5.com forums on Mar 27, 2015

It is not the prettiest or square, but I finished the battery tray.
20150327_193244.jpg
 
Last edited:
Originally posted on CK5.com forums on May 10, 2015

ABS blues, or is that 6 or 7 blinks?

I went to plumb the vacuum lines for the EGR, but vacuum ports for the EGR solenoid are melted shut. I can't get a new one since it is discontinued. I went ahead and bypassed it with a relay and a resistor and my check engine light is off.
Now on to the ABS. In an effort to save time. I did an online search to what the problem is instead of the tech manual. Big mistake. I was getting mixed information about whatever my rear ABS needed a code reader or jump diagnosis port to ground. It was the later, but to do it right, I am supposed to have a special diagnosis tool which just grounds terminal 13 on the diagnosis port. A wire did the same job.
I should have read the damn book first instead trying for months to get my code reader to work, and I wished it did because counting flashes suck.
One, two, three, four, five, six, holy **** this thing flashes fast, seven?
Okay, let's try this again,
One, two, three, four, five, six, is that seven flashes? No it was six.
Did this about ten times I think end up at six flashes.
Book says it is the sensor on the rearend. Mother****er, I have already replaced it hoping for a quick fix. Could it be the tone ring? I go home and did some research. I could get new tone rings for reasonable price, but I know it be a pain to replace. Best to test it. When I get back to the truck, I get out my multimeter a hooked it on the sensor, jack up the rear of the truck, and started turning the wheel and nothing. WTF. After messing around with it for an hour I figured out I had the multimeter on the wrong setting. Dumbass. Okay let's try this again and I'm getting constant voltage. Okay that is good, and bad. Where is the problem? I have read there could be a break in wires by the gas tank. Harness look okay. Let's test signal by the ABS controller. I have current there too. So it is not the sensor.
Was it seven flashes? Checked the book and it said some valve circuit is shorted to ground. Checked the circuit and everything was fine. If the circuit is good then the controller is bad.
In my research on this ABS mess, I was looking at parts cost and availability. I couldn't find the valve assembly. The valve assembly I had picked up was used. I thought it could be the problem but is not. The controller was available at Napa and Rockauto a few months ago. I checked Napa online to get a price and nothing. Oh uh. Try Rockauto and they had two listings. Buy the cheap one and went to check out and it is out of stock. Buy the expense one and it out stock. I am watching parts for a 17 year old truck bring discontinued before my very eyes. Try O'rielys online and said the part is active. I go down to O'rielys the next day after work and ordered one. I installed it and the ABS light is off. Woo Hoo! That was the last problem. Now I just have to get the windshield replaced which I had done last Friday. Now I have to go down to Seventh ring of Hell AKA the DMV.
 
Last edited:
Originally posted on CK5.com forums on May 15, 2015
Have you ever skipped something only to have it bite you in the ass?
I have and this project in peculiar have bit me more times that I have no ass left.
First, I have delayed going to the DMV because I didn't want to deal with them. There are many reasons. One of them is mostly because I have done my vehicle registration at AAA. A lot less headache. I can't do that with savage title. I have to go to the DMV.
Two is my late uncle didn't give me the title when I bought the pickup because he didn't know where was the title. His secretary AKA my aunt, knew where it was at and she was to mail it to me.
Three, she didn't mail it. She sent it with my brother who I don't know when he visited her, but he bought it back and placed it in my room, and may of offhandedly mentioned to me when I wasn't paying attention. I had the title for a undisclosed amount of time and didn't realize it.
Four I think it was almost a year before he mentioned it again. By then I have used my cash to buy parts. Not to pay the registration.
Five, I kept thinking I'm so close to getting the truck going, but I kept running into set backs. I was thinking the truck was cursed by the ghost of PO. Btw I have inside knowledge that last two PO have died.
Six, I sometimes didn't have time.

I had options today. Wait in line in town, or drive to the next town over which is 30 minutes away. I figured if I going waste 30 minutes, I might as well drive by the local one first. I was there 40 min early and there was five people already in line. I got in line and waited. 8:00 and the line reached around the building. They changed how do things at the DMV. Handing out numbers and other things.
There was no doubt I was the first plug. When the lady first pulled up the registration, she told me there was over $2000 in fees.:eek1: Well that the combined fees from when the truck caught fire till now. My uncle intended to get truck going himself, so he started the salvage a year before I bought the truck. Well, the paper work side of it anyway. He had already paid some of the fees, since the process was never finished it somehow showing total fees due. Somehow, the DMV lady could see some of the fees where paid and started knocking it down. I had to pay a late fee since my uncle already filed a release of liability two years ago. No getting out of that. I had to pay $777. Still a lot but better than $2000 plus I could afford it. I didn't have $2000.
 
Last edited:
Originally posted on CK5.com forums on May 15, 2015
I swear this truck is going to turn me into a novelist. I don't like to write this much.
Anyway, part two of getting my ass bitten off.
To finish the savage, I needed a light and brake inspection and VIN verification.
While I was at Seventh Ring of Hell, I mean the DMV, I picked up a one day driving pass. I drove the Dodge to a garage in town which does brake and light inspection. I soon found out if I going to start driving this thing every day I'm going to have fix the HVAC. It being stuck on defrost Isn't going to work in the summer.
Anyway, the guy said it probably going to be over an hour. A hour later I get a call saying I have three problems. I already knew where some of the problems were.
One problem were the wheel cylinders. The seals were cracked and the cylinders were leaking goo.
Second problem were the adjusters which were frozen.
Damn it. In my laziness, I just checked the shoes though the inspection windows in the backing plates and hoped everything else was okay. It was not.
The third problem was the head lamp lenses were foggy. They have to be clear. Okay, I didn't know about that one, but I could have saved a couple hundred in labor if I pulled the drums. I just told him to fix everything.

They got done at 3:30. Enough time to go down to the DMV again for the VIN verification and to finish the rest of the paper work. I was done at a few minutes before five o'clock. All I need now is insurance.
 
Last edited:
Originally posted on CK5.com forums on Jul 4, 2015
I got new plates and registration, but no title. I think the dmv forgot to ship it. I'm going to have call to find out what is up.

Anyway, my dad totaled my car so I need to get the Dodge as a reliable driver.

Things that need to get done.
Vacuum lines for the HVAC. It is stuck on defrost.
Exhaust leak.
Leaking radiator.
Killer Dowel Pin
Adjust lash.
Oil leaks. I suspect while hard parts came out okay, the gaskets did not. The biggest PIA is the tappet cover. The injection pump is in the way. I plan to time the motor. I'm going to have remove the injection lines, and I'm pulling timing cover for KDP. I might as well go a little deeper and remove the injection pump.


I also taking this time to also do up grades.
While fixing the Exhaust leak, I replace the EGR manifold with a three piece manifold.
GSK and adjustable timing gear for the injection pump. Unfortunately, the gear is back order.
60 pound+ valve springs. I want wheel speed while out at the dunes.
Gauges. fuel pressure, boost, EGT, transmission temp.

Up first is the exhaust leak.

cumminehaust2.jpg


I removed the exhaust manifold last night. I'm picking up gaskets today and and finish this part of the job.
cumminsexhaust3.jpg
 
Originally posted on CK5.com forums on Jul 10, 2015

Here is source of the exhaust leak. I could of just replace the gasket, but I've already bought the three piece manifold.
20150710_000456.jpg

Changed out the valve springs. The four in the back was PIA.
20150709_223134.jpg

I think this is the reason why the radiator is leaking. Must have happen when the firefighter busted the hood latch.
20150710_143822.jpg


Diving in to get to the KDP.
20150710_143840.jpg
 
Originally posted on CK5.com forums on Jul 10, 2015

What a rip off. Most of my vacuum fittings are already split.
20150710_144008.jpg


Looks like somebody already marked the balancer at TDC.
20150710_144403.jpg


Too bad the balancer is bad.
20150710_144827.jpg
 
Originally posted on CK5.com forums on Aug 1, 2015

Anyway, I've tackled replacing the tappet cover gasket. It was burnt and cracking. But to do that, I have to remove the injection pump.
20150724_151811.jpg


Well, since I'm that deep in this mess, I decide to replace the cam. You know for more power.
20150724_110201.jpg


Well, tonight I removed the old cam, and the front cam bearing is showing copper. My friend some bushing for transmission show copper, so I'm suppose to to some research to see if that is the case with the cam bearing.
20150801_192156.jpg
 
Originally posted on CK5.com forums on Oct 3, 2015
Well, I got the cam in, and I'm slowly putting the truck together. Modified the front timing cover so I get the adjustable timing gear later if needed.
20150801_201848.jpg

20150821_170435.jpg


Installed my gauges.
20151002_203932.jpg

20151002_203949.jpg


I went a little different for plumbing the fuel pressure sender. Instead if of buying the pressure scrubber banjo bolt, I bought the Autometer scrubber 1/8 npt. That way if I up grade the fuel lines later, I won't be stuck using the banjo bolt. I drilled and tapped the factory banjo bolt. I thread in a 1/8 npt to 4 jic fitting that has a .020" hole. 24" of 1/4" dia hose the scrubber then to the gauge. I didn't want to mess with the needle valve other people have installed. Instead of have the sender flop around on hose. I built a bracket out of a old shifter bracket and mounted that bracket of the bracket off the master cylinder.
20150918_131559.jpg

20150918_131620.jpg

20150920_162929.jpg
20150922_180433.jpg


I also fixed my vacuum lines and went a little overkill by the vacuum pump by using AN fittings and 1/2" push lock hose.
20151002_203846.jpg
 
Originally posted on CK5.com forums on Oct 3, 2015

When I timed the injection pump, I pulled number 1 injector and used a dial indicator to find TDC. I didn't feel comfortable using the drop valve method. After I timed the injection pump to 16 deg BTDC, I went to put the injector back in and found out the new sealing cooper washer is thinner. I have already mangled the old washer getting it off the injector. Update, Power Driven Diesel has a pack of various thickness sealing washers


20151002_210138.jpg


Some research last night, I could install the thinner washers, but I'm going to have to install the thin washers on all six injectors. My options are to find 1 thick washer, or install 6 thin washer. I couldn't find a single thick washer searching the internet last night.
My last problem, is the seal on the front timing cover. Not the seal per say but the metal shield. It seems too close to the crankshaft diameter, plus I may have pulled the alignment tool too soon when installing the cover. I don't think the seal and shield is centered on crankshaft.
20151005_175623.jpg


Oh I also pulled one of the transmission cooler lines so it could clear my friend's timing wheel. It was a ***** to get off. After I get it off, I found out the fitting is smashed.
****ing great.
20151002_204422.jpg
 
Originally posted on CK5.com forums on Nov 15, 2015

A lot has happened since I lasted updated. I guess I start with how I fixed my last dilemmas.

The injector seals. I had the thin ones so I swapped them all.

The front cover shield. Actually, it was a installation guild, somebody told me to remove it, so I did.
20151005_175623.jpg


Transmission cooler lines. I had -8 JIC fittings blazed on the hard lines and replace the hoses with pushlock hose.
20151014_173810.jpg
 
Originally posted on CK5.com forums on Nov 15, 2015

Here is a picture of modified front cover with the adjustable timing gear. Came in handy since I screwed up the timing and had to redo it, but that story is for later.
20151005_175712.jpg


The flat plate didn't clear the injection pump shaft, so it had to be modified plus I needed a way to get oil in the motor. First I cut a 1.5" hole and dimpled died it. Then I opened the hole to 1.75 so I could fit 1.75 exhaust tubing elbow. At the other end of the tube, I topped it with a weld on screw on cap. My friend welded it up for me.
20151030_201232.jpg
 
Originally posted on CK5.com forums on Nov 15, 2015

The harmonic damper was an adventure. I bought an ATI. It came in pieces and the pieces have to be assembled on the motor. The first problem is I need a #40 torx PLUS bit. Not something you can go to Sears or Harbor Fright. Regular torx sure, but not Torx PLUS. Snap On should have one, but I won't be able to chase down a dealer truck till Friday plus Snap is way expensive for a few time use. I also wanted a set since this not the first time I needed a Torx plus bit. I did a on-line search and found on Amazon a SK set for half the price of Snap on. I've used SK before and have no problem buying more. The set arrived on Thursday. :doh:
Anyway, I got the the damper on and went to install the crank position sensor and it don't don't line to the notches on the damper. I have to space the sensor out. I picked up some metric all thread and machined some spacers.
20151009_182214.jpg
20151009_182301.jpg
20151009_182915.jpg
 
Originally posted on CK5.com forums on Nov 15, 2015

Anyway, I think at this point, the truck is together enough to fire it up to brake in the cam. Cranked it till fuel reached the injectors and closed the lines. Cranked it again till it fired, checked the oil pressure. It is good. Revved the motor 2000 rpms for 20 mins. in doing so I smoked out the shop. I had to take my fans from the blazer and hooked them up to dodge battery to air out the shop.
20151012_185824.jpg


Anyway, I went to start the Dodge afterward, revved it up and it runs rough. WTF? It didn't do that during break in. It did smoke a lot though.
I did see the fuel pressure drop during break but only 5 psi.
I'm not going to get into the trouble shooting part but I decided to recheck the timing and I'm off a lot. I was aiming for 4.9mm of lift at TDC. I was at 2.9mm.:doh: I was concentrating of getting the .9 mm number I didn't realize I was off a full rotation on the dial. (my indicator has a 2mm per revolution). Anyway, I timed it right and the motor runs like it should.
Drove it around the parking lot, and now it is making a racket. WTF is wrong now? My friend came over and said it was probably the fasteners for the torque converter are loose since the noise went away when you put it gear.
Turns out he was right, but it was getting late. I tighten up the bolts the next day after work and the racket went away.
The HVAC still blows only hot air even though I hooked the vacuum lines. I think the box is warped.
Anyway, the truck is driving now.
 
Originally posted on CK5.com forums on Dec 5, 2015

Transmission acts funny when cold, HVAC still blows hot air, but I have been driving it. In fact, I drove it to work for a week then I drove it to Dos Palos (about 200mi) , Los Banos (17 miles from Dos Palos), and Livermore(78 mile from Los Banos, and 250 miles back to Santa Maria) during Thanksgiving week. There is a bunch of small stuff to be done, but I have moved on to another project then the Blazer is next. The head liner bugs the **** out of me and the carpet needs replacing. The Cummins is so loud, I could barely hear the radio. The radio volume control is touchy. The interior is the next project, but man, I would like to have the Club Cab ( 4 door extended cab).

Update, the only thing I have replace in the interior is the radio.
 
Originally posted on CK5.com forums on Jan 9, 2016

Well, I had my first break down.

I went to start it a few weeks ago and it wouldn't start. As I was cranking it, I noticed the fuel pressure was not picking up, then I ran the battery down.
Luckily it happened at home and I had access to another vehicle to get to work.
Due to the rains and me bring sick, I didn't get a chance to look at the truck till yesterday.
Tried the hand primer and confined I have something between the pump and the tank, but the pressure is low like 1 or 3 psi. I know I won't be to get 20psi with the hand primer, but I think I should be able to get at least 10.
Battery is charged, let see what is the pressure running, but first, let check if the fuel shut off solenoid is working. It is not. Okay lets just pull it up manually. It went up manually but I didn't feel the "hold" grab it. WTF, but I get to that later. I wanted to see if it starts and what is the fuel pressure. Started it and fuel pressure is 24 psi at idle. The same it been the last month. Turn the key off and and the engine kept running. Okay, something is majorly wrong with the fuel shut off solenoid. I manual move the FSO lever down to turn the engine off. I think it is binding, but I checked the power first the to the "hold" and "pull up" circuits because that was an easy check. Power checks out. I pulled the FSO solenoid off and found the plunger had come apart.
20160108_123513.jpg

I pressed it back together and reinstalled it on the truck, and the truck starts.

So after mulling about for a few hours, I'm trying think about why it failed.
I think I have the adjustment off, so when I try to start the the engine, the "pull up" part is hammering apart the plunger.
Anyway, I ordered a new solenoid because I don't trust this one, and the clear hose to test for air bubbles. I still think I have a fuel pressure problem at start up and I'm thinking it is sucking air.
Update - 8 years later and still haven't checked for air.
 
Originally posted on CK5.com forums on Jan 31, 2016

Well, I decided to check out why my heater was stuck on blowing hot air. Over the course of months I have fixed some problems, At first I thought it was the vacuum lines. I patched the vacuum lines and I got it to switch between vents, defrost, and floor vents, but still stuck on heat. I left it alone since it winter time, but took the book home to read. I've never read it since I like to relax in my time off, and I sometimes get busy doing something else.
Well, that didn't mean I didn't mull over the problem. I got to thinking the temp control wasn't vacuum control since vacuum was is either on or off. Temperature control requires an ability to adjust the blend door. Did a search and found out the later model dodges have a electronic control blend door. A plastic couple breaks and people lose control of their blend door. I assumed that that was the case for the second gens. Not so, as I found out reading another thread on another forum that the blend door is controlled by a cable.
It was a little warm driving home last Friday, so I decided to do a quick check to see if the cable was doing it's job. I took off the dash bezel to see if the blend door linkage was moving. After removing the radio, I see couldn't see the linkage. I decide to pull the heater control since the bezel was already off. Turns out, that was where the problem was at. The temp control is a rack and pinion deal and the rack had the tab broken off where the cable attaches. For a quick butch fix, I drilled a new hole for the cable end to attach to, but the material is thin and may break again. I'm on the hunt for a permanent fix.

2016-01-31 09.22.57.jpg

Update, I'm still using this butch fix after 8 years.
 
Top Back Refresh