How to install the app on iOS
Follow along with the video below to see how to install our site as a web app on your home screen.
Note: This feature may not be available in some browsers.
You are using an out of date browser. It may not display this or other websites correctly.
You should upgrade or use an alternative browser.
You should upgrade or use an alternative browser.
MCI 102-C3 coach to RV - General/Floorplan
- Thread starter JNHEscher
- Start date
JNHEscher
Red Skull Member
CarterKaft said,
I am always humbled by how slow I am at fab projects when I work by myself. Small tasks seem to take forever and don't even come out like I wanted...
I am always humbled by how slow I am at fab projects when I work by myself. Small tasks seem to take forever and don't even come out like I wanted...
JNHEscher
Red Skull Member
FirstRam said:
You've been working alone in an open field, in Colorado, in the winter! Seems to me you have earned the right to take it easy for 1 day.
You've been working alone in an open field, in Colorado, in the winter! Seems to me you have earned the right to take it easy for 1 day.
CarterKaft said:
I am always humbled by how slow I am at fab projects when I work by myself. Small tasks seem to take forever and don't even come out like I wanted...
I, myself, am quite humbled by the understanding of the PBB members following this. You all know by now that I find difficulty in taking the easy way out and that there have been numerous factors to contend with. Regardless, I've been thankful for all input and the opportunity to build vehicle as I fit.I am always humbled by how slow I am at fab projects when I work by myself. Small tasks seem to take forever and don't even come out like I wanted...
The floor sheet prep is dun. Dee. Yoo. Enn. DUN. Threw a box of baking soda in and filled the table to the brim with water. It is draining now. I'll let it dry then dump the remainder of the WD-40 into it so that it doesn't become another rusty heap. I plan to set up axles on the table once we get them. Probably cannibalize for the bus it after that. Beer thirty.
JNHEscher
Red Skull Member
JNHEscher
Red Skull Member
Java said:
Thats a big milestone! Not go weld it in <a href="https://www.pirate4x4.com/forum/images/smilies/biggrin.gif" border="0" alt="" title="
 " >
</a>
" >
</a>
On it. Ordered a new mig gun today today and started clearing out all the downstairs bays so I can burn it all in. I'm going to see if wax and grease remover will clean the sheets enough for tig.Thats a big milestone! Not go weld it in <a href="https://www.pirate4x4.com/forum/images/smilies/biggrin.gif" border="0" alt="" title="
JNHEscher
Red Skull Member
Didn't have time to grab welding supplies today. Still deciding whether I should stick with 3/32" rod or use 1/8" rod and crank up the amps a bit to flow more material in. I only have two rods of 3/32" 309L left.
I started unbolting brackets to move the brackets of copper air lines and valves just ahead of the drive axle. What a cluster. Removing bolts didn't do much. The brackets are either tack welded or adhesive taped on as well and rather difficult to reach. Called it a night before my back gives out because I found that some of my air line ID tags up front got ripped off by the wind. I'm going to be occupied with wrenches and colored zip ties for a while.


I started unbolting brackets to move the brackets of copper air lines and valves just ahead of the drive axle. What a cluster. Removing bolts didn't do much. The brackets are either tack welded or adhesive taped on as well and rather difficult to reach. Called it a night before my back gives out because I found that some of my air line ID tags up front got ripped off by the wind. I'm going to be occupied with wrenches and colored zip ties for a while.
JNHEscher
Red Skull Member
Minor progress identifying air lines. Hopefully I can come up with a more complete schematic soon so I can get the rest of the lines out of the way.

JNHEscher
Red Skull Member
Not much else going on other than getting air lines figured out and labelled. A friend and fellow MCI owner was gracious enough to crawl around his bus and chase air to direct me on what hooks to what. I've since unhooked all five lines from the rear storage bay bulkhead so that I may reach up to mark where conduit stub holes need to be cut. Mostly waiting on winter weather to pass. I'm sick of freezing and getting blasted with dirt. Crawling under a bus in such weather is like working in a wind tunnel full of sand.
JNHEscher
Red Skull Member
Squeezed in some bus time today. Unbolted the valve bracket and scrunched it out of the way. Crawled under the bus and sat up between the drive axle and rear storage bay wall. Stuck a carpenter's square to the underside of the floor and lined it up so I could score the floor sheet at 3" from the edge of the sheet to mark where the back of the bedroom wall lands. This is for reference so I can mock up conduit stubs, mark their locations, and drill pilot holes.


JNHEscher
Red Skull Member
MIG gun still hasn't shipped. At a bit of a standstill with orders. Stuff isn't in stock and there's nobody around to send it out. That reminds me that I need to call Summit to cancel the rest of my order from last month. Ship dates keep getting bumped a month out.
JNHEscher
Red Skull Member
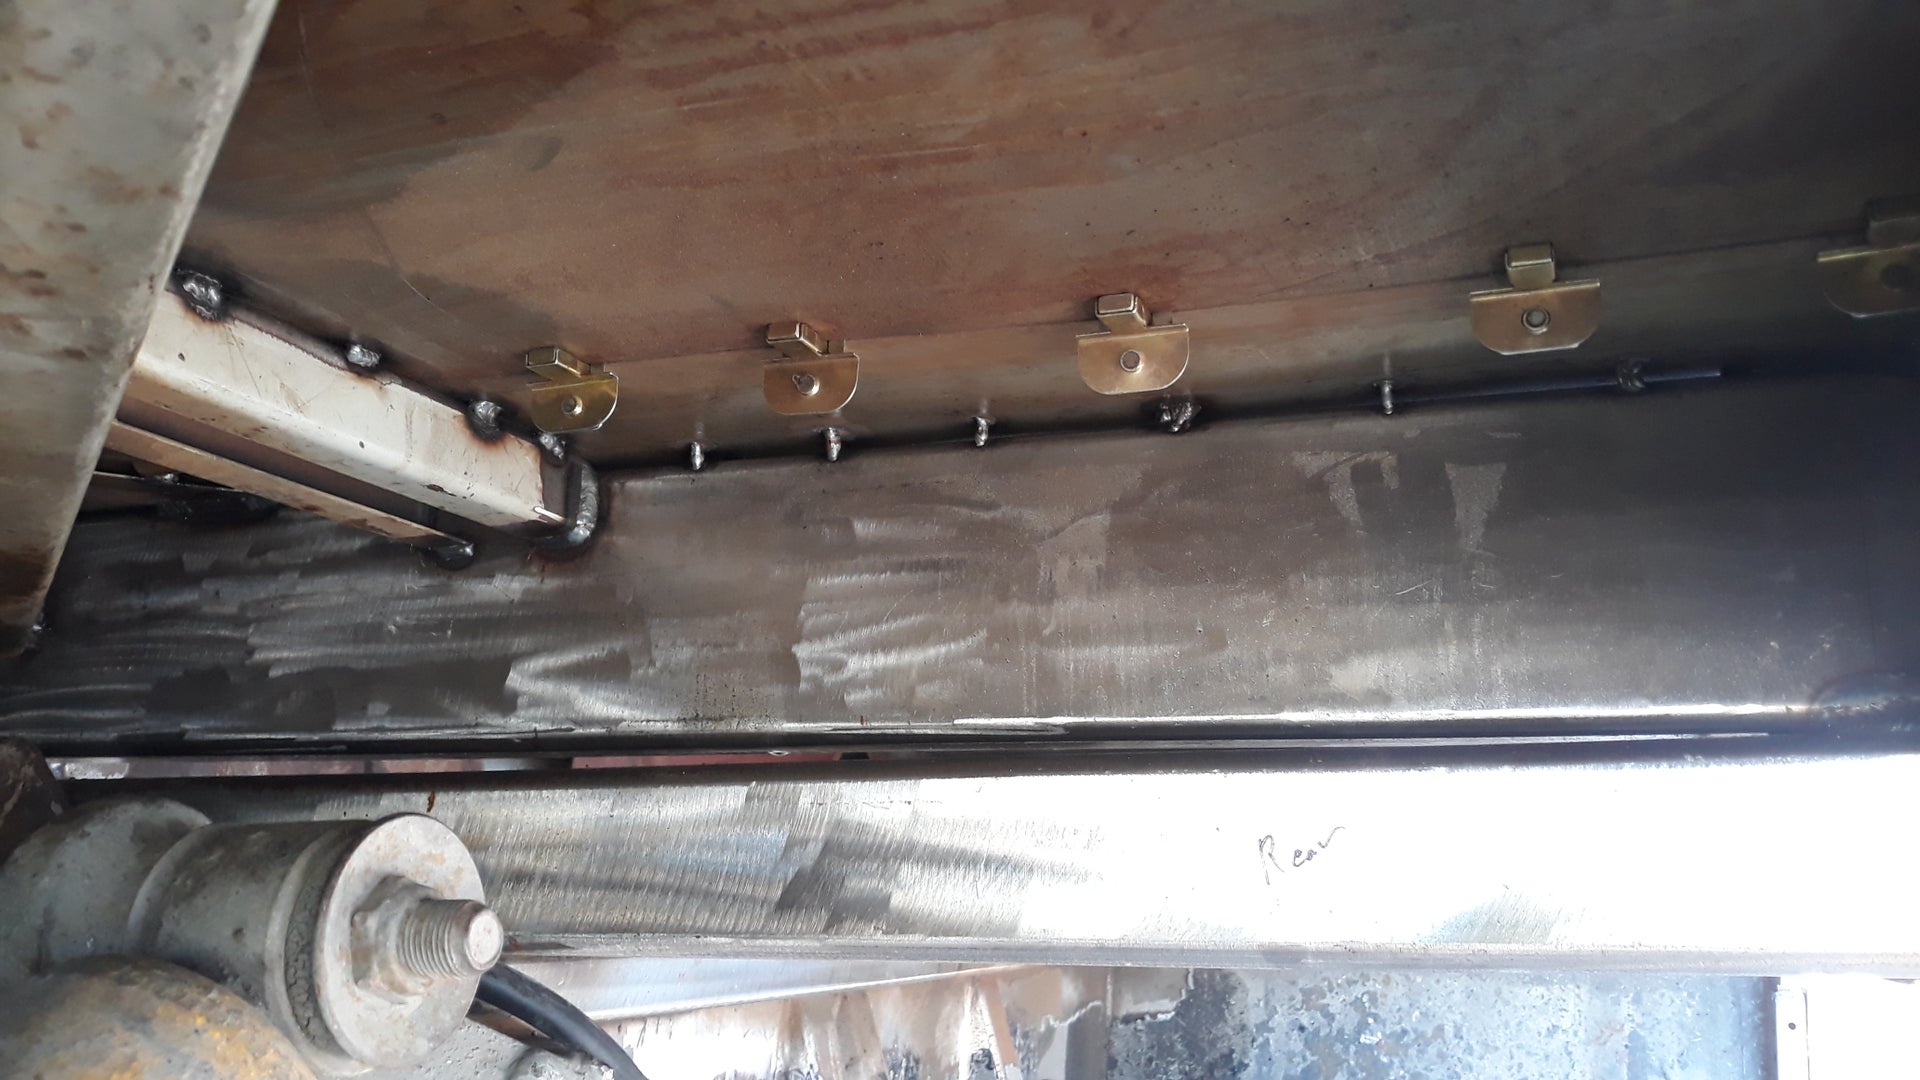
Wife and I were just out tinkering on the bus. Lining up conduits to position the rearmost stubs. Took a pic while sitting up between the bay wall and drive axle where the sanitary tees go. Got myself stumped on which direction to point the fuel tees.
To this day, I still haven't put my foot down on where I'll be placing the diesel tank and propane tanks. Nixed the idea of putting propane in the rear bay so I can just stay away from putting gas leaks and electrical sparks right next to each other. I was going with the diesel sitting as close to the drive axle as possible so that it would be somewhat supported by the strength of the subframe being welded to the rear bay. 880+ pounds of diesel, if I remember correctly.
I'm tempted to find the volume of the subframe rails to use those as the diesel tanks. Haven't figured out what else I want to cram in them to occupy the bountiful volume that would otherwise be left empty. I know they don't currently add up to 142 gallons, but I can change that.
I kinda want to stick propane in the engine room, but kinda don't. Kinda want to put diesel in the engine room, or rear storage bay, or go for frame rails.
All this has me puzzled about which direction the sweep in the fuels conduit sanitary tee needs to face because I can't decide which direction the source will come from. $0.02, if you feel like it. I might give it the thumbs up and run with it.
JNHEscher
Red Skull Member
Latest word on my mig gun as of a couple days ago is that it is expected to ship out on the 30th. Shall see. Ton of stuff on back order being bumped further and further out. I'm waiting on the gun before I burn in the floor sheets.
Grabbed what I think is enough 3/32" 309 to join all the floor seams and the sheets to the outer edges. Haven't used Klean Strip's wax and grease remover before. Surely it'll take WD-40 off. I have paint thinner and hand in case I gotta get serious. Generally don't like to use it because it chills metals enough to wet them with condensation.

Grabbed what I think is enough 3/32" 309 to join all the floor seams and the sheets to the outer edges. Haven't used Klean Strip's wax and grease remover before. Surely it'll take WD-40 off. I have paint thinner and hand in case I gotta get serious. Generally don't like to use it because it chills metals enough to wet them with condensation.
JNHEscher
Red Skull Member
Pt_Ranger_V8 said,
Running fuel in the frame rails seems like a bad idea
A little bit of flex, then you've got 40 fucking feet of weld to track down your leak
Running fuel in the frame rails seems like a bad idea
A little bit of flex, then you've got 40 fucking feet of weld to track down your leak
JNHEscher
Red Skull Member
bigun said,
JNHEscher said:
Wife and I were just out tinkering on the bus. Lining up conduits to position the rearmost stubs. Took a pic while sitting up between the bay wall and drive axle where the sanitary tees go. Got myself stumped on which direction to point the fuel tees.
To this day, I still haven't put my foot down on where I'll be placing the diesel tank and propane tanks. Nixed the idea of putting propane in the rear bay so I can just stay away from putting gas leaks and electrical sparks right next to each other. I was going with the diesel sitting as close to the drive axle as possible so that it would be somewhat supported by the strength of the subframe being welded to the rear bay. 880+ pounds of diesel, if I remember correctly.
I'm tempted to find the volume of the subframe rails to use those as the diesel tanks. Haven't figured out what else I want to cram in them to occupy the bountiful volume that would otherwise be left empty. I know they don't currently add up to 142 gallons, but I can change that.
I kinda want to stick propane in the engine room, but kinda don't. Kinda want to put diesel in the engine room, or rear storage bay, or go for frame rails.
All this has me puzzled about which direction the sweep in the fuels conduit sanitary tee needs to face because I can't decide which direction the source will come from. $0.02, if you feel like it. I might give it the thumbs up and run with it.
I remember seeing a company in Australia that was making conformal LPG tanks for vehicles, not sure if they were ever able to get them imported into the USWife and I were just out tinkering on the bus. Lining up conduits to position the rearmost stubs. Took a pic while sitting up between the bay wall and drive axle where the sanitary tees go. Got myself stumped on which direction to point the fuel tees.
To this day, I still haven't put my foot down on where I'll be placing the diesel tank and propane tanks. Nixed the idea of putting propane in the rear bay so I can just stay away from putting gas leaks and electrical sparks right next to each other. I was going with the diesel sitting as close to the drive axle as possible so that it would be somewhat supported by the strength of the subframe being welded to the rear bay. 880+ pounds of diesel, if I remember correctly.
I'm tempted to find the volume of the subframe rails to use those as the diesel tanks. Haven't figured out what else I want to cram in them to occupy the bountiful volume that would otherwise be left empty. I know they don't currently add up to 142 gallons, but I can change that.
I kinda want to stick propane in the engine room, but kinda don't. Kinda want to put diesel in the engine room, or rear storage bay, or go for frame rails.
All this has me puzzled about which direction the sweep in the fuels conduit sanitary tee needs to face because I can't decide which direction the source will come from. $0.02, if you feel like it. I might give it the thumbs up and run with it.
JNHEscher
Red Skull Member
Pt_Ranger_V8 said:
Running fuel in the frame rails seems like a bad idea
A little bit of flex, then you've got 40 fucking feet of weld to track down your leak
Totally, but these here rigs are unibody. Subframe rails are 4' long. I can throw in some pics and talk it over more later. Boxing in the space between the rear rails made for a total of 74 gallons. One up front and one in rear gets me my 140ish gallons. Running fuel in the frame rails seems like a bad idea
A little bit of flex, then you've got 40 fucking feet of weld to track down your leak
bigun said:
I remember seeing a company in Australia that was making conformal LPG tanks for vehicles, not sure if they were ever able to get them imported into the US
The fiberglass tanks? I remember looking at some years ago when I was building a yota to run on pane.I remember seeing a company in Australia that was making conformal LPG tanks for vehicles, not sure if they were ever able to get them imported into the US
JNHEscher
Red Skull Member
For what it's worth in conversation.
First three pics are rear subframe - side, from above, and from below. No current plan for the space between the rear rails. Each rail holds 11.8 gallons. Box in between the rails and get a total of 74 gallons.
Last two pics are front subframe - side and from below. Boxing in the space between the rails comes out roughly the same as the rear.
The space between the front subframe rails is still slated to be the cavity for the corny tanks, but I'm not the least bit opposed to moving those tanks elsewhere for easier access. The boxing of the subframes would probably be done with a minimum of 3/16" plate, maybe 1/4". Stupid stout for fuel tanks. The subframe rails are 3/16" formed plate. I just seriously wish we an AxleTech 4500 or Oshkosh TAK-4 here so that I could be taking measurements and mocking up parts to know what and where the mounting points would be.
I checked and both "subframe fuel tanks" would be far enough below the fuel pump to not worry about siphoning fuel past the pump when the engine is off. I'm really digging the idea at the moment. Seems like a good spot to storage diesel since both subframes are locations that I don't really need or want to have to access that often. Comparing leak repairs of that to the original aluminum tank makes me lean towards the subframe tanks. Easier to weld and quicker to drain versus thinner aluminum that held the entire 142 gallons. Talk some sense to me. I know I'm crazy
JNHEscher
Red Skull Member
JNHEscher
Red Skull Member
Java said:
Just get a regular fucking fuel tank..... Boxing that area would be a PITA, nothing is ever going to be able to get in there to fix if there is a leak (no top access??). Just put a damn tank in somewhere with a standard pump and filter.
There's enough top access for repairs. The pump and filters are mounted on the engine. Still contemplating alternative fuel tank locations. Diesel creeps all over, so some place where we aren't storing other stuff that we don't want covered in oil would be nice. The original fuel tank/battery/HVAC bay was soaked with diesel.Just get a regular fucking fuel tank..... Boxing that area would be a PITA, nothing is ever going to be able to get in there to fix if there is a leak (no top access??). Just put a damn tank in somewhere with a standard pump and filter.
JNHEscher
Red Skull Member
JNHEscher
Red Skull Member
87manche said,
Grendel said:
There is a reason most manufacturers make fuel tanks external and easily removed.
If you were to do it, I'd build in a bypass, at least.
I am not a fan.
one bout of contaminated diesel will make storing fuel in frame rails a bad idea.There is a reason most manufacturers make fuel tanks external and easily removed.
If you were to do it, I'd build in a bypass, at least.
I am not a fan.
JNHEscher
Red Skull Member
Grendel said:
There is a reason most manufacturers make fuel tanks external and easily removed.
If you were to do it, I'd build in a bypass, at least.
I am not a fan.
There is a reason most manufacturers make fuel tanks external and easily removed.
If you were to do it, I'd build in a bypass, at least.
I am not a fan.
87manche said:
one bout of contaminated diesel will make storing fuel in frame rails a bad idea.
True, true. I've kept removable tank in mind, but that doesn't seem to be bothering me in this application at all. The cons of all this leaves me with the engine bay. There's lots of room. Thinkin' split the total between two tanks - one per side. I'll scheme on this later today or tomorrow.one bout of contaminated diesel will make storing fuel in frame rails a bad idea.
JNHEscher
Red Skull Member
Turned into a bus day. My original intentions for today were to pull all the OE radiator support pad cups to send off to a bus friend and to hook up the welder to be ready. With all the windy, dust stormy, frozen horseshit and a half that I've had to put up with here, today was oddly dead calm with a splendid temperature. Wife got home from and interview in Denver and kept bugging me to start welding. And so I did.
New MIG gun showed up the day before we left for OKC. Did some fingering around the connection today to see what the deal has been with the gas flow (or lack thereof). Pulled the old out and found the inner gas o-ring to be slice exactly as the last one. The top cropped off due to the hole drilled and tapped for the gas hose barb fitting. I didn't feel anything that would catch the o-ring, but hosed all parts with WD-40, gently worked the connector in, back out, in again, out once more to double-check, then seated it for assembly. Gas flow is now perfect.
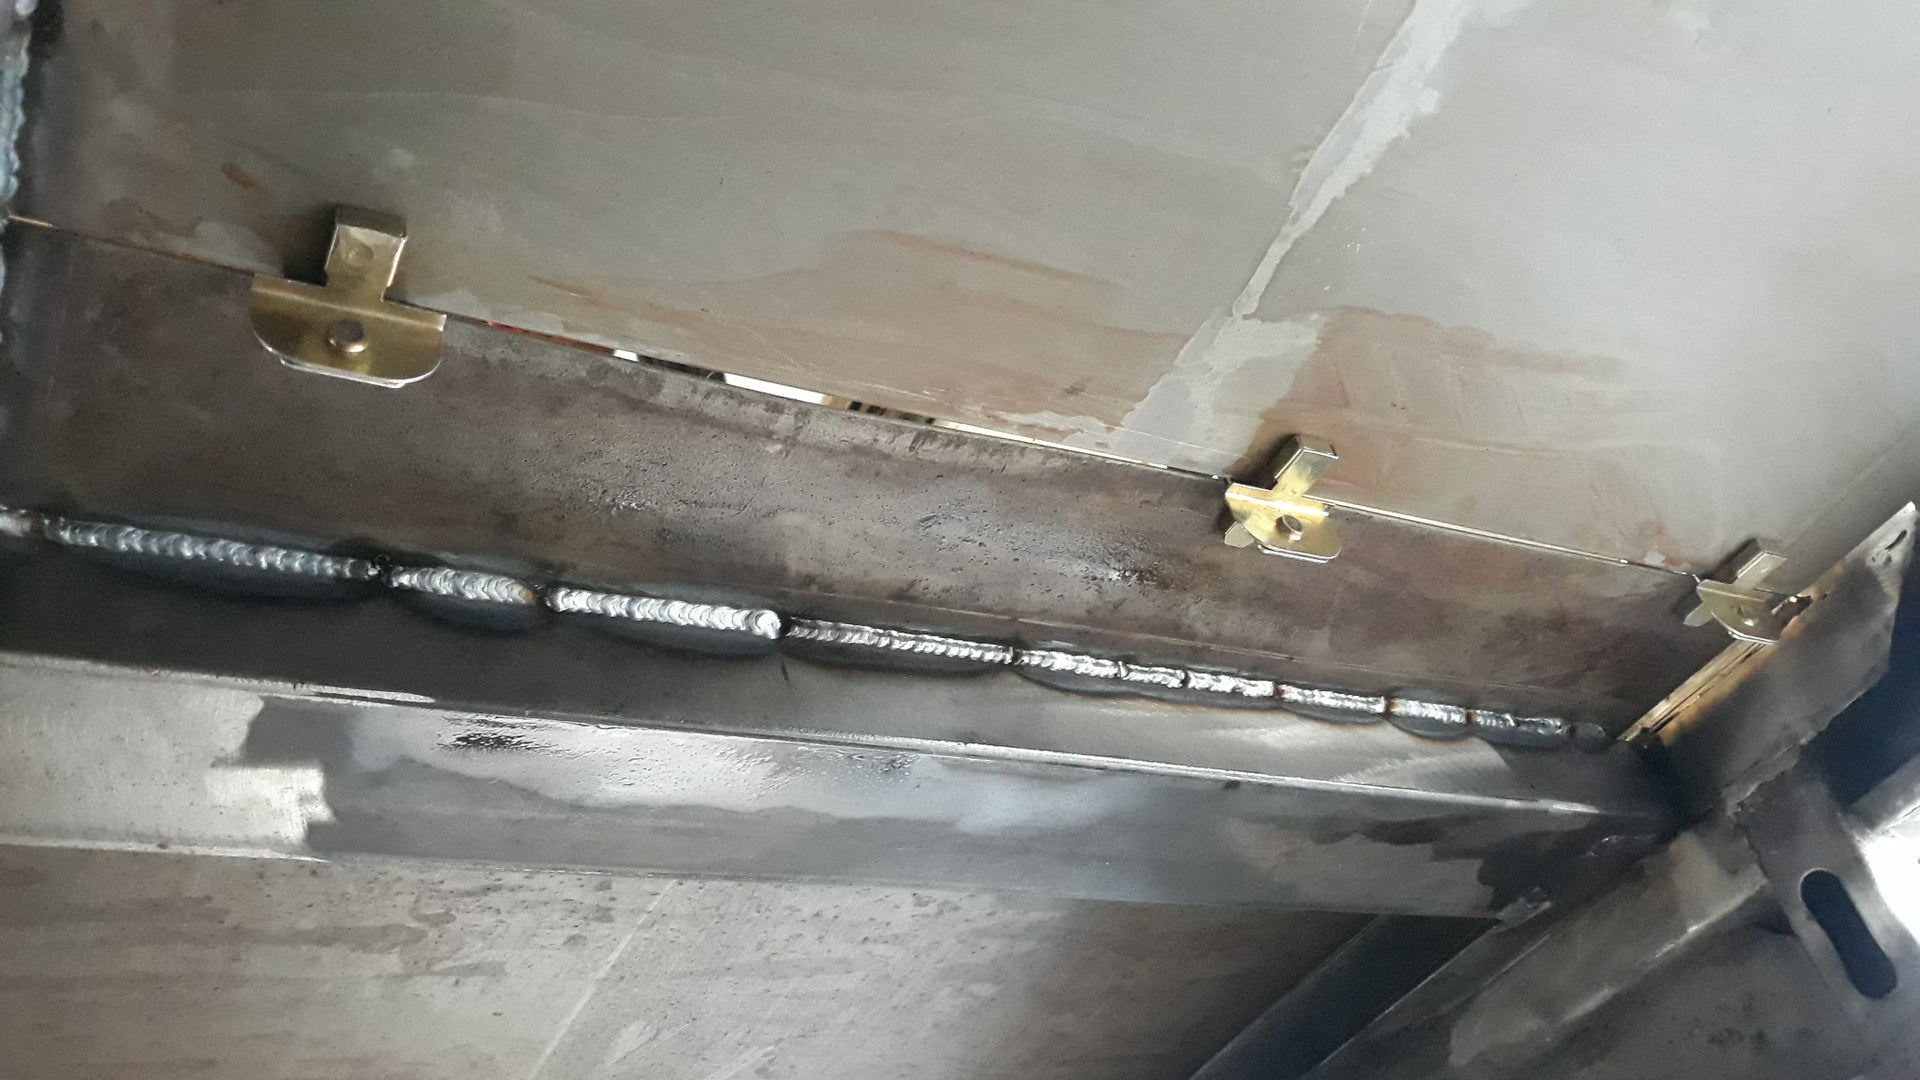
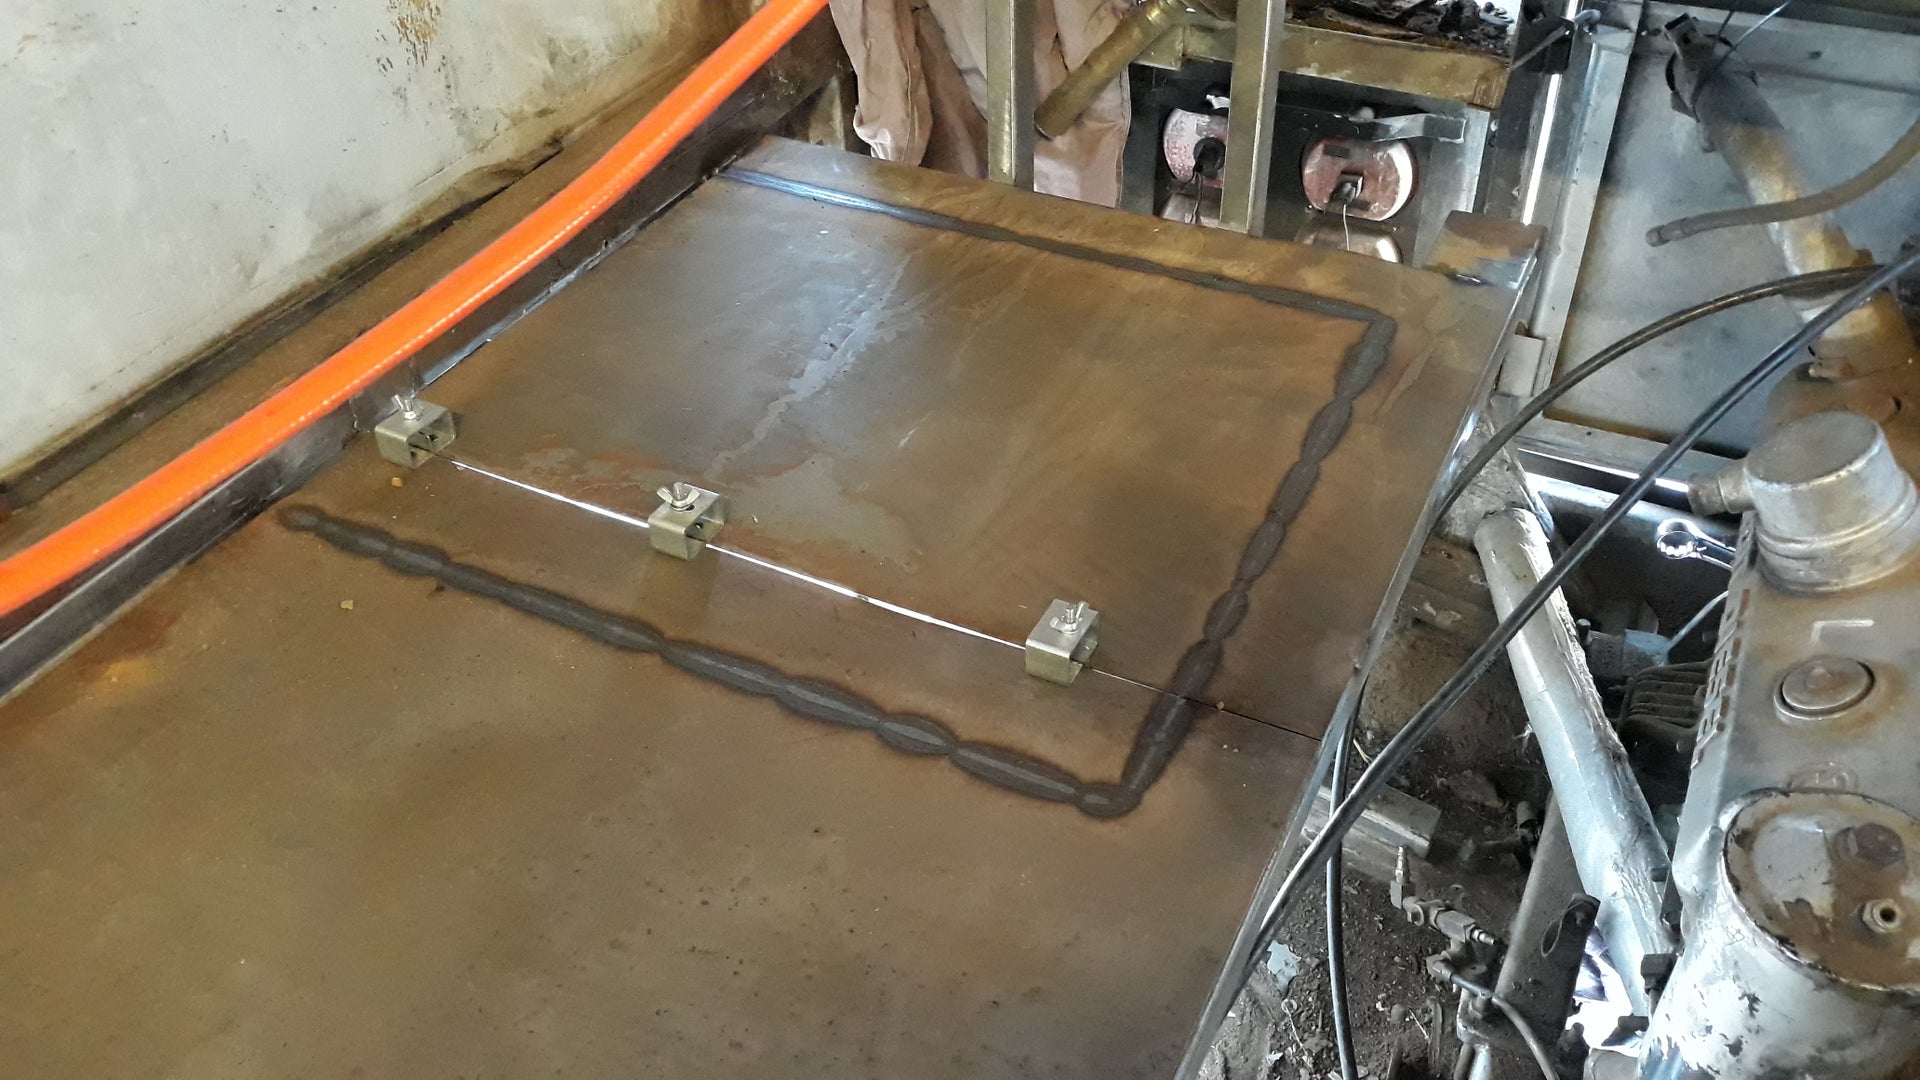
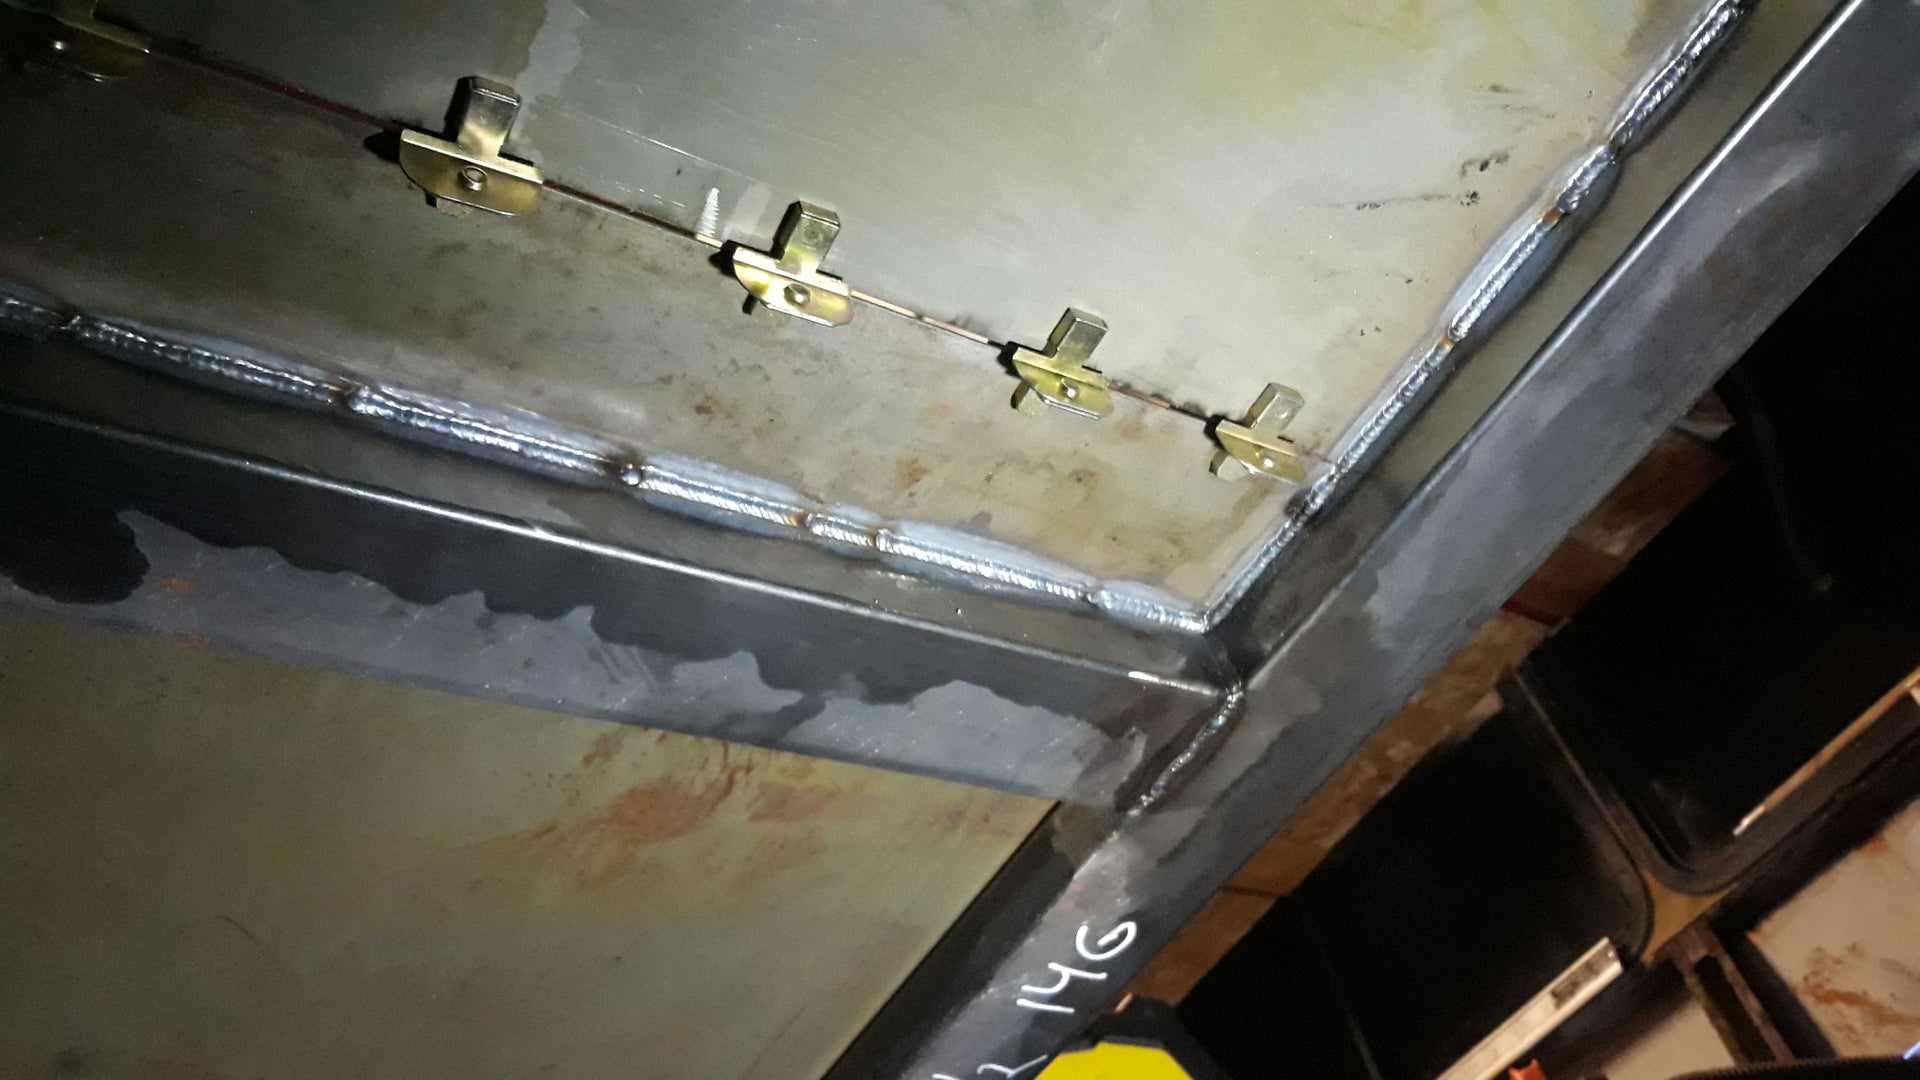
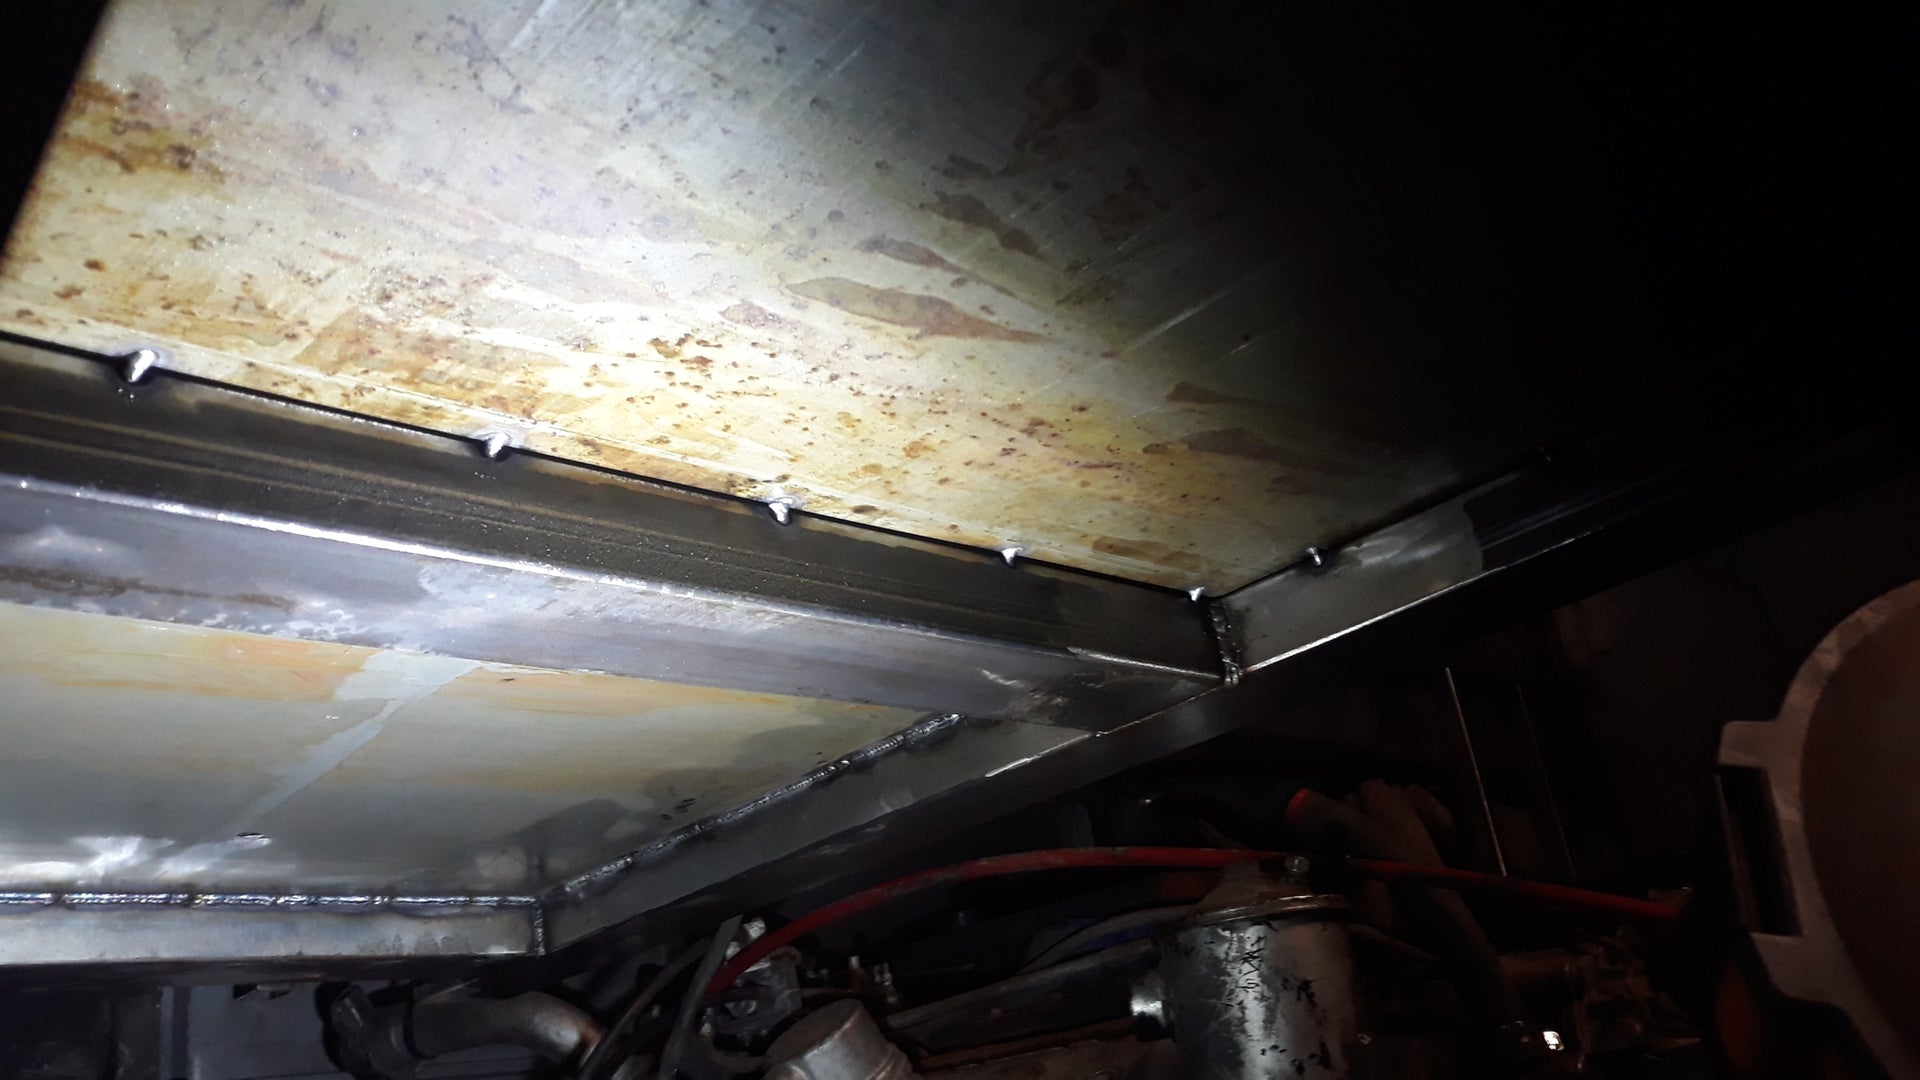
Mostly overhead work and my undsteady hands aren't doing too bad. Curlicue weaves aside from a couple spots and the welds up top.. You can see where I put a little more heat into one run and warped the sheet a bit. Totally forgot that I meant to put all six clamps on before welding on the first side. Put six on the other side and had no trouble at all. The warped spot won't be any problem to clamp flush again. That last pic definitely shows the difference between the old and new guns. Same settings, but I had a trashes liner, shorted nozzle, and bad o-ring.
The heat stain map is going to be really cool when it comes time to drop the 2" washers in place. Can't wait to make this first floor layer nice and solid. I'm having to spray the weld joints with WD-40 and then shop vac it to pull the dirt out that has blown in. Crazy weather. The bus is about the only thing that hasn't gotten torn up by the wind. 60mph sleet hit here the day we arrived in Oklahoma. Yard looks like it was in a flood.
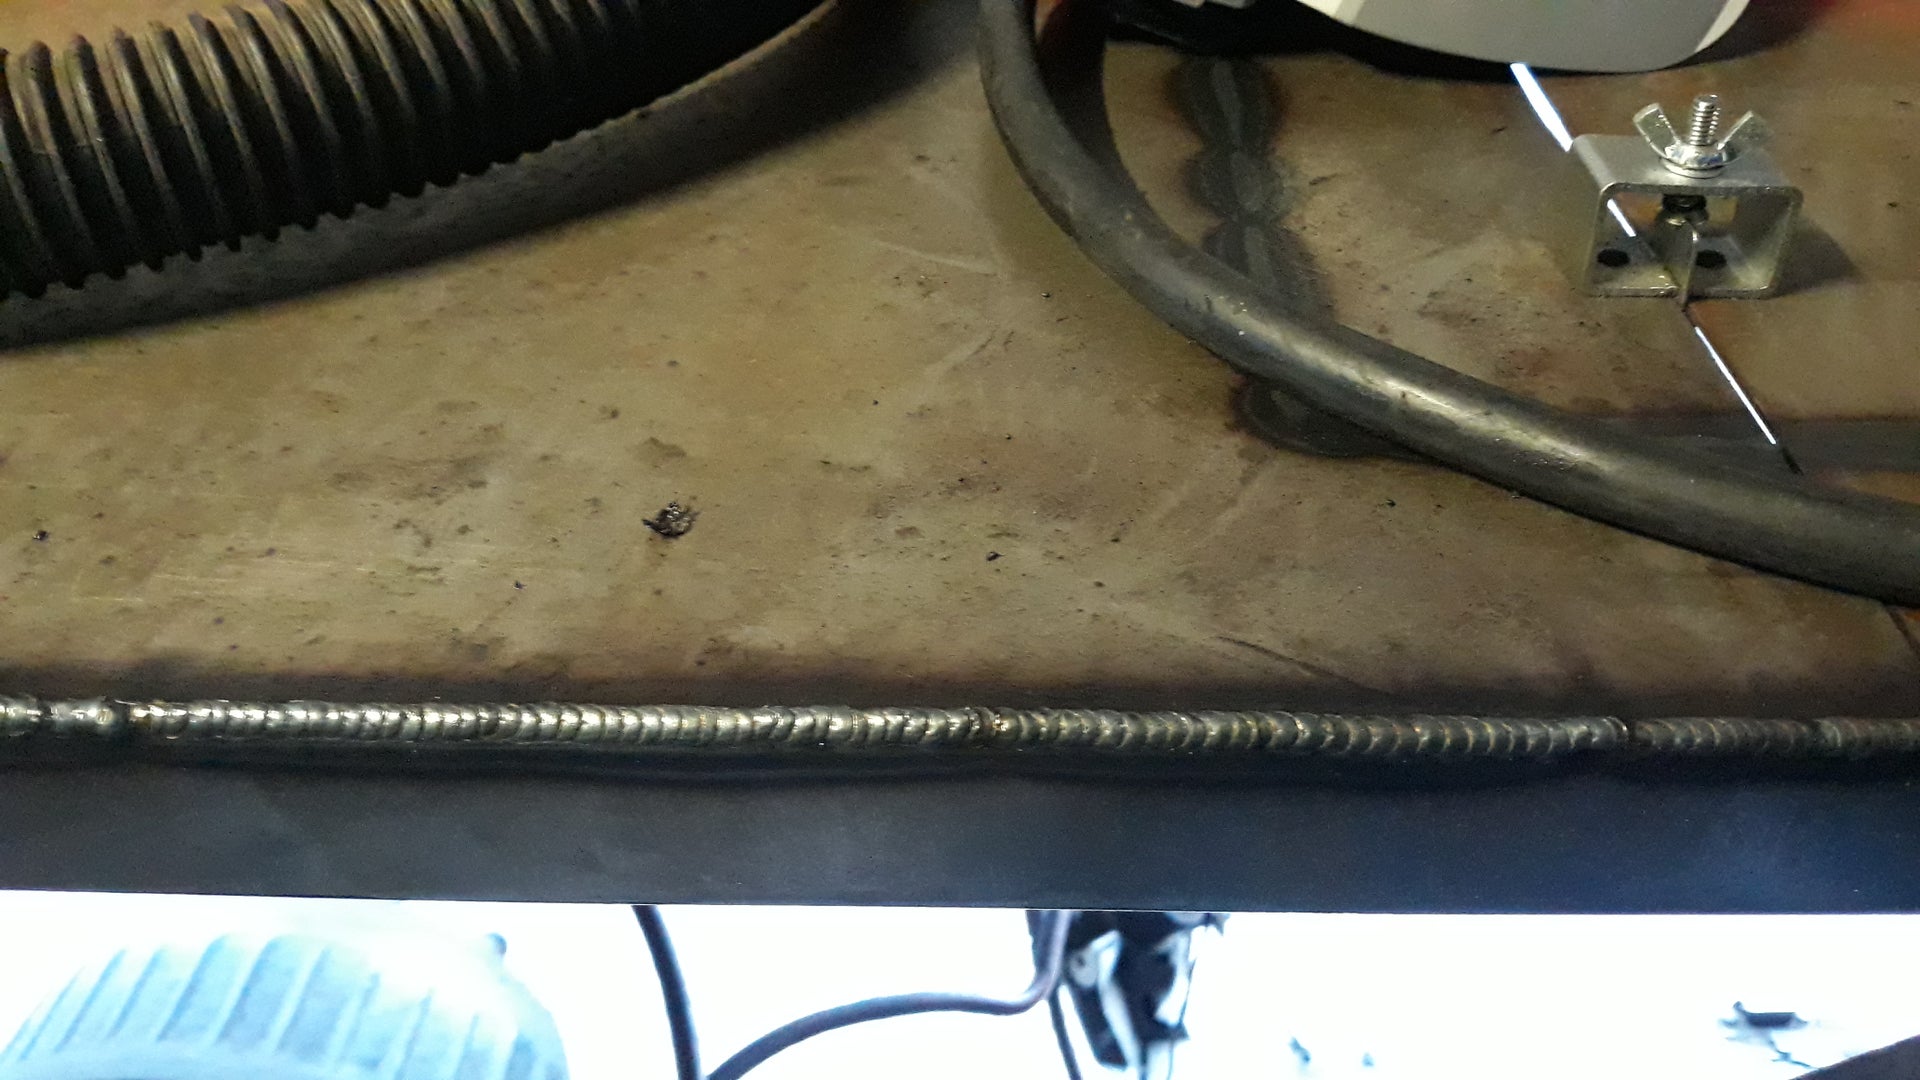
New MIG gun showed up the day before we left for OKC. Did some fingering around the connection today to see what the deal has been with the gas flow (or lack thereof). Pulled the old out and found the inner gas o-ring to be slice exactly as the last one. The top cropped off due to the hole drilled and tapped for the gas hose barb fitting. I didn't feel anything that would catch the o-ring, but hosed all parts with WD-40, gently worked the connector in, back out, in again, out once more to double-check, then seated it for assembly. Gas flow is now perfect.
Mostly overhead work and my undsteady hands aren't doing too bad. Curlicue weaves aside from a couple spots and the welds up top.. You can see where I put a little more heat into one run and warped the sheet a bit. Totally forgot that I meant to put all six clamps on before welding on the first side. Put six on the other side and had no trouble at all. The warped spot won't be any problem to clamp flush again. That last pic definitely shows the difference between the old and new guns. Same settings, but I had a trashes liner, shorted nozzle, and bad o-ring.
The heat stain map is going to be really cool when it comes time to drop the 2" washers in place. Can't wait to make this first floor layer nice and solid. I'm having to spray the weld joints with WD-40 and then shop vac it to pull the dirt out that has blown in. Crazy weather. The bus is about the only thing that hasn't gotten torn up by the wind. 60mph sleet hit here the day we arrived in Oklahoma. Yard looks like it was in a flood.
JNHEscher
Red Skull Member
Forgot to add how utterly badass it is to have a welding mask with induction sensing. Got a new work light with some crazy bright LEDs because I dunked my last one in the vinegar which had us in suspense when it sizzled for two days and wouldn't shut off. X mode on the Miller picks up the welding current in any light and doesn't cause the lens to flicker when sunlight hits it or I looked towards my light or catch a reflection of my light off some prepped steel. Straight up bliss when having to pretzelize myself to squirm into tight spot. Gecha one.
JNHEscher
Red Skull Member
JNHEscher
Red Skull Member
Not much to show, but tacked a bunch more on the curb side. The road side sheet lifted A LOT while burning it in because I got hasty. Curb side is staying flat. I knew some of the rear welding would be hell due to multiple layers of paint that I couldn't remove completely. Getting it done, though.
I take delivery of a Tuff Shed in the morning. We'll finally have some sort of shelter to store all the bus crap in the yard. Maybe even somewhere for me to stage parts of the build out of the wind.
I take delivery of a Tuff Shed in the morning. We'll finally have some sort of shelter to store all the bus crap in the yard. Maybe even somewhere for me to stage parts of the build out of the wind.
JNHEscher
Red Skull Member
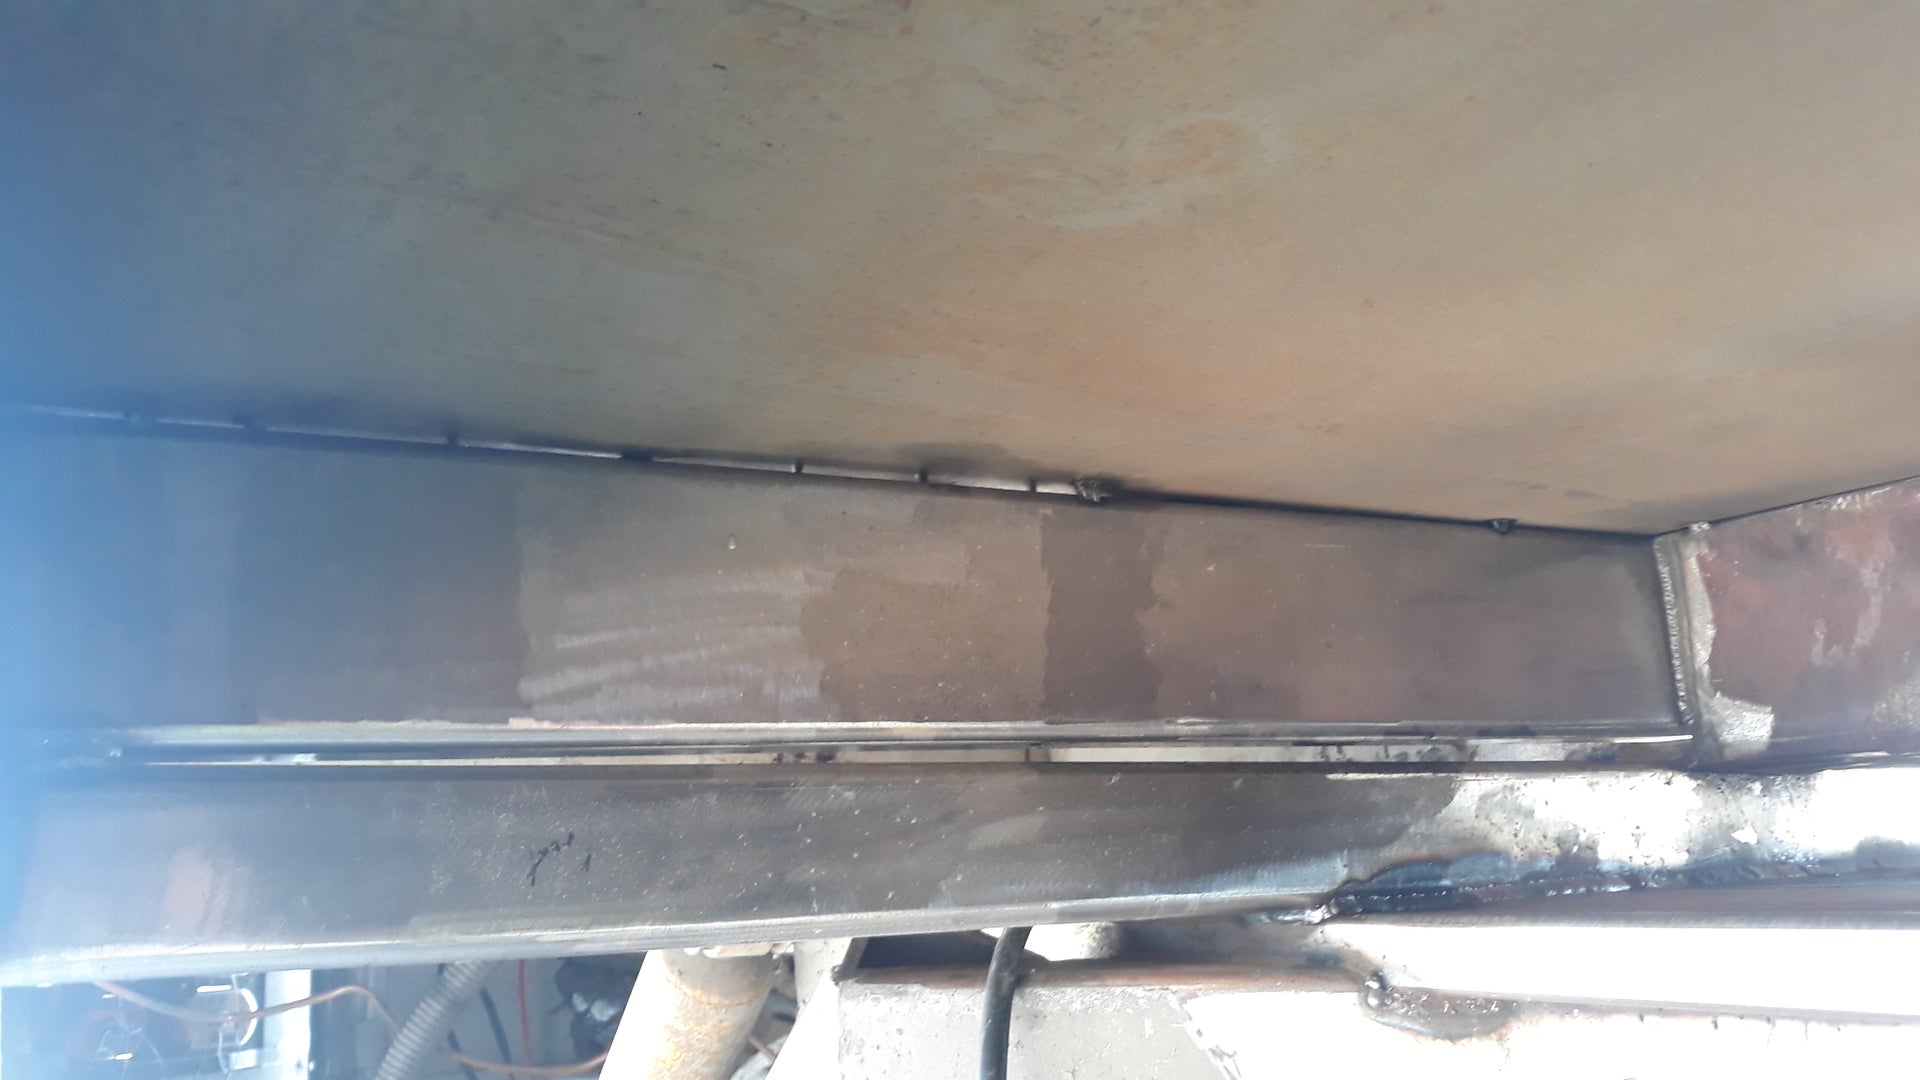
Slow at deciding what to do here. Cut some strap to weld over the gaps, maybe. Dunno if anyone remembers this back when I was fitting this 2x5 tube in. I was puzzled as to why the tapered gap was there and the fact the the tube matched the transverse grade after welded the two halves back together heat warped the tube just right.
While laying in the floor sheets, I gradually realized that the center chase is lower than the outer wall lips up front and transitions to the center chase being higher than the outer wall lips in the rear. Gotta deal with it.
The bottom gap opens up to about 3/4". The top is 1/4" at most. Too much heat for the sheet up top to fill that gap without major warping. Not really feeling like cutting down and de-rusting stuff I have on hand. May just have a steel shop cut fresh stuff for me.
JNHEscher
Red Skull Member
Squirmed my feeble self between the tag and drive axles to weld today. Most welds are turning out well. Others horrible. All depends on gap and whether or not I can see what I'm welding at all. Weaves are turning out the be a bad idea. Warping the sheets, so I'll be heating and shrinking some areas. Stitch welding is typically my go to, but figured I'd weave for the best coverage. Gonna have to stitch the rest. Where I stitch, there's little noticeable warp.
JNHEscher
Red Skull Member
Welded a bit more.


JNHEscher
Red Skull Member
Skeeters drove me inside for the night, I think. Neighbor watched our boys for a couple hours today, so I took the opportunity to work on my welder without little hands trying to grab at everything.
I tore down the new mig gun to replace the liner - change of plans. Discussed the many problems with Tweco torches with a fellow ESAB 215 owner. Ordered a Lincoln Magnum 250l 15-footer per his recommendation. Needs a couple simple mods before it's good to go. I've liked the feel of the Tweco 180 gun, but damn, some cheap assembly.
The first gun had a shorted nozzle, sticking trigger, torn up liner, and the inner o-ring cut at the gas input. Cut o-ring due to sharp gas input port in the tensioner and the trigger got stuck when cold. Liner was done for after my wire would burn back and melt to the tip each time my spool ran out. I could only pull the wire through the gun end each time which would tear up the liner with bent up wire ends that got yanked off the spool and stopped in the tensioner.
Second gun nozzle already started shorting. During the last round of floor welding, the wire started binding which was causing it to peck at the metal rather than feed smoothly. Wire tension isn't too tight. Maybe the Chinese Hobart wire flaking anyway? I would have to purge the gas for two five-second pulls every time I set up to weld for the first time in a day or two. Pics show the lead was hanging by the copper strands with a large gap between the gas tube in brass nipple. Apparently I was having to fill my gun handle with gas before I could weld without the beading fizzling. Inner tail shank o-ring was gut again upon removing the lead from the welder today. Guess I'll figure out how to chamfer the port inside the tensioner.
The ESAB machine has been badass otherwise. Tweco just needs some help in the assembly department.
JNHEscher
Red Skull Member
Back to working on this machine. Almost done with the bird coop, but the cat that took up residence under the bus killed our second pair of guineas that were replacements for the first pair killed in the hail storm.
I'm still running kinda slow. Headed up to Denver International Spine Center in the morning to discuss the possibility of getting PRP or PRF injections for my two blown discs.
Boys and I cleaned up the bus floor so that we could get to welding again. Both of our boys are now thoroughly interested in watching me tig weld from behind my cheaper helmets and taking pride in learning it. I'm going to set the oldest up for a little practice welding and the wife on some of the interior projects that need to pre-assembled like the closets and various storage pockets.
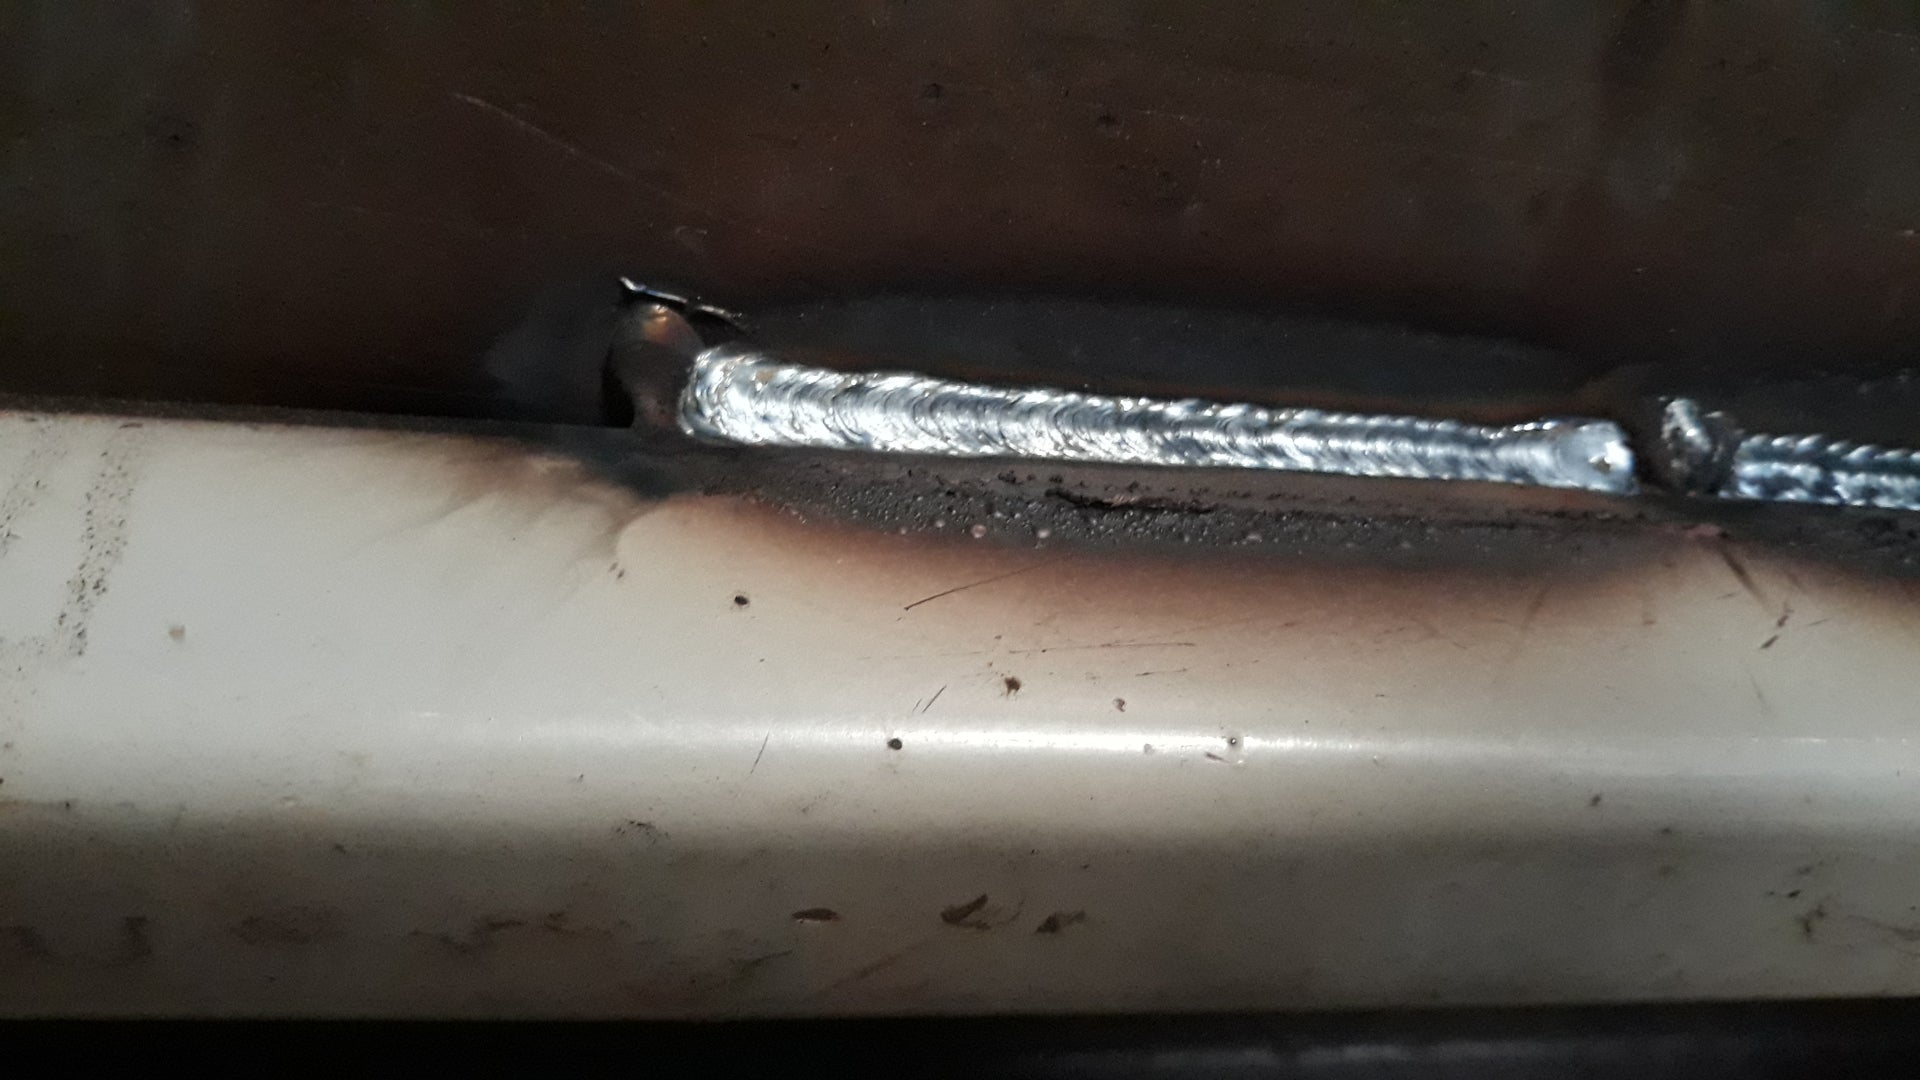
Ran my first few mig beads with the new Lincoln gun. Gas coverage is far superior. Much happier with this setup. Ran the stainless tig to close up the sheet seams at the very rear. Kinda ugly welds, but for as narsty as the steel has gotten and the flood of WD-40 I've drenched everything with, the welds came out pretty good. Much better than I was expecting, anyway.
The next sheet seam to weld up has been haunting me ever since I welded part of it from underneath. The center warped pretty badly. I could barely see what I was doing underneath there and ended up welding a gap that kept getting larger which ended up creating and gnarly hump. This is probably the next item to tackle. Alas, my motivation to get this floor done is regaining. Insurance is covering nearly $20k in damage to our home that was caused by the last hail storm. All new roof and such - taking a huge load off of me. To the bus.


I'm still running kinda slow. Headed up to Denver International Spine Center in the morning to discuss the possibility of getting PRP or PRF injections for my two blown discs.
Boys and I cleaned up the bus floor so that we could get to welding again. Both of our boys are now thoroughly interested in watching me tig weld from behind my cheaper helmets and taking pride in learning it. I'm going to set the oldest up for a little practice welding and the wife on some of the interior projects that need to pre-assembled like the closets and various storage pockets.
Ran my first few mig beads with the new Lincoln gun. Gas coverage is far superior. Much happier with this setup. Ran the stainless tig to close up the sheet seams at the very rear. Kinda ugly welds, but for as narsty as the steel has gotten and the flood of WD-40 I've drenched everything with, the welds came out pretty good. Much better than I was expecting, anyway.
The next sheet seam to weld up has been haunting me ever since I welded part of it from underneath. The center warped pretty badly. I could barely see what I was doing underneath there and ended up welding a gap that kept getting larger which ended up creating and gnarly hump. This is probably the next item to tackle. Alas, my motivation to get this floor done is regaining. Insurance is covering nearly $20k in damage to our home that was caused by the last hail storm. All new roof and such - taking a huge load off of me. To the bus.