What's new

Mad Hatter - YJ Unlimited

1tonhammer

Member
Joined
Jan 30, 2023
Member Number
6007
Messages
20
Dragging this build thread from P4x4....

Its now going back under the knife for rear stretch w/ trailing arms, upping the 5.3 to a chop cam'd L86 6.2.

I bought this jeep when I was 15 and have been steadily hacking it up

Old thread starts below -
 
I figured I'd start a build thread on doing a Gen 5 swap since I hadn't been able to find much info at all on the Internets. Got a 5.3 out of a 2017 GMC, came with an 8l90 8 speed tranny (which is for sale if anyone wants it.) Starting with whats left of my 87 YJ that was sporting a 4.2L w/ HEI, weber, ect and a Peugeot 5 speed that is surprisingly tough.

I've had this jeep since high school and slowly up graded this over the years and now I've finally acquired my own shop at home so let the games begin.

Current rig specs -
-4.2L HEi/webber blah blah blah
-5 speed Peugeot
-NP231 short shaft
-Front HP D44 sprung over w/ 4" lift YJ springs, 5:38s all chromo, CTMs, Auburn E locker, Hydro assist ect
-Rear D60 sprung over XJ springs 5:38s, detroit, disk brakes
-39.5 Iroks on home brew beadlocks

Plans-
-Gen-V 5.3, stand alone harness and hot tune
-all new wiring harness, been chasing electrical gremlins since I bought this thing
-Turbo 400 tranny
-Either Hero or Atlas, leaning toward Hero
-no plans on the suspension but i'm sure i'll break down and back half it
-cage


Pics from college in Moab sprung under w/ waggy axles and spools -
Wx8uRa6.jpg


n56rw4t.jpg


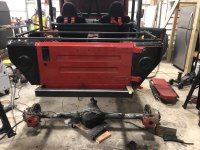
The rig as of the late, poser pics

AZ9K1Wy.jpg


yyo7A89.jpg


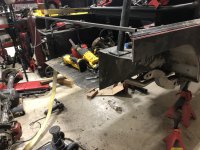
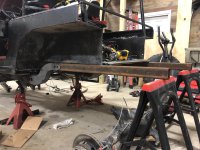
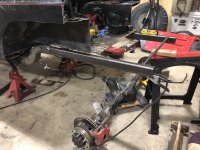
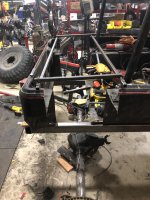
And its on, tear down and cage
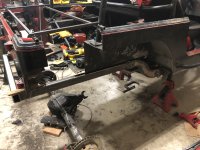
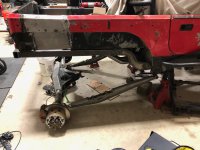
SdXWlmf.jpg


Its gone

B1dages.jpg


my first attempt at bending w/ my affordable bender

1V0UlsI.jpg


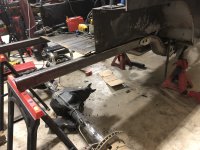
then broke the fu*k out of it

1Fk6E7D.jpg


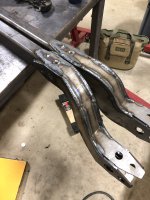
Fixed, new bracket and new 20 ton jack vs 8 ton

0iNQMj8.jpg


Dash and all the fu*kin wires gone

yXt86dR.jpg
 
then some major changes were made....

Scored a deal on a front D60

fafRrKk.jpg


chopped the leaves and old D44 off and ordered link material :smokin:

wj0GMtR.jpg


out with the old

32Rvvbc.jpg


broke out the ghetto fab bender and bent up some hoops for the airshocks or coilovers, whichever i decide, leaning towards airshocks because of price

f8MTD2t.jpg


Hoops mounted and threw some gussets on these, I'll probably add more tube once I locate the shock mounts

lYCL3xF.jpg
 
Hacked all the brackets off the D60, got 5:38s and a Detroit. Ended up destroying the spindles getting them off so had to ebay some.

Scored some 18" BNIB Fox airshocks on FB for the cheap, this is mocked up without and w/ tires.

got my t case adapter today, should have the link material and engine wiring harness tomorrow and hopefully get major progress this coming weekend...

sKIdUkF.jpg


rR8uKQ1.jpg
 
got some pretty good work in on the 3 day weekend

got the 3 link where i want it, re did the shock mounts and had to make my own track bar bracket cuz I never did get the barnes one i ordered, also had to make the frame upper link mount because the barnes bracket was too big and right where the header collector is...

v7Ol6VZ.jpg


should have pretty salty droop travel

RWILezg.jpg


welded all the links and axle brackets and painted

49iNcQ3.jpg


1tN7byt.jpg


bent up a tube to start the X case mount and ran out of time, if i can finish the X case mount and roll the tub for beliner i can start running wire and hopefully get ready to fire this thing
 
got a decent amount done this weekend, mocked up the intake (still need a MAF) and bent a spreader bar for the shock hoops w/ flanges for removal. bolted up the NP205 checked clearances and pulled the motor right after this pic

ROBIhaF.jpg


word to the wise, bleed your airshocks before you attempt to pull the motor, learn from me. it got crazy when i picked the motor up with the lift, ended up pushing the motor motors up past the motor and the bumper was about chest high.

anyway, finshed welding a few things in the front, built a X-case cross member / hoop thing to protect the hang downy thing on the 205. then shot it all low gloss black

PbHLEIL.jpg


got the last few things hooked up on the motor, belts on ect almost ready to go back in, Waiting on the spud shaft from AA for the X case and shifter kit from NWF.

CJ4sFpB.jpg


Wife informed me she'll be leaving wednesday to sunday this week, should be getting a ton of shit done this week/weekend.
 
Got a little wrench time in this weekend, got the NWF cable kit for the 205 and installed it. got the missing spud shaft from AA finally and stabbed the Xcase. Bent up a crossmember to hold up the tranny/x case and got everything in and holding it's own weight.

decided mounting the ECM to the shock hoop was too vulnerable, welded a plate to the "inner fender" on the tube fenders to hold the dirty dingo ECM bracket so it's up out of the way for the most part. I'm going to use some rubber like gt1guy was saying and maybe a little plastic shield or guard to keep the rocks from hitting it.

VwxK5uz.jpg


5ZbyuUz.jpg
 
Back to working on the heap now that hunting season is over and all my traveling for the foreseeable future is done, i did break my hand on the last trip snow boarding which is proving to be difficult to wrench. I think I got the airshock pressures figured out after extensive research here on pirate. I got the front axle complete hub to hub, engine in and most accessories in as well. I forgot how much i hate wiring, i bought a 22 circuit universal harness and wish i would have only bought the 10 or 12 circuit harness, this is my hell. still need to mount the coolant over flow, PS reservoir, and few other odds and ends. got the console built and mounting the shifters. more pictures and hopefully progress this weekend

XgEdxab.jpg


3qwKAUM.jpg


zVN8WxM.jpg
 
got a little more 1 handed wrenching in this weekend, kinda hoping we get quarantined for 2 weeks, i'd get so much wrenching done. dash/console coming together and grill hoop and stinger burned in. really debating re-doing my shock hoops, I think the angle is too much for the shock mounts and it'll eventually bend the shock eyes, i hate doing re work...

edZDfHl.jpg


ZcvBCFP.jpg
 
probably should have taken more pics but its hard slow down when you're makin progress. She left the shop under her own power yesterday, pretty cool.

vid -

It does sit up higher than planned, i do have brand new springs in the rear, once they sag and break in a little i'll lower the front to match, my OCD has to juice the air shock up to match the rear. they have about 8.5" of stem showing and the plan is 6".

ozQeiio.jpg


F4DJUDt.jpg


tried to keep the interior simple, still have some loose ends to tie up, clean up some wiring and so on

jnUKP9Q.jpg


1g13qLV.jpg


ynx9qME.jpg


TvtDsBh.jpg


ended up doing away with the cross bar on the shock towers so i could put the hood back on. i think they're braced good enough, they tie into the frame a 3 places and are guesset'd to the frame.

Still trying to decide on mufflers, ordered a 180 thermostat, it was getting a little hot but i re plumbed the steam line and it stuck around 210 but i'd like it lower than that.
 
Ok now the thread is up to current times as of 1/31/23

Started the backhalf'ing this weekend, chopped the rear frame off, no going back now...

6KGXLc6.jpg


Using the YJ backhalf kit from Artec, didn't read the directions, apparently you have to use a 1" body lift so now i'm waiting on the amazon guy to bring me a poly 1" body lift kit. going to unbolt the body and lift it to start on the rear frame.

Also need the back half of a YJ tub if anyone knows where one is. Mine is Comp cut right now but wouldn't mind going back with actual corners. plan is to stretch it 15"
 
I bought some 18" fox coilovers for the front, I did not like the way the airshocks wheeled. Looking at them now I think 18"s might be too big but i'm gonna give it a try first.
 
Awesome! Can’t wait to see the progress. Slowly working on a yj unlimited stretch with my sons Jeep. Motobilt has their blank stretch corners on sale with free shipping if that’s something you’re interested in.
 
Thanks man, I’ll check that out.

Got some solid progress in today since it was a snow day.

Chopped the body, mocked up the back half brackets and frame rails. Everything looked good so I burned them in
 

Attachments

  • BD8EAD46-E6E3-42DF-9C87-446F876EE58A.jpeg
    BD8EAD46-E6E3-42DF-9C87-446F876EE58A.jpeg
    3.5 MB · Views: 35
  • B6779DA8-D057-4DBF-8B9E-9DD9F16EBD37.jpeg
    B6779DA8-D057-4DBF-8B9E-9DD9F16EBD37.jpeg
    3.1 MB · Views: 32
  • 8B572349-74FA-4A43-A0E4-7F790BE96386.jpeg
    8B572349-74FA-4A43-A0E4-7F790BE96386.jpeg
    3.1 MB · Views: 30
  • 8F9D29B8-A1CB-4225-A1D2-81937135110B.jpeg
    8F9D29B8-A1CB-4225-A1D2-81937135110B.jpeg
    1.5 MB · Views: 34
Snow day #2x got the frame welded up with a stubby bumper. I decided to just extended the body instead or trying to find another tub to chop up. Going to have some 15” sheet metal chopped up for the body panels. After adding that length to the frame I’m gonna weld some extra fish plates to strengthen the tie in, the Artec kit only attaches to 5” of frame and with the added length I think I’ll need some extra support.

No idea on where to start with the trailing arms so off to do more research
 

Attachments

  • EA7AE9FD-DC7C-4489-8553-BF36ADCBF03A.jpeg
    EA7AE9FD-DC7C-4489-8553-BF36ADCBF03A.jpeg
    3 MB · Views: 33
  • 145D1D22-F9D3-4109-BD60-AC046FB809E1.jpeg
    145D1D22-F9D3-4109-BD60-AC046FB809E1.jpeg
    3.1 MB · Views: 35
  • C7F19D4A-985E-4500-B54E-A56F80753C5E.jpeg
    C7F19D4A-985E-4500-B54E-A56F80753C5E.jpeg
    1.9 MB · Views: 33
  • A83C5DC8-AA5F-4A04-8D8C-6CA757A5B483.jpeg
    A83C5DC8-AA5F-4A04-8D8C-6CA757A5B483.jpeg
    3.2 MB · Views: 38
probably should have taken more pics but its hard slow down when you're makin progress. She left the shop under her own power yesterday, pretty cool.

vid -

It does sit up higher than planned, i do have brand new springs in the rear, once they sag and break in a little i'll lower the front to match, my OCD has to juice the air shock up to match the rear. they have about 8.5" of stem showing and the plan is 6".

ozQeiio.jpg


F4DJUDt.jpg


tried to keep the interior simple, still have some loose ends to tie up, clean up some wiring and so on

jnUKP9Q.jpg


1g13qLV.jpg


ynx9qME.jpg


TvtDsBh.jpg


ended up doing away with the cross bar on the shock towers so i could put the hood back on. i think they're braced good enough, they tie into the frame a 3 places and are guesset'd to the frame.

Still trying to decide on mufflers, ordered a 180 thermostat, it was getting a little hot but i re plumbed the steam line and it stuck around 210 but i'd like it lower than that.

I'd think about adding something back in. All 3 of your connection points to the frame are in about the same plane, so the shock will constantly rock the hoops back and forth with every hit and crack.
 
Agree with that too. Tube clamps to make it removable work better for you?

If you don't want something side to side can you do from shock mounts angled back to firewall. Possibly tie it in to dash bar or A pillar legs somehow down the road.
 
I have a crossmember already made I'd just have to chop the hood to clear it. i'll just do that.

got a little work done this weekend, installed the poly 1" body lift.

made new body mounts for the new rear section of frame and burned them in

qKT8Khp.jpg


1uGgbBX.jpg


chopped the back of the cage off to start over for the longer body. I hate cutting up hours of previous work but thats part of it I guess.

Ntuqb9i.jpg


Ordered trailing arms from Ruffstuff, axle link brackets from Barnes and some other odds and ends from Barnes and TMR.

No body makes a 3" wide frame link bracket for the upper trailing arm mount so i'm going to whip up my own.
 
Back to working on the heap now that hunting season is over and all my traveling for the foreseeable future is done, i did break my hand on the last trip snow boarding which is proving to be difficult to wrench. I think I got the airshock pressures figured out after extensive research here on pirate. I got the front axle complete hub to hub, engine in and most accessories in as well. I forgot how much i hate wiring, i bought a 22 circuit universal harness and wish i would have only bought the 10 or 12 circuit harness, this is my hell. still need to mount the coolant over flow, PS reservoir, and few other odds and ends. got the console built and mounting the shifters. more pictures and hopefully progress this weekend

XgEdxab.jpg


3qwKAUM.jpg


zVN8WxM.jpg
what headlights and turn signals are those?
 
SPL 105W Brightest 5''x7''/7''x6'' Projector Led Headlights Sealed Beam H4 Plug H6054 H5054 with DRL Compatible with Jeep Wrangler YJ Cherokee XJ S10 Blazer Truck Ford Van(Black Pair) https://a.co/d/2Ppy22r

Screenshot_20230226_175521_Amazon Shopping.jpg


Nilight 2PCS 42W Flush Mount Amber LED Light Pods Upgraded Spot Flood Combo Beam Driving Light LED Work Light with 16AWG Wiring Harness Kit-2 Leads,2 Years Warranty https://a.co/d/inFRlTF

Screenshot_20230226_175443_Amazon Shopping.jpg


Looks like these or similar ones from Amazon or Nilight, online LED, etc.

Have the round with DRL and turns integrated and love them in my CJ
 
Sweet build! Didn't catch it but did you leave the front axle full width?
 
Now that its not hot as balls and my daughter is a few months older, i'll be back in the shop.

is there any good trailing arm threads out there? I'm out of my element on setting these up.
 
Top Back Refresh