What's new

Lets tear apart a perfectly good truck

Hey, look what I found in the box that the AC compressor came in!

IMG_20230218_101003315.jpg


Got the leak in the power steering pump taken care of. Filled up the engine and trans with oil, and about an hour later find this...dammit

IMG_20230218_161928658.jpg


Nice part about not having driveshafts in it yet, only took about an hour to get it out.

IMG_20230219_102906238.jpg


I had a feeling it was this countershaft cap, I left it alone initially because it wasn't leaking before, should've known better.

IMG_20230219_103029837.jpg


Got all the silicone out, just a tiny pinhole, looks like someone used a punch or screwdriver to drive the plug in at some point. Hopefully it gets here by the weekend so I can spend all day cursing at it trying to stab the trans back in.

IMG_20230219_105226385_HDR.jpg
 
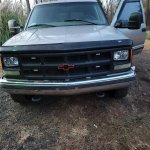
All put back together. Nothing fits great. But, it didn't before either, actually think the headlights are better then before. But that's to be expected with all aftermarket parts. Need to clean up those headlights I guess, They look pretty nasty next to those new park lights.
I've been trying to figure out what to do for headlights and the front turn signals on the Yukon and K2500. Both vehicles the lenses are pretty much shot and I haven't been impressed by the aftermarket stuff I've seen so far.

I've debated switching back to the '88-'89 style with glass lenses or the work truck style, again with glass lenses. I fucking hate how the plastic lenses fog over and deteriorate.

neqrkfp3in481.jpg


1661988297-1.jpeg
 
I'm a fan of the 88-89 headlights myself. I have an 88, I like the glass lenses and the ability to adjust the low and high beam independently. I think I read somewhere the core supports are different for those trucks, vs the scottsdale models. Never looked into it though.

Maybe you could mount some of those SS3 (or rigid, or whatever) lights like I put in the bumper as headlights, put the SAE ones for your low beams, then some non-sae ones for the high beams. Probably get three lights on each side, could do a yellow SAE, a white SAE, and a white non SAE for a high beam.
 
Got the countershaft cap in, and the tranny/tcase back in the truck. I left it sit on the floor for a couple days to make sure it wasn't leaking before I stuffed it back in.

IMG_20230225_134403989.jpg


Had to pull the bulkhead connector back apart to put a wire back into it that I had pulled. I never really looked at the wiring diagram for the reverse lights. Its get power from a fuse inside the cab, runs out the bulkhead connector, down to the trans where the park/neutral/ reverse switch is, back up to the bulkhead, not sure what it does inside the cab this time, then out the bulkhead again to the rear of the truck. I had pulled the wire out of the bulkhead where it came out the first time (straight from the fuse) because it is labeled in the FSM just as an ignition fused input. And it went to the trans harness that got yanked.

So pulled the connector out, put a wire back in where it gets power from the fuse. And pulled the connector out of the bulkhead where it comes out of the cab the second time. Those two will run down to the trans for the backup lights.
So now it'll get power from the fuse, go out the bulkhead, down to tranny switch, back up to the connector that goes to the back of the truck. Just waiting on the pigtail piece to plug into the switch on the trans.
 
I'm a fan of the 88-89 headlights myself. I have an 88, I like the glass lenses and the ability to adjust the low and high beam independently. I think I read somewhere the core supports are different for those trucks, vs the scottsdale models. Never looked into it though.

Searching around, I found these units from Holley: Holley Classic Trucks 07-115 Holley Classic Trucks GMT400 Dual Headlight Outer Lamp - LH

I could make up whatever mounting is required to put them on my trucks.

This was just the first one that came up in my search not a buying suggestion lol

As BustedCrank says, I'm pretty sure that's just the work truck grille (like the white truck I posted) in dark plastic.
 
Starts faster then my phone starts recording apparently, I hit the record button before the key. Took longer then expected to get it to fire, I had filled the filter up, and also used the fuel pump to prime it. I was starting to think i needed to check the valve lash since I put springs in it. But once it caught it ran pretty smooth right off the bat. Was a little nervous as the oil pressure gauge took at least 30 seconds to show pressure. I had filled the filter almost completely full before installing it. But as I was reaching to kill it, it went up and pretty much pegged the gauge full. So i let it run for about half an hour, this was the first time its really ran in over ten years, other then on the floor for 15 seconds or so before I started this ordeal.

Didn't smoke near as much as I thought it would, in fact, hardly anything on startup. And its quieter then the 6.5 in my blazer.

Tach isn't working at all, and the alternator isn't charging. So I need to look into that, Should just get a new one anyway cause it has the same squeak it had on the 454, which I had forgotten about until it fired up today!

Fuel pressure was only about 10lbs, Not sure what to think about that yet. Could be not enough fuel in the tank, as I only dumped about 4 gallons in it that I had. Wonder if the truck it came out of had an airdog or fass setup in it and theres a bigger ofv in it.

Clutch seems to work, no shafts in it yet. But I could easily get it in gear after pushing the clutch in, when I did that noticed the speedo going, so thats good. Will need some adjustment, as at idle in 4th gear it was reading about 100mph!

Noticed a little seepage on the 90 on the backside of the needle valve for the fuel pressure gauge, not enough to drip, but was wet.

Never got warm enough to open the thermostat, need to get it open to clean all the rust out of it, Popped the radiator cap off and all the water is pretty rusty looking, Once I get it to cycle i'll drain it. Also a little leak on the lower radiator hose, not sure if its my welded adapter, or the shrink clamps, but its got a little drip in the transition somewhere.

It's got some issues to take care of, but I'll call it a win for today.
 
Fuel pressure was only about 10lbs, Not sure what to think about that yet. Could be not enough fuel in the tank, as I only dumped about 4 gallons in it that I had. Wonder if the truck it came out of had an airdog or fass setup in it and theres a bigger ofv in it.
Try pinching the return line and see if the fuel pressure goes up. If it does, pull the overflow valve apart and stretch the spring out a bit. If that fixes it, order a new OFV. The springs tend to get weak over time.
 
Try pinching the return line and see if the fuel pressure goes up. If it does, pull the overflow valve apart and stretch the spring out a bit. If that fixes it, order a new OFV. The springs tend to get weak over time.
Good call, I'll give that a try.
 
Finally got the reverse switch wired up and working. Pulled the plug on the back of the alternator to make sure I had the wire in the right spot for the tach signal, it was good, plugged it back in, and it started charging and the tach works now. So must not have been plugged in all the way or something. I like those kinds of fixes. Still need to grab a new alternator though, as this one sounds like there's a bunch of tweety birds in there.

Dug the rear axle that matched the front out of the bed of the truck that it's been sitting in since 2015. Never spent much time looking at it when I got it. Needs new parking brake cables, got those ordered. Judging from the pictures of the different ones on Rockauto, it appears this is a cab & chassis axle. Also ordered the flange yoke for the driveshaft.

IMG_20230305_112431661.jpg


Was staring at it for a minute before I started ripping all the stuff off and wondered what that teal-ish plug was for. It's got sensors on both wheels so I wouldn't think that it has a speed sensor on the carrier as well. No-way I got lucky enough to get one with an electric locker in it. But I threw 12 volts to it, and hot damn, it locked up! Guess I need to figure out a spot to put the switch now.

IMG_20230305_112624605.jpg


Had to move both the spring perch and the shock mount 3/4" out on each side. Was able to re-use the spring and shock mounts after cutting them off with the death wheel. Ready to sling it under.

IMG_20230312_112328887.jpg
IMG_20230312_112449546_HDR.jpg
IMG_20230312_143318601_HDR.jpg
 
I need to make a decision. As it sits, with 10psi in the airbags, it's 3/4" lower in the rear then the front. I can get it level with 25lbs in the bags. Do I want to leave 25psi in them and call it good, or lower the front down. To lower the front I could cut one coil out, and that would drop the front 1.75". Then get a shorter lift block for the rear to lower it 1". I currently have 5" of uptravel in the front, so that would bring me down to 3.25", and I would have to get an adjustable track bar to center the axle again. I would prefer to have the truck lower as a whole, but at the same time I like the 5" of uptravel vs 3.25". I have no idea what how much uptravel a stock super duty has up front, I'm gonna try to remember to look at one at work this week and see. Being able to only run the minimum pressure in the bags would help with the ride as well, but even with the 25 in it, it will be better than it was. I was running 40 or so in them all the time since I put the 37s on it, because I had to crank the bars up front to clear the tires, so I added air in the rear to get it to sit level.

The lazy in me says just to leave 25lbs in the bags all the time and call it a day.
 
Anybody have any real world experience between the bilstein 5125 shocks with the different valving?

They have two different options in the length i need. One has valving at 170/60 the other has it at 255/70.

At first I was thinking using the 255/70, but wonder with the airbags if should just go with the 170/60.
 
Is there anything stopping you from just cutting half a coil or so? That way it brings it down to almost level without having to touch rear and you get to keep more up travel.
 
It wouldn't sit right in the bucket if you take anything other then a full coil at a time. Would it be an issue, not sure. But half a coil would put the end not even touching the coil bucket.
 
Could, just don't want to! Current block is 2.75. Would need to get a 3.5" block, which is easy enough to find I'm sure.
 
just use 25lbs of air in the bags. See what it rides like.
if it sucks, revisit the suspension.
 
Still tinkering away with it. Got some f350 cab and chassis ebrake cables, at least that seemed to be what was on it as far as what the brackets looked like on the old ones. Connected those to the GM ebrake adjuster piece that i cut off and made work with the new cables. Then used a piece of rod from the other side of the adjuster to reach to the cable coming from the brake pedal.

IMG_20230318_165431354.jpg


Was able to put new brake line fittings on the ends of the hard lines on the axle to connect them to the GM rear brake line T. I ended up shortening up the shock mounts on the axle so they didn't hang so low. Went with Bilstein 33-230382 shocks, they are the 170/60 valving. Figured the softer valving would be fine with the airbags having 25lbs in them.

IMG_20230402_112315876.jpg


Got the brakes all bled, spent what seemed like a couple hours bleeding the hydroboost setup. Will wait to see if that was succesful or not when it pulls out of the garage. I used the method of engine not running, turn it from lock to lock, back to lock five times, then pump the brakes three times...do all that about a hundred times it seems.

Wheels took me forever to settle on. I liked the weld super singles that were on it. But, new ones are only in a 20 or bigger, and I didn't want to go that big. Plus they are about 1800 a piece now! Also, am over having polished wheels, they looked good on this truck, but were so much work to keep them up with the shit they put on the roads here in the winter. Could drive it ten miles down the road and would have to spend hours polishing them to get them back in shape. So a non polished wheel was a priority, and my other stipulation was no fake bolts, I have never liked the fake beadlock look. That took out the majority of the wheels out there. I do like the spoked AEV wheel, but its only for 8x6.5, and I wasn't going to run spacers/adapters. I wanted to run 17s but couldn't really find anything I liked. Also wasn't sure if a black wheel would look right on the truck without blacking out all the chrome thats on it. So I ended up going with an 18x9 Ultra Butcher with the bronze face and black lip. Wrapped it with a 285/75 Trail grappler. Picked up some black splined lug nuts and two sockets for them so I could leave one in the truck and one in the toolbox.

IMG_20230402_151354699.jpg


Never done it before, but figured I'd try beads to balance them. I went with ceramic airsoft bbs. Decided on 8oz per wheel. Which ended up being about 1.5 paint can cap fulls per tire. These wheels didn't have the markings on them for runout balancing, and turns out the tires didn't have the red dot to correlate with it anyway. So yellow dot to the valve stem it is.

IMG_20230402_132953085.jpg
IMG_20230402_131423027.jpg


Also the hub caps that came with the wheels where friggin yuge. They stuck out far enough you'd bash your shins walking by. So I opted to go without, had to paint inside the hub bore though, but that was easy enough. I think I like it without the caps anyway.
IMG_20230402_163609903.jpg
IMG_20230402_163602056.jpg
IMG_20230402_163550393.jpg


Tires measured 34 3/8" mounted on the front of the truck, right about where nitto's website said they'd be.

IMG_20230402_163823739.jpg


Wheels ended up being a lighter bronze then I anticipated, they actually match fairly well in person, the camera makes them look pretty dark in most pictures. Maybe it will be better once its outside. Got the hood back on, had to loosen up the core support bolts and shift it over about a quater of an inch to get fender to hood gaps lined up. Used a donaldson B085046, which is an 8.5" dia version of the BHAF all the dodge guys like to run. Still a little big for where its at, but I smushed it a bit to make it fit.
IMG_20230402_175439229_HDR.jpg
 
Wheels look way better without the center caps. I don’t think the beads are very good, but those tires should be pretty good balanced without any help.
 
Top Back Refresh