1997 Toyota 4runner Limited SAS with F150 tank swap (NO BODY LIFT). Below is the parts list and information regarding this swap as well as resources and links for the products. Vehicle is running and driving and can hold WOT up to 65mph no problem, no sputters or anything.
Parts List:
Hoses (Be sure to measure, lengths are a guideline and I didn't use all of what I got):
Wire identification:
Factory Toyota Line Sizes (I didn't adapt line sizes, hoses were more secure this way on the Ford sending unit):
Sending Unit Info:
It reads backwards, a full tank is below empty.
Reference Threads:

 www.pirate4x4.com
Eimkeith Bracket:
 eimkeith.com
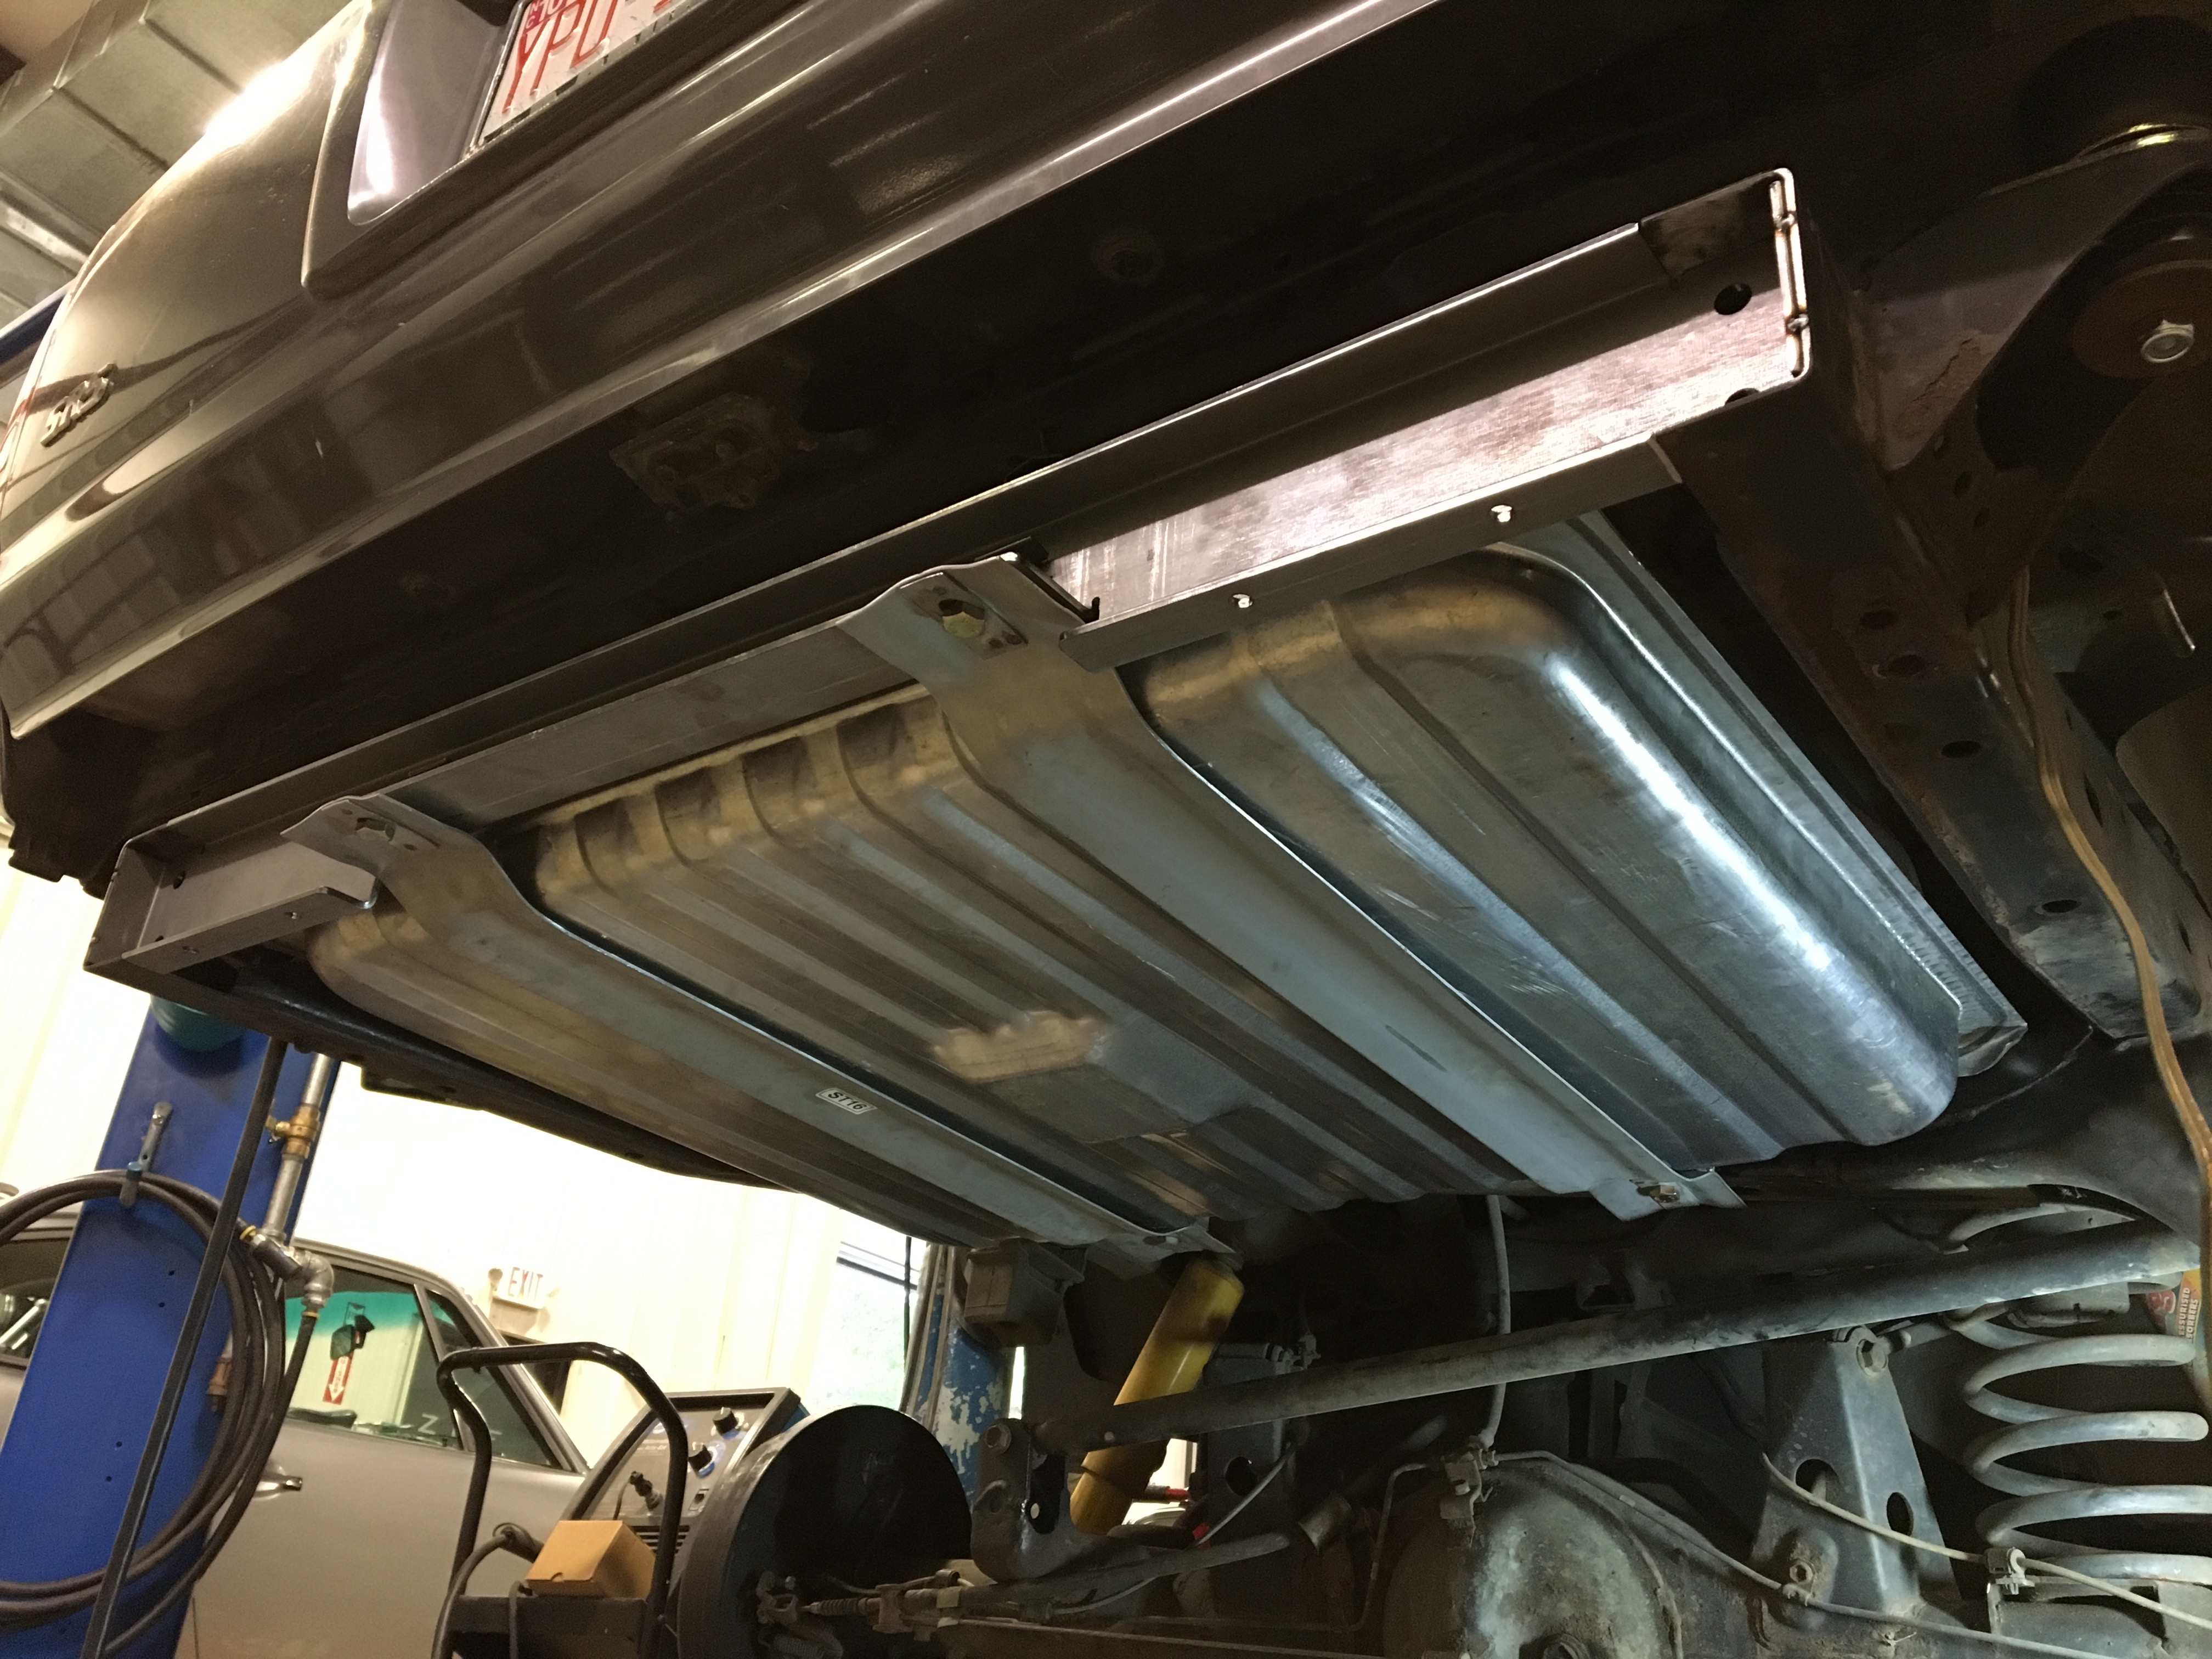
Cut your spare tire carrier crossmember out and grind it all flush.
Cut off spare tire metal brackets with the isolators under the rear hatch.
Remove old tank, undo all the bolts, under the passenger rear seat there is a hatch to access the top of the factory fuel tank to unplug it.
Cut old lines, I cut the hardline at the bend rearward of the fitting, then used the factory spots for the canister and return lines.
Old filler neck can be removed by unbolting it underneath and in the wheel well then pulling it out of the door receptacle.
Cut your wheel well to fit your new filler neck.
Cut the filler neck where it is 2" OD (near the top where it begins to neck down).
Make a harness, reference your spectra pamphlet for harness labels. (I will try to remember to post a picture of it here also).
Cut factory toyota plug off, splice harness into Toyota wires using wire reference above.
If you don't cut the factory body support out your tank will contact that first, I reused the foam isolators from my spare tire brackets and pasted them there, but this leaves the rear of the tank not contacting anything, so I used some kneeling pad at the rear of the tank so the tank has 3 soft points of contact against the underside of the body, I did this to get it as far up as possible and also secure the tank better.
Mount tank to your vehicle, run lines, put filler neck into receptacle, plug in harness, profit.
Parts List:
Ford Fuel Vapor Valve E7DZ-9B593-A
Ford F6TZ-9B076-AA Fuel Vapor Valve Seal
Spectra Premium F1G1FA Fuel Tank Assembly (comes with pump, sending unit, and straps)
Roll over valve and adapter fitting for breather line to stock filler neck (what I used, probably better solutions).
Hoses (Be sure to measure, lengths are a guideline and I didn't use all of what I got):
Dayco 80306 2" ID flexible filler neck hose. (I suggest something different, this thing is stiff as fuck)
1/4" ID EFI fuel line - 14 ft
5/16" ID EFI fuel line - 7ft
5/8" ID fuel line - 3ft
Wire identification:
Factory wire labels (worked for my model year 1997)
Blue/Orange = Pump positive
White/Black = Pump ground
Yellow/Red = Fuel gauge positive
Brown = Ground
Black/Red = Fuel Light (unused)
Note: Factory sizes look anywhere from 14ga-18ga, I didn't measure, I used 12ga on my entire harness extension that's about 5ft long)
Factory Toyota Line Sizes (I didn't adapt line sizes, hoses were more secure this way on the Ford sending unit):
5/16 is fuel supply line
1/4 is fuel return line.
1/4 line for canister vent.
5/16 approx. breather hard line (I used a 10an (5/8) barbed roll over valve, the 5/8 line fit over the factory breather hard line OK, 5/16 would be better)
Sending Unit Info:
It reads backwards, a full tank is below empty.
Option 1: Bend the arm 180* so it reads more correct, but will never be full apparently.
Option 2: Use the Speedway unit to modify the signal to your factory cluster (what I am doing).
Option 3: Mod the tank and put the Toyota sending unit in it (doesn't look very fun to me).
Reference Threads:
Reference Thread I will be basing this off:
Old ass PBB thread for another reference:
Who used a Ford gas tank in the toyota?
Eimkeith Bracket:
Eimkeith F150 tank bracket if you wish to go this route (check how your bumper mounts first, if it slides over the inside of the frame this
won't work).
Fuel Tank Relocation Mounts – 3rd gen T4R
OK, so if you've been following this thread on T4R, you know a bunch of us 3rd gen 4Runner guys are relocating our fuel tanks from the factory location and repl
General Steps:Cut your spare tire carrier crossmember out and grind it all flush.
Cut off spare tire metal brackets with the isolators under the rear hatch.
Remove old tank, undo all the bolts, under the passenger rear seat there is a hatch to access the top of the factory fuel tank to unplug it.
Cut old lines, I cut the hardline at the bend rearward of the fitting, then used the factory spots for the canister and return lines.
Old filler neck can be removed by unbolting it underneath and in the wheel well then pulling it out of the door receptacle.
Cut your wheel well to fit your new filler neck.
Cut the filler neck where it is 2" OD (near the top where it begins to neck down).
Make a harness, reference your spectra pamphlet for harness labels. (I will try to remember to post a picture of it here also).
Cut factory toyota plug off, splice harness into Toyota wires using wire reference above.
If you don't cut the factory body support out your tank will contact that first, I reused the foam isolators from my spare tire brackets and pasted them there, but this leaves the rear of the tank not contacting anything, so I used some kneeling pad at the rear of the tank so the tank has 3 soft points of contact against the underside of the body, I did this to get it as far up as possible and also secure the tank better.
Mount tank to your vehicle, run lines, put filler neck into receptacle, plug in harness, profit.
Last edited:


