UglyTruckNut
Member
- Joined
- Mar 29, 2021
- Member Number
- 3728
- Messages
- 13
Lots of awesome work there.
Follow along with the video below to see how to install our site as a web app on your home screen.
Note: This feature may not be available in some browsers.
Lots of awesome work there.
Loving this
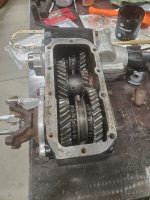
whats going inside the 10 bolt?
EditedDoes this seem accurate or have I forgotten some major things? Want to use this as a placemarker for coilover ordering later with people chiming in that may have more accurate estimates that have completed similar builds.
Frame 225 (gusseted 2x4 and 2x3 .120 wall box)
Coilovers 40 x 4 = 160
body 500
Tires and wheels 72x4 + 20x4 = 368
Trussed 10 Bolt front 380
Trussed 14 bolt rear w/ discs 550
Engine (LS2) 443
Trans (6L80E) 230
Transfer case (dana 300) 90
Driveshafts 50
Gas Tank 90
Seats 50
Misc 400 (comms/heat/ac/radio/accessories)
Suspension arms LCA 30 x 4 + UCA 20x4 = 200
Roll cage 200 (est.100ft 1.75 x .120)
spare tire and carrier 200
Exhaust 45
Battery 50
Radiator 40
Roughly 2500-2700 sprung weight
Roughly 1550 unsprung weight
Approximately 4200 lbs total vehicle weight
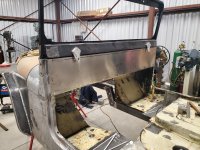
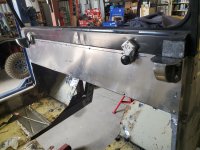
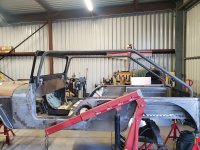
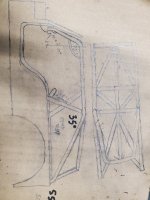
All pillars will be tied to frame. A pillar pad goes through dash with shear points. Will be tied to floor with backing plate then to frame and through the firewall to the engine cage. Just doing mockup now then finishing tie ins. Have to wait for body bushings for proper spacing before I complete tie ins to frame as well.Are you planing to run any of the cage tubes down through tub to the frame?
If so, why not tie the A-pillar to the frame also.
If not, make sure you make the landing pads as large as possible and tie into two different planes if you can.
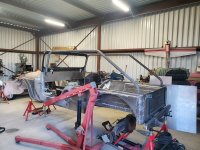
Build is coming along nicely. Actually, is one more build that makes me want to set my shit on fire
Tell him to do it. Would be good to see more CJ's. They just aren't that popular anymore.good looking build. Keep up the good work! My bro is building a cj6ish jeep as well...maybe ill get him to get a build going on here.

Exactly! Plus the 110 atc. Good times!Good idea building two of them. Now they can race.