What's new

Buford T - 79 Ford Crew Cab Powerstroke Swap

curious to see where you end up at for final ride height. My '74's roof is about even with some of the newer/higher one tons coming out, but floor pans are wayyyyy higher. I have had a few folk mention how high it is....im 6'1'' and have to jump into it.....and it does feel high. Looks good though :grinpimp:
 
curious to see where you end up at for final ride height. My '74's roof is about even with some of the newer/higher one tons coming out, but floor pans are wayyyyy higher. I have had a few folk mention how high it is....im 6'1'' and have to jump into it.....and it does feel high. Looks good though :grinpimp:
It's for sure too tall for 37s. I think this chassis had a 6" lift? I kinda hate to take it off because it's all new, with nice blocks in the back and drop pitman arm, etc.

Roof wise, it sits about 6" higher than a stock 2023, the cab is much shorter though, so the rockers are pretty damn high.

Just looking at it with the fender on, I think I can lower the cab 2" and it will look proportionate, I may have to trim slightly to clear when it's articulated, we will see I guess.
 
I situated the body a bit better. Lowered it down and slid the body forward to center the fender opening.
20240531_060540.jpg


I decided that the best way to locate the rear was to repurpose the subframe I put together earlier. This keeps the frame mounts stock, and is the most efficient way I have on hand. Obviously, there is bracing under the cab floor, not just the tube welded to the pinch weld. I tacked it in place to mock it up and it seems like the ticket.
20240531_065927.jpg


The front cab mounts I'll have to actually fabricate. No big deal, just have to blow them out on my plasma table and weld them on.
20240531_070302.jpg


Fender gap looking better. There still is a lot to install, bumper, front clip, interior, winch, etc, so I bet it settles a bit still.
20240531_070328.jpg


I also scored another 2009 parts truck last night at an auction. I wanted the wheels and some other stuff for my Amarillo F350
Screenshot_20240530_220548_IAA Buyer.jpg


Happy bonus of these heated leather seats, which I will probably stick in the 79.
Screenshot_20240531_072451_IAA Buyer.jpg
 
1) Im 41.5'' from ground to the crown of my fender openings (using center of hub as my datum per say). Youre on the superduty frame and I think thats what also bumps you up a smidge. Excited to see where you end up!
2) The seats WILL fit :smokin:
 
I'm about 45" to the fender lip now.

Just did some brainstorming this morning. Hung the inner fenders on to see what they hell to do with cooling stack and charge piping. Thinking about flipping the manifold to get more room, or looking at different chargers with a forward facing output. I really don't know much about these turbos, and selecting them, so I hate to really mess much with the stock stuff at this point, although I do want to bump up the power a bit eventually.
20240601_075539.jpg


I'm thinking I will modify the left fender to hold both batteries, in an effort to keep real estate open on the right for plumbing and air cleaner.
20240601_075304.jpg
 
There should be plenty of dudes here to lube you out on best turbo selection.

Keep it up it's fun to watch you do what we all want to do...
 
Got a little sidetracked this weekend. I kinda ran out of driving trucks again, a friend with a tree service keeps buying all my super duties. Last friday I scored one I've been chasing a while, 2006 Amarillo edition. Ive wanted one of these for years, but was never willing to pay up for one. I scooped this truck for $2500, with no idea what was actually wrong, the photos sucked, but it only had 138k miles and the interior seemed ok.
Screenshot_20240524_145535_Copart.jpg

We got it from the windy city to Ohio, and figured out it had a broken spring and bent rear axle, so off to our super duty graveyard to dig out some parts and fix it.
20240602_165225.jpg

20240602_173013.jpg


All better. I ordered a set of 35's for some stock wheels to ditch the flatbiller moto metals, and have some body work to do to make it look presentable. I need to get this thing ready to camp for fathers day, so I might have some dentside delays
20240602_192138.jpg
 
Ill support your decisions and allow the Dentside delays...this time :grinpimp: Super Dutys are the quickie builds, Dentside is the patience build
 
I'm back. It's been busy as hell here, I made another thread about the Amarillo adventures
Amarillo by Mornin'

Also ended up on another project that hopefully will cover bills for the next few months and finishing this truck, just now wrapping that up.

Managed to get the 79 back into the lift bay, and moved the front cab mounts. Don't crucify me, I'm not a professional welder by any stretch.
20240801_072653.jpg

I also ordered up this radiator for 6.0 application. there is no possible way a 6.4 radiator would fit, and the stock 6.0 one has the correct ports for trans cooler lines. I'm going to try electric fans on it, might be a fools errand, but worth a shot.
20240801_072637.jpg

Rear driveshaft is off and at the driveline shop being shortened 2.5 inches.
20240801_062607.jpg
 
Took a lil bit off to do work on my 4x4 VW Bus, and to regroup . I got the driveshaft back like 3 hours after I dropped it off, shortened and balanced for $109. Pretty good deal. No photos but it's back in place.

I decided to tackle steering next. The previous setup for the 6.0 chassis wouldn't work on the 09 chassis, as the steering shafts are different and the 09 shaft is too long to fit the 79 column. I decided the best thing to do would be to use a super duty column, which has real bearings and tilt, plus, how hard could it be. After weighing my options and measuring I figured I would try using a 2008 dash structure I had and see if it would work. I refuse to compromise on keeping the 79 dash itself, so I just winged it.

First, out with the dash.
And
20240909_163922[1].jpg

Stripped down the 08 dash.
20240909_163931[1].jpg

With the angled "ears" that bolt the dash into the sewer duty cut off, it slid right into the 79 cab.
20240909_171935[1].jpg

Hung the column, good to go, right? Not even fawking close. I probably spent 2 hours taking it in and out, trimming, moving it, twisting, until I finally got the column to align with the box, clear the pedals, and actually be in a spot where driving was possible. After a bunch more trimming, the 79 dash slid right back on. I need to do a ton of finish work around the column itself, the mount sticks out too far, so I need to cut the dash more and blend it with a surround. I need to look at steering wheels, and see if there is something more vintage I can use. I do like having a locking column though for a tiny bit more security.
20240910_133823[1].jpg

So now, good to go right? Absofuckinglutely not. The steering shaft is now too short. Chop it in half and figure out that is slide perfectly into a piece of 1.25" .125 wall tube, so sleeved it and welded it all up.
20240910_124448[1].jpg
20240910_131756[1].jpg


Now there is steering, which is handy to have. Tomorrow I'm going to attach fuel lines, wire the fass up, make some battery cables and try to start this thing. I also need to revisit power steering lines to get the hydroboost and steering functional.

Until next time.....
 

Attachments

  • 20240909_173845[1].jpg
    20240909_173845[1].jpg
    1.9 MB · Views: 1
It lives.....

This morning I decided that this damn thing was going to start today.

First I did some professional wiring. Lot easier to standalone a 24v than a 6.0. Only takes 5 wires and a relay.


20240913_075323[2].jpg


Jumper wires and the fass kicked on/bled. I assumed the VP44 was powered up, no way to tell really.
20240913_102428[1].jpg


Went to attach the battery cable to the stater, and snapped the lug right out of the bakelite. Found another starter in my stuff and promptly broke it too.
20240913_102433[1].jpg

That semi pissed me off, as a new starter is like $300, I have more over at the other shop, but that is 40 min each way. Then i remembered I had another 6.4 I bought delivered here yesterday. It's a driving truck, but I needed this thing to run dammit. So I slid under it and found an almost new starter, score!
20240913_120234[1].jpg


Hooked it up, cracked the feed line to the vp44 to prime it, and gave it about 4 cranks before it popped off and idled perfectly.


Now I can prop the front inner fenders back on and do the wiring correctly, and get the plumbing started up.
 
Started in on thinking about how to wire this thing. I have full painless harness kit sitting in a box here, but I think I'm going to save it to use on my bus maybe.

I luckily saved everything off the last 2 super duty trucks I've torn down, so I drug out everything and made a plan.

Under the hood, I mounted the upfitter switch relay box from a 2008 F250. These things are sweet, two 25a circuits, a 10a and a 15a. I used the two 25a to run the VP44 and FASS, the 10a for the starter circuit, and the 15a for the ECU. I just trimmed the factory bracket and used some plastic bushings I had left over from a TV wall mount kit. There are 6 mini fuse ports that I intend to use as well for spare circuits as soon as I can find the correct pins for them (currently just blank)
20240913_152918.jpg
20240913_153049.jpg
20240913_153031.jpg

Everything in place. The second relay box is also off the 08. I'm not entirely sure what it will run yet, but I figured it couldn't hurt to have some options. The Deustch connector goes tot he IGN switch to trigger key on and starter. I still need to pull OBD2, cruise, and maybe grid heater signal lines off the ECU, then I can wrap that bundle up. The distribution box is off an Audi TT/2000's VW. I use them on absolutely everything I swap, They are compact and have multiple interchangeable fuse bars. There will of course be a grommet on the firewall. Once I have everything figured out, I'm going to blow the truck back apart and rework the entire firewall with new material to stiffen it up.
20240915_073234.jpg


Then I dug out a full cab harness and fuse box from a 2006. Quite the disaster.
20240914_091733.jpg

Refined down to just the fuse box.
20240914_115114.jpg

And refined further to just one circuit to power up the IGN switch.
20240915_074832.jpg

Now it starts with the key. Mission accomplished. I need to play with where to mount the fuse box up in the dash. getting around the clutch pedal might be tricky.

Since I had part of the front clip on, I decided to put on both fenders and the core support to start thinking about intercooler plumbing. I'm using a 6.0 ford radiator & intercooler still, and it looks pretty straightforward. The right side coolant line might be a little tricky, but I think I can sneak behind the counter at napa to measure hoses and find the right one.

Driver side straight shot
20240914_141930.jpg


Passenger a bit more tricky, but seems doable. I don't see any advantage to clocking the turbo a different way.
20240914_141921.jpg

And one last shot for motivation.
20240915_071132.jpg
 
Making some more progress here.

Rattled its way out of the shop under it's own power and turned around.
20240916_103054.jpg


Set the radiator in place and started to noodle on hoses. The cummins upper looks like non issue to the radiator.
20240916_172502.jpg


The lower is not so easy. It seems like most guys are splicing a few hoses together, which I'd like to avoid. With a bunch of digging, I found this, which should work, but I can't find the US version of it. More digging to do I guess. I need to figure it out so I can build intercooler piping.
https://www.napacanada.com/en/p/UNR...rBacY9hI9gaskfJ7JWMYjrgvgdCzYPfOGXule12OUdKw-

I went ahead and figured out mounting the fusebox. This is about the only place I can clear the pedals and everything else in here.Stock 2006 superduty box, using modified stock hardware.
20240917_170954(1).jpg


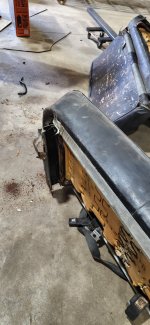
Since I was inside the cab, and tired of moving super duty seats, I decided to see if I could get them installed. First I pulled the seats out. Not too horrible, but shit they are heavy
20240918_161355.jpg


I set the super duty seat up in there and quickly figured out that won't work. The power seat base is way too tall. I don't really need power seats anyhow, more crap to wire and more crap to fail. I figured the best way to approach it was to use the bench seat base, build a frame and mount the buckets to it. No super ideal, but simple, quick and works.
20240918_155633.jpg


So I dug some angle iron out, and with some drilling and trimming, here we are.
20240918_172445.jpg

Had to tap the extra bosses in the seat base, and bolted them up.
20240918_171821.jpg
20240918_174013.jpg

In the back, I used the extended cab seat. It's less comfortable, but my kids will survive, and it's a lot better than the rock hard vinyl fold up seat in the 77 supercab I rode in as a kid. The rear mounts sit on the stock shelf perfectly, and the front mounts are close. I think I'm just going to box in the back of the footwell a bit with some 11ga scrap I have and run with it.
20240919_053724.jpg


That's all for now. Floor patch panels are coming today, I'd love to have all the interior cab fabrication stuff done this week. I'm trying to stick to an order of operations to get this thing done without wasting time.
 

Attachments

  • 20240918_161408.jpg
    20240918_161408.jpg
    1.3 MB · Views: 1
Top Back Refresh