This is just an absolutely fantastic project. Nice build. Glad to see you have it out and rolling. Looked like a fun beach trip.
How to install the app on iOS
Follow along with the video below to see how to install our site as a web app on your home screen.
Note: This feature may not be available in some browsers.
You are using an out of date browser. It may not display this or other websites correctly.
You should upgrade or use an alternative browser.
You should upgrade or use an alternative browser.
WC53 Carryall Restomod - Cummins ISB170, Allison, ORI Struts
- Thread starter AlxJ64
- Start date
AlxJ64
Rust is Paint
Thank you much! This truck is a dream to own and have built. I've obsessed over the Carryall trucks since I first saw a picture of one when I was 16 on the back of an MVPA publication. I had an M37 when I was 17 because its all I could find at the time. That was in 2001.Bar none, this is my favorite build of any kind, on any site, ever. I absolutely love it. Wishing you much happiness.
Thank ya! Glad to know multiple folks dig this thing.I second this statement.
Thank you thank you! Yes, it is a fun thing to drive too. I do need to adjust the toe setting or something. Noticed one front tire wearing weirdly.This is just an absolutely fantastic project. Nice build. Glad to see you have it out and rolling. Looked like a fun beach trip.
So, in other news, not exactly truck related, per say... but it is somewhat related. Its kinda cool to find more old iron local. What is EXTRA cool about this is it has two ORIGINAL war time, hand drawn Kilroy's on it.
10kw Genset, powered by a Ford GPW 4 cylinder gas engine. This thing is sweet, and is rather complete and original. Serial number tags and stuff are all matching. 1943 order / production. 878.1 hours on the ticker. Gonna try to get it fired up here soon. Might become my genset for my barn.
AlxJ64
Rust is Paint
Found the service manual for the Generator... and found this interesting. This is why so many of these old trucks and machines are hard to find... in conjunction with being 80 years old too.

My dad was in France after WW2, his job was to load jeeps and trucks and other equipment onto a barge. The barge would go a couple miles out into the med and push everything into the ocean. He did this for 2 years......
AlxJ64
Rust is Paint
Been working on the front window hardware. Have all new seals and track guide felts. The winders have some age and wear to them but oh well. People keep saying to go with power windows and I just keep saying "its been too fucking long working on this thing, I just want it together and TO DRIVE IT".
Last weekend of Sept was a brewery run with the front windows out of it and just the back lexan panels screwed in place. Trying to get the front glass in place before a few Vineyard / Brewery adventures at the end of this month. I also need to finish up the small middle seat floor brackets and get it installed so I can move the full bench to the very back where it actually should be.


Last weekend of Sept was a brewery run with the front windows out of it and just the back lexan panels screwed in place. Trying to get the front glass in place before a few Vineyard / Brewery adventures at the end of this month. I also need to finish up the small middle seat floor brackets and get it installed so I can move the full bench to the very back where it actually should be.
AlxJ64
Rust is Paint
Took it to a car show over in the Shenandoah Valley hosted by the Lions club; it was a fund raiser for a local blind person to get a "Leader Dog" which is a company that trains guide dogs for the blind. My Girlfriend and I just recently sent off the Guiding Eyes (another company) black lab to her final training back start of this month. We got her as a tiny fluff ball and raised / trained her for 18 months. Thats the black lab in the photos previously in this thread. My GF is a teacher of the blind and on the way to the car show we picked up her Teaching Assistant who is blind and has a Leader Dog herself, but she didn't bring the dog. Also, two of my GFs blind students and their families showed up and wandered around the car show. So at one point there are 2 blind kids and a blind adult, with Canes and such around my truck... and not a single person from the Lions club talked to us at all, the entire 4 hour show. It was very strange. However, we did realize at the end, the show winners and most of the socialization was just within the members of the Lions club and nobody knew us.
GF is the tiny lady in flannel shirt.

Yesterday evening I decided to get the floor adapter brackets made for the middle row of seats so that I could push the bench row to the back and have the middle half seat in place for this coming weekend. Taking the GFs parents and some friends to a Brewery / Vineyard fall festival thing down on the James River; should be a good time. Decided to throw the Dodge Brothers DB logo into the middle seat bracket just to taunt some of the purists a little more. The dual bolt pattern is because the seat is wider than just half the truck width and I have the floor brackets laid out in a modular fashion so that this seat can go in 4 different locations in the back and even be turned sideways behind the driver's seat so that the back can be left very open for camping or hauling stuff. I hope to take the truck on a few camping trips where I can sleep in the back of it with the roof open looking at the stars. GF's mom is going to help me out with getting these last seat cushions made.
Instagram Reel of the process - to some Glenn Miller music of course.


GF is the tiny lady in flannel shirt.
Yesterday evening I decided to get the floor adapter brackets made for the middle row of seats so that I could push the bench row to the back and have the middle half seat in place for this coming weekend. Taking the GFs parents and some friends to a Brewery / Vineyard fall festival thing down on the James River; should be a good time. Decided to throw the Dodge Brothers DB logo into the middle seat bracket just to taunt some of the purists a little more. The dual bolt pattern is because the seat is wider than just half the truck width and I have the floor brackets laid out in a modular fashion so that this seat can go in 4 different locations in the back and even be turned sideways behind the driver's seat so that the back can be left very open for camping or hauling stuff. I hope to take the truck on a few camping trips where I can sleep in the back of it with the roof open looking at the stars. GF's mom is going to help me out with getting these last seat cushions made.
Instagram Reel of the process - to some Glenn Miller music of course.
Last edited:
AlxJ64
Rust is Paint
Meant to post this yesterday, but I am a terrible truck owner. lol
HAPPY 80TH BIRTHDAY to this pile of metal. October 19th, 1942
.jpg")

^ Just noticed... the end of the card says Printed in U.S.A "REMINGTON RAND" - interesting.
HAPPY 80TH BIRTHDAY to this pile of metal. October 19th, 1942
^ Just noticed... the end of the card says Printed in U.S.A "REMINGTON RAND" - interesting.
Last edited:
AlxJ64
Rust is Paint
Pulled the seats back out and took them to the upholstery shop to get the rest finished up to match the first. Will do some clean up of the wiring, a little touch up painting inside and then work on the rear window winders some as well. Nothing like 3,000 projects at once.


Also, the GF was helping me with this, and she had changed her shoes right before leaving. I had these all stacked in the corner and was getting ready to load them. She grabbed a piece of uncut foam off of the top of one and it was just enough of a change in weight balance that the big rear seat tipped over and the top rail smacked the top of her foot, busted it, and I honestly don't know how it isn't broken. I think the padding of her flip-flops are what saved the bones. We ended up getting it X-rayed immediately after it happened and she's hobbling on crutches today from the swelling but will be okay once that's all settled down. This damn truck is a haunt jealous of any other things in my life.

Also, the GF was helping me with this, and she had changed her shoes right before leaving. I had these all stacked in the corner and was getting ready to load them. She grabbed a piece of uncut foam off of the top of one and it was just enough of a change in weight balance that the big rear seat tipped over and the top rail smacked the top of her foot, busted it, and I honestly don't know how it isn't broken. I think the padding of her flip-flops are what saved the bones. We ended up getting it X-rayed immediately after it happened and she's hobbling on crutches today from the swelling but will be okay once that's all settled down. This damn truck is a haunt jealous of any other things in my life.
WaterH
Well-known member
grabbed a piece of uncut foam off of the top of one and it was just enough of a change in weight balance that the big rear seat tipped over and the top rail smacked the top of her foot, busted it, and I honestly don't know how it isn't broken.
Busted it and don’t know how it’s not broken? I think I know what your saying.
Carry on
CarterKraft
Red Skull Member
Try like hell to keep these wemens in the correct footwear.Pulled the seats back out and took them to the upholstery shop to get the rest finished up to match the first. Will do some clean up of the wiring, a little touch up painting inside and then work on the rear window winders some as well. Nothing like 3,000 projects at once.
Also, the GF was helping me with this, and she had changed her shoes right before leaving. I had these all stacked in the corner and was getting ready to load them. She grabbed a piece of uncut foam off of the top of one and it was just enough of a change in weight balance that the big rear seat tipped over and the top rail smacked the top of her foot, busted it, and I honestly don't know how it isn't broken. I think the padding of her flip-flops are what saved the bones. We ended up getting it X-rayed immediately after it happened and she's hobbling on crutches today from the swelling but will be okay once that's all settled down. This damn truck is a haunt jealous of any other things in my life.
My wife two Fridays ago trying to go to dinner...
AlxJ64
Rust is Paint
Busted it and don’t know how it’s not broken? I think I know what your saying.
Carry on
Massive contusion and split open across the top. Basically pulverized the flesh but didn't break any bones.
Dethmachinefab
Red Skull Member
- Joined
- May 19, 2020
- Member Number
- 96
- Messages
- 1,345
The big toe bones must be pretty sturdy. I had a hefty steel part get dropped on mine and was sure it was destroyed. Squished the meat off but the bone was good. Probably just squished into the shoe rubber.Massive contusion and split open across the top. Basically pulverized the flesh but didn't break any bones.
At least it didn't get the nail bed so it'll grow back fine and she won't have that to hold over you forever.

AlxJ64
Rust is Paint
The pick is of CarterKraft's lady, mine had the top of her foot hit and its finally seemingly better.The big toe bones must be pretty sturdy. I had a hefty steel part get dropped on mine and was sure it was destroyed. Squished the meat off but the bone was good. Probably just squished into the shoe rubber.
At least it didn't get the nail bed so it'll grow back fine and she won't have that to hold over you forever.
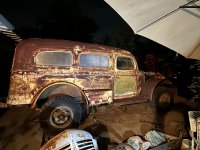
Better, but not better enough that she could put her foot down on me saving more old junk... eventually, maybe, this will get its own thread but in the meantime its the yard art. Already had one neighbor say "what are you doing with more Old JuNk?"... because they saw it on the trailer when I was coming in the lane.
1959 Power Giant D600
Krackle959
Well-known member
That’s a nice start to a project truck! My wife would kill me if I brought another one home, but if you ever decide to part with it, let me know.
NORDFORD
Well-known member
- Joined
- May 20, 2020
- Member Number
- 765
- Messages
- 129
Already had one neighbor say "what are you doing with more Old JuNk?"... because they saw it on the trailer when I was coming in the lane.
My response would be: “What? I didn’t tell you? Must not be any of your god damn business”.
My response would be: “What? I didn’t tell you? Must not be any of your god damn business”.
AlxJ64
Rust is Paint
Nothing too exciting. Finally got my seats back from upholstery shop. Gonna tinker with cleaning up some wiring under the dash before putting them back in. Trying to decide if I want to paint the seat frames and front floor sheetmetal boring black, primer and leave, or do some funky attempt at a patina. Might paint over the loose rust growing on them and then knockoff whatever is flaky and see how they look from there.

tracyb
Well-known member
if you like the look but just want to protect it, i use allot of this stuff and it works great.
using ospho and then the everbrite is a look i really like.

 www.everbritecoatings.com
using ospho and then the everbrite is a look i really like.
Restore Metal & Keep Metal Looking Its Best | Everbrite Coatings
Everbrite Coatings has Metal Restoration Kits to restore the color and luster of metal around your business and home for years. Keep Metal Looking Its Best.
www.everbritecoatings.com
Jedrattle
Member
- Joined
- Jan 28, 2022
- Member Number
- 4751
- Messages
- 10
Killer!! I love what you’ve done with it. I forgot about it until I did something stupid last night…I bought a really rusty one! 🤦🏼. I remember your thread on pirate (can’t find it now). I have a ton of sheet metal work. I’ll be following along and bugging the crap out of you with questions. 🤣
Attachments
AlxJ64
Rust is Paint
Killer!! I love what you’ve done with it. I forgot about it until I did something stupid last night…I bought a really rusty one! 🤦🏼. I remember your thread on pirate (can’t find it now). I have a ton of sheet metal work. I’ll be following along and bugging the crap out of you with questions. 🤣
Congrats on the find! That looks pretty solid still compared to a lot of them out there. I've not seen pics of that one so add yet another one to the ones still popping up. There are a LOT more of these out there than one realizes. Theres a guy in California right now who owns 22 or 23 of them last I had heard. He is holding them and keeping the prices up. I also know of two others that are or were for sale in Texas. Anything under $10k for a basket case seems like a deal these days.
Also, the thread on Pirate is gone. It got deleted following my divorce.
Jedrattle
Member
- Joined
- Jan 28, 2022
- Member Number
- 4751
- Messages
- 10
Thank you! No, it’s not solid at all. There’s nothing to attach lower door hinges too. And the B pillar and the rocker panel are no longer in a relationship. The belt line has left the premises as well. Very rusty but I can build exactly what I what with. It will just be a crap load of work. I stole it but I have to deal with the rust and I need a hood.
G8trwood
Member
Great to see your truck moving again. I Remember its first build followed by yours on the old PWA site.
Just started a refresh of my Carryall (presently in pieces) with a nephew who will ultimately get it for his 40th.
Just started a refresh of my Carryall (presently in pieces) with a nephew who will ultimately get it for his 40th.
AlxJ64
Rust is Paint
Seeing this Allison exposed is causing some PTSD reactions... from too many times fighting with the various ones.
Started pulling all these panels out. Amazing how one trip to the salt air flashed these things so well. I am not running an interior carpet but rather just putting the insulation and deadening on the underside of the panels so once I knock the rust off of these and paint them, I think the texture will match some of the original sheetmetal on the truck and it won't look like "new sheet metal" installed in an old truck. At least not as badly.
I do wish the Allison shifter handle wasn't so obviously new, but thats a project for later, if ever. Honestly I have a few drawings in my mind already of how I'd make it look and work. The parking brake handle is out of a '42 CCKW GMC 2-1/2 ton that I cut down and made linkage for. All of the red and blue hoses are the T-case air shifter setup. Big blue hose feeds the main valve body and the shuttles are controlled by the air toggles in the console next to the shifter.


I am putting lizard skin and a layer of jute pad on the firewall. These floor pieces are having a lot of these screws replaced with rivets before they go back in. I had it all screwed together for testing in case I wanted to change a panel shape, size, etc. Once that is done I will affix them into the largest sections that are still reasonable to remove. I have some thermal sheet on the way as well to adhere to the bottom of these panels too but I also want to make some sort of separate shield with a double air gap to cover the exhaust from the floor. It gets hot during the summer when cruising on the highway. Not like melt shoes hot but 100% can't be barefoot on the passenger's side until I do something about it.

Titanium... I know its hard to work with but I have a 5'x10' sheet of 0.080" 6AL-4V that I haven't had anything to use if for since it showed up at my place. It has a few gouges in the surface of it so I never tried to sell it as stock and also doesn't have any papers with it but I know for a fact what it is.
Anyways, I was thinking... titanium heat shield for the exhaust would just be another small feather in the hat on this truck. I would basically just cut flat shapes and rivet them to an aluminum frame and mount it with standoffs off of the floor. Either that or try to anneal it in some places before bending it because I don't need the strength so much as I need the thermal dissipation properties.
Started pulling all these panels out. Amazing how one trip to the salt air flashed these things so well. I am not running an interior carpet but rather just putting the insulation and deadening on the underside of the panels so once I knock the rust off of these and paint them, I think the texture will match some of the original sheetmetal on the truck and it won't look like "new sheet metal" installed in an old truck. At least not as badly.
I do wish the Allison shifter handle wasn't so obviously new, but thats a project for later, if ever. Honestly I have a few drawings in my mind already of how I'd make it look and work. The parking brake handle is out of a '42 CCKW GMC 2-1/2 ton that I cut down and made linkage for. All of the red and blue hoses are the T-case air shifter setup. Big blue hose feeds the main valve body and the shuttles are controlled by the air toggles in the console next to the shifter.
I am putting lizard skin and a layer of jute pad on the firewall. These floor pieces are having a lot of these screws replaced with rivets before they go back in. I had it all screwed together for testing in case I wanted to change a panel shape, size, etc. Once that is done I will affix them into the largest sections that are still reasonable to remove. I have some thermal sheet on the way as well to adhere to the bottom of these panels too but I also want to make some sort of separate shield with a double air gap to cover the exhaust from the floor. It gets hot during the summer when cruising on the highway. Not like melt shoes hot but 100% can't be barefoot on the passenger's side until I do something about it.
Titanium... I know its hard to work with but I have a 5'x10' sheet of 0.080" 6AL-4V that I haven't had anything to use if for since it showed up at my place. It has a few gouges in the surface of it so I never tried to sell it as stock and also doesn't have any papers with it but I know for a fact what it is.
Anyways, I was thinking... titanium heat shield for the exhaust would just be another small feather in the hat on this truck. I would basically just cut flat shapes and rivet them to an aluminum frame and mount it with standoffs off of the floor. Either that or try to anneal it in some places before bending it because I don't need the strength so much as I need the thermal dissipation properties.
Last edited:
AlxJ64
Rust is Paint
This is what I decided to do for fastening the floor parts together. Since I built it out of a million pieces, and then they flash rusted, I cleaned stuff up with a wire wheel and replaced a number of the screws with some flush head rivets. I was given about 15 bags of these in this size and they turned out to be exactly the right size. Kinda want to just clear coat the panels now after seeing how these turned out. Still have a good bit to go yet to get the whole floor back together, and I am going to leave some sections removable for access inside the center console.


Looks fantastic
AlxJ64
Rust is Paint
Been doing a little more work on this thing. Finally dug out the stupid sheet of 6AL-4V and ripped a piece off that will fit on my plasma table. I can't find the fitting I had made to hook my Nitrogen bottle to the Hypertherm from the last time I cut Titanium so I am having to remake that adapter. I also thought I'd have better luck ripping it with the Cermet II Diablo blade but it did not like it and is pretty much trashed now. Oh well.
I would not be doing this with this material if I didn't already have it, thats for damn sure. But I do have it, and it will be one more feather in the hat for this weird old truck.
More rivets and stuff in the transmission cover. It'll end up being 3 big sections and the center console.

Dug out the 0.090" sheet of Titanium thats been functioning as a neighborhood eye sore for years.

Cleaned it up some. You can see my reflection in the dull grey of the sheet.


Hacked a 2' x 4' drop off of it. Turns out the sheet is only a 4' x 8' and not a 5 x 10; I was thinking of a sheet of stainless I have hoarded.
And before you start saying, thats not Ti, its AL or Stainless.. I assure you, it is not. This shit is hard AF but also smeary. Very weird.

And like I said, if I didn't already have it floating around in the woods, I would not be going out to buy it for making an exhaust heat shield.

The plan is to use some 0.080" AL sheet for the angled parts and not deal with heating and bending this stuff. I did some test drilling with some Carbide spotting bits I have and its easy enough for driving some Rivets. This will be under the floor of the truck and never even be seen. Thats why its being documented here.
I would not be doing this with this material if I didn't already have it, thats for damn sure. But I do have it, and it will be one more feather in the hat for this weird old truck.
More rivets and stuff in the transmission cover. It'll end up being 3 big sections and the center console.
Dug out the 0.090" sheet of Titanium thats been functioning as a neighborhood eye sore for years.
Cleaned it up some. You can see my reflection in the dull grey of the sheet.
Hacked a 2' x 4' drop off of it. Turns out the sheet is only a 4' x 8' and not a 5 x 10; I was thinking of a sheet of stainless I have hoarded.
And before you start saying, thats not Ti, its AL or Stainless.. I assure you, it is not. This shit is hard AF but also smeary. Very weird.
And like I said, if I didn't already have it floating around in the woods, I would not be going out to buy it for making an exhaust heat shield.
The plan is to use some 0.080" AL sheet for the angled parts and not deal with heating and bending this stuff. I did some test drilling with some Carbide spotting bits I have and its easy enough for driving some Rivets. This will be under the floor of the truck and never even be seen. Thats why its being documented here.
Last edited:
AlxJ64
Rust is Paint
Finally got back to work on this thing; been busy relocating a shipping container to the property here.
I sent my old roof covering out to a friend so that he could re-make it for me. He has a beautifully restored 1/2 ton Carryall that he did all himself. He has seen this project on a few forums over the years (WW2Dodge Forum) and always was kind while the purists beat me up. He now says he is wishing he had not done the stock fabric insert (it stays in place and doesn't remove) vs the way I had done mine after now handling it and seeing how it goes on the truck easily. He has enough fabric left over he is contemplating doing it to his original truck for the sake of air flow improvements and other features. Sometimes rest-mod aint so bad after all. They are only original the day they roll off the assembly line anyways. He also cut me an amazing deal and pretty much just did the work for the cost of materials and shipping. I had two local boat canvas shops quote me a min $1k just to even consider the project. He did this whole thing for $300 plus shipping. He also increased some dimensions per my request, quadruple stitched stress points, and ran the webbing fully across this time so that it won't rip out. The whole top weighs close to 30 lbs. WW2 correct Waxed Canvas, like 30 weight fabric or something


So Titanium is some finicky stuff but with some carbide tooling and some patience I am starting to see the beginnings of the heat shield take shape.
5/32" Aluminum rivets buck easy into this hard ass Ti. Plenty of energy rebound vs aluminum to aluminum.


Will add some downturn flanges and also make the mounts. Probably convert one of the PTO cover bolts to a stud and also use one of the stud bolts for the bell housing to hold it in place.
I sent my old roof covering out to a friend so that he could re-make it for me. He has a beautifully restored 1/2 ton Carryall that he did all himself. He has seen this project on a few forums over the years (WW2Dodge Forum) and always was kind while the purists beat me up. He now says he is wishing he had not done the stock fabric insert (it stays in place and doesn't remove) vs the way I had done mine after now handling it and seeing how it goes on the truck easily. He has enough fabric left over he is contemplating doing it to his original truck for the sake of air flow improvements and other features. Sometimes rest-mod aint so bad after all. They are only original the day they roll off the assembly line anyways. He also cut me an amazing deal and pretty much just did the work for the cost of materials and shipping. I had two local boat canvas shops quote me a min $1k just to even consider the project. He did this whole thing for $300 plus shipping. He also increased some dimensions per my request, quadruple stitched stress points, and ran the webbing fully across this time so that it won't rip out. The whole top weighs close to 30 lbs. WW2 correct Waxed Canvas, like 30 weight fabric or something
So Titanium is some finicky stuff but with some carbide tooling and some patience I am starting to see the beginnings of the heat shield take shape.
5/32" Aluminum rivets buck easy into this hard ass Ti. Plenty of energy rebound vs aluminum to aluminum.
Will add some downturn flanges and also make the mounts. Probably convert one of the PTO cover bolts to a stud and also use one of the stud bolts for the bell housing to hold it in place.
Firstram
Well-known member
If you didn't make everything look so damn cool, you'd be finished by now
Man that looks killer. When working titanium, slow cutting speed and lots of coolant. As soon as it gets hot, it gets hard.