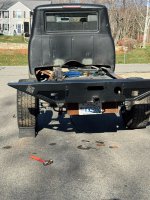
What's new

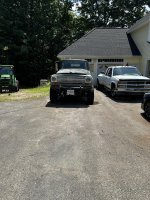
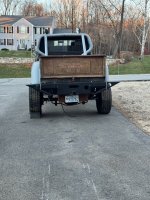
War Pig Version 12

You should have hit me up for a tailgate, I don’t have a step side one, but I’d have sold you a fleet side one cheap.
Thanks. I am not sure I am going to use the one we built.

I found one on eBay, that is solid as fuck.
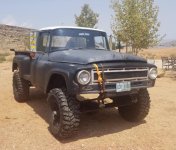
 
So I sent this to a friend of mine, for wiring, etc.... and he hasn't touched it in 8 months or so.

Time to bring it back home.

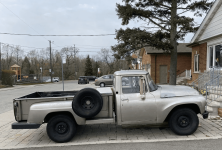
Also, this popped up in my feed today. I wish I had kept it.
 

Attachments

  • 6617DD53-B678-4AA4-889A-AE65B5E51BC1.jpg
    6617DD53-B678-4AA4-889A-AE65B5E51BC1.jpg
    81.6 KB · Views: 15
you still planning on selling it?
This? Never planned to sell it. It's a "bucket truck".

There have been times where I needed to sell it and haven't. There are times where I want to sell it, since it's not making progress, but haven't.

So with the sale of Pinky, I have no desire to sell this, beyond the fact that it needs to start making progress again.
ahh, so it was a half joke when you asked if I wanted to buy it. good. I can't justify it, so now it can stop floating around in the back of my head:homer:
 
ahh, so it was a half joke when you asked if I wanted to buy it. good. I can't justify it, so now it can stop floating around in the back of my head:homer:
Sort of, as I said, when I hit the lowest points, I am attached to nothing.
 
So, as said before, this went to a shop to get worked on, and sat, only collecting rust and mice.

I cleaned it out last weekend. Mice evicted.

I have the LB7/Allison stand alone harness back from Ken Wolkens. I also have the American Auto Wiring harness and most of the other stuff for it.

I decided on a switch panel for the center console(s), so wiring gets easier. RCR-Force® 12 is on it's way.
 
Current work list:

  • Mount and configure trans shifter on column.
  • Mount and configure parking brake to trans and both rear axle brakes.
  • Replace rear brake hose and change axle mount to vertical.
  • Bleed brakes
  • Add lock nuts to the pan hard bar and paint.
  • Mount steering shock mount and shock.
  • Mount steering wheel.
  • Mount bed.
  • Nut and bolt entire truck. Example – example missing nuts and washers on engine mount bolts.
  • Anything else required to run, like fuel plumbing.
Wire:

  • Kenwood DMX1057XR centered
  • Dakota Digital HVAC controller under it 4000-K-K
  • Dakota Digital Clock
  • Dakota digital delayed accessory power
  • American Auto wire harness for chassis
  • Fuel pump controller, with relay for fuel pump and oil shut off. Relay fuel pump controller
  • Remote starter and alarm
  • Trans shifter back light
  • Air compressor, relay, switch, and gauge
  • Power seats via relay
  • Power door locks – IH door handles unlock doors plus one 99022-B switch on console
  • Power windows
  • Electric life 99022-B switches – side by side four in console. One sideways on top for door locks – they are lit with dash lights.
    • One on each rear door
  • Dakota Digital HDX-60C-PU in a custom carrier. Ignition, dimmer for Dakota stuff, and wiper knobs left of the steering column, factory positions, with light boxes from CJ7.
  • Vintage Air HVAC
  • Dual Batteries on frame
  • Power and heated mirrors
  • ALL Switches, circuit hot indicator, label back lit and dimmable:
Console:
  • 4 window switches
  • 1 door lock switch.
  • Driver’s seat heater
  • Fog lights
  • Driving lights
  • Roll bar lights.
  • Passenger seat heater
Dash:
  • Cruise control power
  • Cruise accel/decel
  • Headlight switch
  • Wiper/washer switch
  • tap shift
Overhead Console
  • Front/rear winch power.
  • Front winch/in/out
  • Rear winch in/out
  • Rear locker
  • Exhaust brake
  • Air compressor
Random:
  • Phone pad on console with Mophie Snap Plus 15W charging station
  • LED back up lights and alarm with trans switch.
  • Back up camera
Plumb:
  • Air gauge and tank, plus air fittings in front and rear bumpers to York.
  • Fuel to fuel filters and engine.
  • Full filler to fuel tank behind driver’s rear fender.
  • Check all brake plumbing/hoses.
  • BIG Windshield washer
  • Hydroboost and power steering. Should be all o-ring, including adapters on steering box.
 
I never made lists like that for the HEMTT until it was a lot shorter. It just made me depressed. I know some of that stuff will go quick, but other stuff will consume more time than you can imagine.

I’m happy to watch though.
 
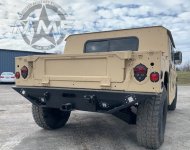
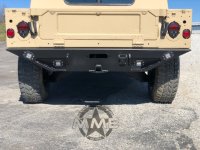
So, this is why I hate lack of forward progress... I am going to section the exhaust and put an elbow on it, to fit the rear/winch bumper I talked about a few pages back.

I spent another 1600 on a bumper I plan to cut up... still can't build it for their asking price.


Oh and it was tail pipe thursday, yesterday:

465403947_10228505057746219_4120298533943967359_n.jpg
 

Attachments

  • 8__23421.jpg
    8__23421.jpg
    226.1 KB · Views: 6
  • IMG_7517__49559.jpg
    IMG_7517__49559.jpg
    246.1 KB · Views: 6
Last edited:
Cutting hangers on the laser tomorrow, thus the wire ties.

Thinking about this for a rear bumper:
1671414314647.png

It's 86.5" wide and 9" deep.

Rear fender OD is roughly 76.75" wide.
Resurfacing this, as I think we're cutting 4.875" off each side to make my "farmer winch bumper with side steps". The cuts should be right on the inside of the outside set of back up lights.
 
So, final dressed the rear frame rails, and have my modification plan.

Winch is 5" under the bed, giving the bumper a 4" stick out.

Will cut on the white lines on the 2nd picture and go forward like some of the old school bumpers, giving the Beemers in NJ something to bounce off of, instead of really hard to find fenders. They will be like the steps in front of the step side fender. Like the third pic.

and a little bit of this:

1731197205892.png
 

Attachments

  • IMG_9788.jpg
    IMG_9788.jpg
    2 MB · Views: 2
  • IMG_9785.jpg
    IMG_9785.jpg
    1.8 MB · Views: 1
  • 1671832990282.png
    1671832990282.png
    427.4 KB · Views: 1
Last edited:
I follow Mike Rowe - he posted a lot about the build. I also posted it on my Facebook, which is where you saw it. :flipoff2:

I dig it, hope it sells for a lot. I'd do some things differently, but it's quality.
 
interesting that they not only made the front bumper uglier than the render, but also looks like it was way more complicated to fab when they did so

sweet build either way
 
Top Back Refresh