What's new

Trying to get it mostly right the first time: A 5.9 and 46RE swapped Tummy Tucked Daily Driven Jeep TJ

Dan_Goodwin

Red Skull Member
Joined
Jun 25, 2020
Member Number
2170
Messages
87
Loc
Birmingham, AL
The quick backstory: I’ve been into off roading since I was taken on my first trail ride in 2001 and have been hooked ever since. My actual wheeling experience had been limited to web-wheeling and riding shotgun with friends up until I graduated from Auburn in 2016 and bought a clapped out 2004 Yamaha Rhino with a +6" long travel setup. The Rhino was fun, but I’d still always wanted a Jeep and a friend’s 1997 TJ came up for sale in May of 2019 so I jumped on it.

This first post will bring you up to date from over 2 years of ownership and what led me to the build that’s about to start. There’s not too much real ‘tech’ to be had as much of this has been maintenance related and added creature comforts, but there’s a place for those things as well.

Spoiler Alert: Just so I don’t lose anyone right off the bat, the Rhino has been sold and there is a literal pallet full of parts and a 5.9L Magnum waiting to go onto the TJ as I’m typing this. But first, the history of my TJ:

I drove to Carrolton, GA with an empty trailer and pocket full of cash to pick the Jeep up in May of 2019. The Jeep was a 132k mile 97 TJ SE with the 2.5L and 5 speed. The PO had owned the Jeep since 2004 and had been mainly used as a grocery getter and hunting rig. The only modifications it had was 31x10.50 Kenda Klever MTs, 2.5" RC lift and a 3" body lift. Overall it was a pretty clean rust free TJ that needed some TLC. Here it is the day we brought it home:

01e49fa2c069f8b3431953826213538c4bb92fa3d7.jpg


015e8822cccc81d4ab447c4d7a696dc6990876abad.jpg


01dd46d9c26e652a66022f58850cc2c90b0cbb80f3.jpg


01720a737611ea0a4421f47bf21f98aadef33742de.jpg


I originally intended for this to be a reliable stock-ish daily driver and mild weekend toy. In my pursuit of that, the following has been done to the Jeep:
  • ZJ rear disc brake upgrade to replace inoperable rear drums.
  • Replaced 3” body lift with 1.25” body lift
  • Painted the fender flares with Krylon Fusion satin black
  • Busted radiator fan shroud replaced with a Mishimoto electric fan
  • Barnes 4wd rocker guards and custom slider installed
  • Added a Superwinch TS9500 on an Amazon winch plate
  • Installed flush mount LED pods in the rear bumper
  • Installed new JVC KD-X35MBS
  • Installed Noico 80mil sound deadening
  • Replaced the horrendous Rough Country shocks with Rancho RS 5000X
  • Installed Polk DB652s in the dash and sound bar
  • Installed Moab wheels with 305/70 Toyo MTs
  • Bought and sold a hard top
  • Replaced the 9 year old Smittybilt top with a Bestop
  • New Cooper 305/70/16 STT Pros installed. (Best tire ever, IMO)
  • Installed Rugged Ridge Dash Multi Mount System
  • Installed Savvy transfer case shifter
  • Rebuilt the front drive shaft
  • Installed 1.25” Spidertrax wheel spacers
  • Installed Amazon Truck-lite knockoff headlights
  • Installed a full center console
  • Replaced the intermediate steering shaft
Here it is now:

01416e24fcd6421390326d2c6a79a0d70b7b6b9ea8.jpg
 
Early 2020 is where the Magnum part of this begins. Not long after buying the Jeep, my lovely wife makes a comment that she wishes it had an automatic transmission in it so she could drive it (she can drive a 5 speed but doesn’t really enjoy it). Like any good gearhead husband, I wasn’t about to pass up the opportunity to kill multiple birds with 1 stone and upgrade in the process. I pitched a V8 and automatic swap and was met with “Well, what are you waiting on?” Remember when I said I wanted to keep this Jeep mild-ish?

To be fair, the 2.5L and AX-5 is a reliable combination for a stock-ish Jeep and is good for backroads cruising but is painfully slow no matter which way you slice it. Initially, I wanted to swap in the spare 5.3 LM7 I had in storage, and while it had the ‘sexy’ appeal, it was a bit cost prohibitive (to do a bare bones LS swap decently well STARTED at $3500. The LS swap also doesn’t integrate with the Jeep electronics at all, so a lot of ‘adapting’ was needed to marry everything up. My research led me to the Magnum V8 Discussion thread on the other forum and the slippery slope that thread is. Combine the low cost of donor vehicles and the almost seamless integration of electronics and a lot of other OEM parts and I was immediately sold on the Magnum swap.

Since my Jeep is a 97 with the CCD bus, I was looking for 97-00 Rams, Durangos and Dakotas and even entertained Grand Cherokees. I preferred a donor Ram since I wanted to harvest the front axle for a solid axle swap I have planned on another vehicle, but had trouble finding one for a reasonable price.

I kept watch on FB Marketplace and found a 1999 5.9 Durango that ran and kinda drove for $500 in May of 2020.

013873e2b369a5c9fa19a621be2e2cd0047072b8ef.jpg


I was in the middle of a bathroom renovation, so the Durango was delicately unloaded in the back lot at work and parked while I got my ducks in a row (okay, at least in the same pond) for the swap.

014cf48875abe1f239f06879f1430de63f1996a343.jpg


After a few months my parking spot for the Durango had expired, so I needed to make it disappear. A perk of my job is access to equipment. A few sawzall blades and body bolts later:

01b2ac16eed7d9c29ace5216006fc136993c1142e8.jpg


Off to the scrap yard it goes! I wish I had the space to store the Durango and part it out but this was the best option.

0108726a165fc559c68560a49b68beccb360abef91.jpg


I labeled and removed the wiring harness and PDC (power distribution center) and only cut the harness where it passes through the firewall. I am planning to use the Durango harness as the base for the swap since I am going from a manual to automatic transmission.

012bb0c1a71a4c58f9af6938edb4420318681d1976.jpg


The trans has ‘12/04’ written in paint pen, so I am assuming it was rebuilt swapped in with a junkyard unit at some point and the missing bolts have me skeptical of its longevity. Y’all…my wife is a saint and lets me get away with far more shenanigans than should be allowed. The engine lived in our carport for a few days before I had a chance to take it to the farm to put in storage. I figured it needed time to get acquainted with the Jeep anyway.

014a1b347dbba99043a936223b1b367659db739539.jpg


I had plans to use my 2020 tax return to fund the swap, but the .gov decided I owed money that year, so the swap was put on hold and the Jeep went back to getting regular maintenance while we put some miles on it. We took it backroads cruising to the lake:

01871a9a36655028a3f130f30790e8be01d24f050f.jpg


We also took it down 600-1 in the Talladega National Forrest on the way to our anniversary weekend getaway at Pursell Farms in Sylacauga, AL. I didn’t get many good pictures since we caught the sunset and did most of the trail in the dark.

015cae65b4dfafb75abf78ae927d30252e54c2c9e1.jpg


0164b0ef788b5b429825061bf875d00ea801be313b.jpg


Don’t worry, it’s about to get good.
 
My original plan was to take my annual bonus and swap the Magnum in around January 2022. This scope was limited to swapping the drivetrain and any required modifications in order to get it running and driving. But in August of 2021 I decided to sell off my Rhino, flip another Rhino and sell a CLEAN Honda Fourtrax 250 in an effort to build the best daily driver / weekend wheeler I could with that ‘pot’ of money. With my budget now close to 3x what I originally planned on, I now had the opportunity to set this TJ up as a capable DD now, but equip it to be taken to the next level later.

Will the TJ replace the Rhino in terms of capability? Absolutely not, and it isn’t meant to. I spent a lot of time thinking about how I was realistically going to use the Jeep and have let that guide my plans the entire way. This Jeep will be 90% daily driver and 10% weekend wheeler and I decided for my design criteria to be focused on using as many off the shelf OEM parts as possible so that it can be easily repaired in the event of a breakdown. I also chose to build around 33” tires and 4” total lift, which meant I could utilize the stock axles with without too much fear of breakage and they already had 4.10 gears, which should be perfect for this combo.

With the intended use, lift and tire size decided, here is how the build plan shook out. I’ll elaborate further on each item once I start that specific item:

  • Swap in the 5.9 magnum and 46RE. Inspect and refresh as required. Upgrade as necessary.
  • Install transmission and power steering coolers and a transmission temperature gauge.
  • Install a SYE. Brand / style TBD.
  • Keep the stock short arm suspension and install adjustable control arms.
  • Install a Rockjock Anti-Rock sway bar.
  • Lift springs are TBD. I’ll weigh the TJ once it’s complete to figure out what I need.
  • Install new track bars, both fore and aft.
  • Tummy Tuck using either a Barnes or UCF skid plate with a custom transmission crossmember.
  • Install a full Bedrug carpet kit and Mastercraft Baja RS seats.
  • Upgrade the stock front bumper to either Barnes 4wd or Motobilt.
  • Install a subwoofer in the center console (because why not?).
  • Install a rear cargo rack and organize tool, cooler and luggage storage.
Admittedly, I love a spreadsheet so I created one to both keep track of this project and to hopefully serve as a good resource for someone else looking to do this swap. The latest draft can be found HERE.
 
I intentionally waited on Black Friday deals to post since my budget needed all the help it could get. While browsing FB Marketplace one Friday at work, I happened up on this:

Facebook.JPG


This was a deal that I knew I couldn’t lose on so a guy did the right thing and grabbed some cash and the trailer and headed to TN to pick up another TJ. This was a clean titled, rust free 98 TJ with a 5.2L Magnum and 44RE transmission that had kinda been installed and then abandoned.

012e22e9b8db110e25172a2227644060fe4c454cdb.jpg


Why on earth did I buy this?

My TJ gets driven at least 50% of the time and is backup to my 2003 Silverado so I didn’t really want it down for months while I figure the swap out. This would allow me to mock the entire swap up (and probably get it running) before I put in my TJ. With the current state of the world I didn’t want to get halfway through the build and have something hold me up for weeks on end because its floating off the coast of California. I might even swap in the 5.2/44RE it came with and sell it as a running and driving Jeep. Probably not, but we’ll see. Worst case I can see the 98 TJ for what I paid for it.

Black Friday rolls around and I managed to snag some better deals than I expected since most of this stuff really doesn’t go on sale. Everything I ordered was either required to get it running and driving or was too good of a deal to pass up since I’d be buying it later anyway. The parts list I now have sitting at my house is:

Out of that entire list, only 1 package was lost (GC steering bracket) and the 2 Rock Jock items were a few weeks backordered. Everything else came pretty much on time.

Every forum I posted this on immediately asked when I was upgrading the D35. Point taken. I decided to quit ignoring the fact that my D35 rear was going to have a short life and found a 4.10 geared 8.8 local to me that I’m picking up on Friday. I weighed the option of a Super 35 kit against the 8.8 due to cost and aftermarket support.
 
I hope everyone had a merry Christmas and good new year.

My riding group hit a few roads in the Talladega National Forest the weekend before Christmas, the most notable being 600-1. It’s a scenic gravel road / light trail that runs from Sylacauga to Talladega and then from Talladega to Mt Cheaha.

0138296628bc5e1d99a810e9ced9c106e5337c6203.jpg


0198ea8e6450482214951916b52a3a74030f346a70.jpg


01e9a03dfc5e6608121cc6c45969ac6e498eebdfeb.jpg


The only real ‘obstacle’ we hit was this rock climb coming out of a creek crossing. Everything else was rutted out muddy roads.

01ecbb3f2e26c7dbc16b8f66f3d30c1c687d7c51a5.jpg


01b278b2162e09655fb357a22ca124f9b40901dc55.jpg


I also spent a minute over the Christmas holiday working on the Jeep. I got the Motobilt bumper, Custom Splice fairlead and Diamond winch line, Currie Rock Jock Anti Rock and Roadshock LED bar installed.

010d874e10e4f24c3102ec9db928fa71215c8d4d28.jpg


I installed the Anti Rock with the links as short as they’d go without trimming and set them on the middle hole as a starting point and will play with adjustments in time. I’ll get the angle of the arms dialed in once my final ride height and springs are selected. My first impression of the Anti Rock is positive and aligns with everything I’d read about it– The Jeep absolutely rides smoother and the added body roll was definitely noticeable on the first test drive but I got used to it quickly. It’s not anything I’d consider a negative – it’s just different. The decision to go with the AR came from not having the budget for a Sway Loc but wanting an upgrade over disconnects and still wanting some sway control when on the trails.
 
Progress has been sparse due to prior commitments, me being sick for a week and it being far below my cold threshold for working outside. This build is primarily being done in my open carport at home.

Two Fridays ago I received a notification in the morning that my seats had been delayed another 3 weeks which was a bummer but not the end of the world since I don’t have to have them. Much to my surprise, my doorbell rang later that day and:

01904b1b82e2c369f8461ff6f58d013d161d5163af_00001.jpg


Go figure. I had a free day this past weekend and decided to focus on the interior so I could enjoy the new Bedrug and Baja RS seats.
Mastercraft wanted $89 per side for the seat adapter bracket, which looked like nothing more than a piece of flat bar with 2 spacers welded to it so I decided to make my own.

624005.jpg


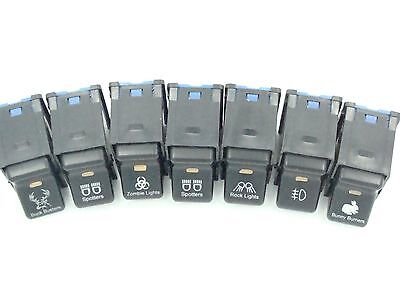
I managed to get the seats and front Bedrug installed as well as mounting the transmission temperature gauge and switches. Here was the final result:

0173d31fa429ef7e6f800c224af47eb1ef56b5185c.jpg


01603fc443965d08127b49b65f5db5278acd44896b.jpg


First impressions on the seats is positive – the fit and finish is great and the seats sit really well. The only complaint I have is that they sit way too high, but that is entirely due to my brackets. I was unable to find any installation instructions to borrow pictures from so I really just winged the install. I used 1.5” x .25” flat bar for the mounts and 1” coupling nuts for the spacers. The limiting factor here is a bracket that’s riveted on the factory seat base that has a 1” rise, so I can’t go below that without cutting that bracket off. I’m going to ponder on this issue and live with it for now.

01b1e5e561ed86b525033fbfd98a76faf38a97c607.jpg


The O/D switch is an OEM Mopar unit and the others are from Gold Coast Distributing on eBay. I wish they all matched, but GCD doesn’t offer an O/D switch so I’ll live with the slight variation. The transmission gauge is from Glow Shift and fit nicely in this space. This will all get wired later.


0187841773c82f974038d8f607d9299de21bdd8a65.jpg


As with everything these days, SYEs have been a little hard to come by. I noticed a forum post over on Wrangler TJ Forum that the JB Conversions SSSYE was back in stock about the time I received notification that my Advance Adapter SYE was pushed out to a possible 2/26 ship date, so I canceled the AA order and ordered the JB Conversion unit which arrived yesterday.
 
Are you able to retain the fold and tumble forward feature with aftermarket seats like these?
 
Are you able to retain the fold and tumble forward feature with aftermarket seats like these?

Yes, the factory seat bases still work as they did before. The new seat doesn't have the handle in the back to make it tumble like the OEM seats do, but it's not hard to reach the handle under the seat.
 
That is good to know. That is the thing that has been holding me back from getting aftermarket seats. I thought I would lose that function. I have kids that come on the trail sometimes, so I need to retain that.
 
Digging this build. Similar approach to mods as I have planned for a 03 that I recently picked up for my oldest first vehicle.
Question, where did you get the reverse light rocker switch?
 
Digging this build. Similar approach to mods as I have planned for a 03 that I recently picked up for my oldest first vehicle.
Question, where did you get the reverse light rocker switch?
Below is a link to the eBay site I bought them from. These don't feel quite as crisp as the OEM switches, but I have yet to hear of any issues with them.

 
Anti Rock update: I’ve put about 500 miles on it so far (all on pavement) and continue to be impressed with it. Just from going over potholes and driveway transitions I can tell that the Jeep rides much smoother. I’m eager to see what it does in the dirt.

I also learned the hard way that soft top windows get EXTREMELY brittle when its cold.

015e011f555bbd96549b991b30833fdedc540376c9.jpg


This past weekend brought King of the Hammers coverage and some warmer weather, so I turned on the live feed and went to work getting the driver side seat lowered. I cut off the factory bracket that was previously holding the seat up and bolted the seat directly to the sliders. I’m 5’ 9” and the seating position is dead on. As with any suspension seat, getting in and out of the Jeep is slightly more difficult but having this quality of seat is well worth it.

013f69c23f36d7658c67d15e36ac0d0284b0db4065.jpg


The live feed coverage was top notch, as always.

019f070c631da1e843b4d8d13839cd9400b9ba20aa.jpg

If I had it to do over again, I’d probably still make my own brackets as I still think I’m ahead of the $200 price tag of the adapters.

Last night I started what seems like the most feared part of this swap – the wiring. And yes, that's 11x17 paper. Not today eye strain! I’ll write a dedicated wiring post that outlines my method to approaching this once I’m further along. Once I figured out how to find information in the FSMs, this seems straight forward.

01c329f1f3a6661aba73c2a4e78994143fa3483081.jpg


Since we’re all gearheads here, I figured some of you would want to see my ‘shop’.

01c2f0619cbdfd824bd355b7e91feb812622462567.jpg


015476ab9aea8dcd1c77193981d2a4f2b686d9b5c2.jpg


It’s a 12’x24’ building that stores all my tools and some small parts – the big stuff lives at my in-laws farm about 30 mins away. Everything in here is on wheels so it can be rolled outside to service any project that doesn’t fit in here. I’ve been in this space about 18 months and it’s still evolving as I figure out what layout works and what doesn’t. Once I purge a last bit of clutter it’ll be just about dialed in. I’d like to tell you it’s messier than normal, but it’s not. I ALWAYS have something in process that keeps my workbench occupied. I sit behind a desk 40+ hrs a week, so projects that enable me to work with my hands are what keep me sane, really.
 
Appears you have optimized the space you have available.
 
Wiring Part 1 – The Approach

The wiring for this swap seems to be what scares people the most. The intention of this post is to provide a guide for how to pick up the FSM from both your donor and your TJ and work through this swap.

My search for a donor started with confirming which vehicles would be compatible with the TJ’s CCD Bus setup. Break out the Google machine if you’re unfamiliar with that as there is a ton of information online that I won’t get into here. I wasn’t terribly picky on what my donor rig was, so I bought what I could get cheap and around here that’s Durangos. I also have a but of a soft spot for the GCs and would hate to cut one up. So far I haven’t found anything that makes a Durango (and I’ll loop Rams and Dakotas in here too) substantially better or worse than a Grand Cherokee. I’ll touch on those differences later once I’ve confirmed what works from the Dodge.

Remember, I am going from a 1997 2.5L AX-5 to a 1999 5.9L 46RE out of a Durango. Everything engine related would apply if I kept a manual transmission, but since I am swapping an automatic transmission in place of a manual, I elected to use the Dodge engine harness and make it ‘plug in’ to the Jeep harness. There are too many circuits related to the automatic transmission I’d need to add to the TJ harness for it to make sense as the base.

Both the Dodge and Jeep have 3 plugs on the PCM; 1 is a body harness and the other 2 are engine related. Additionally, there are 2 plugs that tie into the PDC to provide power and grounds (C103 and C104 on the TJ and C105 and C106 on the Dodge). This means that you can separate the ‘engine’ harness from the rest of the wiring harness. The PDC plugs for both the Dodge(C105/C106) and the TJ (C103/C104) have many of the same circuits in them but utilize different plugs which prevents this from being a re-pin, plug and play deal.

Now, let’s talk about the splicing / de-pinning that many other threads mention. Splices are fine when done correctly, but that’s a pretty tedious process. Add to that the factory connectors are over 20 years old and very brittle, so de-pinning them would likely end up with a broken connector. And I’d probably end up with the pin tool stuck through my hand.

To avoid all of that, my goal is to cut the plugs off the factory harnesses and swap to a common Deutch/Molex/ Delphi type plug where I can match the pins to their prospective circuits, plug it in and go. As mentioned before, I didn’t want my TJ down for a long time during the swap, so I purchased a 97 TJ 2.5/AX-5 engine bay harness, including the PDC, off eBay for about $150. I bought. It occurred to me later that since I’m swapping to an automatic, it might have made more sense to purchase an automatic TJ harness since the control relay would already be there. Even if you don’t buy a spare harness, I’d strongly recommend unplugging your TJ harness and laying it out on a table.

It took me a minute to figure out where to get information in the FSM. THIS thread and THIS thread were beneficial to read through. Here’s what I learned:

• Since all the changes were being made at the C103/C104 and C105/106 plugs, and many of these are fed from the PCM, I started looking at the PCM circuit descriptions under the Connector Pin Out section. I built a simple Excel spreadsheet that listed the cavity number, circuit number, wire color and size, and page number. This Excel sheet has been major asset for the electrical portion of this project. A link to it can be found HERE.

• Review the rest of the Connector Pin Out Section and fill in the remainder of the circuits. Be sure to note what plug it appears on and page number in case its needed for future reference.

• Compare the TJ C103/C104 to the Dodge C105/106 and make notes of what matches. I used the spreadsheet to create pinout guide by copying and pasting. The neat thing about this swap is that many circuits use the same (or similar) wire colors, gauges and descriptions.

Here is a sample of the spreadsheet I created:

Spreadsheet Sample.jpg


Part 2 will get into the actual execution of this plan.
 
I have completed the wiring on the body side of the harness and have the rough shape of the engine harness completed. I’m waiting to trim wires down to length until the motor is in the TJ so I don’t cut anything short. I’ve also started tearing the motor down to re-paint it, install the Hughes plenum plate and see what accessories, sensors, etc might need replacing while I’m here.

Getting the engine in my shop was a little bit of an adventure. It started with getting the motor off the trailer with the help of my Jeep co-dog Mitchell. He’s a rescue that found us at Lake Mitchell (hence the name) when he was a 6 week old puppy and we couldn’t stand to leave him. After 2 years I’m not sure who has trained who.

013ef6b25ad8c3e3ac79a7a00ab44bf2836240bc62.jpg


01a7163907fea4ba3e77fea9b939686c3ae1157651.jpg


I then had to build a new ramp since my old one was a loaner from work and wasn’t tall enough. Since I have gravel around my shop, I had to drag the motor up to the ramp with the new multi mount winch I built from leftover Rhino parts. To get it into the shop I lagged a D ring to a joist in the floor, rigged up my snatch block and started pulling.

01f4209c2960e922065581c207924ff0c20a8ddc8c.jpg


The end result:

01359f3d2bb54257d5761f541597057a6e244d352c.jpg


With the motor torn down and an initial parts list ready to order, I’m bringing the 98 TJ home this Saturday to start mocking up the swap and see what else I might need to order in addition to the motor parts. The big ticket items I want to verify are:

• Will the stock Durango exhaust manifolds and y pipe fit the TJ?
• Inspect the transmission to see if it needs to be rebuilt.

My goal is to hear this run by April 1st. Here goes nothing.
 
I finally have something that gives the resemblance of progress!


Since Alabama weather in March is a mixed bag, I’ve tried to have stuff to do both in my shop and outside so I can maintain progress no matter the weather. With a BEAUTIFIL weekend of weather forecast, I enlisted the help of my dad to help me drag the green TJ out of storage on March 3rd (remember, I want to hear this run on the weekend around April 1st.)

01ac24d40030bdb8315d62d8a9bd32ff35be2dc22a.jpg


01b6d3f6093006928aaf1032c1a62ada6ef7168c88.jpg


Side note – I have a few Badlands winches from HF and bought their Apex wireless controller so it can be used on multiple winches. I’ve had really good luck with the winches and absolutely love the remote. It was used heavily this weekend.

018168521ea833f000a68e5251b1ae3f39cee5c1e2.jpg


If you recall, the green TJ had a 5.2/44re/231 out of a GC sitting in it, so the first order of business was to pull that out.

0106626c68e4d17703ad845af29d9326c878d409d0.jpg


Since my 5.9 was in my shop getting a refresh, I opted to use the 5.2 as a mock up. I swapped the 46re transmission and the Durango exhaust manifolds onto the 5.2 to duplicate the final product. I’d thrown the 3in body lift that my TJ came with into the parts bin a few years ago thinking I might use it for something later (I’m kind of a parts hoarder). The body lift was brought out of retirement, cut down to 1.25” and installed to replicate what I have on my 97 TJ.


My wife says I can't ever live somewhere with an HOA. I can't quite figure out why...

017cc7cd7097f8ce9c9acdfbb2a828936a2ca2d985.jpg


The Advance Adapter mounts are (allegedly) designed to work with a 5.2/5.9 and an automatic transmission, so I set them in their recommended place and tacked them in. Using a digital angle finder, the mounts were angled back 5* relative to the flat frame section under the tub and tack welded into place. I researched several tummy tuck threads and most all of the builds required some form of MML. Since a Magnum swapped TT wasn’t very well documented, I assumed there was the likelihood I would need a MML, so I opted to keep the AA engine mounts in their recommended location and build some spacers should the engine need any vertical adjustment. Using the frame as a reference again, the engine is currently angled back just shy of 4*, so I currently don’t plan to add any spacers.


01e213a2b440e1e53b6e03fa894fbed63dc87bd4cb.jpg


I raised the transfer case up within a 3/4" of the tub to give myself some room for the drivetrain to move. That tab contacting the body will go away with the SYE.

014070ce733b9bdc5350b2e0400a87bceb1011defe.jpg


Up to this point I had intentionally not ordered any headers in hopes that the Durango manifolds and Y pipe fit as-is, mostly for the sake of the time it would save. Much to my satisfaction, everything fit like a glove. Score!

014804e49e12c761c18c418024d5298bf7f876fe90.jpg


01b3a7c1928095cb1c3b059f902a2b677e7a4dcc02.jpg


Just take my word that the Y pipe fits. It didn't photograph very well when its all right in your face.

I bolted the Summit radiator onto the grill to verify fitment with the GC fan. It clears the radiator by ¾”. I plan to run electric fans, but still wanted to keep the option to go mechanical.

With the engine on the mounts, the transmission / transfer case sitting roughly in their final home, and the manifolds and Y pipe installed I grabbed a cold beer and studied for a bit. Here were my initial observations:

  • The Durango manifolds and Y pipe fit well, but wouldn’t allow the engine to come back any further if needed. Not sure why it would need to though.
  • Just by eyeballing the transmission mount in relation to the center skid plate bolt, it looks like the 46re mount would sit back down in the factory skid plate holes (or at most require the Barnes 4wd skid plate)
  • A completely flat skid plate is definitely possible, but you’d have to either bolt the transmission to the skid plate or get creative with the crossmember. The distance from the bottom of the frame to the underside of the CV joint on the front driveshaft is your limiting factor here – its about 1.25”.
  • This swap might be doable without a BL if the AA mounts were moved slightly forward.


This brings us up to Friday March 11th.
 
I took off work on Friday the 11th to spend working on the Jeep. The goal for the day was to get the transmission crossmember completed and start on the exhaust.

I purchased the Barnes 4WD Crossmember Mounting Set to serve as the foundation. Since the TJ frame tapers in and I wanted the bushings to be parallel with each other I used a straight edge on the UCF skid plate to mark and trim the mounting tabs. I am quite a ways from claiming to be proficient at tube bending, so take my building process as a grain of salt. My skid plate has a 1” drop (measured from the mounting flange to the top of the skid), so I cut 2 1” spacers and clamped up my level to use as a straight edge and figure out the bends. The tube had to be directly under or behind the front CV joint for it to clear the drive shaft, so I opted to put it directly under the joint.

01e7ec1cf8fbedd06ea103c648d1889efd59cd119f.jpg


After 2 bends and a few trips back and forth to the notcher, this was the final result:

0150ab11b4827bdf3e1b2e23b236817dc23ff30ef5.jpg


I opted to use the factory transmission mounting plate as part of the crossmember. It’s not as elegant as I wanted, but it was simple and worked. I cut and notched 2 short tubes to tie this mount to the crossmember. And no, I didn’t weld those huge gaps – the tubes were readjusted after this was taken.

0143faf57b065f61259f407662b53a124e4358782d.jpg


With the crossmember tacked together, the exhaust was the next piece to tackle. The Durango used 2.5” exhaust, and since I was utilizing the Durango manifolds and Y pipe I chose to maintain that size on my Jeep. Had I started from scratch I would have likely done a 3” all the way back.

The addition of the crossmember made routing the exhaust a tight squeeze, but a fairly simple ordeal. I welded on a pair of 3 bolt exhaust flanges from Summit Racing to mate the new exhaust to the Durango Y pipe and ran the new catalytic converter and muffler straight back to the factory exhaust hanger. An O2 sensor bung was added behind the cat to maintain the stock configuration. I’ll let an exhaust shop bend a new tailpipe for me once I have this running and driving.


Spoiler alert: I didn’t get ALL this done on Saturday. I can't have y'all thinking I work that fast....
 
Last edited:
Looks like taking time to do it right the first time is paying off. Slow and steady wins the race. Are you supporting the engine just on tag welds?
 
Thanks. Its a little more than a tack - each motor mount has 2 1" beads on the front and back.
I thought it looked like more than a tack in the photos. I was on my phone and just woke up.

Do a really great how to on the wiring. The excel sheet is awesome, and I HATE wiring so seeing someone do a lot of detailed work is kind of motivating for a newb like me to give things a shot.
 
Do a really great how to on the wiring. The excel sheet is awesome, and I HATE wiring so seeing someone do a lot of detailed work is kind of motivating for a newb like me to give things a shot.

I'm decent with typical 12V stuff, but this is the first time I've done anything like this. Take this with a grain of salt until this pile actually runs, but the wiring isn't too hard. Once I learned my way around the FSMs its been pretty straight forward.

I haven't found a how-to on the wiring that I really liked , so I'm going to spend a lot of time detailing how I did it.
THIS is what the site needs. Put it into a word document, write a How To for people (idiots like me who hate electrical) to follow, and post it up. You could be the Billavista of magnum swaps using an easy to find harness.
 
THIS is what the site needs. Put it into a word document, write a How To for people (idiots like me who hate electrical) to follow, and post it up. You could be the Billavista of magnum swaps using an easy to find harness.
I would suggest a PDF document in stead if you do this. This way, any platform can open it without issue as not all platforms can open a MS Word document.
 
THIS is what the site needs. Put it into a word document, write a How To for people (idiots like me who hate electrical) to follow, and post it up. You could be the Billavista of magnum swaps using an easy to find harness.

Not sure I can ever get to a Billavista level of tech, but that's a goal to shoot for. Would you want to see a Magnum wiring specific document or something like the TJ Magnum Swap Bible V3.0 that covers everything? I've used V2.0 for reference, but do feel it needs a little more information to it.
I would suggest a PDF document in stead if you do this. This way, any platform can open it without issue as not all platforms can open a MS Word document.
Good point. My shop computer is Windows, but I don't have Office on it and can't open a .doc file. I'll save it in a PDF or Google Doc format when the time comes.
 
Download libreoffice.
Not everyone will be able to download LibreOffice for their work computers due to user account not able to install software or policy to only run software installed. PDF or Google Docs is much more portable for all.
 
Not sure I can ever get to a Billavista level of tech, but that's a goal to shoot for. Would you want to see a Magnum wiring specific document or something like the TJ Magnum Swap Bible V3.0 that covers everything? I've used V2.0 for reference, but do feel it needs a little more information to it.

Good point. My shop computer is Windows, but I don't have Office on it and can't open a .doc file. I'll save it in a PDF or Google Doc format when the time comes.

A version 3.0 would build on the first instead of the typical ‘well 2.0 has some stuff but go over here too.’ Obviously it will look like three or four people worked on it, and the important part is the information. Bibles are ALWAYS helpful. I used the Dana 60 Bible over the past 2 years and it’s HOW old?? Website says 2005 so that’s 17 years old. It lasts because it is high quality information.
 
Remember the mixed back of weather I talked about? It was mid 70s the day before. The next morning?


0123bf535acdb185d31cc1e79fa65258975d8be16f.jpg


I don’t like to bounce around on a project, but I can’t help the weather. I spent the next 2 days checking items off my to-do list for the 5.9 since I couldn’t just toss this motor in the Jeep after all the other work I’ve done. I decided to do the following:

  • Install a Melling oil pump and Felpro oil pan gasket
  • Install the Hughes Engines plenum plate kit. PS – this is a really nice and complete kit. Their directions are pretty great too.
  • Install a new Melling timing chain set and Felpro gasket.
  • Replace all the spark plugs and wires.
  • Install a new belt, tensioner, water pump and a ZJ PS pump bracket.


At my wife’s request, I ordered new Weathertech mats for the front. Its almost comical how big of a difference new mats make on an interior.


01b84a228cc112e9891b8708be98702418ccadfb26.jpg


I blinked and my deadline of hearing the Jeep run was here and I was nowhere close to being ready for that. With the mock-up complete enough, I decided it was time to start hustling on the final product. After about 7 hours on Saturday I had a destroyed carport and had managed to sell the 2.5 engine, ECU and air intake.


01913bd975a62a9947feefa10668cda448773e8aab.jpg


I spent Sunday getting re-organized and returning the 98 TJ back to storage. I’ll focus on getting it sold once the swap is complete. My next goal is to have the motor and transmission in the TJ by 4/11.
 
At this point I’ve given up on deadlines and am simply putting in the hours until this is done.

With the 2.5 out, it was time to rinse and repeat and get the drivetrain set in its final home. A Sawzall, grinder and air hammer (sorry neighbors) removed the old engine mounts. I set the mounts to the same 5* angle back I’d mocked them up for, fully welded and painted them.

The engine refresh was completed, so I turned my attention to the transmission and transfer case. The transmission received a new Wix filter and pan gasket, new overdrive housing (I cracked the old one-oops), new torque converter (another oops – I scrapped the old one) and a sending unit mounted in the pan for the Glow Shift gauge. The pan in the 46RE had some clutch material and minor metal flake but not enough to concern me so I’ll run this transmission until it needs a rebuild.

Next was to install the JB Conversions SSSYE. Since the AX-5 transmission that comes behind the 2.5L has a 21 spline input and the 46RE has a 23 spline input I needed to swap the input shaft. I bought a pair of lock ring pliers off Amazon [DG1] and went to work. The only difference I found between the NP231D and NP231J was the output shaft and shaft housing, but since I’m swapping in a SYE that is now irrelevant. I opted to keep my Jeep case and swap everything into it.

01e503ab98af48680ae4ebdb332bf5e8db1bcd41fd.jpg


There’s really not much to the NP231, so installing the SYE was a matter of disassembling both cases, swapping parts around and reassembling. I’d read on other threads about folks buying and swapping in an HD chain, 6 gear planetary and input shaft and here is an advantage to buying a Dodge as a donor (not sure if this is applicable to a GC or not) – my Dodge NP231 already had 2 out of the 3 so there’s no need to buy anything.


My NP231D had the same 3 pinion planetary, so no upgrade there. The input shaft was removed and installed into the Jeep case.

014b9be3a79d6dd01167356a39967dd0630c63d43c.jpg


It did have the wider HD sprocket and chain:

012dc87f10b73cca42ae4aceade6be06fb07dc73fd.jpg


This shows the differences in the input shafts. From Left to Right: JBC, NP231J and NP231D. Look how short the JBC SYE is!

016b55479686a12e3e1e1a4bd7a5e7e9513a969250.jpg


I installed a thin bead of ultra grey RTV to the case halves, torqued everything to spec and bolted the transfer case back up to the transmission.

01c9034b51cf0820849816fc74964153d1d12097fc.jpg


The transmission was married back to the engine and the entire assembly went into the Jeep for what should be the final time.

0100140989ce76ffc5ddae890e8f61199115c621cb.jpg


0151bfb635890b282cef8adba517ba6dfa71b25476.jpg
 
Top Back Refresh