rockota
white collar hillbilly
- Joined
- May 28, 2020
- Member Number
- 1642
- Messages
- 3,959
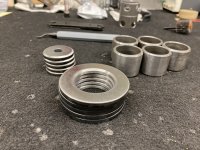
For your viewing pleasure...
I hate you just a little bit right now....
Follow along with the video below to see how to install our site as a web app on your home screen.
Note: This feature may not be available in some browsers.
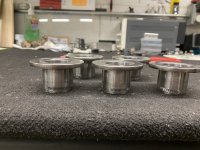
For your viewing pleasure...
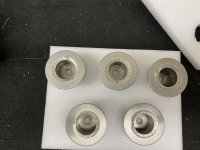
For your viewing pleasure...
 Was hoping you finished it up. Came out as expected
is that at gold lake?

I hate you just a little bit right now....
I wish I was done! That’s right before we murdered it. It’s much more red now....
http://www.woodwardsteering.com/PDF/...d%20Shafts.pdf
UA201108 is what I use.
Call them up. Very helpful over the phone.
Its not that lame. Good information to know.
This is kind of lame, but I hate the glued in windshield trim and have always wanted to try the roped in gasket on one of our 2nd gen trucks. The FW471 aftermarket glass did not fit using the roped in gasket. 5/16” needed to be trimmed from the bottom edge and from one side. Fits nice...
dude
what gasket did you use? and did you just glass cutter and heat for that cut on the glass?
i actually need a new windshield and that looks really nice
Having never cut glass before, we watched every video we could find. We ultimately grabbed a couple of used / damaged practice windshields from a body shop and gave it a try before cutting the toy windshield. Wasn’t that tough really. Used the smaller of the 2 oil filled glass cutters we got on amazon. I like the smaller one better for curves, but they cut about the same. The real trick that no one shared with us was that after you cut the outside surface first, make sure that the cut line fractures all the way down to the laminate layer by aggressively tapping on it before attempting to flip it over and cut the inside surface. Be certain it’s fractured all the way down. After both surfaces were fractured down to the laminate layer, we used a small torch to warm the area just enough to get a razor in there and cut the safety laminate. Last steps were to use a 90 degree air grinder with some 2” 80 grit discs to smooth out the edges. Used scuff pad discs for the final edge prep to make it look nice. Very pleased with the final result. Actually gonna cut the glass from our grey 85 soon and do the same. The gasket can be found online. Mine came from Japan and was under $100 shipped, but took about a month to arrive...

Well...I’m no glass guy, so when we bought the windshield, we actually bought 2 just in case. First one worked out perfect so we didn’t need the 2nd, but your statement got me wondering if it was just dumb luck, so I cut the second just to see if I could. Went smooth. It’s yours for the cost of the glass if you want it. It’s got one small spot where I touched it with the scuff pad on accident, but it’ll polish out. You’d have to pick it up in SJ though, I’m not packaging it and doubt a shipping label stuck right on the glass is gonna work out well.....very nice
im actually a commercial glazier, and thats not an easy cut to make!
sounds like you free handed the cut too, ill have to skip out on coffee that day when i try it
Well...I’m no glass guy, so when we bought the windshield, we actually bought 2 just in case. First one worked out perfect so we didn’t need the 2nd, but your statement got me wondering if it was just dumb luck, so I cut the second just to see if I could. Went smooth. It’s yours for the cost of the glass if you want it. It’s got one small spot where I touched it with the scuff pad on accident, but it’ll polish out. You’d have to pick it up in SJ though, I’m not packaging it and doubt a shipping label stuck right on the glass is gonna work out well.....
 thats tempting.... i just had a new windshield put into it last week