Project: Midnight Panic

But, the right letters to even spell "easy" cant be found in Midnight Panic.


And yet you still somehow find a way to actually make it look easy. I'm 100% serious in that. I tip my hat to you Sir. :smokin:

The out of the box thinking and problem solving skill set you're using is amazing. Take that as a complement.


Does your neck get sore balancing a 75lb brain above it all the time?:flipoff2: I have no idea how that feels.


Progress looks great and even I am learning form it with every update.
I bet his back is sore from the weight of us all swinging from his nuts!

There's a hand full of build threads on this site that motivate me to work on my shit and this is #1. :smokin:

It's also the inspiration for me to plan bigger than originally.
 
I bet his back is sore from the weight of us all swinging from his nuts!

I believe proper respectful etiquette is to cup the balls. Swinging adds unwanted tension on the sack and none of us are getting younger.

To be able to spend a week learning how he goes through his thought process.........I'd cup the shit out of um.:flipoff2::usa:
 
Are you sure it will hold together with so few zip ties? Jk jk it’s amazing how many zip ties you have eliminated with custom clamps and mounts. My rig has bags and bags of zip ties and it’s no where near scratch built
He needs to make custom clamps that facilitate the use of zip ties and hose clamps to hold stuff. :laughing:

Kinda like how marine heat exchangers and some pickup filler necks drop onto a bracket and then get held to it by an off the shelf hose clamp or U-bolt.
 
He needs to make custom clamps that facilitate the use of zip ties and hose clamps to hold stuff. :laughing:

Facilitate is the perfect term,
I especially like how the half round mounts worked out,

The actual clamps did completely eliminate the need for zip ties in some areas though.
 
I make up for it by using hundreds of ties to hold the harnesses together & making sure everything is laid out just so, right before cutting them all of & looming the harness up. 😆

This is a great tip I'll be able to use when wiring my pile. Having the wiring already in perfect bundles when it's time for loom.

Looks like you're initially putting a tie every couple inches as the wires are being laid out?
 
Looks like you're initially putting a tie every couple inches as the wires are being laid out?

Pretty much,
Makes it easier to keep wires laying together & not twisting/overlapping, which keeps your harness smaller in the end,

Also if you know you have a pair or more that are going to peel off down the line, you can start segregating them early,

Under the dash it was handy when I had the odd wire or two that came in from the opposite side of the cab that I started from.


Done right a bare tied up harness looks every bit as good as one that’s nicely loomed.
 
Kind of a quick update this week, not from lack of hours put into the project, wiring just isn't that interesting,

Before actually starting on the chassis harness I needed to install one more bulk head connector, With the ignition box mounted behind the passenger seat I had previously installed a 6 pin DT series connector to pass the wiring through from the chassis harness in to this box,
Main feed power & ground will come from the same pass through lug as the rear steer, so that part is covered, the rest of the connections that are required for the MSD 10 box include, Mag pickup + & - from the distributor, keyed power from the ignition switch/RII, then an output to the tachometer, & a positive & negative feed wire to the coil on the engine,

It's been a long time since I had wired in a MSD 10 box, & sometime in the last few years it has been discontinued, (which is unfortunate, only one other ignition out there is more powerful & that is the MSD 44 supermag) Fortunately I still have two of these ignition boxes, with coils,
One thing I remeber was the coil feed wires were a bit heavier, probably 14 ga & used a weatherpack connector, (rated for 20 amp)
I started thinking the DT series pins might not be up to the task for this circuit,
So back to the bulkhead/passthrough plug I needed to install. I ordered a DTP series (25 amp) 4 pin bulkhead plug kit, that should work great for the two coil feed wires, ignition feed, & probably reverse lights from the shifter,
While the plug I got had a mounting flange, it was not threaded like DT 6 pin plug, not a big deal to use nuts, but I had some leftover knurled flange nuts, so the DTP bulk head plug got a couple to make installation & removal easier later on,
826.jpg

Next a hole was cut & fit for the plug next to the existing 6 pin connector, (oddly enough I didn't take a single pic of the interior ignition wiring yet)

So with 95%+ of the components in place, I started stringing wire,
I don't think there's much in this world that will test your patience like fighting the coil memory & constant detangling of several wires & circuits,
I would try to "back bend" & straitend each wire out as much as possible as I went, but even if it was perfectly strait after a short time the wire would try to return to it's coiled form right off the roll,

After close to 20 hours, & probably 150 zipties, I had the major portion of the harness laid in place,
827.jpg

828.jpg


For the interior wiring I have been looming everything up with a braided, chinese finger type material, I like the material for the most part, but if there are a lot of offshoots it gets hard to install, since it's not split, (the harness has to be fed through the loom)
I was originally going to wrap the main body of the chassis harness up with super 88 vinyl electrical tape, then loom what I could with the braided stuff & call it good, so the whole harness came out of the chassis & taped up, cutting each ziptie off as I went,
829.jpg


Once back in the chassis I really don't care for the unfinished look of the taped up portion of the harness,
So I'll be ordering some split braided loom that I can fit on there & give it a little more protection,

Where the harness was in fact loomed up turned out good,
833.jpg

In the above pic you can also see where this harnes feeds into the back of the box built last week,
 
Next up was battery cables so I could power this thing up finally,

Starting with the cable ends, & a piece of 6061,
IMG_5627.jpg


Just kidding,


2ga cable & crimp on cable ends feed the main power relays from each battery, The ground side got 1ga since I had a piece just long enough for both cables,

While working in the belly I added a sealed 2 position fuse holder, one fuse is for the main feed relays activation wire, (to the big red button in the dash) the second fuse is for the feed wire back to the accumulator valve relay in the box at the back of the truck,

831.jpg

I really would have liked to move this fuse block location up about 10" to put it closer to the harness, but with rear steer hoses, a RTC cable, & air locker line all moving/shifting around, that area is pretty busy,

I might revisit this before the project is done, this location is really easy access if trouble shooting or maintenance is needed, but I think the install could be cleaner, Maybe a plug in fusable link harness?

For now this will do,
832.jpg


In the last couple hours of my days off I was able to turn on a few switches & listen to some of the components respond back,
And I only popped one fuse,
My 15 amp test fuse wanted nothing to do with starting up the cooling fan, once a 25 amp fuse was installed there was no longer an issue,

The engine even cranked over, There's a pretty good list of things to check over yet, but maybe next days off I'll get some methnol & see if I can light a fire in it,
 
Migh look for a starter with a little more zip too, this one is just a stock gear reducted unit from a mid 90’s F-250 that’s probably been rebuilt a half dozen times.
 
Are you unspooling the wire off the spool? Or are you cutting a longer piece first and working with that?
 
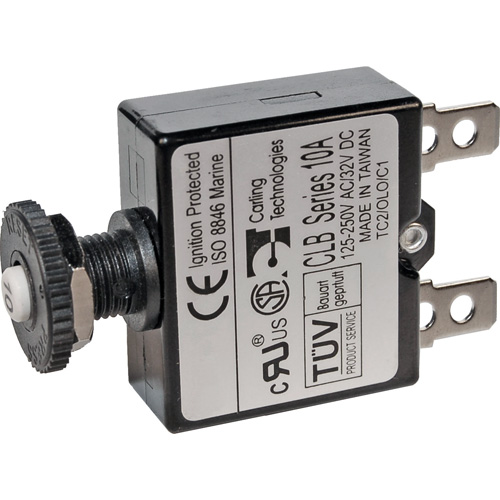
Fuse holder link? That's slick

Holder


Cover


The “overview” section lists part numbers for the contacts & seal.
 
Top Back Refresh