What's new

Project CJ7Years

Exhaust is done, 2.5" pipes into 3". Magnaflow muffler, v band after Y pipe. Sounds great and the 02 sensors will be looked at tomorrow to see if they are running pig rich. 409 stainless, i didnt go with mandrel bends, seemed like an unnecessary cost for what Im doing.
 

Attachments

  • 01ce865b14c1971972babd0b6583263cc87dcdd2ee.jpg
    01ce865b14c1971972babd0b6583263cc87dcdd2ee.jpg
    806.3 KB · Views: 65
  • 01f657b067d5e1cd64dd70cf927968ec5e646c84e8.jpg
    01f657b067d5e1cd64dd70cf927968ec5e646c84e8.jpg
    1.1 MB · Views: 62
  • 01f92362c626977988b4dce3aa32a4cf6542569f0f.jpg
    01f92362c626977988b4dce3aa32a4cf6542569f0f.jpg
    1.2 MB · Views: 65
  • 0156a39096f498a040e9e0abe9c7332d2b97d64510.jpg
    0156a39096f498a040e9e0abe9c7332d2b97d64510.jpg
    871.4 KB · Views: 65
Weird, all I heard were ducks.:flipoff2:

Nice deep quiet sound.
That is exactly what i was going for :flipoff2:

as for the deep sound, i have gotten real tired of obnoxiously loud shit. I will be curious how this sound settles in.
 
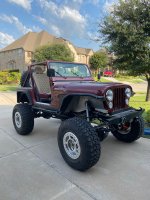
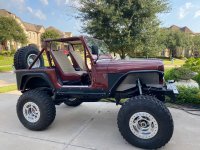
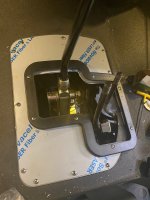
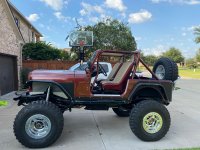
I havent been updating so i will list out what i have been working on and attach pictures.
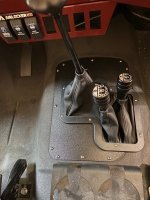
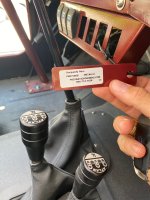
  1. finished up shifter boot and tunnel cover. Stronghold boots makes a T176 Dana 300 twin stick setup that worked perfect for a 4l60 with lokar shifter and Atlas twin stick.
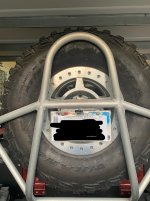
  2. Got rear tire carrier mounted and spare on. I likes Genright's design because it hinges and I dont have to lift a 120lb wheel and tire
  3. PRP seats mounted, these are the daily driver series and are super comfortable
  4. Completed first drive to "work the bugs out." Needed to change the water temp pickup for fans because it was running hot. Changed from the probe sensor with DC Control unit to a FlexALite variable speed controller with screw in sensor. Much better, operates at 200-210F now.
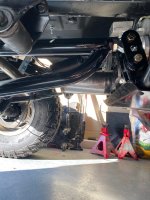
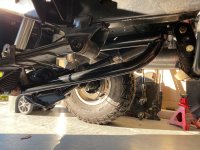
  5. Adjusted driveline angles with the weight in the jeep to get ready for anti wrap bar, its necessary with SOA in my opinion. Spring wrap is definitely there.
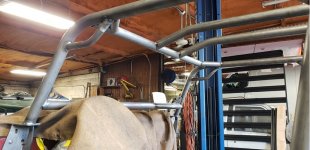
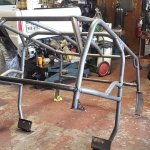
  6. I will be changing the roll cage, i have a legacy (see: old) MORE front half kit but the cage makes it difficult to get in/out. I bought a genright kit for a CJ and am working on that.
Bottom line is this is so much fun, and terrifying, to drive at the moment. Its a lot of power, sheepishly i will admit i have already broken the forward sprag on the transmission due to the shifts being too firm with the LQ4. I fully realize the 4L60 has its limitations, i am having a local shop in Houston take a look and see what we can do.
 

Attachments

  • 01a63603d09b8a9e59236ef4b8793cdc69026b97e8.jpg
    01a63603d09b8a9e59236ef4b8793cdc69026b97e8.jpg
    830.8 KB · Views: 78
  • 01c2b576816aeb1cf2ab1763055758b546314ea680_LI.jpg
    01c2b576816aeb1cf2ab1763055758b546314ea680_LI.jpg
    3.5 MB · Views: 73
  • 015fb47f3826ce40bafe59a410d32027ddef3dc315.jpg
    015fb47f3826ce40bafe59a410d32027ddef3dc315.jpg
    1 MB · Views: 67
  • 01017d849cf145a541bb95b0a1c94661789e53ddf0.jpg
    01017d849cf145a541bb95b0a1c94661789e53ddf0.jpg
    1.1 MB · Views: 74
  • 01192f873922003386ed7c1da1c2f1022d0af26845.jpg
    01192f873922003386ed7c1da1c2f1022d0af26845.jpg
    1.2 MB · Views: 74
  • 0152327a1d25fe0681daa1b7fc51c45df680f15808.jpg
    0152327a1d25fe0681daa1b7fc51c45df680f15808.jpg
    1.3 MB · Views: 74
  • 0114080911fc1daf8220565740d16b788d93ae8efb.jpg
    0114080911fc1daf8220565740d16b788d93ae8efb.jpg
    948.6 KB · Views: 81
  • 0180074355b2b6b0b12d72eca7a43e4832732b56cd.jpg
    0180074355b2b6b0b12d72eca7a43e4832732b56cd.jpg
    1 MB · Views: 80
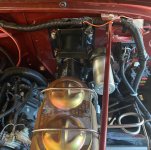
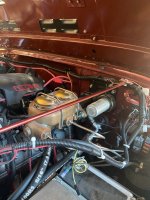
Genright cage is all welded and off to powdercoat. Also got the antiwrap bar and hydroboost on. What a difference the anti wrap makes for SOA vehicles. I flipped the hydroboost unit (Vanco)for better coil pack clearance. Regarding that unit, holy crap it stops this things fast.
 

Attachments

  • 01a80e0014e77e1fd08aa4f4c7374bd652b21d75c0.jpg
    01a80e0014e77e1fd08aa4f4c7374bd652b21d75c0.jpg
    172.8 KB · Views: 47
  • 01cdb83746d194ac94ac80ef8be7a25826b2fea9a3.jpg
    01cdb83746d194ac94ac80ef8be7a25826b2fea9a3.jpg
    446.2 KB · Views: 40
  • 019aec138f93495c78df589cb81a54aebda5e10568.jpg
    019aec138f93495c78df589cb81a54aebda5e10568.jpg
    1 MB · Views: 39
  • 0195bef3cfc7c52898abb8dc600010ca77d3bf45df.jpg
    0195bef3cfc7c52898abb8dc600010ca77d3bf45df.jpg
    464.6 KB · Views: 45
  • 01223b7a62e50acc8d8eee27a0eb6da2ab502ef0ad.jpg
    01223b7a62e50acc8d8eee27a0eb6da2ab502ef0ad.jpg
    699.6 KB · Views: 50
  • 01877f171e5cec91ec2e107a7f37c276afb31844d7.jpg
    01877f171e5cec91ec2e107a7f37c276afb31844d7.jpg
    903.6 KB · Views: 51
  • 0177153ce19d227e97c3728149bd6438d86e60b35c.jpg
    0177153ce19d227e97c3728149bd6438d86e60b35c.jpg
    922.5 KB · Views: 53
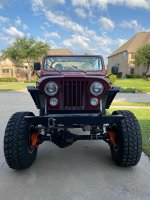
Cage is back from powder-coating and installed. I love it and the color came out to very close to the Garnet that's on the Jeep. So much easier to get into and out of with the dash stanchions.


Now i have to cut the dash pad to go over the stanchions. I have been driving it, and its been worth the 7 year build.


I had to shim the master cylinder away from the Vanco hydroboost unit, others have reported to have to do the same. The brakes were grabbing and as they warmed up it would end up in a total brake lock situation. Smoked the pads. Right now im using a single washer on washer on each side. I have been looking the hydroboost unit and trying to figure out if i can adjust the rod length. The washers seem to have done the trick, I am finding any excuse to drive the Jeep anywhere.
 

Attachments

  • 01b43fd02b06ba8ee6ab36d18183e9ad80ca1e452d.jpg
    01b43fd02b06ba8ee6ab36d18183e9ad80ca1e452d.jpg
    1 MB · Views: 38
  • 0181496e5a91d9631b9b524c4581ef5cf7ffca29b3.jpg
    0181496e5a91d9631b9b524c4581ef5cf7ffca29b3.jpg
    1.2 MB · Views: 36
Got the pad trimmed to fit around the dash stanchions. Drove it for a bit today before the rain, loved every minute of it.

Question, with the shape of the cage what rain cover should i get. I was thinking TJ but the 2 door JK ones look like they would fit also.
 

Attachments

  • 01b6f42bf0f6ed1985d09c16effbf23dada9864d61.jpg
    01b6f42bf0f6ed1985d09c16effbf23dada9864d61.jpg
    757.1 KB · Views: 27
  • 01c830d345ace953da2a1e461b62ddc7dd36716036.jpg
    01c830d345ace953da2a1e461b62ddc7dd36716036.jpg
    755.3 KB · Views: 27
The jk ones are really long compared to the to the to. Look at overall body lengths.
Yeah, i started looking at that and figured out a TJ is probably the closest. The YJ and CJ versions all have slant backs, so they wont clear.

I ordered a few, i will just see which one fits the best.
 
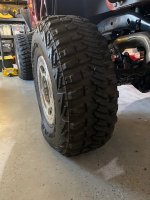
new meats! Maxis RAZR MT 37x13.50x17 were what I selected. They look like they will fit the bill in the rocks, and they were one of the few tires I could find that wasn’t backordered. Same load range as my former MTR’s so overall I’m a happy camper.
 

Attachments

  • 1.jpg
    1.jpg
    2 MB · Views: 6
I finally had the chance to make an appt for some dyno tuning. I’m not going to say I broke any records at Houston House of Power except for the slowest ride to grace their dyno. We got all of the issues I was having worked out and it drives so much nicer. If you are questioning if a dyno tune is worth it, it is 100%. This was also the only time the Jeep will see redline again ...

Rolling Pull

Pull from stop
 

Attachments

  • 2.jpg
    2.jpg
    239.3 KB · Views: 11
So what did she throw down for numbers? Question 2 is what headers or exhaust manifolds did you end up using?
 
Corvette c6 manifolds

298/327 at the wheels. I was actually pretty happy with that considering my drive train. 4l60 and Atlas with 5.13's and 37's

Engine is mostly stock, mild cam. I thought driveline loss would have been more.
 
Last edited:
Great work and execution.

Edit: Do you plan on trimming the tub? Cant see how you have the shocks set up with the boots, looks like factory bump stops a foot above the axle. The tub looks to be 3" away from the tire and the exhaust even closer to anti wrap.
 
Yes, I need to trim the body where the armor shows it underneath. I really dont have a lot of uptravel in the rear, most of the time before full stuff i will lift a tire.

The exhaust actually is inside the frame until the last two feet where it passes behind the driver rear tire. it is in no danger of being hit by the tire because my WMS is wide enough. The anti wrap bar is on the other side, so out of the way.
 
Last edited:
Thanks for the info--I'll have to look in to getting some of these corvette exhaust manifolds for my Willys.

Yea not bad numbers, bottom line it's gonna be fun to drive!!:beer::beer:
 
Nice to see you breathing life back into the old girl!

For comparison, what numbers did you get on the engine dyno?

Also, did I miss the you are doing for a parking brake?
 
To be honest i dont really remember, i think it was 390ish HP after the cam and tune on the engine dyno. It was 6 years or so ago.

The parking brake is the original pedal along with the main cable that goes all to the way the equalizer but i used a Lokar cable kit for the eldorado rear calipers. They connected right up.
 
Last edited:
Thanks for the info--I'll have to look in to getting some of these corvette exhaust manifolds for my Willys.

Yea not bad numbers, bottom line it's gonna be fun to drive!!:beer::beer:
They worked great because they are mid length for the collecter dump, hug the block for great clearance, have o2 sensor spots in both, and are easy to find and cheap.
 
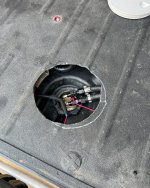
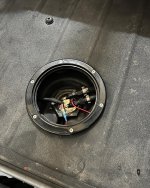
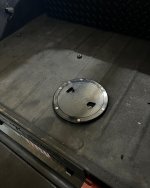
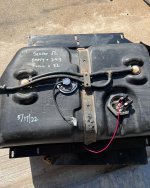
Figured I would post here to update on my in tank sending unit / fuel pump assembly saga. you can read my thread here to read about the issue. I decided I was tired of not having a working gas gauge when the engine was on so I bought a VDO reed fuel sending unit and Autometer gauge rings. Part numbers are below:

VDO 226-633
Autometer 3263 x2

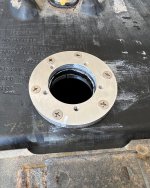
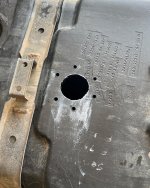
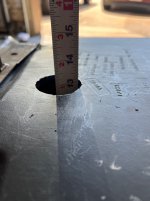
I decided the best place to drill the hole for was right above the small 8x8 recess in the middle of the tank, also keeping in mind clearing the body cross members that are directly above the tank. This gauge is 13inches long and with he flange is was 13.75” to the bottom of the tank.

I cut one of the rings in half to fit it inside the tank to give some backing to the whole assembly and to assist in compressing the gasket. Once the hole was drilled it was easy, getting the nylok nuts in there wasn’t fun but I didn’t drop any. Remember, most stainless steel isn’t magnetic, so a magnet doesn’t work if you drop one in... luckily, I didn’t. I sealed everything with Seal All.

I used all stainless hardware and the #10 mounting screws I used were 1.25” long.

After doing the cutting and drilling I thoroughly washed the tank out to remove all the plastic that fell into the tank.

Then it was simple to mount the gauge after confirming the new Ohm readings. I have a Speed hut speedometer, so the fuel gauge is programable as far as resistances.

It also gave me a new viewing window to look at fuel pump pickup distance from the bottom of the tank. I needed to shorten the assembly up about an inch, but im about 1/8" above the fuel tank floor now.
 

Attachments

  • 01c61ec9c55513c50c3bc47e7416fd1b88ecccad72.jpg
    01c61ec9c55513c50c3bc47e7416fd1b88ecccad72.jpg
    741.3 KB · Views: 4
  • 01a47e50a0141c2b741db99c78c5085e76b4d6fd4f.jpg
    01a47e50a0141c2b741db99c78c5085e76b4d6fd4f.jpg
    1.5 MB · Views: 4
  • 01a15ce6112d9f56fba60663b2cf9c3afece9c1594.jpg
    01a15ce6112d9f56fba60663b2cf9c3afece9c1594.jpg
    1 MB · Views: 4
  • 01d964889cbef13031807f449d0399a9b0063fb5a5.jpg
    01d964889cbef13031807f449d0399a9b0063fb5a5.jpg
    437 KB · Views: 5
  • 01e17eb3bf335200ea41210ffd2ed2ba90bb8fcded.jpg
    01e17eb3bf335200ea41210ffd2ed2ba90bb8fcded.jpg
    1,009.7 KB · Views: 5
  • 01f439095dcff57604035d4a08650e91093bd0c9ed.jpg
    01f439095dcff57604035d4a08650e91093bd0c9ed.jpg
    824.8 KB · Views: 4
  • 018db1a547750c3acfb178b0b92df2febdcc29ab6e.jpg
    018db1a547750c3acfb178b0b92df2febdcc29ab6e.jpg
    668.7 KB · Views: 4
I have been using the wetsounds soundbar, and while it works fine, the small speakers just can’t hit some of the overall notes. I added 4 marine 6.5" speakers with a small amp to get a better rounded out sound. It sounds great.


I played around with the rear speaker’s cans mounting location and i suppose they sounded best in the middle of the cage vs the outside of the cage pointing at the back of the seats. The centrapod worked out great also, i did have to remove the YJ heater duct on the bottom of the heater vent, we will see how that works out in the Texas winters. Probably not a problem. I will just wear an extra set of socks!
 

Attachments

  • 01260fc9119407a089df5cafc359c35a719a131e82.jpg
    01260fc9119407a089df5cafc359c35a719a131e82.jpg
    1.1 MB · Views: 9
  • 0131d73cf1b5fa50b4706d46376bec0f58f3bf0b02.jpg
    0131d73cf1b5fa50b4706d46376bec0f58f3bf0b02.jpg
    790.7 KB · Views: 9
  • 014ca403da59cfb0a07f0e615b230f2243ef17e9a2.jpg
    014ca403da59cfb0a07f0e615b230f2243ef17e9a2.jpg
    1 MB · Views: 10
Has to be a good feeling just having to dial in the finishing touches!!!!
Really nice Heep you got here!!!!
:smokin::smokin::smokin:
 
Top Back Refresh