What's new

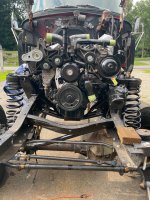
Lets tear apart a perfectly good truck

Had to clearance the throttle return spring bracket around the pump housing. It's tight, but it works.

IMG_2134.JPG


Went to swap oil pressure sensors but broke the GM one when I pulled it out of the 454. They are the same style, but one has 1/8 thread and the other is 1/4. Got an adapter and a 45 to clear the steering pump housing, as you can see the hole for it in the block in some of the previous pictures. A one inch tube and a 90 would be better, but I thought that with all the vibration it would be more likely to crack off in the future. Would it ever be a problem? Probably not, but i just saw a 50psi stream of oil coming out of a cracked pipe nipple. I guess I didn't take any pictures of it once I got the sensor in.

IMG_2117.JPG


I put the GM temp sender in the same hole the dodge used. Needed a 3/4 to 1/2 fitting to make it work. There is a couple spots by the thermostat housing you could use without needing an adapter if you wanted as well.

IMG_2127.JPG


Notched the motor mount to clear that sensor in the back of the steering pump.

IMG_2124.JPG
 
Had to swap to an 8 rib pulley on the alternator. Ended up getting a Tuff Stuff Performance pulley from summit for 16 bucks. Part number TFF-7610DB

The stock pulley had a spacer behind it. New pulley has it as part of the pulley.
IMG_2128.JPG
IMG_2129.JPG
IMG_2130.JPG
IMG_2131.JPG
 
Adventure vehicles NW has a template you can print out to use with their engine mounts. Made short work of that. You need to trim a little off the bottom of the engine mount pads, it's already done in these pictures
IMG_2149.JPG
IMG_2150.JPG
IMG_2151.JPG
 
Need to make some room for the bellhousing. Put some relief cuts in the pinch weld, then bend it back. Those cuts were the hardest part so far, they were the first hacks into such a clean cab. I think this is when it got real for me. Nevermind the fact I had already fubared the frame rails!
IMG_2152.JPG
IMG_2155.JPG
 
So the whole time I've had this truck, I thought this thing was just an aftermarket deal. Two cup holders that can either cool or heat your drink. Actually worked pretty well, one of them stopped working on the cool setting at some point. Wish I could have kept it in there.

But it turns out its a factory option. It's had the same plastic under it that the 4wd shifter has under it.

IMG_2139.JPG
 
Ripping the interior apart to have access to cut a hole in the floor.

IMG_2144.JPG


Engine, trans, and tcase all bolted together, ready for the first test fit. The trans I bought came with the same transfer case I had, but I swapped the one from this truck behind the trans because I know it's in good shape. Transfer case will be the only original drivetrain component left.

IMG_2157.JPG


Stress testing the cherry picker.

IMG_2159.JPG


And its in for the first time.

IMG_2160.JPG
IMG_2162.JPG
 
Bellhousing clearance looks pretty good all around.
IMG_2163.JPG
IMG_2164.JPG
IMG_2165.JPG


The turndown off the turbo will get ditched when I make the downpipe, but it's still probably going to need a heat shield for that drier.

IMG_2166.JPG


Need to trim a little more off the bottom of the motor mount bracket.

IMG_2167.JPG


According to adventure vehicles NW, you need to cut the braces out that go from the framerails to the crossmember. I did some eyeball measuring beforehand and thought they could stay, so I didn't cut them. There is plenty of room in this picture because the trans/tcase isn't all the way up yet, as I hadn't cut the hole for the shifter at this point. But it did still clear once the trans was all the way up, so they got to stay in place.

IMG_2169.JPG
 
If you're set on an 05+ axle. If i were to do it again, I'd probably go with coil overs like everyone else does. Just because its easier. It's more expensive, but less time.

Or another option, that I never thought about until someone here brought it up, was to run a plate across from the coil mount pad on the axle to the bumpstop pad on the axle, tap it, and move the coil mount in a couple inches. Then you wouldn't have to build the frame out like I did. So, there's options.
I didnt do coil overs. I wanted to be able to find parts anywhere.
I built my coil buckets out a bit.

Battleborn makes brackets now: 1967-1979 Ford F250 2wd to 4wd 2005 Super Duty Front Axle Conversion Kit | eBay

Those spring buckets should fit any narrower frame from the 70's to 2000's at 32" wide.
 

Attachments

  • 219274693_799414060742966_7419943254999339959_n.jpg
    219274693_799414060742966_7419943254999339959_n.jpg
    1.6 MB · Views: 30
I didnt do coil overs. I wanted to be able to find parts anywhere.
I built my coil buckets out a bit.

Battleborn makes brackets now: 1967-1979 Ford F250 2wd to 4wd 2005 Super Duty Front Axle Conversion Kit | eBay

Those spring buckets should fit any narrower frame from the 70's to 2000's at 32" wide.


That's the main reason i went with coils over coil-overs as well.


Those look like a good option. Those spring buckets would make it easy as well. However, I do like the ford buckets for the fact they kinda-sorta look quasi stock. Not that you'll see much once its all together anyway!
 
Finally cut the hole for the shifter. You can see how much further back it is compared to where the stock one would have been. All those dimples would be for the screws for the stock shift boot cover, and trim ring.

IMG_2176.JPG


Bought the crossmember from WFO when they started offering it for the 88-98 trucks. Spendy, but probably worth the time savings for me since I only get a few hours a week to work on it. When I bought it, they didn't offer a whole kit yet, or I might have went that route.

IMG_2179.JPG


The mount for the transmission is for an automatic, and i believe their site says it needs to be modified for manual trans. They were right, it hits the case of the nv4500 if you leave it how it is supposed to go. I ended up flipping it around backwards on the crossmember. In order to do that I had to cut the tabs off that you use to line it up in the crossmember. You can see one, of the two, already cut off in this picture. Bonus of flipping it around is it gives me about 8" longer arms.

IMG_2181.JPG


Nice that you can put it together in pieces, and I like the fact you can drop the trans without having to fuck with the suspension links.

IMG_2186.JPG
IMG_2187.JPG


One thing I would do differently. The crossmember is designed to use the factory holes from the original crossmember. Obviously, that's not going to work out when you use a cummins because it sets your trans back several inches, plus the differences of going from a 4l80 to an nv4500. Anyway, after i spun the trans mount around on the crossmember, I bolted it to the tranny and drilled away to mount the crossmember. I think next time I would modify that trans mount so I could catch one of the stock holes. One of the holes in the crossmember is only about an inch or two away from one of the factory holes, So it wouldn't have taken much to move it. I dont think it's close enough to cause a problem though.
 
Clean work, subscribed.

What you doing with supercharged 454 drive train ?


Thanks, can't hold a flame to a lot of guys here. Mostly just trying to stay out of the hack job thread!


Dunno for sure yet. Originally was going to use the whipple on the cummins. But it'll probably just get a set of compounds and be done with it. Another thought I had was to buy a manual gmt400 work truck for some parts (clutch pedal/instrument panel, and some other little things), then put the 454/4l80 in that and sell it. Needed a clutch pedal before i found a truck that had all the parts i needed, so that idea is probably out the window now. Could still happen though. But more then likely I'll just sell it if I don't come across something I feel the need to throw it into. I don't need any more projects, I have plenty of crap already.
 
Placed the front end under it to get started on the radius arms. Threw the inner fender on it to make sure I knew how to read a tape measure on the axle placement.

IMG_2191.JPG
IMG_2193.JPG


Used WFO again to save some time. This is their universal radius arm kit for 05+ front ends. I think it was well worth the money, made it super easy. I cut the lower to the length I needed, I used the upper without even cutting it down.

IMG_2195.JPG
IMG_2196.JPG
IMG_2197.JPG
IMG_2202.JPG
IMG_2208.JPG
 
Sitting on its own weight for the first time. Used a couple straps to keep it from flopping over since there's no track bar yet. Front tires are sitting on some wood to bring the axle centerline to the same height the rear is sitting.

IMG_2211.JPG
IMG_2212.JPG


So I had measured a bunch of super duty trucks at work to get an idea of compressed height of the springs, and that's what I had been using to set the ride height. I had a set of what I believed to be stock springs, since they had a ford part number. When I set the weight down on it and bounced it around a bit, it was still sitting an inch and a half higher then i thought it would. And that was unacceptable. If anything I wanted the truck sitting lower then it was, I would have been fine with the same height it was, but taller was a no go for me. Truck had a 6" kit on it, and I had cranked the keys up a little to stuff the 37s under it. So I measured the distance, with the weight on it, that one full coil would give me. and it was an inch and three quarter if i remember correctly. The top coil didn't have any goofy coil at the end like some do, or like it has at the bottom. And I did one full coil so it will ride the same in the bucket as it did originally. Worked out perfectly. Apparently I didn't take any pictures after the fact though:homer:

IMG_2215.JPG


Here's the tag that was on the springs if anybody cares.

IMG_2216.JPG
 
2 things, Did you set the front sheetmetal\radiator etc or same amount of weight on front before lopping off the coil? I just hate to see you get it back together and front be sitting low. Also sorry if you covered it but I don't remember seeing it but did you take care of the 5th gear nut?
 
Had a hard time tracking down a clutch pedal for some reason. Ended up paying too much for one off fleabay. There are two different clutch pedal brackets for the 88-98 trucks, I think its 88-93, and 94-98. Which I thought was odd that it didn't coincide with the new dash in the 96 trucks. Got it cleaned up and painted, ready for install.

IMG_2218.JPG
IMG_2219.JPG


I'm using a stock GM clutch master for this truck, so just drilled out the holes that where already indented for the studs. Bitched and moaned that my hole saw was a piece of shit. I really need to buy some new ones, all my hole saw are garbage at this point.

IMG_2220.JPG


Mounting the pedal is pretty straight forward. There is already a stud and a captured nut for it mounted under the dash where it goes. Do yourself a favor and take the two bolts out of this bulkhead and it'll move out of the way enough to make it much easier to get the pedal assembly up in there.

IMG_2222.JPG
IMG_2221.JPG


We got three pedals!

IMG_2223.JPG


I didn't want to fight getting the brake pedal assembly out to switch it over to a little pedal. So, being the pedal covers are the same part number for the clutch and manaul trans brake pedal, did some measuring, and out came the cutoff wheel. Only cut was on the left side of the pedal. Used a bunch of boxes so I wasn't flinging sparks all over inside the cab.

IMG_2224.JPG
IMG_2225.JPG


This is the hole the auto trans shift cable runs through. I just siliconed the initial plate i cut out for the shifter over it, it was just big enough to do the trick.

IMG_2226.JPG

IMG_2272.JPG
 
Last edited:
2 things, Did you set the front sheetmetal\radiator etc or same amount of weight on front before lopping off the coil? I just hate to see you get it back together and front be sitting low. Also sorry if you covered it but I don't remember seeing it but did you take care of the 5th gear nut?
I did not put everything back on it, I don't think its going to drop much, but if it does that's ok. I'd be fine with it being lower. There's still plenty of uptravel for it. After I cut the springs it still had 5.75 inches of uptravel in it.

I didn't. Honestly, I kinda forgot about it before i stuffed it in there. I was wavering on it a long time ago, thought i had heard the gm trans had something different with regards to it. But never looked into it. I would think its the same as the dodge. You never hear about the gm units dropping it, but i believe the consensus is the 6.5 and gaspots don't have the harmonics to loosen it.

I should probably tack it or something, it wouldn't be hard to drop the case off the back of it since I don't have driveshafts yet.
 
Yeah basically my understanding of it is the cummins just vibrates enough to cause problems since it generally lugs along at lower rpm. The lock nut kits for them have actually become pretty common to place where you can find them for $30 or less but a tack weld isn't terrible either.
It's kinda like the KDP deal where some guys get away with it forever and other have issues early on.
 
Yep. The harmonics beat it up behind the Cummins; 6 cylinders vs. 8 plus lower RPM. Don't lug it in 5th. Mine made it to ~188k on the stock trans, then 3rd gear broke (I think it broke a couple teeth off, but it was 15 years ago). The reman I put in had the basic upgrades including a 5th gear fix of some type.
 
Off I go to look for a lock nut kit...
Torque King is informative on this and have parts.


My truck’s 5th gear was double nutted and welded together. Sheared all teeth off 5th gear towing my XJ last year. :homer:

FWIW
 
I read that last night. Basically says you're SOL, and they have discontinued their retrofit kits. They even say the best current option is to go with a full spline mainshaft, but it's still gonna back off...gee, thanks.

They say they discontinued their fixes for them because the transmission was getting too old, and the OE parts where getting hard to find. I would think there's plenty of nv4500s out there that could still use the retrofits, but I guess they just weren't cool enough anymore.


I had originally considered putting something like a rto6610 in it, but didn't want to cut up the floor, and setting it up for a divorced case. Planned on a G56 and NP271 setup as well, but it was 3k or more for a used g56 at the time plus another grand for a 271. Went with the 4500 just because it was cheaper, and ease of putting it in the truck. Maybe I'll still keep an eye out for a g56 and 271.
 
I have had a nv4500 behind my 4bt for 9 years, just got my first replacement earlier this year after the first trans suffered an input bearing failure that caused 2-4 synchros to also fail. The trans was bought new from dodge/Chrysler. Assumed cause of input bearing failure was due to excessive input bearing wear during low speed (crawling) use.

High impact is the company I got my new trans from. They were great to deal with, let you spec the input/output shafts, and will even cut the output shaft for you if that's what you need, to whatever distance you want, while honoring their warranty.

I've had it for a few months, their "brand new" offering, and it's been great. A thousand or two miles and it's still slightly notchy, but not bad at all. I expect it to wear in nicely.

Point is, not sure they sell individual parts, but if you need a trans, they've been real good to me.


This is all to say, get the 5th gear fix, but also run an extra quart of oil in your trans to prevent an input bearing failure. Instead of getting the fixed 5th gear/nut, you can weld the factory nut to the output shaft, which works awesome in my experience. Word on the dodge forums is that 4qts is not enough if you use it crawling. 5qts apparently helps, so that's what I'm doing now. Only ran it up to the fill plug before.
 
I might need to go this route on my 98 3500hd to 4wd it. one of the front leaf springs are bent and I'm sure it'll ride better on coils.
 
I have had a nv4500 behind my 4bt for 9 years, just got my first replacement earlier this year after the first trans suffered an input bearing failure that caused 2-4 synchros to also fail. The trans was bought new from dodge/Chrysler. Assumed cause of input bearing failure was due to excessive input bearing wear during low speed (crawling) use.

High impact is the company I got my new trans from. They were great to deal with, let you spec the input/output shafts, and will even cut the output shaft for you if that's what you need, to whatever distance you want, while honoring their warranty.

I've had it for a few months, their "brand new" offering, and it's been great. A thousand or two miles and it's still slightly notchy, but not bad at all. I expect it to wear in nicely.

Point is, not sure they sell individual parts, but if you need a trans, they've been real good to me.
Maybe I'll go that route when this one shits the bed.
 
Top Back Refresh