What's new

Is this lathe worth picking up?

desertPOS

Red Skull Member
Joined
Jul 2, 2020
Member Number
2236
Messages
331
Kind of late and kind of a lame thread, but going to look at this lathe for sale tomorrow, and have no info other than the pic. Anyone know what it is or if it's worth picking up? Can't tell brand, though someone here might recognize it. I've never used a lathe and would like to learn - looks like it might be a good, small beginner setup, but don't know what it has for tooling, how easy it is to get tooling, etc.

Thanks in advance :beer::beer::grinpimp:

lathe.jpeg
 
That's a $400 and it's on CL for 6wk or $800 and it's on CL for 6mo lathe around here.

I would pass. Atlas has a fairly decent hobbyist following and you can get much more for the same money.
 
Location matters as you can probably guess by the reply’s so far.

In good shape with a moderate amount of tooling.$800-1000.

Abused I would pass at even $400.
 
kinda crap but whatever, it'll make bushings and such

I wouldn't give 200 for one, but that's having learned on an atlas piece of trash
everything is easier when you've got just a little more machine than that
the taiwanese 12x36 or whatever the fuck ones are a good starting point for "you'll be a little less frustrated but still cursing the torque transmission abilities of a single A profile V-belt"
 
At least it has a quick change gearbox and a modern toolpost. I think someone (not me) would pay $1000 for it easy.
 
Well, I dragged it back to the shop earlier, so we'll see how it does. All the gear teeth look to be in good shape, but the grease is all the consistency of wax - needs a little cleanup. I think it sat for a while, but seems relatively well-taken care of, and has what looks like a new motor on it. Came with a small box of different tooling and a few different manuals. Craftsman aka Atlas/ light duty lathe.

Thanks for the replies. Couple better pics:

IMG_3549.jpg


IMG_3555.jpg
 
OP, how about you let us live vicariouslylsly through you and let us help you tighten up the gibs and get it all setup properly?

Oh yeah, pics of the ways near the headstock.
 
OP, how about you let us live vicariouslylsly through you and let us help you tighten up the gibs and get it all setup properly?

Oh yeah, pics of the ways near the headstock.
For the cheap price of a 7hr drive I'll let you come set my lathe up. :laughing:
 
Super handy to have around. I also like the leg extensions. Those things were made for midgets.
 
Super handy to have around. I also like the leg extensions. Those things were made for midgets.
I have a similar looking lathe, but it is about 4' long overall with a 1/3HP motor on it.
Is the stand like that a necessity, or would a heavy table (thinking 2 layers of 1" plywood on heavy legs) be sufficient?)

Aaron Z
 
I have a similar looking lathe, but it is about 4' long overall with a 1/3HP motor on it.
Is the stand like that a necessity, or would a heavy table (thinking 2 layers of 1" plywood on heavy legs) be sufficient?)

Aaron Z
The stand isn't 100% necessary. But you do need it mounted to something flat and rigid for best results.
 
The stand isn't 100% necessary. But you do need it mounted to something flat and rigid for best results.
I have a bunch of 40x46(ish) pieces of 1" plywood that I will lay down (with the seams overlapping) and glue/screw them together to make the top.
Likely will have a vertical piece of the same on each end as a leg and a piece cut into a triangle to brace the legs in the back.
Then a couple pieces of 2x4 or 2x6 running across under the top of the table lined up with the bolt holes and screwed in place.
That shouldn't move too far and I can move it with the forklift if needed.

Aaron Z
 
I have the exact same machine, minus the stand....or you actually only have part of the stand. Someone obviously modified it to keep only the under drive cabinet. Should be a 12"x54" which actually come out to about 48" between centers.

They either came as under drive or bench mounted with a motor and counter shaft mounted behind the headstock

Good machine and I've used the shit out of mine. Certainly not the most rigid machine but you'll find plenty of uses for it.

I'm just about done restoring my 12.5" x 60" Cinci and have no plans to get rid of the craftsman.
 
Yeah I was wondering about the extensions on it - clearly didn't come like that. Seems like a pretty necessary modification though

It'll honestly probably be a while until I clean this up and try to do anything with it. No room in the workspace right now, but that should be changing very soon. It's got a bit of a noisy drivetrain that needs to be addressed - like I said, grease is all the consistency of wax, and one of the shivs for the lower belt is super loose and wobbling around. The biggest concern to me was to inspect all of the teeth on all the gears - which all look great. No damage to any of them that I can see. As long as those are good, I think the bearings are all Timken and should be replaceable. So hopefully some cleaning and fresh grease will make it run a little smoother. I don't know the correct terminology for the belts inside it, but they're orange 'sectional' belts that are held together with metal rivets - that could be what's noisy as well. I think there are quieter belts, or sectional belts that use plastic instead of metal that might be better. I'll post a pic later - don't know if that made sense.

As for price, they wanted $1,500 but got them to take $1k due to the noisy drivetrain. That's higher than suggestions above, but I think I'd be hard pressed to find a better deal than that around here. There are rusty wood lathes around here missing parts for double that price. Maybe a CA thing, I don't know. It was at an estate sale, so I may have been able to get them down on price the next day, or someone else may have snagged it by then

rockmup I will send you a PM and see what parts you've got and what you want for them:smokin:
 
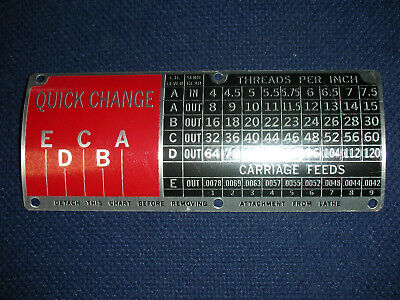
And to any of you with this exact same machine - anyone willing to take a good clear picture of the info plates on it? If you look at the pics above, these are pretty worn off. Would be great to print them out and mount them on the wall behind it:grinpimp:
 
You can buy replacements on ebay.
1626696882508.png


1626696965390.png
 
This is what the cabinet would have originally looked like. Probably got damaged while being moved or something. That motor and counter shaft is in the cabinet under the head stock so they obviously had to save that .
1626697066415.png


As for the noise gear train, they're straight cut gears and will always be noise. Just make sure they're set up with the proper spacing/backlash.
I'd start buy taking all the gears on the banjo off and making sure they bores aren't worn out and wobbling on the shafts (you can bore them and press in bronze bushings if they are). Oil the shafts while you have them out. When putting them back together, use a piece of notebook paper between each gear interface to set the spacing - starting at the quick change box and working up the banjo to the spindle.

The 16/32 compound gear on the banjo will usually have the most wear. I have a bunch of those that I 3D printed out of Nylon with bronze bushings if yours is shot.
 
OP, how about you let us live vicariouslylsly through you and let us help you tighten up the gibs and get it all setup properly?

Oh yeah, pics of the ways near the headstock.

After a couple years wrapped in a tarp outside I finally have a spot for this, and started to clean it up a little. I intended to 'quickly' do some light cleanup on it and see if I can use it to turn down a 14bolt ring gear. Threaded cross shaft on the carriage was spinning freely one direction, but would barely move the opposite direction. Pulled that off and cleaned it up, went to reassemble, and there's a gear that dropped off the shaft when I pulled it apart that I didn't notice - assuming some kind of autofeed off the feed screw. Oil's all pretty gummy under the carriage, and not knowing if there were any washers or other parts that may also have been on the shaft, decided to pull it apart a little more to have a look.

Now it's half disassembled and I guess it's a project now:shaking:

IMG_8565.jpeg


I'm assuming 'wicks' for oil? I have the manual for this, but it doesn't cover specifics on disassembly this far, or how those should be routed in there, so something to figure out
IMG_8566.jpeg

IMG_8569.jpeg

IMG_8576.jpeg

IMG_8581.jpeg

IMG_8582.jpeg
 
Last edited:
Finally got most of this cleaned up and hit with some fresh paint. There are some 'oil wicks' that feel like they're just pipe cleaners - any ideas for how I can figure out how they should be routed, and where to get replacements. I have pipe cleaners, if that's all they are. The one closest to the camera lense looks like it goes around the clean groove right below it. The others, not sure - although once I start reassembling, maybe it'll be more obvious. There are three of them...

IMG_8566b.jpg


And where can I order fresh wiper felts? As I was just typing I realize I've got a stack of Toyota front axle knuckle felts, so probably best bet is to just cut some fresh ones out of that:smokin:

IMG_8575.jpeg


Lastly, I bought 'slide and way' oil from McMaster in the smallest quantities I could - gallon each of SAE 10 and SAE 20. Although now that I have it, seems like it may not be the best for some of the oil cups where it needs to flow into things, with tackifiers in it. Especially for headstock bearings, which calls for SAE 20 weight, but I think it's supposed to be automotive oil. Is the stuff with tackifier in it going to flow into the bearings correctly, or should I be using something else:homer:
 
you're totally fine with slathering on whatever engine oil you've got an odd bottle laying around of
perfect use for that old stash of grandpa's pennzoil and quaker state

way oil you can use bar oil, or just content yourself with squirting that same oil can full of "whatever" on them when you feel up to it
I really should keep my ways cleaner, but in reality there's black goo under the carriage that's probably mostly made of cast iron
 
Finally got most of this cleaned up and hit with some fresh paint. There are some 'oil wicks' that feel like they're just pipe cleaners - any ideas for how I can figure out how they should be routed, and where to get replacements. I have pipe cleaners, if that's all they are. The one closest to the camera lense looks like it goes around the clean groove right below it. The others, not sure - although once I start reassembling, maybe it'll be more obvious. There are three of them...

IMG_8566b.jpg


And where can I order fresh wiper felts? As I was just typing I realize I've got a stack of Toyota front axle knuckle felts, so probably best bet is to just cut some fresh ones out of that:smokin:

IMG_8575.jpeg


Lastly, I bought 'slide and way' oil from McMaster in the smallest quantities I could - gallon each of SAE 10 and SAE 20. Although now that I have it, seems like it may not be the best for some of the oil cups where it needs to flow into things, with tackifiers in it. Especially for headstock bearings, which calls for SAE 20 weight, but I think it's supposed to be automotive oil. Is the stuff with tackifier in it going to flow into the bearings correctly, or should I be using something else:homer:

There's a seller or two on ebay that has repro felts if you don't want to make your own. They're usually cheap enough that I just buy them.

Same for oil. There are a couple sellers that repackage the bulk stuff in to pint or quart bottles for reasonable $$. By spec, the way oil should be Vactra No. 2 and the lube oil should be Velocite No. 10. You can get away with other random stuff, but some of it will gum up your oilers or felts. It's cheap enough and lasts forever that I just bought the right shit. I bought a quart of each like 8 years ago an still have a good 1/2 of each left.
 
These are the oils I got:

10W

20W
 
Top Back Refresh