What's new

Higher horses, higher revs & even higher torque, a streetable LJ engine swap

The OEM TJ brake booster uses a 11/15" vacuum hose and so I replaced the one way valve with one from GM for the larger 1/2" barbed fitting to match the vacuum port on the LS3 car intake. Part #179-1266. I used 1/2" air brake hose to connect (I had to buy 50ft so if anyone has a use for 49ft let me know).

20220303_brake-booster-valve-.5in.jpg


The side that fits into the brake booster fit just as snug as OEM.

20220303_.5in-brake-booster-hose.jpg


I still need vacuum for the OEM Jeep HVAC controls. So I shortened the Jeep hard vacuum line that runs along the firewall and wrapped it in self fusing electrical tape to increase the diameter for a snug fit:

20220303_increase-diameter-vacuum-line.jpg


On the back of the LS3 car intake there's a 1/4" vacuum port that's blocked off. There's a tab on the back with 2 wings that needs to be cut off to use. I used a 90* fitting from Standard Motor Products (VT25) to adapt from 1/4" to 3/16"

20220303_ls3-vacuum-line.jpg


Everything on the other side I left stock so the vacuum reservoir and HVAC are left intact.
 
My harness doesn't use the oil level sensor so I changed it out for a plug (ICT Billet FBA_551413). No real purpose other than I think it looks cleaner.

Before:

20220304_ls-oil-level-sensor.jpg


After:

20220304_oil-sensor-plug.jpg
 
Info from Advance Adapters about the 4x4 and low range switch locations:

atlas-2-sensor-switch-ports.png


I swapped the o-ring over to the switch (switch part number 300364):

20220304_atlas-2-4x4-sensor.jpg


And installed:

20220304_atlas-2-4x4-sensor-installed.jpg
 
20220305_trans-tunnel-plate.jpg


Winters shifter mocked up. Reverse, neutral, drive, and manual (TUTD) are all pretty close to the stock TJ location and easy to reach but park is a little forward of stock and requires some extra reaching. But I don't think that'll be a problem.

20220305_winters-shifter-mocked.jpg
 
I made the mount for the Winters shifter. It's nice and solid.

(ignore the really long bolts. those will be replaced)
20220308_winters-shifter-installed.jpg


I cut the Jeep console to fit around it. I'm not sure I love the look, but at least it beats nothing. Maybe some trim would make it look better?

20220308_center-console-ls-swap.jpg
 
Clamped the shifter cable out of the way of the Atlas yoke. There's a little more than a finger's gap between them which should be enough if the tub moves around.

20220314_shift-cable-clamp.jpg
 
I'm been waiting on parts to arrive so progress has been slow. I decided to revisit my engine skid front supports and add a little gusset to it to remove some flex in the support.

20220314_skid-brace-gusset.jpg


20220314_brace-gusset-installed.jpg
 
Mail arrived!

My wiring harness from RPM Extreme was designed to route the wiring for the transmission and Atlas (4x4 sensor) over top of the transmission. That is by far the easiest and cleanest way to route them, however the exhaust on my Jeep will also be routed over the top of the transmission so I've been pretty worried about the radiant heat melting those wires. While playing around with heat sleaving, I realized that I could splice another 8ft into the harness and route the harness along the opposite frame rail and then jump across at the skid crossmember to avoid the exhaust pipe entirely.

I ordered a 6L80E pigtail from LSWiring so that I'm splicing in the standardized GM wire colors. I also ordered enough red and black 20ga wire to lengthen the 4x4 sensor. The other wire is some that I'll be using for the dash.

The last of my electrical connector parts also arrived, so I've got multiple tasks I can work on now!

20220314_box-of-wiring.jpg


My ground straps also arrived.

For the engine, I wanted to increase in size from the original TJ size to avoid any ground issues going forward especially since the LS grounds more things to the engine than the 4.0l did. I had tried a 1/0 strap but it was massive, heavy, and clearly way oversized for what I need. I settled on a 4ga strap from Standard Motor Products (B12G).

20220314_engine-ground-strap.jpg


I did some research on why the TJs come with a hood ground strap. The best answers I could find is that it affects radio AM/FM reception (I don't have a radio antenna), and that it might be for safety in case a hot wire touches it. So, I decided to play it safe and added the extra few ounces of weight using Dorman 85669.

20220314_hood-ground-strap.jpg
 
It turns out that the drive accessory brackets I installed have a known issue of throwing belts (yay...). Using a particular tensioner might help, and that was my plan to wait and see if it is indeed a problem and keep an extra belt on hand just in case. However, I found a 2nd hand deal on the race proven Bomber Fab setup that I couldn't pass up. I still have PTSD from my supercharger on my 4.0 eating belts so the added peace of mind will be nice.

It's still on it's way, so I started swapping out parts needed for it so I can work on hoses in the meantime.

Parts list for Bomber Fab accessory drive:
  • LS1 Water pump / 1999 Corvette / ACDelco 252-846
  • Thermostat and housing / 1999 Corvette / ACDelco 15-11057 (no gasket needed with this thermostat)
  • Balancer / 1999 Corvette / ACDelco 12560115
  • Idler Pulley / 1999 Corvette / ACDelco 12564401
  • PSC CBR Pump Bracket (order from Bomber Fab)
  • Alternator (order from Bomber Fab)
  • Bomber Fab LS Alternator Brackets
  • Bomber Fab idler bracket

2010 Camaro top, 1999 Corvette bottom:

20220317_compare-waterpumps.jpg


The LS1 Corvette water pump sits only 1/4" further out than the 2010 Camaro pump.

The thermostats are not interchangeable.

This should make routing the upper radiator hose easier too.

Removing the cam sensor wiring harness extension bracket off the LS3 block to get it out of the way (didn't need it with my harness anyway):

20220317_remove-cam-wiring-bracket.jpg


LS1 water pump installed and moved the AC compressor rearward a position.

20220317_ls1-water-pump.jpg
 
The goatbuilt alt bracket throwing belt is easily fixed by welding a flat tab to it and adding an idler. I fell like you went the expensive and long route with the bomber accessory drive.

Also, the alt used in the bomber kit isn't easily found in parts stores (unless I'm mistaken) which may become a problem if you have a failure in the field.

my 2cts.

Other than that, great attention to detail and I really appreciate you posting part numbers and valuable tech. Thank you !

Thanks for sharing the insight. This is the kind of stuff that I wish was posted up when I started this swap.

I was thinking along the lines of adding an idler too. Good to know that it's the solution. If I hadn't found this used kit available, I likely wouldn't have gone this direction unless I was starting over.

The unfortunate truth is that less and less of my essential parts are available off the shelf. Such as radiator fan, steering pump and gear, etc. I made the list for the Alcan 5000 TSD race this August, so it's rather important to me to be able to fix it in remote Canada/Alaska.

Once the box arrives I'll check if the alt has a part number on it to check what the application is.
 
Not to hi-jack, but Bebop can you share more about the Goatbuilt Alt bracket mod you stated above?

Toximus--good info there.
 
I thought the GoatBuilt setup is only for the truck spacing setup. I could be off on this. You'd think I'd know "fer sure" since that's what I have in boxes as I wait for my motor, but alas the ol' brain cell only has capacity for so much these days.
 
I thought the GoatBuilt setup is only for the truck spacing setup. I could be off on this. You'd think I'd know "fer sure" since that's what I have in boxes as I wait for my motor, but alas the ol' brain cell only has capacity for so much these days.

Yup. I changed from truck spacing to f-body spacing. 2010 Camaro is truck spacing. Meaning, the belt will now be 3/4" closer to the block. The LS1 water pump is the issue of why the hose of it sticks 1/4" closer to the radiator fan.
 
Not to hi-jack, but Bebop can you share more about the Goatbuilt Alt bracket mod you stated above?

Toximus--good info there.


I don't know if I have a picture somewhere but I'll try to dig. Just add a tab and idler to push the belt away from the tensioner idler.
Basically you try to mimic this ICT billet kit :

551780-3_5__1.jpg


S10 swap kit.


FYI, the Goatbuilt kit also works with F-Body spacing, not only truck.

Making sure I'm not misunderstood, the bomber kit is awesome, works great and is a good solution. I'm just saying you could have used what you had.

My new accessory drive is on Corvette spacing and that was a mission to accomplish. I did a ton of research on the subject of belt routing and various LS water pumps etc.
 
Bebop--thanks. I'll be running a M122 blower on my motor and bought a bunch of mackdaddyparts.com and one thing I did buy was their tensioner upgrade, so now looking at the pic of that kit I guess my Goatbuilt kit isn't to relocate the alternator to the passenger side, but to use one of the PSC pumps and the bracket for it and the alternator on the drivers side. The kit below is almost the same as the kit you posted.

I have to much crap still in boxes and it takes a day or to for the brain cell to rotate before a light goes off and I remember something I bought.


Now back to the regularly scheduled channel!!
 
Blower is why I wanted a corvette spacing for my accessories. I wanted the room in front to fit another belt line for the charger.

I just sold my M122, going to go with a Magnuson.


If you want to run both the accessories and the blower on the same belt, I suggest truck spacing and keeping the alt/pump on the driver side and using a good tensioner on the pass side, for more belt wrap and making sure the tensioner works in the correct direction. All the pass side alt relocation brackets put the tensioner working backwards.

This is the unit I would use :


Cheap, find parts for it at every parts store and works damn good.
 
Last edited:
Yea I saw that you had that for sale and a great price for the guy who bought it.

That's why I bought the goatbuilt stuff and ordered mackdaddyparts stuff.
 
Bebop beat me to it, but yes, you can get the Goat Built brackets in F-Body and Truck spacing.

I have the GB F-Body brackets on my LS.
 
My new accessory drive is on Corvette spacing and that was a mission to accomplish. I did a ton of research on the subject of belt routing and various LS water pumps etc.
Do you have details up someplace?
 
I'm waiting to make sure the alt idea works, but the steering pump is simply the GB CBR bracket on the passenger head with shortened spacers. Reservoir is in the passenger "fender" area.

Alt on the driver side is a lil more tricky, I had to find a different alt that would work. I think I got it mostly figured out, but I'm holding out before I'm claiming victory.
 
As far as the Goatbuilt bracket kits throwing belts, yes and no, but mostly no. I move a TON of those 4405 bracket kits (moves the alt to the passenger side) and then single or dual pumps to the driver side, or dual alts and a single pump. The tensioner that the kit was designed around is from a Jeep TJ with a 4.0. It is small, cheap, and adequate for a stock 5.3 or 6.0 running a factory alternator and single steering pump. In late 2018 we had a bad batch of Gates branded tensioners that we sold or recommended to customers. Dealing with the failures led us to looking into a different brand tensioner for the kits. We switched to Dayco brand tensioners, and had great luck and continue to sell them.


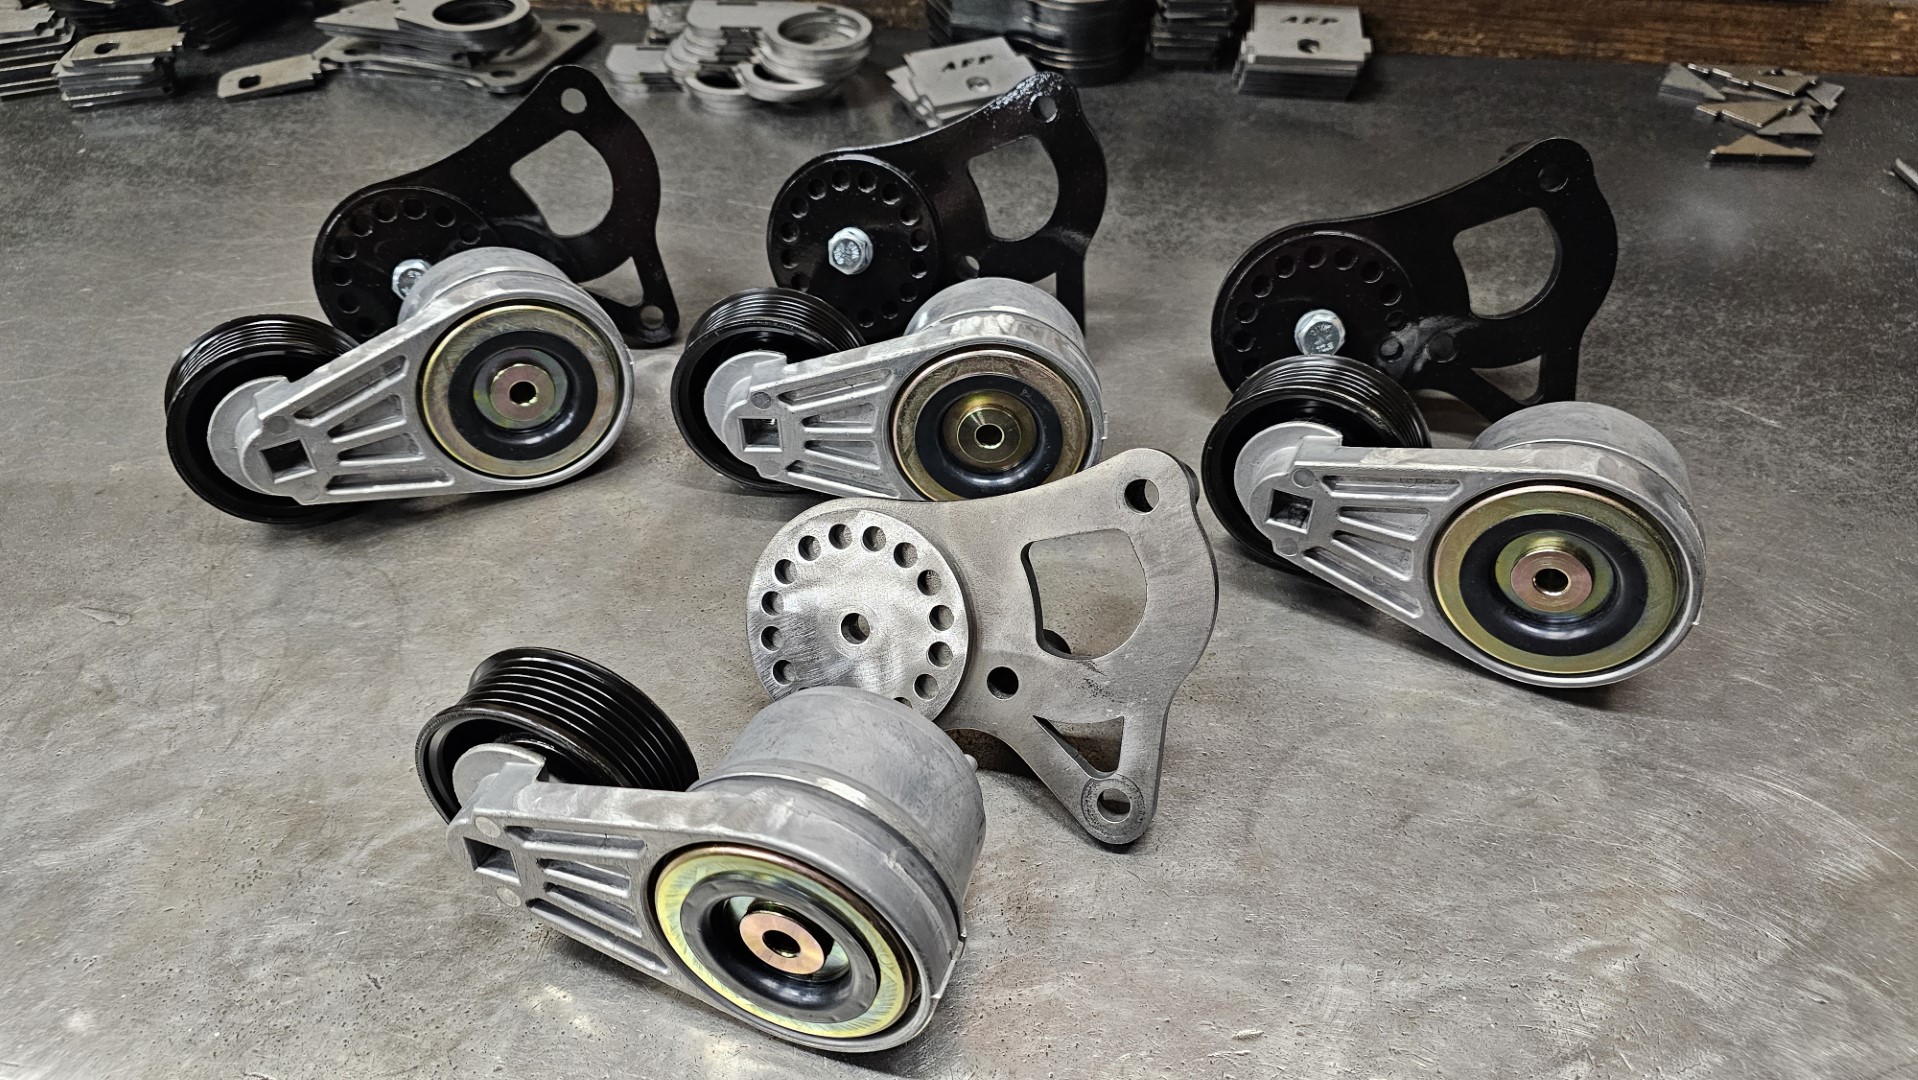
As you all know, our sport is evolving very fast. These brackets have been on the market for almost ten years. With that being said, some of our customers attempt to use our brackets on a supercharged set up running on the serpentine belt, or running a high output alternator and DUAL power steering pumps. Neither the Gates nor Dayco tensioner was up to the task, so we made a few modifications to the bracket, and now use a massive tensioner assembly from a corvette with a 350. It has a much higher spring force as well as a pulley with shoulders. Since making that change ~2 years ago, we haven't had any reliability issues.


wTFsnCwBHTH7-j9jzo8QXKMtO=w842-h1171-no?authuser=0.jpg

We also offer that bracket kit as a manual tensioner with the upper idler pulley.


Keep up the good work, and see ya at apple valley! :beer:

I didn't mean to cause such a fuss over this here. I'm glad you chimed in.

Will we be seeing your LJ buggy at Apple Valley this year?
 
Top Back Refresh