ndtguy
Mr. B
- Joined
- May 26, 2020
- Member Number
- 1505
- Messages
- 35
Long post any help would be appreciated. Cliff notes: My question is at the bottom
Backstory: My wife’s 2014 with the 3.6 v6 grand caravan is making a single popping noise when pulling out of the driveway (slight angle like all new homes) or when turning at a slow speed (pulling into a parking space or a drive thru). Started on the left now both sides pop (pop not a click/clicking like a cv joint) Does this when the wheel is near or at full lock (I told her jokingly to stop turning the wheel so much).
I’ve replaced the front and rear dampeners no change (front passenger side needed replaced anyways). Went through, loosened and re- torqued all the bolts again. Still popped.
Found that the sway bar end links could cause a popping. Took them off and replaced them. Right side was bad. Still makes the popping.
Went out and did figure 8 and “S” turns on a wide deserted road. No sounds whatsoever and was normal.
The van need an oil change and tire rotation so I put it on jack stands and did that. Performed the third shake down test in a month and it’s solid.
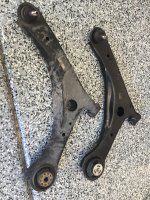
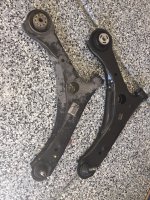
While the oil was draining I took my pry bar and started with any ball joint I could find.
Lower control arm outer ball joint near the spindle. Solid.
Tie rod. Solid. Grabbed the tie rod half way between the end/ball joint and the steering rack. Yanked, turned, shoved the tie rod. Nothing. Solid.
QUESTION:
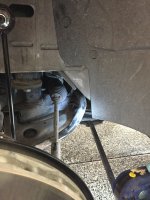
Used my pry bar on the front lower control arm bushing. No issues. Rear mount a arm mount (see picture where my pry bar is pointing) is the only thing that moves. More so on the left than the right. Is that supposed to move up and down? Left side is maybe 1/8” or so. Right side is about half.
Again any help is appreciated before I rebuild the entire front end of her van.
Backstory: My wife’s 2014 with the 3.6 v6 grand caravan is making a single popping noise when pulling out of the driveway (slight angle like all new homes) or when turning at a slow speed (pulling into a parking space or a drive thru). Started on the left now both sides pop (pop not a click/clicking like a cv joint) Does this when the wheel is near or at full lock (I told her jokingly to stop turning the wheel so much).
I’ve replaced the front and rear dampeners no change (front passenger side needed replaced anyways). Went through, loosened and re- torqued all the bolts again. Still popped.
Found that the sway bar end links could cause a popping. Took them off and replaced them. Right side was bad. Still makes the popping.
Went out and did figure 8 and “S” turns on a wide deserted road. No sounds whatsoever and was normal.
The van need an oil change and tire rotation so I put it on jack stands and did that. Performed the third shake down test in a month and it’s solid.
While the oil was draining I took my pry bar and started with any ball joint I could find.
Lower control arm outer ball joint near the spindle. Solid.
Tie rod. Solid. Grabbed the tie rod half way between the end/ball joint and the steering rack. Yanked, turned, shoved the tie rod. Nothing. Solid.
QUESTION:
Used my pry bar on the front lower control arm bushing. No issues. Rear mount a arm mount (see picture where my pry bar is pointing) is the only thing that moves. More so on the left than the right. Is that supposed to move up and down? Left side is maybe 1/8” or so. Right side is about half.
Again any help is appreciated before I rebuild the entire front end of her van.
Attachments
Last edited: