You are using an out of date browser. It may not display this or other websites correctly.
You should upgrade or use an alternative browser.
You should upgrade or use an alternative browser.
SHARPMACHINE
Web Wheeler
Great build!!!! Just looked through the whole thread. Congrats on the BA shop.
Winchested
IH Scout SSII
- Joined
- Jun 19, 2020
- Member Number
- 2128
- Messages
- 1,404
Great build, love the progression. I find myself doing this every year after wheeling season ended. (and I only get out 3-4 weekends a season).
ChrisRWG
Build & Film
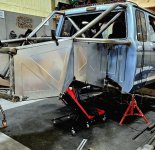
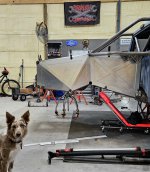
Back from the dead! Cutting the back of the truck off to start again. Tube everything, new axle housing, and fenders. It should be fun!


rattle_snake
Fuckwits
Looks good. New rear axle housing?
ChrisRWG
Build & Film
Time for a long overdue update! I have been working on this all year albeit not as much or as fast as desired. I got an OBS Ford that also distracted me for a long time, but here we are.
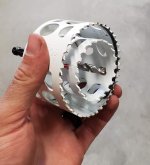
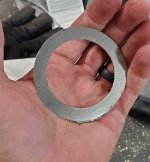
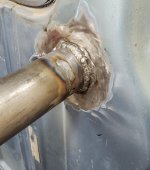
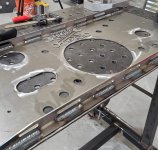
I needed to close the passthrough cuts where the back half connects to the internal cage. I threaded two hole saws together (I had no idea you do this) and cut out some metal donuts to use as fillers to close the holes. It worked well, and it also reaffirmed my hatred of welding thin sheet metal.
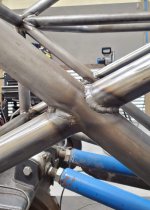
Then I continued adding more tubework to the back and practicing tube welding.
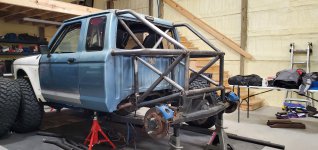
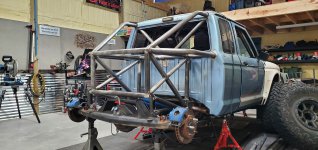
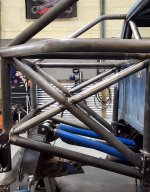
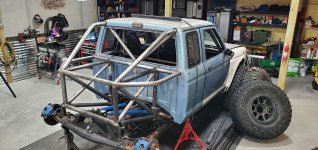
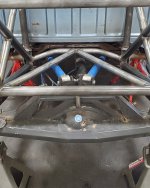
I needed to close the passthrough cuts where the back half connects to the internal cage. I threaded two hole saws together (I had no idea you do this) and cut out some metal donuts to use as fillers to close the holes. It worked well, and it also reaffirmed my hatred of welding thin sheet metal.


Then I continued adding more tubework to the back and practicing tube welding.


ChrisRWG
Build & Film
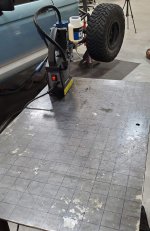
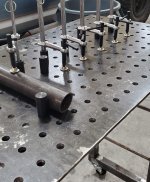
I got a mag drill and needed something to torture myself with, so I converted my old metal table into a welding fixture table by drilling over 250 holes with it. It took about 6 hours but I am happy with the results and the table has been extremely useful. I am not sure how I went so long without a fixture table. Of course, now Harbor Freight sells a cheap fixture tabletop, but this was at least satisfying that I made it.
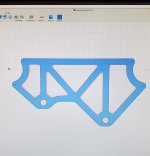
Then I decided it was time to start increasing my capabilities and started learning basic stuff on fusion 3D. I made some shock and bypass mounts and had send-cut-send laser cut them for me.
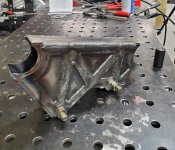
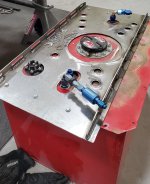
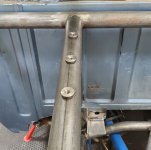
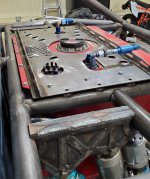
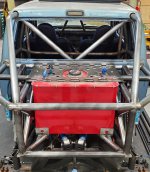
I decided the best home for the fuel cell was in front of the rear axle and the spare will ride aft of the axle. I made some cradles for the bottom supports and then I made a top plate that essentially straps it into the cage. I welded in some threaded bungs to keep it held down. I also put some sling attachments to the top plate so I can lift the fuel cell out even when it is completely full with my cherry picker! No more dropping a tank on your face or grabbing a buddy to throw out your back trying to pull a tank.


Then I decided it was time to start increasing my capabilities and started learning basic stuff on fusion 3D. I made some shock and bypass mounts and had send-cut-send laser cut them for me.


I decided the best home for the fuel cell was in front of the rear axle and the spare will ride aft of the axle. I made some cradles for the bottom supports and then I made a top plate that essentially straps it into the cage. I welded in some threaded bungs to keep it held down. I also put some sling attachments to the top plate so I can lift the fuel cell out even when it is completely full with my cherry picker! No more dropping a tank on your face or grabbing a buddy to throw out your back trying to pull a tank.


ChrisRWG
Build & Film
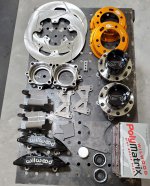
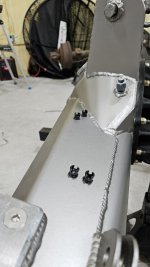
Next was the rear axle I built. I was getting to the point of not trusting the factory 9-inch housing and I was not a fan of the hodgepodge of brackets, tabs, and trusses on it from different eras and manufacturers. I went with a ruff stuff housing, spidertrax end cups, Currie unit bearings, spidertrax rotors, and trail gear brake hats. I had to use the trail gear hats because they fit the spidertrax rotor pattern but come in the smaller wheel stud size. Spidertrax only offers them in 5/8 and Branik said their hats won't work. I did have to take the brake hats to a local machine shop to have the hub diameter opened up .25 to clear the Currie unit bearings. I made the upper link tabs from 3/16 plate and I added weld washers outside and captured nuts on the inside to make installation easier. I decided to go with 6 piston brakes at all 4 corners and used my old front brakes as a dedicated handbrake caliper on the rear. This may prove to be too large of a fluid volume for a handbrake, but we will see.
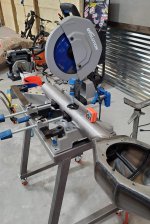
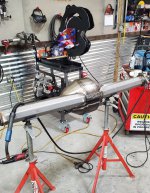
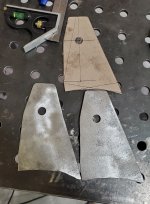
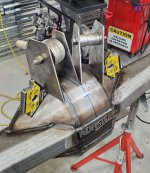
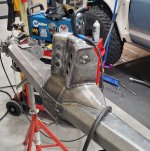
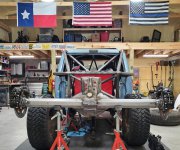
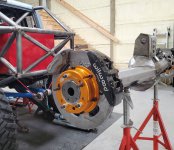
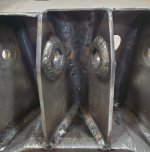
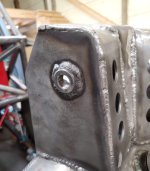
I decided to cut the housing so that the center of the housing is actually the center. This requires me to use 2 different length axle shafts, but offsetting the upper link tabs would drive my desire for symmetry crazy. I used Branik for the axle shafts and went with 35 spline 43040. I ordered these last year before KOH and it took over 3 months to receive. I still need to do the brake lines, bump pads, and some paint


I decided to cut the housing so that the center of the housing is actually the center. This requires me to use 2 different length axle shafts, but offsetting the upper link tabs would drive my desire for symmetry crazy. I used Branik for the axle shafts and went with 35 spline 43040. I ordered these last year before KOH and it took over 3 months to receive. I still need to do the brake lines, bump pads, and some paint
ChrisRWG
Build & Film
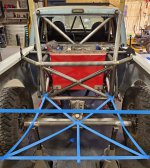
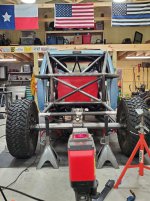
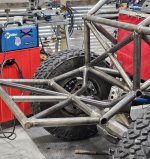
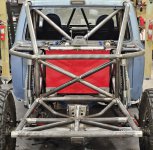
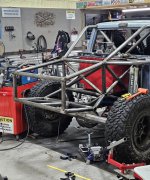
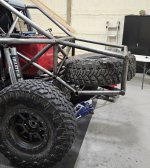
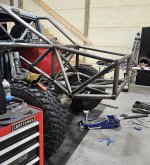
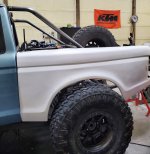
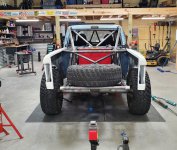
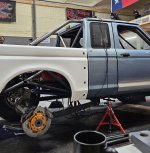
Back to more tubework! I decided the best place for the spare was to lay it behind the axle and it can slide in and out for removals. This gives me less room for storage but I liked the lower center of gravity and visually not seeing it poking up over the bedside is nice and attributes a somewhat "sleeper" look. I used Mcneil bedsides and cut about 10 inches of the leading edge of the fiberglass off to match my shortened wheelbase. I am redoing the mounts for these as I was not happy with my original design. I also am planning to make a custom tailgate here shortly.


ChrisRWG
Build & Film
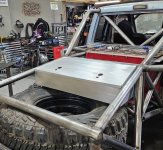
For storage I was planning a custom toolbox that fits over the spare tire. I drew a toolbox up in Fusion 3D and used send-cut-send to laser cut and bend all the pieces for me. It fits like a glove and I am super happy with the quality from send cut send. I used solid aircraft rivets to assemble the box. I added a doubler at each fastener location to strengthen the mounting hole. The hinge is a stainless steel piano hinge from McMaster Carr and I got some flush aircraft latches from Kartek that I riveted on. My first attempt at beadrolling was the lid, which turned out not so good. It warped quite a bit, but I learned a lot. It is still usable so I am just gonna send it.
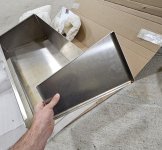
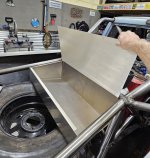
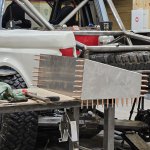
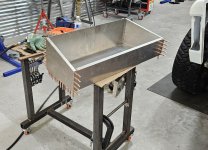
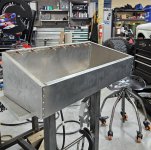
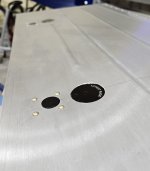
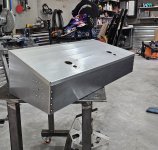
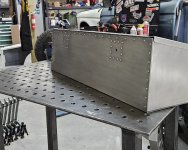
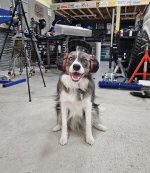
And my dog isn't a fan of rivet operations, I can't say I blame her


And my dog isn't a fan of rivet operations, I can't say I blame her

ChrisRWG
Build & Film
Winchested
IH Scout SSII
- Joined
- Jun 19, 2020
- Member Number
- 2128
- Messages
- 1,404
Such a badass build!
Provience
Kill!
Awesome updates

If this gets done by next october you're coming back to Chile Challenge again right? 

ChrisRWG
Build & Film
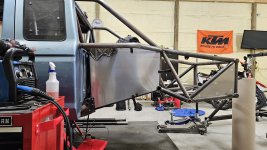
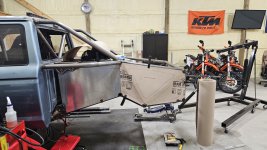
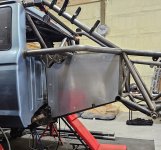
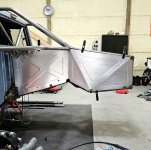
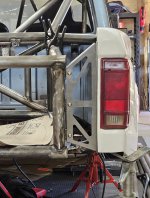
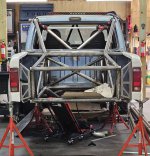
A little progress over the weekend while I waited for the rest of my dzeus tabs to arrive. I initially made bedside mounts out of 1-inch round tube and some tabs on the chassis that they would bolt to. It was a pain to get them lined up and mount the bedside; I did not care for it. I made these aft bedside mounts in fusion and had them cut and bent. I have a tab on the chassis that this main piece bolts to. It is easy to line up and when the bedside is removed there is minimal support structure poking out on the tube work for a cleaner appearance.


ChrisRWG
Build & Film
I have been out of town for work for the last month so hopefully this week gets me back in the shop and making progress again.
In the meantime, here is a short video I did while making the toolbox. It seems there is some interest in the aircraft riveting I used to assemble the box, so I plan to do more in-depth on that process here soon.
In the meantime, here is a short video I did while making the toolbox. It seems there is some interest in the aircraft riveting I used to assemble the box, so I plan to do more in-depth on that process here soon.
ChrisRWG
Build & Film
I'm out working in the shop this weekend on the Ranger so hopefully I get new updates tomorrow. For the time being, here is a video covering the panels I bead rolled.
ChrisRWG
Build & Film
.063How thick is the material you are rolling?
You may have covered that in the video, but I don't have sound.
They look great!
ChrisRWG
Build & Film
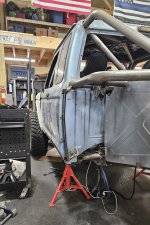
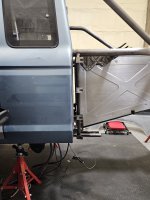
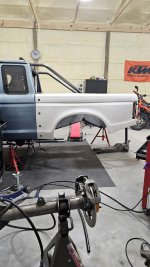
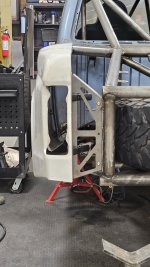
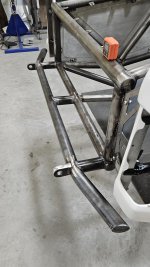
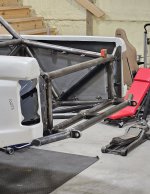
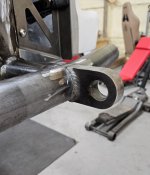
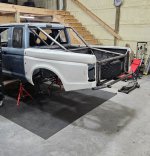
Knocked out a couple of items from my list this weekend. I finally decided on a design for the forward bedside mount. I bent up a piece of 1-inch tube and welded that to the horizontal tube coming out of the cab. Then I welded a standoff on the cab corner for the tube to connect on the bottom. It's pretty simple but it works. Lastly, I put together a rear bumper.


ChrisRWG
Build & Film
I have got some smaller items completed this past week. I wanted a tailgate on the truck especially since it has bedsides now. The tailgate needed to open and close vertically and not like a swing-out gate. I had to design some tabs that allow the tailgate to completely close flush, but wouldn't stick up on the tube preventing the spare tire from sliding in and out. I made these on cardboard first then had a friend plasma cut them for me. The tailgate itself is just 2-inch tubing mitered.
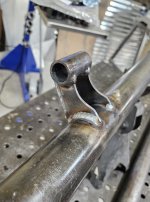
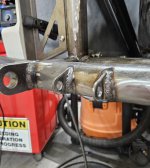
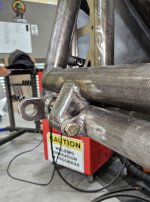

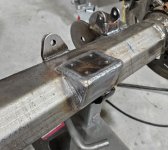
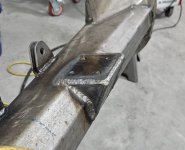
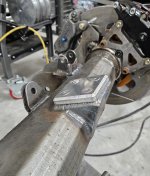
I made some bump stop pads on the rear axle as well. The lower structure is 1/4 inch plate that I tapped and the upper strike pad is 1/2 aluminum I had plasma cut out. I used a counter sink bit for the holes and I got a bit for my handheld router to put a nice chamfered edge on the strike pad.
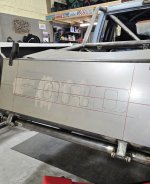
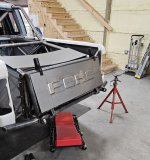
I started working on the sheet metal for the tailgate. I used the font from the original 1991 Ranger tailgate that had "FORD" stamped across the back of it. I beadrolled this yesterday and need to finish the interior lettering and do a border.


I made some bump stop pads on the rear axle as well. The lower structure is 1/4 inch plate that I tapped and the upper strike pad is 1/2 aluminum I had plasma cut out. I used a counter sink bit for the holes and I got a bit for my handheld router to put a nice chamfered edge on the strike pad.


I started working on the sheet metal for the tailgate. I used the font from the original 1991 Ranger tailgate that had "FORD" stamped across the back of it. I beadrolled this yesterday and need to finish the interior lettering and do a border.


ChrisRWG
Build & Film
I finished the beadrolling on the tailgate panel last night, I am very happy with how it turned out! I plan to spot-weld it to the tailgate structure after I finish the locking mechanism.


Provience
Kill!
 that's super sweet
SKULLYOTA
NOOB
- Joined
- Jun 30, 2023
- Member Number
- 6564
- Messages
- 374
The double hole saw is also good for enlarging the center holes in steel wheels. Converted a few sets of Chevy rally wheels to work on larger diameter Toyota hubs. Smaller saw is the pilot and keeps the bigger saw concentric
Love the build. That’s rad you’ve had it so long.
ChrisRWG
Build & Film
Thank you!that's super sweet
Yeah, I never realized they were designed to do this, pretty neat!
The double hole saw is also good for enlarging the center holes in steel wheels. Converted a few sets of Chevy rally wheels to work on larger diameter Toyota hubs. Smaller saw is the pilot and keeps the bigger saw concentric
Love the build. That’s rad you’ve had it so long.
SKULLYOTA
NOOB
- Joined
- Jun 30, 2023
- Member Number
- 6564
- Messages
- 374
Some brands the arbors are too short, so whenever I have to replace an arbor I always look for the longest onesYeah, I never realized they were designed to do this, pretty neat!
ChrisRWG
Build & Film
Progress updates:
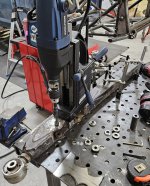
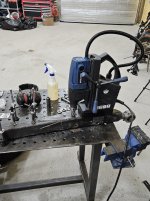
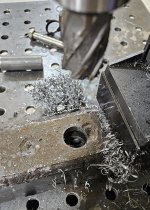
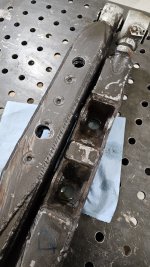
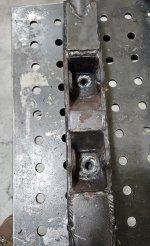
- I spent a couple of hours fixing my trailing arms. These were cut files I bought from DIY Offroad and welded up. There is no drainage hole in the shock pockets which caused water to pool up and completely rust the shock bolt to the spherical bearing in the bypass. When I disassembled the truck I tried a sledgehammer, air hammer, and a torch and couldn't get this crap unseized. I ended up drilling off the bolt which enlarged the mounting hole quite a bit. The mounting hole is thick since it has the trailing arm, weld washer, and overlay stacked up there, so I couldn't just use a weld washer since none go deep enough. I opted to stick the mag drill on the side and drilled to 3/4 inch and shove some 3/4 DOM through to correct the problem. Then I flipped the arm over and drilled a 1-inch hole in the bottom of both pockets and welded some 1-inch DOM in to seal the internal structure. The mag drill was clutch in doing this and the annular cutter ate through the internal structure of the trailing arm like butter.
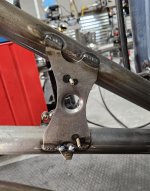
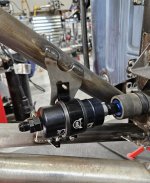
- One of the last brackets I needed to add was one for the fuel pump. I just whipped this up quickly and welded the bolts on so you do need to access the backside to remove the pump.
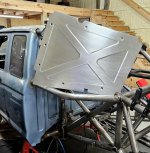
- I finally welded close the cab pass-through for the upper roll cage down tubes. I hate sheet metal and this sucked welding 20 gauge to 120 wall. I am waiting for a small dynafile to try and sand down the welds since I am not a fan of them.
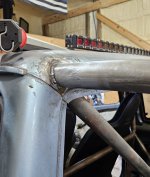
- completely welded the bottom of the tubework on the back half. I managed not to drip molten metal spatter on my crotch so that was a win.
- added zip tie tabs to the tube work where the wire harness runs
- I spent a couple of hours fixing my trailing arms. These were cut files I bought from DIY Offroad and welded up. There is no drainage hole in the shock pockets which caused water to pool up and completely rust the shock bolt to the spherical bearing in the bypass. When I disassembled the truck I tried a sledgehammer, air hammer, and a torch and couldn't get this crap unseized. I ended up drilling off the bolt which enlarged the mounting hole quite a bit. The mounting hole is thick since it has the trailing arm, weld washer, and overlay stacked up there, so I couldn't just use a weld washer since none go deep enough. I opted to stick the mag drill on the side and drilled to 3/4 inch and shove some 3/4 DOM through to correct the problem. Then I flipped the arm over and drilled a 1-inch hole in the bottom of both pockets and welded some 1-inch DOM in to seal the internal structure. The mag drill was clutch in doing this and the annular cutter ate through the internal structure of the trailing arm like butter.


- One of the last brackets I needed to add was one for the fuel pump. I just whipped this up quickly and welded the bolts on so you do need to access the backside to remove the pump.


- I finally welded close the cab pass-through for the upper roll cage down tubes. I hate sheet metal and this sucked welding 20 gauge to 120 wall. I am waiting for a small dynafile to try and sand down the welds since I am not a fan of them.

ChrisRWG
Build & Film
Updates:
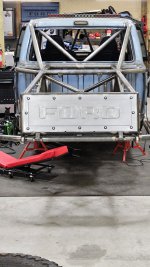
I decided to tab out the tailgate and install it with machined washers instead of welding it:
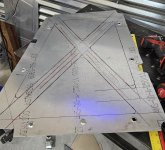
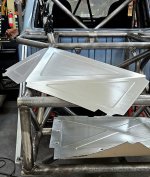
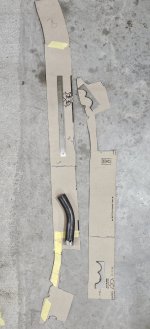
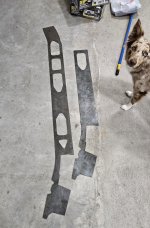
I made some cardboard templates for boxing the frame. First I used ram board and tape, took a picture of it, then scaled it in fusion and traced it. Sent them to the plasma cutter and now I have some nice frame plates. I boxed the frame 7 years ago but I did a bad job and the frame plates never were that great. I am much happier with this rendition.
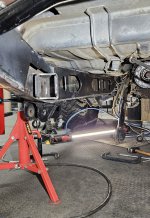
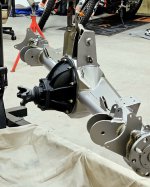
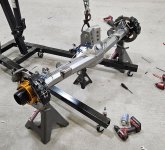
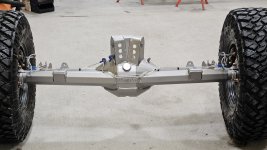
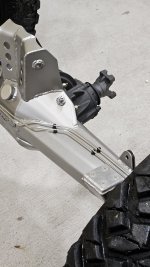
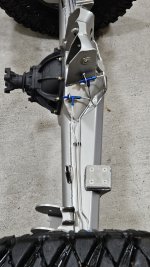
The rear axle is finally complete. I bent up all stainless AN brake lines for it and painted it with Seymour stainless paint. The Seymour paint basically steelit except it only costs $12 a can. The paint lays down very nice and I am happy with the results. I used some brake line restraints from Notchead and they are slick. I saw these from a SEMA post last year and wanted to try them. They go in with a self-tapper or screw/nut and secure the brake line nicely and look clean.
I decided to tab out the tailgate and install it with machined washers instead of welding it:

I made some cardboard templates for boxing the frame. First I used ram board and tape, took a picture of it, then scaled it in fusion and traced it. Sent them to the plasma cutter and now I have some nice frame plates. I boxed the frame 7 years ago but I did a bad job and the frame plates never were that great. I am much happier with this rendition.


The rear axle is finally complete. I bent up all stainless AN brake lines for it and painted it with Seymour stainless paint. The Seymour paint basically steelit except it only costs $12 a can. The paint lays down very nice and I am happy with the results. I used some brake line restraints from Notchead and they are slick. I saw these from a SEMA post last year and wanted to try them. They go in with a self-tapper or screw/nut and secure the brake line nicely and look clean.


