What's new

1968 IH C1300 2wd Restomod/Build

2 votes for notch the frame. those pics gave me more confidence I won't suck and it'll collapse. Realizing finding longer-assed 9/16" bolts or strong enough threaded rod will cost some bucks if I go route #1

plan: finish welding the crown vic mount boxes up at the bend seams so they're strong. Then I can sit it down on the subframe with full weight and see how much drop I'm at as it sits vs the OEM suspension. That'll probably make my decision on the path to take.

I'm not going for slammed, just a nice lowered stance. I'm estimating it's gonna be 6-8" lower when compressed, but its tough to tell without just putting weight on it
 
ran out of welding wire tonight, but had enough welded up to do a weight bearing mockup. well, as much weight as it can get without an engine/trans/etc

with a 2.5" riser, it's sitting at approx 25-27" to wheel center by rough measure. OEM front suspension with no engine/front clip was at 27".
1697593989380.png
1697594061055.png


so that probably pushes me to the rear frame notch for the RCAB to get that extra 2.5" of drop over spacer option. but seeing as the bushing doesn't fit with 2.5" lift spacer, i'm figuring I"ve got to take 3" out, at least, to make it fit. very rough eyeball says at least the white shaded area would have to go, maybe more. That's getting on what feels like the edge of thin in that area considering I'd have to cut the outer wall & bottom out - would definitely fully box and fishplate it all in. not a huge deal, but i'd be more concerned about things flexing than I was for the front cuts.

I can hack/modify/change the bushing mount itself but that becomes more of a pain for future maintenance. but who am I kidding, I'll never wear that bushing out. so maybe I figure a way to recess the bushing into the frame, cut off the bolted mount, and weld the round portion to the frame itself. replacement. not my first choice but it'd work, probably.

1697594255909.png
1697594292197.png


So I'll finish welding the front, add a couple gussets, and brainstorm what I want to do here. I'd rather have it sit lower than I want than higher, its cheaper to raise it up than drop it down further.
 
haven't had any time to hack at the rear mounts, so i'm reading up and brainstorming. I have settled I'm not doing the spacer option, I'm going to hack and box the frame to recess the RCAB's. dump of info below, not much out there for how people deal with the rear mount on a curved frame. Figuring it's going to be easy once I pull off the band-aid

per a forum "On the LCA rear mounts the centerline to centerline distance between the end of the studs on the LCA's when mounted in a CV is 33"." and Outkast Autoworks confirms
1698164895710.png


F100 concepts that don't work since my fame isn't flat. but brainstorming is there anyway. odds of me having to replace this bushing ever are LOW so maybe I don't gain anything by reusing the whole piece vs just the round bushing & housing and fabbing up plates to weld it in similar to the left pic. not sure it'd save me anything in my case tho. the right pic it appears he used an old bushing's plate as a mount bracket (I have aftermarket brackets that'd do the same thing). rightmost is Outkast Auto bolt on mount, which again, doesn't work on a curved frame

1698164718491.png
1698164006415.png
1698164912716.png


these bushings have oval openings for caster adjustment. OEM mounts are at a 45*ish angle to put the oval horizontal. You cut the bushing off the bracket and re-weld it horizontal if mounting the plates flat (not my pics). I spent $45 on new bushings. Or you can spend $150 on ones already cut and rotated.
1698164288889.png
1698164513807.png
 

Attachments

  • 1698163877416.png
    1698163877416.png
    390.5 KB · Views: 5
  • 1698164300469.png
    1698164300469.png
    199.7 KB · Views: 6
  • 1698164841802.png
    1698164841802.png
    19.7 KB · Views: 6
Took Monday off and spent longer than I planned, but it's on its own weight now fully. I still need to spend some time welding the front boxes in fully, and figure out how to box in the rear area.

If anyone wants to try to give me ideas on how to plate it back in for strength, I'm all ears. I do not want to have to think about loading a stack of drywall in the back of the thing, it's going to be used as a truck when needed. cardboard aided design will definitely be needed. Likely going to have to weld the inner bolts in so they act as studs

Onto the pics with comments:

Did about 4 rounds of cuts, working my way upwards 1/2"ish at a time, to get to where I cut away just enough. Shown in this pic is when I was eyeballing mounting them at the factory angle instead of flat. I wound up cutting and spinning the bushing on the plate like shown in the above post to allow for flat mount & caster adjustment, only takes 30 minutes to do again if I destroy these somehow. I also played around with swapping the bushing assys between pass-driver side and spun 180* to decide on which orientation i liked best for clearances and frame positioning
IMG_20231106_113919.jpg


pass side inside. mockup of final position pre-welds. Plates came with the $30 F100 frame box kit, I just had to cut of the 90* "risers" that they had bent into them.
IMG_20231106_113928.jpg


boogers laid, side shot of driver side. triangle gussets will be welded on
IMG_20231106_145725.jpg


more boogers laid + bonus temporary crossmember to help the frame stay square
IMG_20231106_145738.jpg


passenger side inner, boogered in. triangles will be added
IMG_20231106_145747.jpg


pass side looking rearward, trying to show that the new plate is not in line with the inner rail of the frame but angles in some towards the rear. Will make boxing in more annoying. Going to snip off the bushing mount plate overhanging here that does nothing
IMG_20231106_145636.jpg
 
Last edited:
Took Monday off. Was able to get some house crap done, a mountain bike ride in, and get some gusseting / filler / finish welding all the hacks to get this thing ready to be on its' own weight. I need to get it rolling and yank it outside to pull the Escalade in and rip the heart out of it.

RCAB outside shot
IMG_20231113_125129.jpg


RCAB inner shot. I plan to box in this area in the future and just got 3/16" plate to do so. it may be OK as-is, but I'd rather it be plated if I drop a stack of drywall or plywood in the back of the thing
IMG_20231113_125138.jpg


overall side shot
IMG_20231113_155348.jpg


overhead shot showing the frame shape and how it didn't play nice like the F100's do
IMG_20231113_155357.jpg


and a quick coat of bare metal primer before it all gets black. Did not paint the top of the box area as I have a little bit of welding left to do there once the suspension is back under it to sit nice with the upper mount of the crown vic swap. should be easy enough after I finish painting the frame. Don't plan on pulling the suspension out again after I get it under this time, so everything's getting 2 coats of Rust oleum before it goes in
left the front spring hangers for now since they're riveted on and integral to the bumper mounts and not in the way at the moment
IMG_20231113_205756.jpg
 
Last edited:
Fish mouths, kidney beans, bent laments or even circles/washers for gussets over the butt splices(as possible).
 
Couple more "completed" pics. Will still need to add some fishplates & box in that rear area, but its plenty now to move around. pushed it outside, thankfully didn't roll it down the hill into a tree while doing so

IMG_20231119_103315.jpg
IMG_20231119_103323.jpg


Looking back at the original suspension, looks like I got about 3-4 in drop from hoodline to axle centerline
IMG_20231119_123549.jpg


resting spot for now. threw a grill cover over the windshield/roof/upper doors. Remembered I need to get the crud out of the cowl so it doesn't rust more over the winter.
IMG_20231119_130249.jpg


and the heart donor. 2002 escalade. 6.0, 317 heads, DBW. Hoping to have it out over the holiday weekend, we'll see
IMG_20231119_134007.jpg
IMG_20231119_134000.jpg
 
Last edited:
Pic drop

Cam/springs/retainers ordered. Went with a Summit Stage 3 Truck cam after much reading into things I don't fully understand. But I went with this one for 3 main reasons:
1. I'm still a cheapass at heart and BTR/TSP cams are $100+ more. I'm also doing lifters high lift cams meant another $150-200 in springs, plus probably pushrods. This can run with $60 LS6 springs and stock pushrods (unless any look like shit, then I'll throw in new OEM spec ones). If I wasn't doing lifters I'd probably have gone ST2 high lift
2. higher lift reduces reliability/spring life (maybe meaningless at the miles it'll see, but whatever)
3. I prefer lower end power to high RPM max. I'd rather another 20TQ at 3,000RPM than 20HP at 6,000RPM for this build
1701199643821.png
1701199673341.png

1701199700450.png


and LS7 lifters and trays. I may return the lifters, not sure yet. They're good to do, but I'm now wondering if missing exh stud heads was the cause of my suspected lifter noise. I should have diagnosed better prior to ripping the engine out. Would just hate to get it installed and still have a dead lifter in there
1701200545798.png


money shot for you non-rust guys. Escalade donor. what you can't see is the windows thru the main trailer hitch "tube". Got to crawl under my Yukon now and check the hitch integrity before I tow anything with it again
IMG_20231125_150513.jpg


Engine out. 4-6hrs of prep by myself. Dad was up for Thanksgiving and lent a set of hands with the prybar to get the thing fully out, yank random small parts off, etc.
IMG_20231126_114422.jpg


On the stand. Crank bolt already loosened. Found 4 or 5 exhaust studs missing heads, dunno if someone messed with it or they just popped from corrosion/wear at some point.
IMG_20231126_141025.jpg


Final resting place. Now it goes to anyone who's willing to pick it up and scrap it. Interior and bed are filled with whatever scrap I had around including the frontend out of the IH. Even have the title for it
IMG_20231126_141045.jpg
 

Attachments

  • Screenshot_2023-11-25-10-45-37-47_40deb401b9ffe8e1df2f1cc5ba480b12.jpg
    Screenshot_2023-11-25-10-45-37-47_40deb401b9ffe8e1df2f1cc5ba480b12.jpg
    440.6 KB · Views: 26
  • 1701200518982.png
    1701200518982.png
    78.5 KB · Views: 6
Last edited:
1701288884102.png


more parts ordered. that's it for orders for a little bit, the wallet's going to feel it this month
 
small updates catching up. Shitty undercoating stuff scraped from the inside of the fenders, ready for 2 coats of Rustoleum now. May slap a coat on tonight
IMG_20231128_165354.jpg


And the potentially stupid frugal purchase. Picked up a LUK LS1 clutch/PP/Flywheel with <10k miles out of a wrecked vette for $80, with flywheel and PP bolts. Looks great, no signs of heat or anything. PP new is $100 by itself, kit is $350-400 + $20ish for hardware.

Probably just going to slap it in. Am I stupid to not at least take the PP to be surfaced? Don't want to be stupid, but also not looking to waste money.
IMG_20231129_201348.jpg
 
Last edited:
Broken bolts on exhaust manifolds is super common. PITA to do in truck, so most end of lifers aren't fixed because it isn't worth the money.

Not shocked on the hitch. My LQ4 donor's last gig was hauling firewood and was retired when the guy broke the frame off behind the bump pads. It made for a good deal for me.
yeah, i think 3 of the 4 rearmost are gone plus one or two near the center. If they refuse to come out I'll probably grab a cheap set of heads off FB Market instead of spending a weekend drilling them out. Hoping the heat/tap/weld a nut approach works. All visible broken ones are protruding so that's a good start. They're getting a spray of PB Blaster every time I walk by
 
Broken bolts on exhaust manifolds is super common. PITA to do in truck, so most end of lifers aren't fixed because it isn't worth the money.

Not shocked on the hitch. My LQ4 donor's last gig was hauling firewood and was retired when the guy broke the frame off behind the bump pads. It made for a good deal for me.
This is how I got my last low mileage 8.1l donor. Rear leaf hangers back rusted off with 131k on the clock. Love living in rust land
 
Weld a washer/nut to the broken bolts, let cool and spin them right out.

Even if the weld gets into the aluminum it won't stick to it.
100% my plan, had watched the vid Johnny linked a couple days ago. not too worried
 
yeah, i think 3 of the 4 rearmost are gone plus one or two near the center. If they refuse to come out I'll probably grab a cheap set of heads off FB Market instead of spending a weekend drilling them out. Hoping the heat/tap/weld a nut approach works. All visible broken ones are protruding so that's a good start. They're getting a spray of PB Blaster every time I walk by
Tippy tap on em with a little ballpeen hammer too.
 
Got the engine "build" mostly done over the past week or so. Should have bought a used parts washer, woulda sped up the process significantly.

cam swapped, new lifters, new valve springs, front cover seal, head gaskets, etc. Lots of cleaning: LA's Totally Awesome worked well as a degreaser/cutter, did well on the carbon too. That + scotch brite and scraper. 90% clean was good enough for me.

still need to do: remove 3 broken off studs in the heads, the rear cover/seal/barbell, pull the oil pan, replace the pickup tube o-ring, and torque down the pan/covers. intake manifold needs to be cleaned but that's no rush since it won't get reinstalled for a while.

after that, I can bolt up the clutch/trans etc and get the package sitting in the truck

pulled & partially stripped
IMG_20231209_204702.jpg


one side, dirty
IMG_20231209_211422.jpg


one piston clean
IMG_20231211_211501.jpg


left head clean enough, right not yet
IMG_20231212_211349.jpg


current state. block needs degrease/wire brush and paint bad.
IMG_20231217_134931.jpg
 
Last edited:
Dollar store oven cleaner worked well on my block. I did mine on the engine stand with a drip pan under the stand. Just had some water spray bottles, brushes, etc. It does dull aluminum, so be mindful. Got it clean enough that the engine paint has stuck for a few years now.
 
Off today so I spent a little time on the truck. Exhaust studs removed with the weld approach.

After that, made up the frame plate templates and some diamond fish plates. All are cut out, only took a pic of the passenger side mocked up. Happy with the results, portaband is awesome for this stuff

IMG_20231219_104815.jpg


IMG_20231219_114002.jpg
IMG_20231219_121920.jpg
 
Had warm weather and a little time. Frame plates and fish plates done. Believe the frame/crown Vic swap is done unless I add the sway bar later. Except for some spacers at the upper mount that I can do as anytime

Engine is close to done. Need to do the rear main, torque the f/r covers and pan down, and quick wire brush and paint the block
IMG_20231230_144912.jpg
IMG_20231230_144919.jpg
IMG_20231230_152434.jpg
IMG_20231230_152441.jpg
 
You will want the sway bars
i figure you're right. it's sitting in the bed and should be easy to add. maybe I'll try to get it in before the engine, access is definitely easier.

started mocking up the sheetmetal patch for under the battery tray. Front clip is "done" after that for now. Whole thing got a good coat of Rustoleum on the inner side to seal it all up.

updating the parts list on post 1 as well. got a 30" steering column off ebay for $140 that should work great, mocked it up very roughly yesterday. Need to get some mounts, but not going to install it until I pull the dash and repair the duct areas that rusted out. May need to slightly notch the frame for the shaft, we'll see

1704290935925.png

IMG_20240102_143801.jpg
IMG_20240102_143809.jpg
 
Last edited:
got the harmonic balancer install tool so front cover and oil pan are now buttoned up and complete. Need to do a quick wire brush/degrease/spray on the block itself and the engine is done

going to throw the trans adapter & parts on next, and patch the battery tray. Got 8-10" of snow yesterday so truck's buried and indoor/garage stuff is on the short list
 
Slowly throwing parts together, it's been cold the past week or so. Not much for pics

Trans adapter/bellhousing/slave cyl etc are all together, ready to bolt to the engine now.

Bolting accessories back onto the engine, cleaning up some as I go. New water pump is in the mail, idler pulley too. Power steering pump bkt needs some cleaningthen I'll slap that assembly back on, leaving the old pump for now it worked fine.

Bought the cheapest set of long tubes off Ebay with Y-pipe components. I don't like shiny much so I got the black coated ones. having the Y-pipe stuff should let me fab up the exhaust in house simply, vs going to a shop. I'll very likely change out the clamps
1705936713945.png


hoping to drop the engine/trans combo into the truck in the next week or two, depending on schedule. Not rushing since it's easier to bolt on the accessories on the stand vs in the truck, but I'd like to get it resting in there so I can pull the dash and do some cowl rust repair. Then I can get the steering column mounted/connected and start figuring brakes and clutch pedals.

Leaning towards running the GM hydroboost I have on the bench. Thought about going with an iBooster electric setup, but I've got everything for the hydroboost sitting in the garage so its virtually free and parts are everywhere
 
Painted the rest of the firewall Saturday before the engine and trans go in and I can't access it. Need to decide if I lift the cab off to clean and paint the underside now, or just let the grease keep being rustproofing under there. Probably leaving it be or this thing will never get finished

IMG_20240128_160817.jpg
 
I'm engine harness shopping. Cheap ones, not the $500 ones. I may have to convert to DBC, I have a semi-oddball DBW setup that only came on some 2001-2002 trucks. I think only the 6.0's had it. I wanted to keep it for engine bay cleanliness and ease of pedal mounting/solution, but that may not happen

it seems like that gen DBW may not have a cheap harness solution without getting into modifying the harness or mix-matching sensor genrations, which I'd like to avoid. I confirmed my PCM can handle DBC as well as DBW so I think it's just swapping of the throttle body with a cable one.


headers arrived. Cleaned up engine accessories and have been bolting them back on. Progress is slow, but I may get the trans bolted up this weekend and a stretch may be to even swing it into the chassis.
 
Spent some more money. Ebay crown vic steering rack line adapters may work if I modify them, but don't fit quite right and I decided that's a $20 gamble lost. Ordered a reputable one which I like the design of more anyway.

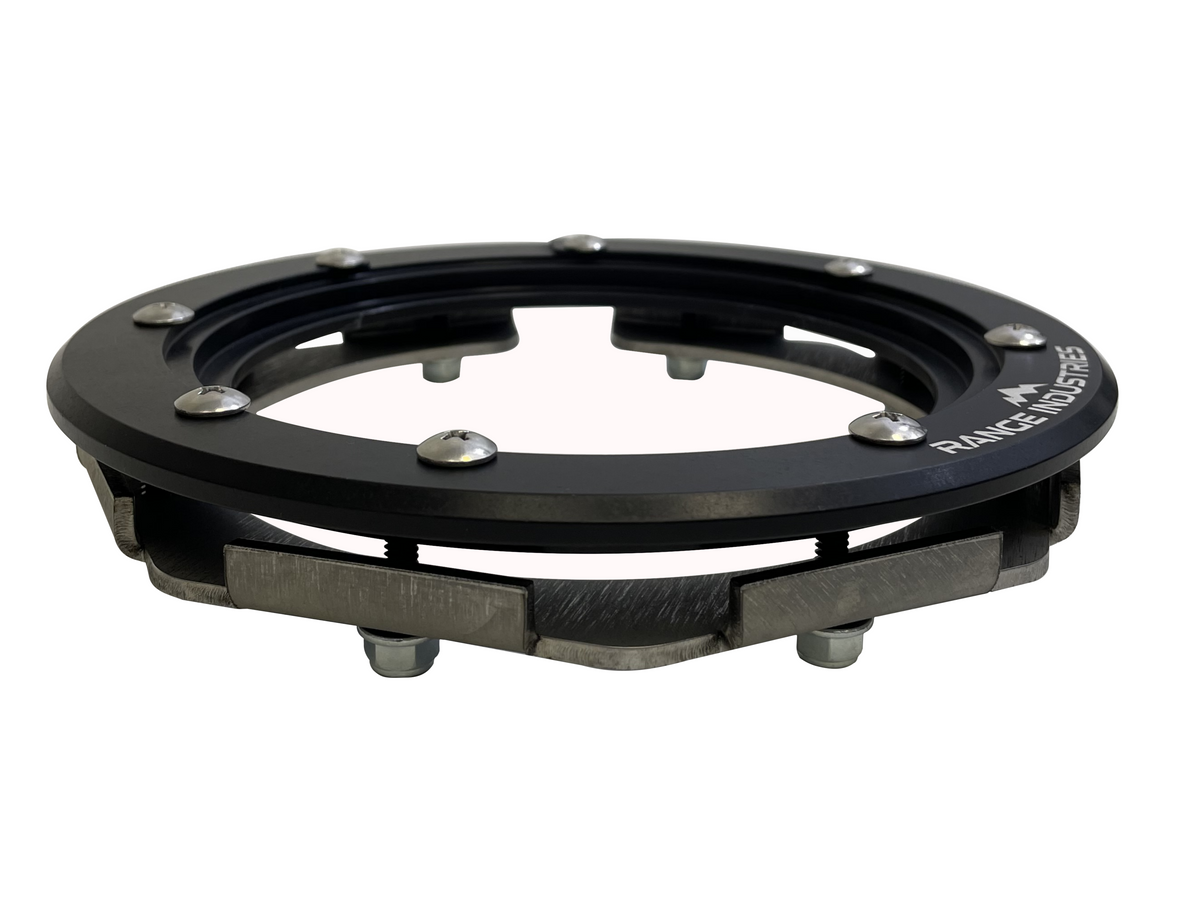
Also ordered a nifty way to put a GM in-tank fuel pump into my OEM fuel tank. Just need to enlarge the sender hole, bolt in the adapter, cap the OEM outputs, and I'm all set. Much preferred to my original in-line pump plan. They had a weld-on flange option too, but this one should save a lot of time and effort for not that much more $$

1706810296308.png

Crown Victoria -6 AN Steering Rack Adapter

1706810322369.png
1706810331623.png
1706810345196.png

 
Top Back Refresh