What's new

1968 IH C1300 2wd Restomod/Build

Welp, think I barely dodged ruining the engine in this thing. Popped the valve covers to take a peek and found this under the drivers side. Looks like condensation sat on that side of the valve cover and rusted it, and that scale rust came loose and fell down into the rockers/springs etc. Wiped everything I could get with a rag, then sprayed it out with brake cleaner, then gave it a good bath in random spray lube. Very little appeared to have made it to the return ports on either end of the head, and debris was mainly only in the front. think I'm OK

question: thing sat for probably 2+ years. is this a sign of oil issues and thus maybe the lifter noise on 1 of those 2 cylinders (if noise is lifters) or more likely just condensation from sitting? I'm leaning towards the latter, everything looked wet when I pulled the cover, except the valve cover

Did an oil change after. As in, I drained the pan, drained the filter housing, and dumped in the old oil that came out of my DD's :laughing: Plus a half a quart of ATF I had kicking around. Its overfilled, but I'll flush it again soon. Wasn't going to use good oil to run it a handful of times before flushing it again to make sure none of that scale shit remains.

p
IMG_20230808_200444.jpg
IMG_20230808_200428.jpg


IMG_20230808_200439.jpg


passenger side looked good overall, nothing stood out as a concern
IMG_20230808_195146.jpg
 
Last edited:
Ever seen this before? Pretty certain its not factory based on the sheetmetal screws holding it in. Its engine oil, I didn't fully open it and make a mess but it oozed oil when I started to. Lines run to the front of the drivers head and to the filter canister housing area if i remember right. 2nd filter? extra oil capacity? Previous oil feed for something that no longer exists?
1691680947278.png
 
you're probably right - that looks very similar. Truck seems like it was maintened well overall and a work truck, so an "improvement" jives with the rest of the truck condition.

I started cracking it apart pre-oil-change when it started oozing I decided I didn't' want to deal with the mess. I'll crack it open next time I drain the oil out and probably eliminate it, zero need for it on a freaking IH SV:laughing: at least not for me

Understanding Engine Oil Bypass Filtration for those unfamiliar like me
 
That thing is a remote vacuum booster. Your brake master is plumbed to a slave cylinder that actuates a vacuum booster that runs another “master cylinder” that runs the brakes.
They were on lots of big trucks with hydraulic brakes. Kind of a pain and not needed in your application.
 
That thing is a remote vacuum booster. Your brake master is plumbed to a slave cylinder that actuates a vacuum booster that runs another “master cylinder” that runs the brakes.
They were on lots of big trucks with hydraulic brakes. Kind of a pain and not needed in your application.
Looking at the wrong end of the arrow. The pointy end is not at the vacuum booster.

OP, if you ditch the booster don't just throw away for scrap. Those boosters are getting harder and harder to find, the last few I got rid of went to a rebuilder.
 
Doh! I didn’t even see the arrow, just the WTF.
I concur with the others. I’ve heard of the TP filter setups, never seen one in the wild tho
 
Looking at the wrong end of the arrow. The pointy end is not at the vacuum booster.

OP, if you ditch the booster don't just throw away for scrap. Those boosters are getting harder and harder to find, the last few I got rid of went to a rebuilder.
it seems to work decently too from the 1000ft drive I took. Will definitely do what I can to sell/give away anything that comes off the thing before scrapping. Basically the entire drivetrain, front suspension, rear axle, etc is getting removed in the long term. I know I've read the rear drums are unobtanium too
 
need to get some smaller progress pics up tonight.

Currently hunting a 2wd Colorado/Canyon manual trans for a reasonable price, with the plan to run a FABbot adapter setup. FABbot AR5 to LS NexGen Adapter Bundle

ordered motor mounts. Its worth my time to just buy ones that bolt in vs spending time fabbing my own shittier options.

was between the Outcast Autoworks and Range-Industry designs. I liked the Rogue for the OEM-bushing use and probably a little more comfort, but went with the Outcast for the fwd/aft adjustability. Figure if the NVH is really bad I can find a softer bushing to put in place. Price was a wash
1693419068300.png


vs
1693419112894.png
 
Making progress on the small junk/insignificant work, but it's progress.

Bed interior is fully painted, sides are done too just no pic. Wire brushed heavy, power washed/dish soap scrub, primed, then Rustoelum Satin brush on. it'll be outside this winter so sealing up the bed was needed

1000003785.jpg

1000003801.jpg
1000003836.jpg


Very happy - got a door latch from Chaz and got it installed pretty painlessly. Pic also shows the prior latch solution
1000003976.jpg


and I am replacing the sheetmetal screws in many places with rivnuts and machine screws. Taillights and door panels got done while I had them off.
1000003843.jpg

1000003975.jpg
 
Last edited:
and then the turd polish. Cleaning up the frontend. Painted basically all the not-aluminum bits with satin black. It had new rotors, pads, one caliper, and I think some newer suspension bits too. Had to order a new caliper and one bearing didn't feel great so a new hub is on the way too. Now I can shove it in the bed and out of the way and, i think, start yanking the front clip and engine/trans out

1000004061.jpg

1000004057.jpg
1000004059.jpg


Rain rail got all the plumbers putty or whatever shit had filled it previously, wire brushed, and 2 thick coats of Rustoleum for now
1000004060.jpg


And i temporarily threw in the battery tray from Chaz @ SpazzFab. I've got to patch a rust hole underneath at some point. Awesome quality and a good dude. Conveniently for me he lives 45min away, but works 10min from my house so we met up and BS'd IH's for an hour or so
1000004067.jpg
 
Last edited:
You're welcome for the Chaz intro. :flipoff2:

Get him to make external visors for our trucks.
thanks, seriously:cool2: He's a good dude for sure, and definitely bit by the IH bug. We BS'd a while, talked your truck/dash some, his projects, other parts, etc.
 
great work, good luck saving that roof. i did a older dodge recently and boy that seam is a monster to get cancer free.
 
I snagged an AR5 for my R112 project for $250 from a yard that had it listed on car-part.com
lucky. i see some cheaper down your way

there's one for $450 close-ish but on Long Island. that's either 3+hrs each way to drive, or 2+ with a ferry ride. I don't have the free time right now to get there, so I'll keep watching until I find one. Realistically I don't have a rush, i've got 2 trucks to rip engines out of before I can even think about mating a trans to the LS.
 
started tracking costs in the first post. that might get painful

taking off tomorrow. Hoping to get some prep work going on pulling the front clip off and stripping the engine bay. we'll see if that comes to fruition
 
Well, I had Friday off and it rained too much for the local MTB trails, so I skipped out on the house projects and spent the day in the garage. BIG progress. Started around 8:30AM, had the garage 95% cleaned up and everything put away by 3:30.

Front clip is off. Engine/trans are out and shoved in the back of the donor truck under a tarp. Next step is finish stripping the last couple of things off the firewall then power wash and start measuring for the crown vic swap.

I have some rot in the cowl, but I still think I got lucky overall all things considered. There is rust on the underside which we knew, pics didn't come out, but the curved areas look pretty solid with only small rot spots. The fact bolts actually come off this thing is a night and day difference to my scout where EVERYTHING was rusted on.

1694914839991.png

1694914914906.png

1694914948229.png
1694914966579.png

1694915016208.png

1694915042731.png

1694915063712.png

1694915162727.png
 
nothing exciting, but i power washed the first layer of grime off the engine bay so I can start measuring/cutting/marking for the crown vic frontend. Also power washed the front clip so I can give it another quick clean then brush everything with Rustoleum

there's shitty undercoating peeling off everywhere. going to have to spend some time with a putty knife scraping all the loose junk off, power washer only peeled the easy stuff


also should be picking up an AR5 trans locally today. not cheap at $800, but basically the same price as anything I can find on car-part and I don't have to drive 2-3hrs each way to get it. I'm sure one will show up for $300 next week, but I've been watching for 2 months and they don't seem to show often, at least in my area.

ordered a bunch of the trans adapter parts too. updated the pain list on the first post
 
made some good progress over the past 2 weekends. Parents were up last week, so dad hung around and we got the front end stripped out.

around 27" from hood to wheel center with weight on the jack/front suspension. Forgot to measure pre-teardown with engine weight but I'm guessing it was 1-2" lower.
1697418763372.png


Apparently didn't take many pics that day, but steering/suspension all removed. After this, all the extra brackets/etc got removed. X on the rivet head and a hammer and chisel to knock off the head made it easy enough. Shitty air hammer would have been nice. Leaving whatever crossmembers in I can for rigidity
1697418796607.png
1697418820219.png


and first mock-up to visualize
1697419961591.png
 
Last edited:
then big progress Saturday. Wife had the kiddo in the AM so I had from 9-2 to plug away. Had been brainstorming / visualizing / etc through the week how to get everything positioned right. Realized at the end of the day if I'm within 0-2" rearward of the no-engine-weight centerline of the OEM setup, the fwd/back of each side was the crittical focus vs exact position. so I made a "fake" crown vic frame from some plywood and 3/4" dowels. this let me position the boxes in their needed positions, align everything, then mark out where the boxes need to sit. Then I transposed this drawing to the frame underside (since I'm mounting from under not above), and hacked.
1697419078128.png
1697419371192.png

1697419428934.png


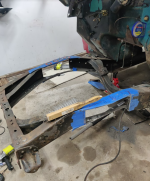
Cut and box mockup. took 4 shitty HF Bauer cutoff wheels. you can see how much the IH frame narrows at the mount spot, and how it curves, making this install more of a PITA than the F100 they're made for
1697419492081.png

1697419514372.png
 

Attachments

  • 1697419479282.png
    1697419479282.png
    227.1 KB · Views: 7
annnnd after having everything perfectly setup, I thankfully did one final measurement check of the box position vs the Crown Vic. WTF, crown Vic front holes are 32.5" wide but alignment pin and rear are 31.5". Debated opening up the holes on the crown vic front, but decided to spread the boxes and make the frame work.
1697419766347.png


for once I had a good thought and left the OEM frame rail longer than I thought I'd need to be able to overlap the box.
1697419848347.png
1697419871567.png
 
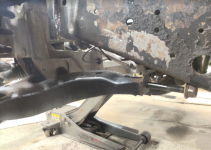
so now here's where I stand. Could use some opinions on the 2 options I see. Because of the shape of the OEM frame the control arms prevent the subframe from seating to the frame boxes. you can see a 1"ish gap on the rear (right) side, front gap was less. The main problem is the rear control arm needs to be able to sit higher but the frame is in the way.

1697420048502.png
1697420330034.png


so I Pulled the bushing off and threw some 1' angle iron scraps between the frame box and crown vic subframe as spacers to visualize. Still have an issue, its still tight to the frame in the back.
1697420259698.png

1697420305684.png


So I think I have 2 options. I'm leaning towards #1. Both require a custom rear mount/bracket to get the bushing at the right angle. End goal has always been improve ride / new steering, not dropping it to the ground.

1. use 2" or 2.5" box tubing to the frame boxes extend further down. This would put me at 25" wheel center to hood with suspension fully extended/in the air. Assuming it drops 4" with weight, that means I'm still 6" lower than the OEM setup. That is PLENTY. Box tubing will get triangulation / fish plates etc. rear mounts would then hopefully have enough space to use the OEM mount (shown above) with a custom bkt to the frame to level it out. Downside: I need to buy or make a new upper subframe mount, AND source longer 1/2" bolts from who knows where. the mount pivots down, and I'd need to make it 2" taller somehow. you can see it doesn't sit flush to the top of the frame as-is anyway

2. cut a triangle out of the frame to let the bushing recess. This would require boxing the frame in that area since it's just a C-channel frame. Easy enough with 3/16"x6" plate steel. I don't necessarily like the idea of cutting a large portion of the OEM frame cross section out. And this is a bunch more thinking/measuring to figure out. I've seen it done, but I don't see a huge benefit?
 

Attachments

  • 1697420275592.png
    1697420275592.png
    394.5 KB · Views: 6
Do what the Ford guy did. It'll be good even if not boxed but box it for piece of mind
 
Top Back Refresh