What's new

14 JKU M-380 "Kilroy"

Mad Max

Imagineer
Joined
May 19, 2020
Member Number
325
Messages
291
Well...after building and wheeling multiple Dodge trucks I'm finally gonna build me a Jeep :flipoff2: .

Just picked up this 2014 JKU - it's bone stock, right-hand drive, and other than a hurt engine 100% complete.

The plan. Gonna gut the Jeep's entire driveline and wiring harness, drop in all of the driveline from another rig, and install a fresh yet primitive electrical system with old-school toggles and switches, Speedway column, Grant wheel - not an OE computer in sight. Magnum 360 with Sniper EFI, 46rh trans, Atlas 4-speed, D60 front, 14b rear. Both axles are getting Artec trusses and full-hydro steering. A 4.5" long arm kit from Iron Rock Off Road will smooth out the bumps, and a host of HD armor will protect the body. It'll be fully highway friendly, and a beast off-road, with lots of strategic armor to protect pretty much everyone and everything. Hoping to start jammin' on it Jan 24.

brought this home Thanksgiving Eve 23. I'll keep the majority of the interior, but otherwise I'm gonna pretty much rip everything out of this -
llMyUhw.jpg


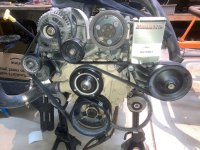
...drop in all of the awesome 5.9 Magnum/46RH/Atlas4/Tons/40s driveline from this -
vsK0eVI.jpg


...incorporate lots of the charm and dirt-simple simplicity of this -
39GlvOV.jpg


...engineer it to feel and perform pretty much like this -
W0ElUqn.jpg


...and after brushing on Air Force Strata Blue oil-based paint it'll look more or less like this -
5swteFG.png


...and in the end we'll have 'his n hers' JKUs in the family :grinpimp: -
dKcH8UL.jpg


Again, I'm going to completely remove the OE Jeep driveline and electrical harness and install a stand-alone, computer-less, dirt simple, primitive, and effective 'switch-to-component' harness, mod the firewall and wiper system for left-hand drive, drop a nice aftermarket 4.5" suspension kit under it, weld on the Artec hardware to utilize the D60/14b, go full-hydro, and rock the hell on. It'll be about 10 times stronger than our M-38...so we're gonna call it the M-380 :smokin: .

- Sam
 
Last edited:
...not sure yet - well, 'no' - not using any of the OE gauges or electrical or HVAC, but I may use the OE dash frame and firewall support, but none of the gauges or OE controls - I'll fab my own dash panel and simple toggles and knobs for lights, HVAC, etc.
 
Last edited:
nope - already gathered most(?) of the dash and wiper assembly hardware to convert it to LHD. And no grumpy grilles will be appearing in this film :grinpimp:
 
Last edited:
BLUF - For the best streetability, where is the best place to mount a full hydro ram?

This Jeep will see a lot of street time, and with full hydro I know the placement of the ram will affect how the steering makes the steering/chassis 'react'. I know what the Ackerman principle is, but what I don't know is the best placement of the ram to result in the best overall Ackerman (for the street). I know a FH setup does not result in the same steering geometry as a typical tie rod setup, and I know I cannot achieve the same 'tire scrub' as a tie rod setup does - I'm just wanting to achieve the best 'overall' Ackerman as possible with a FH setup.

Basically one of these two mounting solutions is likely the best overall for the best streetability...but which one...and how much. I 'think' I've read that placing the ram directly in-line (X, Y, and Z) with the knuckle bolts lends to less Ackerman than placing the ram behind the bolts. Is there 'math' I can work with to determine the best overall placement? IOW, what I'd love to read is "for the best overall streetability place the ram in-line horizontally to the knuckle ends but 'X' inches behind the knuckle ends"...or something like that.

There are two axes in play, so how much of the X (front/back), Y (up/down) is required for the best Ackerman. Is there some bible I can read with the intel inside that I can use to determine the best placement?

I'll be gluing a Artec FH truss to my D60, which has a nice mounting spot...but I can rotate the truss upward or downward a little, which will affect the ram placement, and the Ackerman...but where best to locate it - dat's my question. The correct answer has to be out there...I just haven't yet found it.

I found this tech sheet I think from Howe; I think the assumption is the ram is mounted in-line horizontally to the knuckle bolts...which if so means when centered (and the knuckle ends rotate slightly frontward) the ram is mounted slightly rearward of the knuckle bolts, the amount of which I can determine once in place. Is this basically 'it'?

IrLFJKm.jpg


- Sam
 
Last edited:
ok - talking with Howe, it seems the rationale for the ram placement in the above schematic is to reduce the possibility of bending the long side of the ram rod when it's fully extended long-side out - not (necessarily) for 'streetability', but, if placed as shown above the steering it should 'act' about as good as reasonably expected.

If'n anyone has experience contrary to this pls chime in.
 
Given 'a lot of street time', do you really need full hydro vs a ram assist system? Seems like there is a trade off in street manners.
 
having driven both the pro's of full hydro outweigh the cons (well at least to me) - no bump-steer, super simple configuration, no interference issues, and super simple maintenance. There's always the 'no mechanical link = death' thing, which is crap - I honestly think there is a higher chance of breaking a sector shaft than blowing a hose, and to me a broken sector shaft is a much worse 'control' problem than a blown hose...and I can fix a blown hose in no time. I am also planning to have a PS low-fluid-level warning light to alert me that the system is losing fluid. On the road FH feels 'good'...but off road FH feels 'great'.
 
Last edited:
Ya, that picture above is how you avoid bending a ram shaft. But as with everything else, if you're off or not perfect by a little bit, it ain't the end of the world.

There's two ways to figure out your ackermann. One way is much easier than the other.

Easy way. This picture shows both front steer (tie rod in front of axle) and rear steer (tie rod behind axle). We only care about the front steer, tie rod in front of the axle. The right hand picture.

You run a string line straight from the steering arm bolt hole, through the knuckle pivot and back to the rear axle. You do that on both the driver and passenger sides.
Where those two lines converge will tell you your ackermann


Capture.JPG


If your lines converge right at the CL of the rear axle, you have 100% ackermann. The front tires will follow the correct radius around a corner and neither tire will scrub.

If the lines converge behind the rear axle, you have less than 100% Ackermann. This is called anti-Ackermann.

If the lines converge in front of the rear axle, you have more than 100% Ackermann. This is called pro-Ackermann.

Just remember, there is no set right or wrong Ackermann %. The variables and needs are endless and all vehicles are different.


The harder way is to do it like this. It's just more work to draw lines on the floor and making sure you can get a perpendicular line coming off both wms's.

Ackermann.JPG


As a point of reference. I have full hydro. I also know I'll be driving my pile on the street more that it will be in the dirt. Good offroading for me is hours and hours away. I love driving the Jeep around town.
I built in 100% Ackermann. I don't want to sound like i have the ARB's locked when pulling into a parking spot. I may loose a couple degrees of turning radius on the outside tire when offroading, but for me it was a trade off I was willing to make. I also built in 15* of caster into the axle to help with return to center.

Had to have custom steering arms made to get ackermann where I wanted it.

IMG_20220429_165257.jpg
 
Last edited:
Good info. I just earlier this year did my first full hydro and was nervous as hell driving it but it wasn't hard to adjust to it and I feel it really isn't that bad. It's on a JKU on 41s and I'm fine driving it 85 on the interstate. There is some wander but I've got a buddy with a JK on 37s that is way sketchier to drive at half that speed.

My only complaint is the steering wheel continually migrates counter clockwise. Granted, a QD wheel would be better suited but it's still on stock column and wheel.

I believe caster is your friend with full hydro.

I've heard of people damaging the clock spring with full hydro on JK's. Something to keep an eye on and maybe recenter from time to time. Don't hold me to this, it's been a while, but, if I remember correctly, the clock spring in my 2010JKU had 3 turns in either direction.
 
Yeah it's 3, think total though, so 1.5 in either direction. it was out already but I put a cheap Amazon one in before getting it drivable and it didn't last 2 weeks. I didn't over turn it during that time either so I've just dealt with it. Still have signals and all just no horn or button controls which don't get used anyhow.

It just screws with my OCD. Howe did say it was OK to crank it around to recenter it either running or not since if you turn to lock and hold wheel it will eventually migrate back the other way
 
...no worries there, I'm doing a bare Ididit column - no clock appearing in this film neither 👍
 
Last edited:
...so I'm not 100% certain...but according to the info on Rock Auto I think the OE radiator in the 2021 JL 392 is...pretty much...the same overall size as what is in my 2014 JK. I would have thought the 392 would have a mo-bigger radiator...but apparently not. Anyone have any first-hand knowledge of the 392 radiators, and if so are they really sized as indicated here?

QHALDnt.jpg
 
so...I might have a bit of a dilemma...well maybe not...I just don't really know, and while my research has resulted in lots of info it hasn't really provided the whole picture, so here I go posting the issue and welcoming any inputs or advice.

Issue - MIG welding trusses to assembled axle housings - two actually; a D60 and a 14b. I've read that the center sections are nodular iron and I've read they are cast steel, both of which will accept MIG welding. Good. I understand that pre-heating is preferred but not essential, that 'spreading out' the welds is essential, and slow-cooling is preferred. I've read folks have just blasted away and had good results, and vise versa.

My particular issue - my axles are already assembled, and I don't have an oven and even if I did I'd have to disassemble the axles...which I really don't wanna do. As it stands now, my plan is to pull the covers, drain the oil, leave the carriers fully assembled, loosely bolt up a standard cover to keep slag from hitting the internals, pre-heat with a torch, take my time, and with .030 and typical 75/25 bottle MIG the trusses in place, alternating weld locations as far apart as possible, and wrap the center sections with a welding blanket to keep them as warm as possible for as long as possible while cooling down.

I want to do this right...and I want to keep the axles assembled, and I'm looking for a 'yep that's pretty much on track' or 'no man that's gonna jack up this or that', etc. That all said I welcome and appreciate any/all inputs and/or recommendations.

- Sam
 
Most axles aren't anywhere near dead nuts on so don't get too worried about it. Rears are a lot more sensitive than fronts because there's way fewer parts with slop to take up any misalignment.

As long as you make some half-ass attempt at preventing deformation you should be able to get it close enough to do final adjustment pretty easily if needed at all. Chain the axle to a beam and tension it with a bottle jack so that it's not free to curl up toward where all the welding is happening.

On the FF rear final adjustment is pretty easy because you can just bolt the axles to the hubs with no carrier and lay beads where and as needed to get the shafts centered in the holes and in line.

The front I'd just send it and pray because it's much less sensitive and disassembly to the point where you can check alignment is much more of a bitch. :laughing:
 
...so 'wire' - I'm reading using nickel wire has real benefits for welding to cast and nodular iron so I'm likely going to use this for welding the truss(es) to the center section(s)...unless there are better sources...

 
Last edited:
so this is kinda cool - The JK I got my dash and cowl/firewall hardware from was designated as a 'Mule' - a demo of sorts, which...if I have the story right...was given to the PO to test new hardware and such for the aftermarket. It never had a VIN and as such couldn't ever be registered, which made it a perfect candidate for parts, some of which are going in my Jeep. Kinda cool. I also got the grill, which is now a badge of honor on the shop wall :)

it has a Mopar pn# on it, but note there is no 'Jeep' emblem on it -
Yl62K3y.jpg


and for fun we found a real nice granite grey grill to improve our indoor decor -
K2hEilx.jpg


This weekend I should be finishing up a temporary project in the shop, after which it's game on with my M-380 build :)

- Sam
 
...so I'm not 100% certain...but according to the info on Rock Auto I think the OE radiator in the 2021 JL 392 is...pretty much...the same overall size as what is in my 2014 JK. I would have thought the 392 would have a mo-bigger radiator...but apparently not. Anyone have any first-hand knowledge of the 392 radiators, and if so are they really sized as indicated here?

QHALDnt.jpg

Sorry but I just saw this. I am running this radiator and matching 392 fan in my L96 JKU. It has worked great at 100 degrees with the A/C on but I don't know how much better than the stock JK radiator it is. It does have more fins and tubes per inch.


so you're using the off-the-shelf JL 392 radiator in your JK - any 'bolt-in fitment issues, or did it literally bolt up? I'm planning to use the mechanical clutch fan I already have and works great, and I'm anticipating fabricating a fan shroud, but other than that I want to run OE radiator and not some hi-zoot hi-$$$ aftermarket unit that...from all accounts...is not actually required.

I'm very tempted to run the OE V6 radiator already in it and see what happens - my 5.9 isn't very hot so it might be fine, and if not I have the '392' option available.

Great input - thanks much 👍

- Sam
 
Last edited:
It doesn't bolt in. I cut the lower plastic mounts off of the radiator support. I welded two pieces of flat stock to the bottom square tube of the radiator support to accommodate the lower radiator bushings with one hole being oblong to allow for expansion. The passenger upper mount only requires spacers and a longer bolt. The driver upper needs a drop bracket made. Modifications were required to the JK A/C condenser to fit the radiator.

I would have tried the original JK radiator and added an engine oil cooler before I would have went with an aftermarket aluminum radiator. They seem to fail a lot.
 
copy all - I'll try the JK radiator first, and I've got the links for my oil cooler saved and I'll go that route before trying another radiator. Thanks for the intel - much appreciated 👍

- Sam
 
...body's off the Dakota - time to dust everything off and pull the driveline 👍

OhaBWZm.jpg


butyZz2.jpg


LOVE this Harbor Freight crane -

lrSnvNX.jpg
 
...very productive weekend...and nothing and no one got crushed 👍

All of the driveline is out from under the Dakota's frame, the 'roller' axles are bolted under, and the cab is back on; few things remaining to remove from the cab and the Dakota is ready to roll back into the barn, and will go up for sale.

cHRWtIW.jpg


sG7w4pM.jpg


UlM1YiZ.jpg


Since the Jeep won't have a/c I found the proper serpentine belt to literally bypass the compressor, with no voodoo - love it 👍

tO47D1w.jpg


And here's an interesting view of the frame with the rock sliders and all - this whole thing is for sale, and any 4-door Dakota cab will bolt right onto it

qcxgVTk.jpg


- Sam
 

Attachments

  • tO47D1w.jpg
    tO47D1w.jpg
    244.5 KB · Views: 4
So...back to an annoying but potentially serious item - engine noise. There still seems to be excessive lifter chatter (or something else?) coming from my '02 Magnum 360 (video below).

Engine had ~125k miles on it, stored it for 3 years, then I 'restored' it - not a full rebuild but took it down to the rear main seal and refreshed all the gaskets. Cleaned the heads, new/bigger Comp 'truck' cam (#20-745-9: 212-218 (264/270), .480/.480, on a 114* LSA). Disassembled/sonic-cleaned the roller lifters, and with 10W30 in it it's sounded 'chattery'. On a recommendation I installed .036 longer pushrods, but alas that didn't eliminate the chatter. Poured in 20w50 and it got noticeably quieter tho still more noisy than I like; oil pressure almost doubled at hot idle (bearings obviously are not new). Does not appear to burn oil nor smell like oil out the pipe.

The thicker oil definitely decreased the chatter...and upped the oil pressure at hot idle (good). So...I'm thinking the thicker oil simply provided more 'padding' around the lifters...which may simply indicate the lifters are just wore out......maybe (?).

Found two intake manifold leaks so the intake is back off...and I have a decision to make - replace the lifters with new.....or is the noise 'normal' for a Magnum, especially considering it has a Performer RPM intake on it (which as I understand can 'transmit' a lot more engine noise than the stock kegger).

I am intending to pull the valve covers and check the pushrod length to make sure it's spot on.

Appreciate any comments.

 
Last edited:
...so I've been calling around, and the consensus is that it pretty much has to be the lifters - not that they're 'broken' or damaging anything...just simply worn out, and causing some internal slapping around and/or lose spring pressures or such. Now...I also understand that the Comp Cam I have is I think a 'High Energy' series stick, and as such it with the higher ramp rate it might cause some additional lifter noise, but all indications point to 'worn lifters'.

With all this in mind I've been getting several additional opinions from places including Hughes Engines and Scram Speed, and with a lot of unawesome lifters out there I had to dig for the good stuff, and that led me to...wait for it...Top Line Automotive/Hy-Lift Johnson, which for those following this silly saga is where I got the good replacement lifters for the 440 (which did indeed eliminate the lifter chatter). I was going to order a set of #5006 lifters from Hughes (who sells Hy-Lift Johnson lifters) but they had two versions, including a high-performance 'quiet' slow-leak down set #5006S, but they first recommended I call HLJ to ask about the differences and how well they would work for my 'truck' application. So I called HLJ, and they informed me that there is yet another lifter they sell - same as the 5006S but with an additional feature - an additional oil feed port direct onto the roller bearings (of which I thought 'yes, please'). These HLJ lifters, #2269SE, are direct replacement lifters for the Viper V10, which very conveniently also happen to be direct-fit lifters for the Magnum V6 and V8 engines...and yah I nicely asked them to put a set of 'em in a box for me :) . Granted, my 360 won't be turning the rpms of a Viper V10...but it will be spending a lot of time at very low rpms when rock crawling, and having that extra oil port lubricating the rollers can't never ever be a bad thing, like ever. They also offered a military discount and I got them for $34 each, which for anyone shopping around is really not bad at all. USA made, good reputation, and all the features of slow leak-down, and direct oiling - win-win.

So, those will be going in soon, and I'm hopeful they will all but cure the (alleged) lifter chatter I've been experiencing 👍
 
Last edited:
so one thing about Magnum engines is...it's almost impossible to get the lifters out unless you pull the heads (more specifically the head gaskets). There's a section of the head gasket that has the holes in it for the pushrod, which makes it nearly impossible to get the lifters out - the lifters need about 1/8-1/4" more distance before they'll come out, and forcing them past the gasket would probably scratch the lifters - for sure would scratch the spendy brand-new ones trying to cram them in the bores....but I employed a very simple solution - grab a fresh set of tin snips, cut away the head gasket material, and they pop right out! My new V10 lifters arrive today so I should be able to drop 'em right in 👍

This is the area of interference -
oTE3DxD.jpg


3nIIfQG.jpg


Cut this section of the head gasket out - problem solved, and no need to pull the heads 👍 . Yah you lose the alignment holes, but who really needs those anyway...
VoQ3nuV.jpg


1tW9WoI.jpg
 
Top Back Refresh