What's new

#turd burglar

seebrookmeyer

Well-known member
Joined
May 20, 2020
Member Number
510
Messages
64
Loc
San Jose, CA
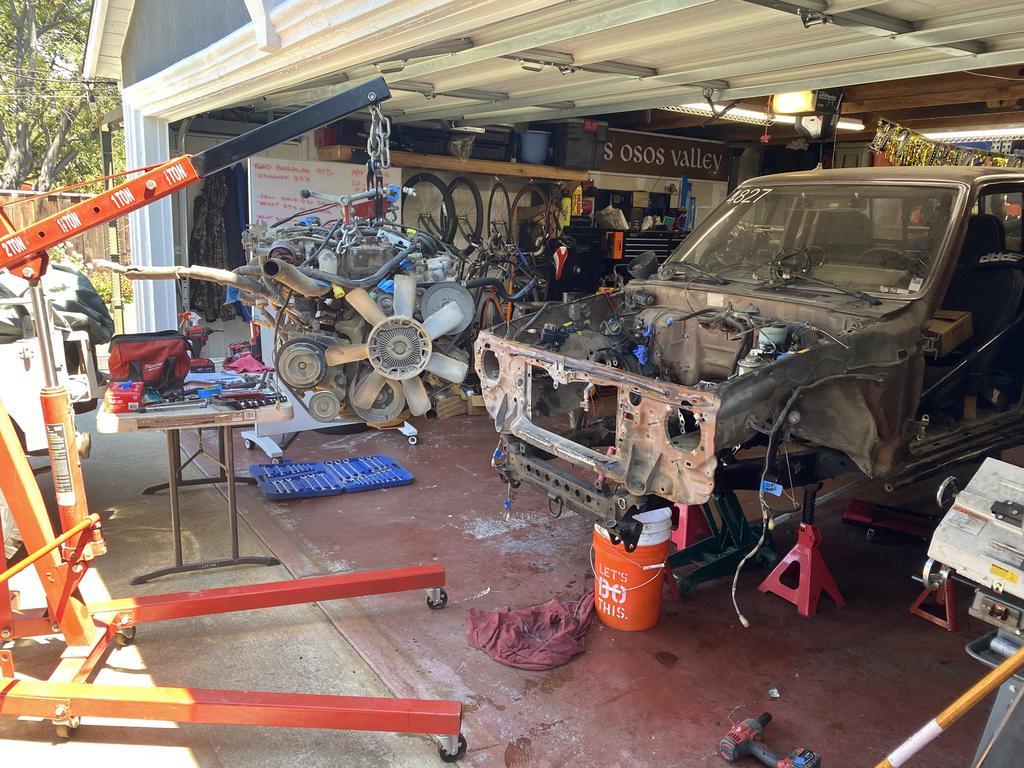
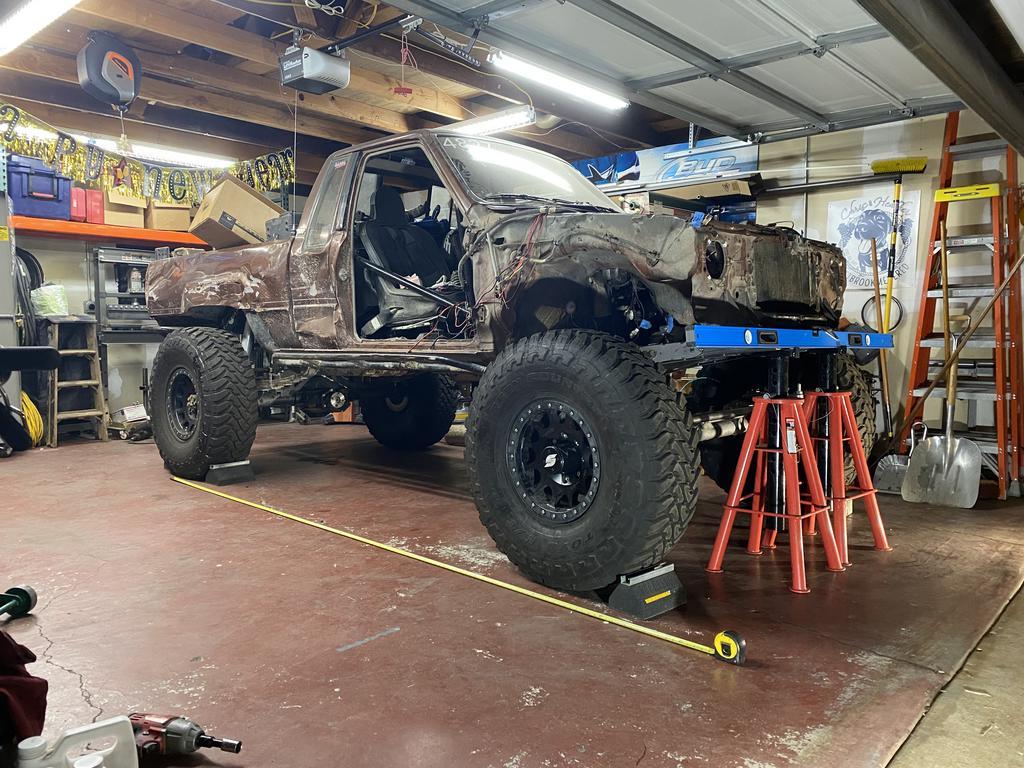
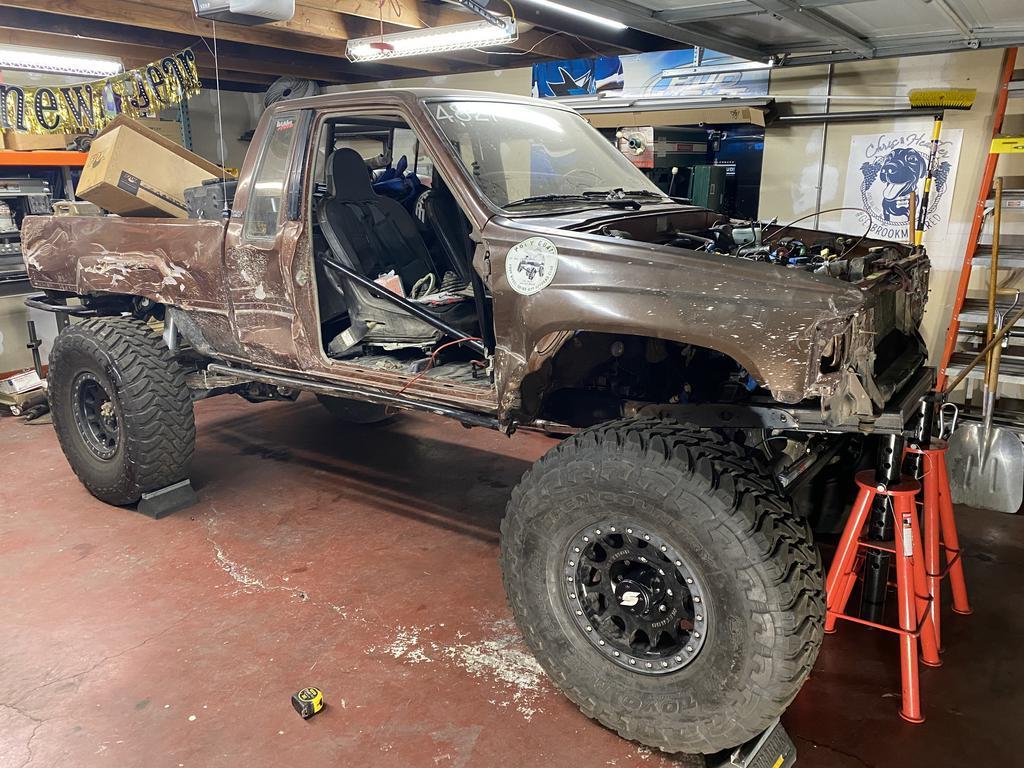
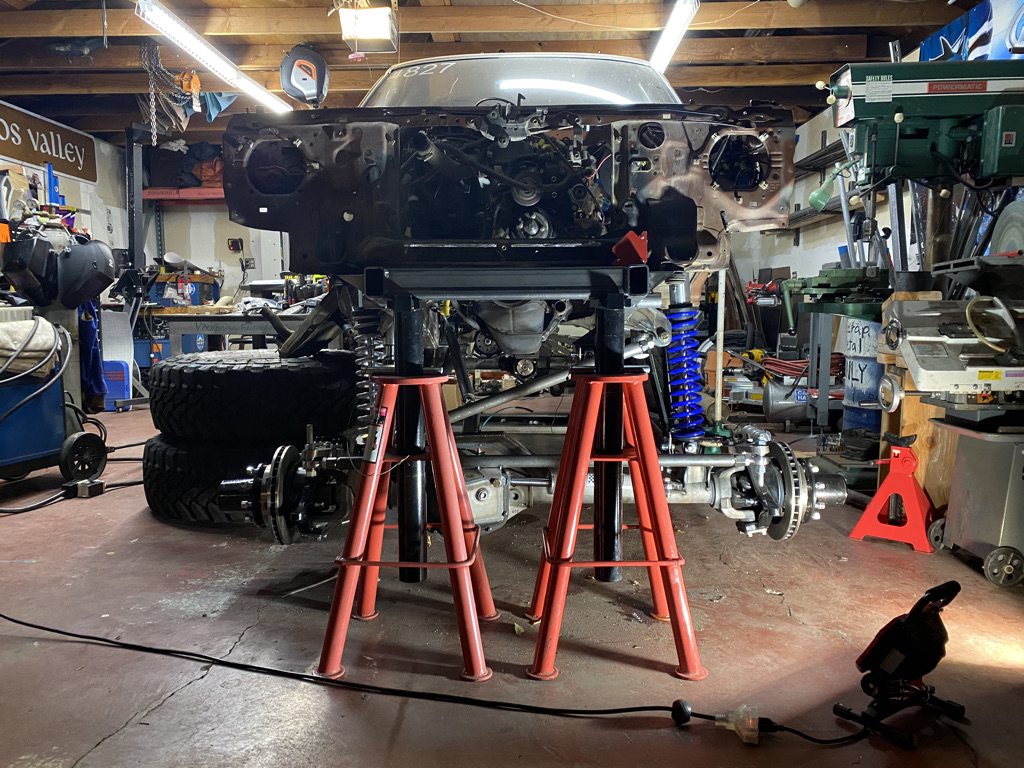
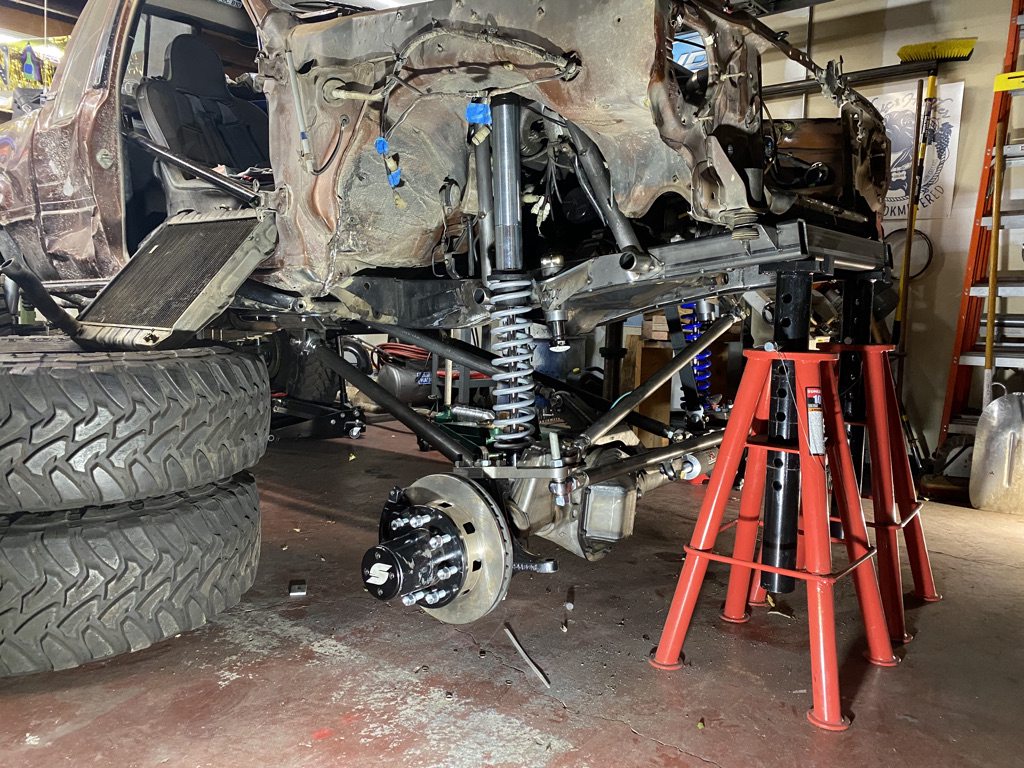
Figured I should start an actual project thread on my poo pile, the Turdburglar

Here are some more details of the car as it was when I purchased it...
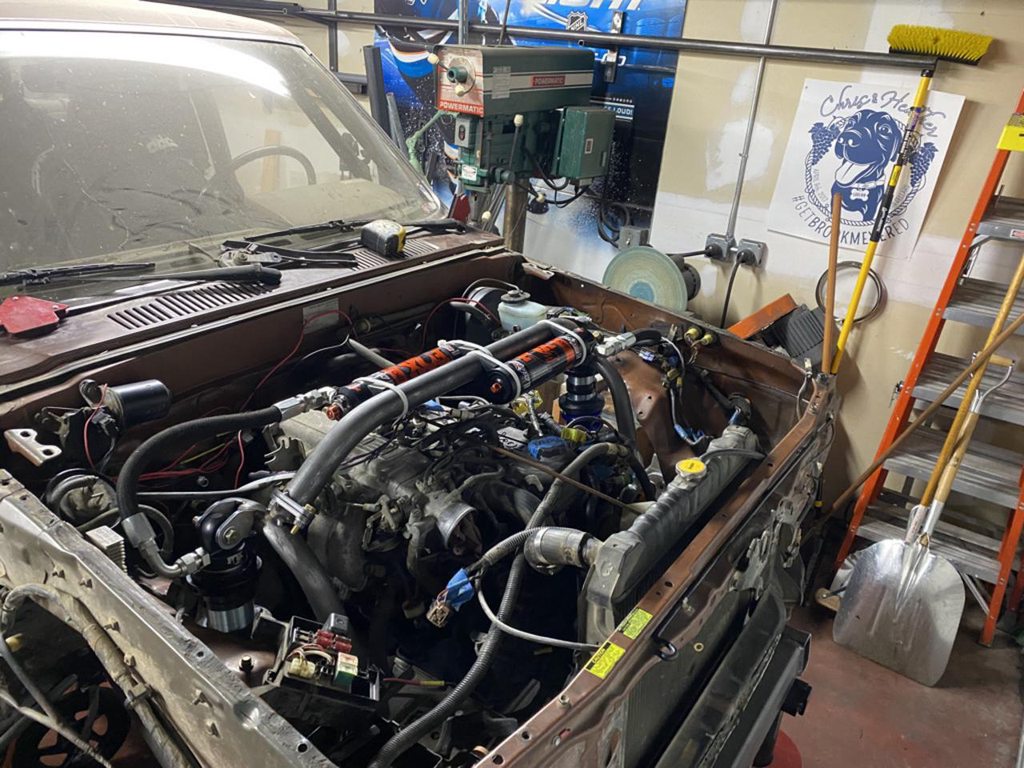
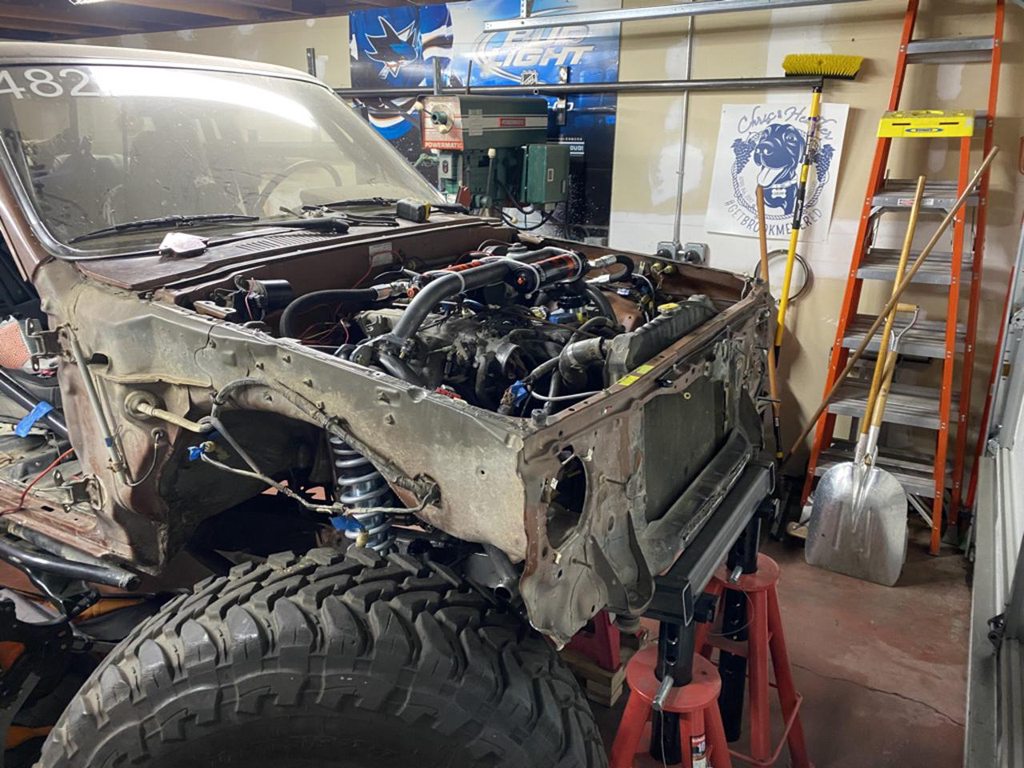
1986 Extra Cab
rebuilt 22re (about 1,000 miles on the motor since rebuild)
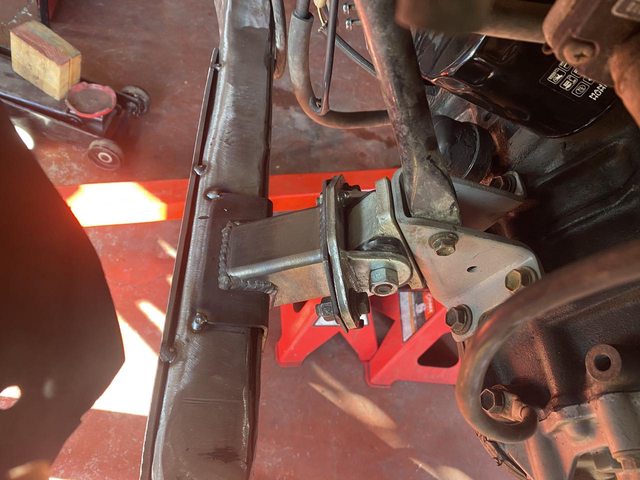
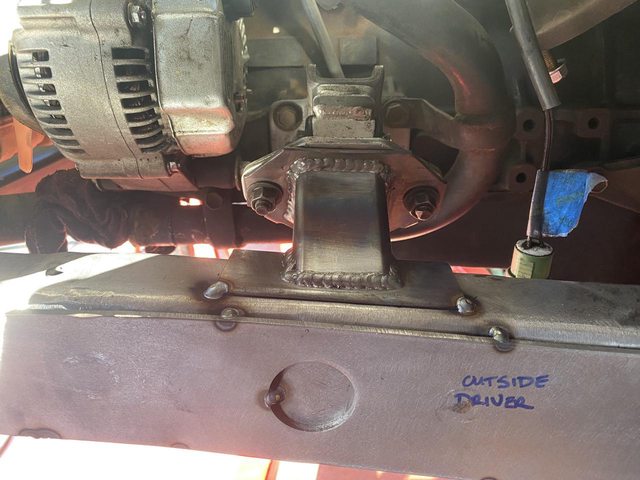
Bomb Proof motor mounts
Big ol' stinger up front with a 9000b warn winch
rock sliders and tube rear bumper

Marlin crawl box
4.70 in the rear case
Bomb Proof t case mount
4.88's with ARB air lockers front and rear
Chromo Shafts front and rear
10 bolt front axle, disc brakes
Toyota rear, with drums
37" Old style MTR's
Steel wheels

interior cage
Master craft seats with harnesses
rock lights
beat for bumping Party in the USA
CB radio

Since purchasing I have been able to wheel this thing a handful of times. Maiden voyage was rubicon for Memorial Weekend with the Poly Goats. Truck worked well, was mostly just getting a feel for it, in particular wheeling with dual cases. Lots of lever to pull, but I'm getting a lot more comfortable with it and enjoying it a lot more.

improvements since buying
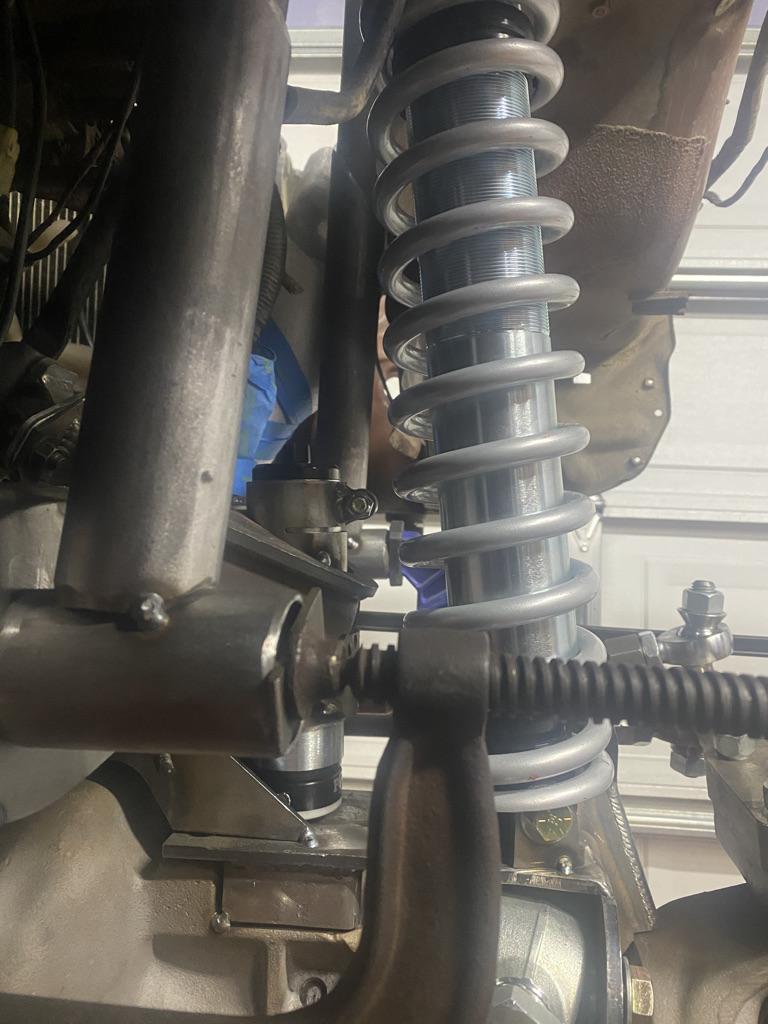
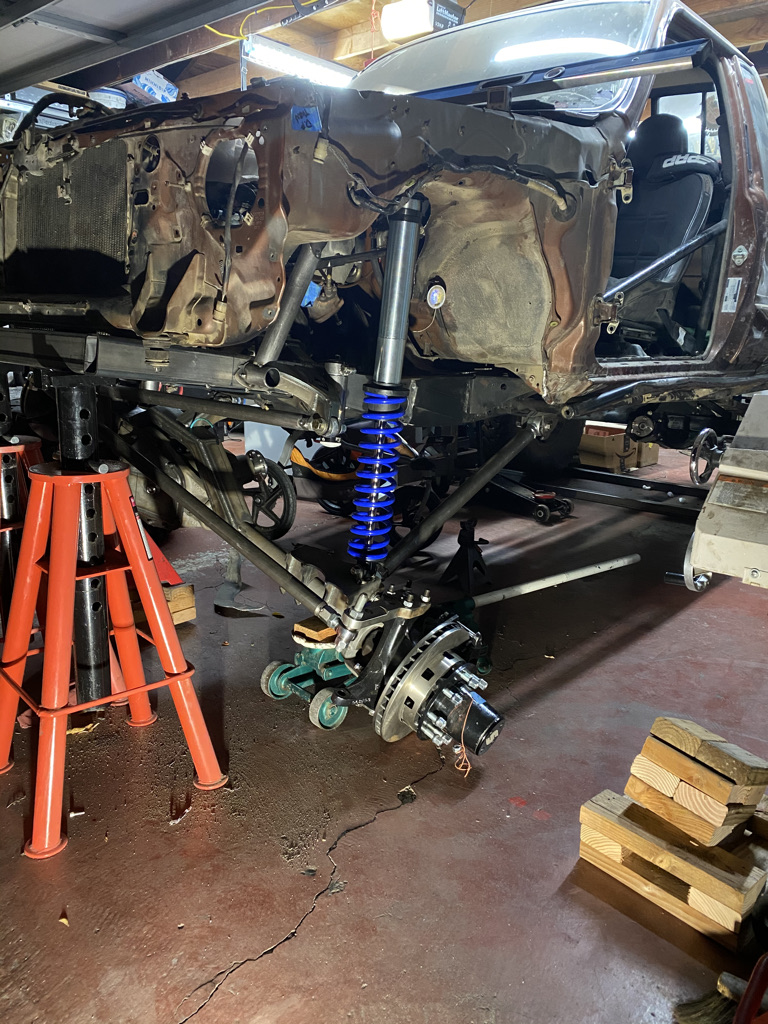
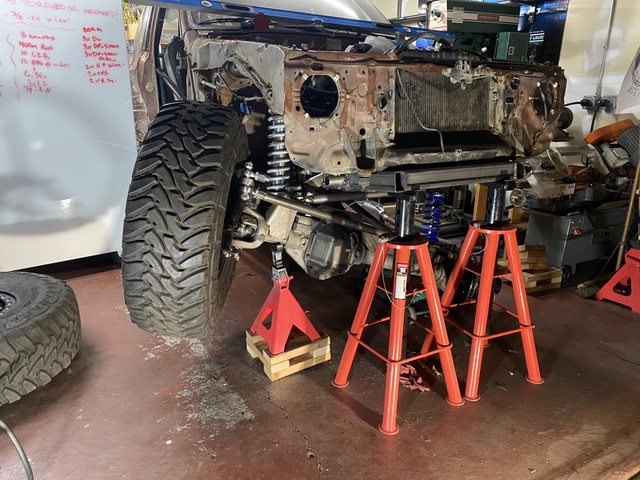
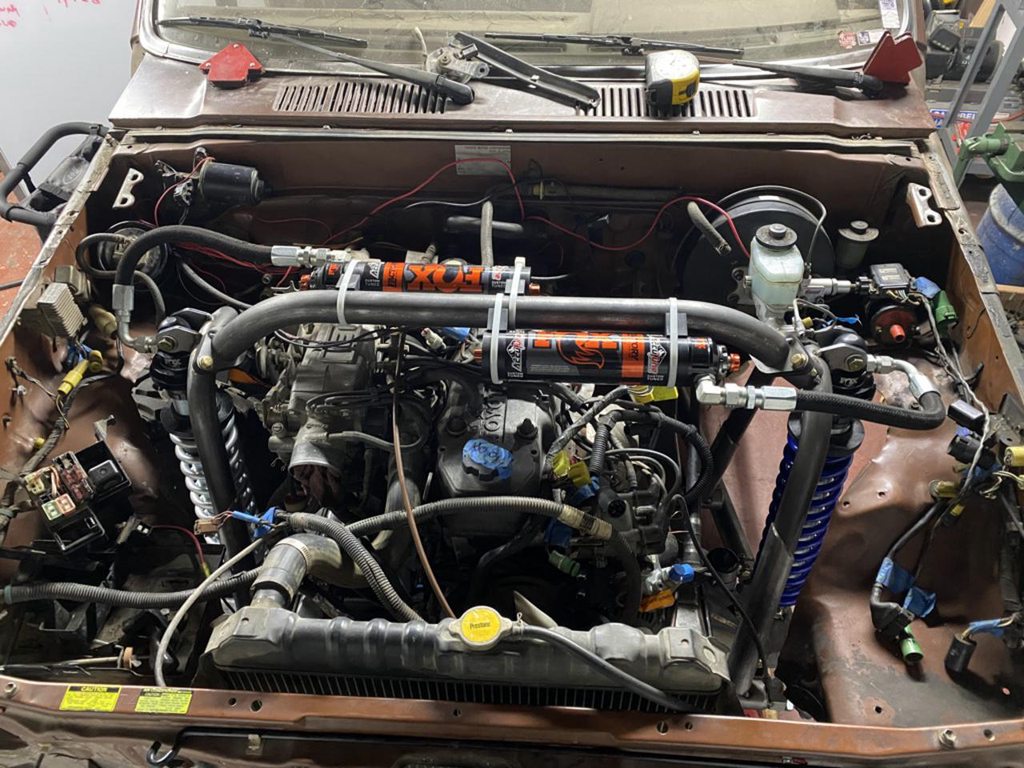
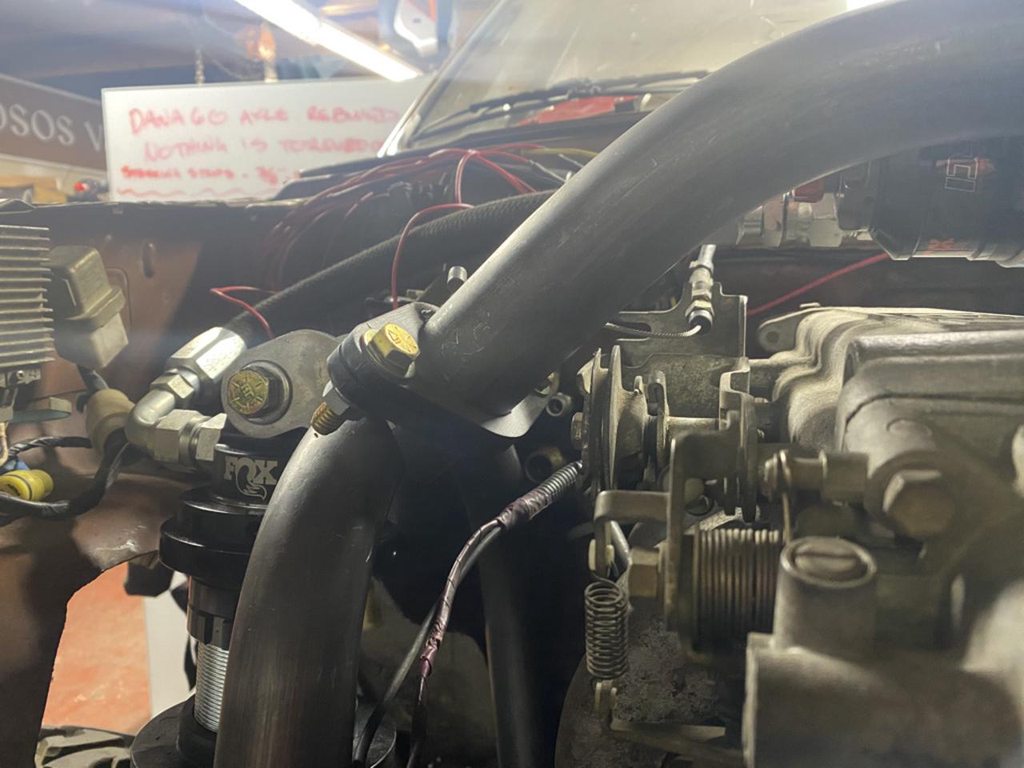
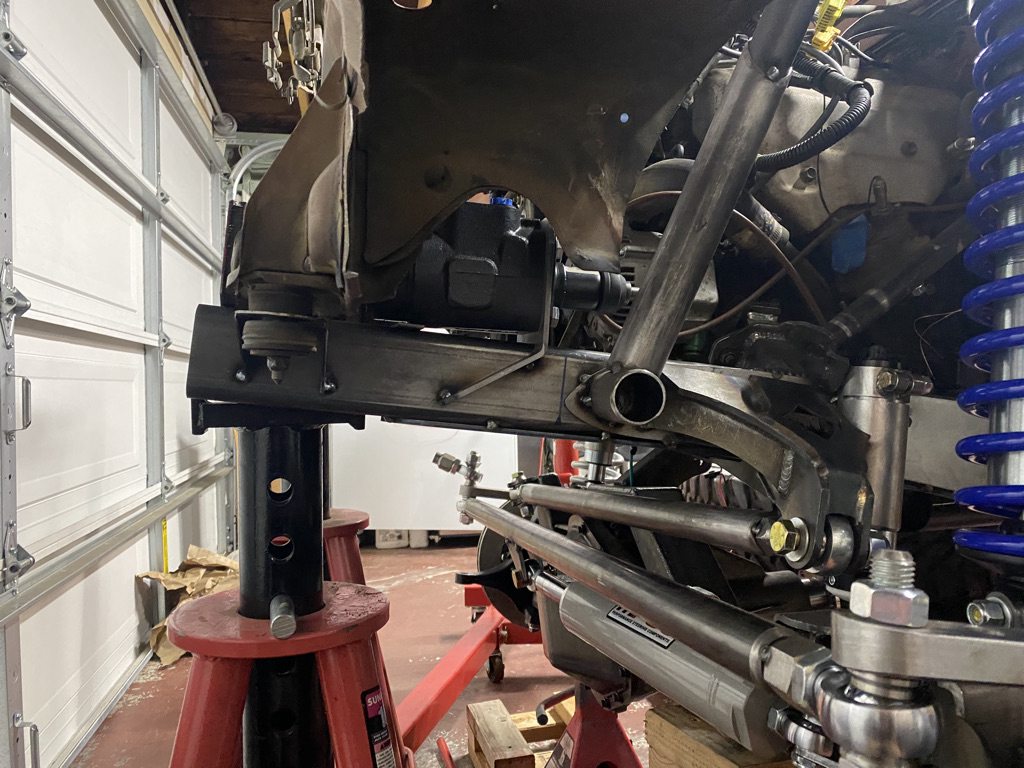
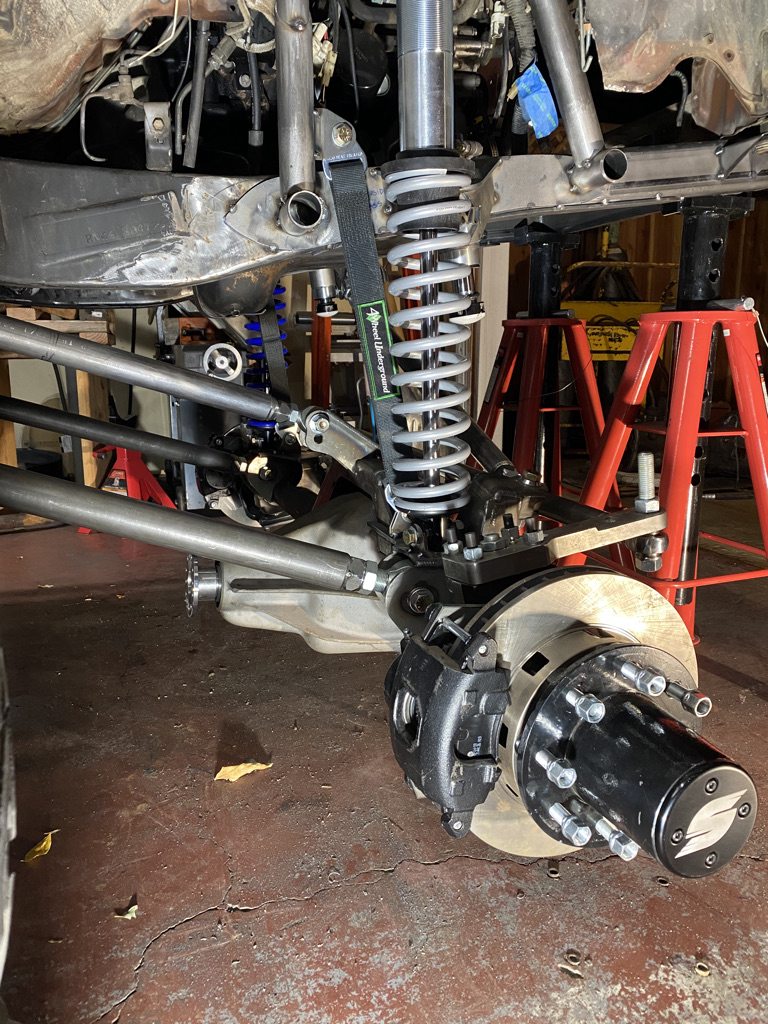
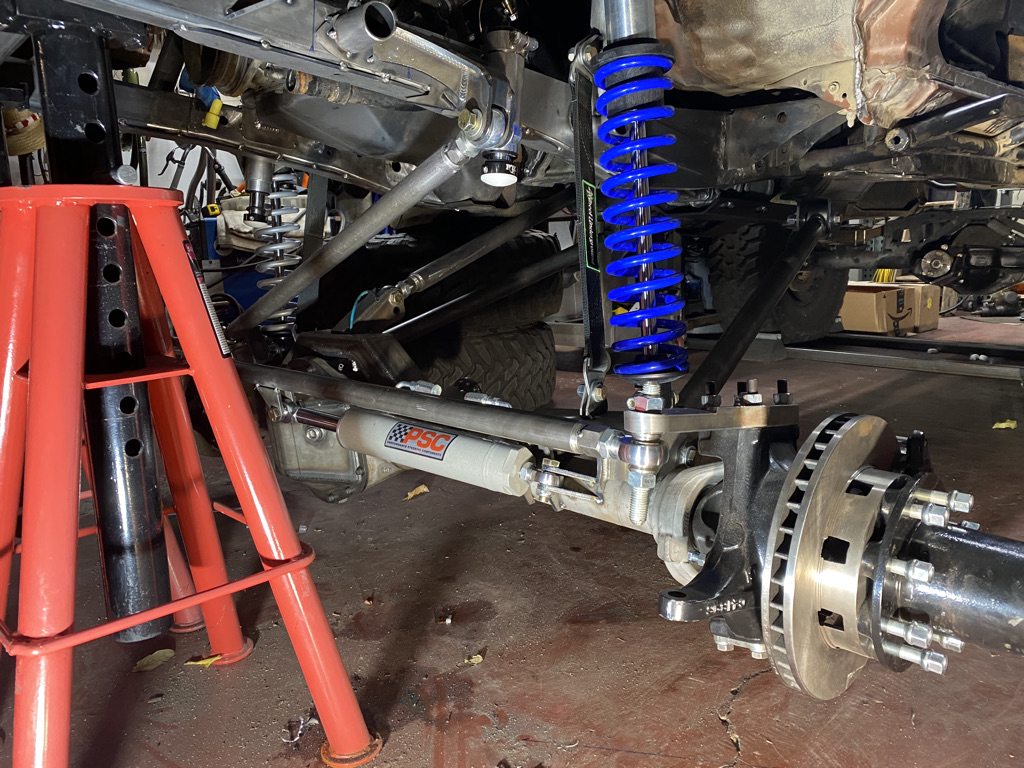
-14" 2.0 smooth bodies up front
-spare tire carrier with 12" 2.5 smooth bodies mounted off the back of this, with hi-lift mount and soon to be a baja basket on top
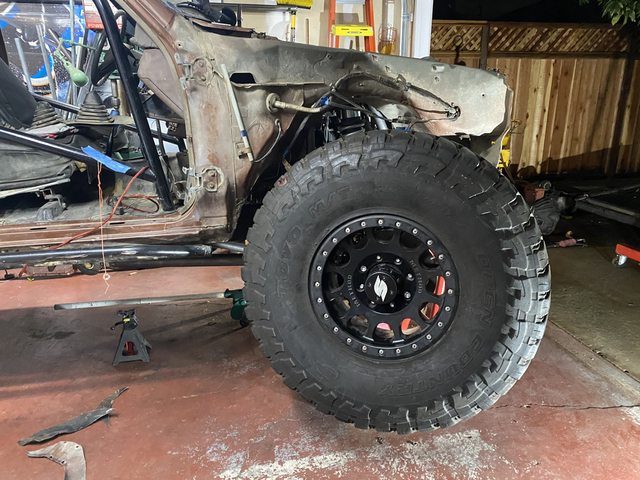
-15" TR beadlocks (snapped a few wheel studs off in the process of removing the old wheels, which led to the discovery of completely blown out seals)
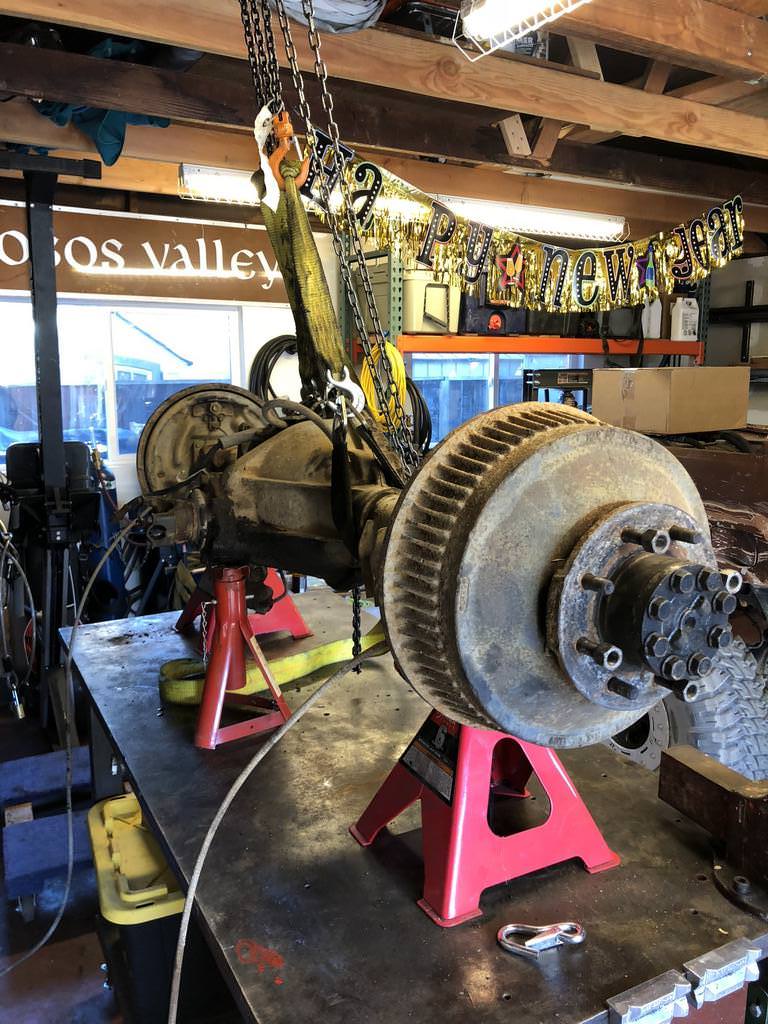
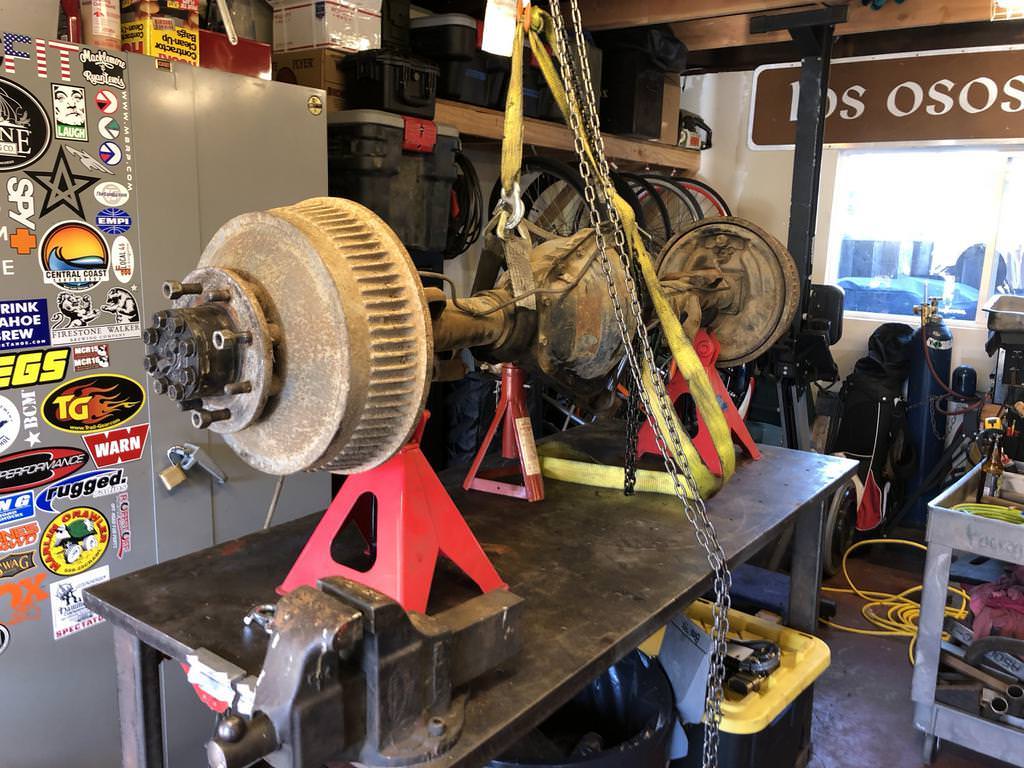
-freshly serviced rear end, new seals, brake pads and wheel studs
-some sweet pink interior lights that look like a Tijuana strip club

on the list still
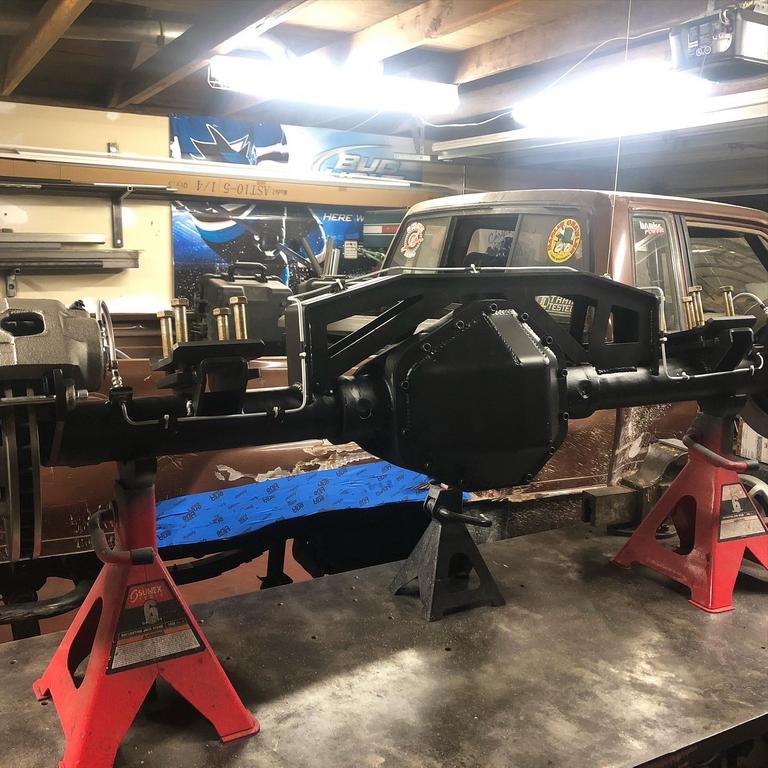
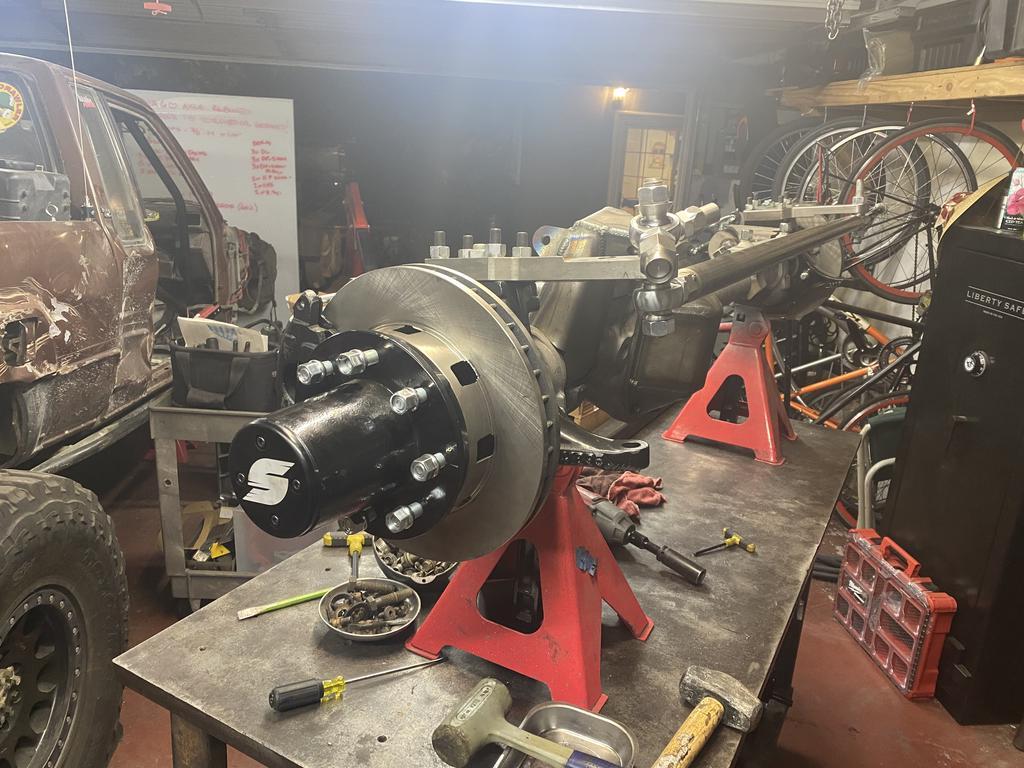
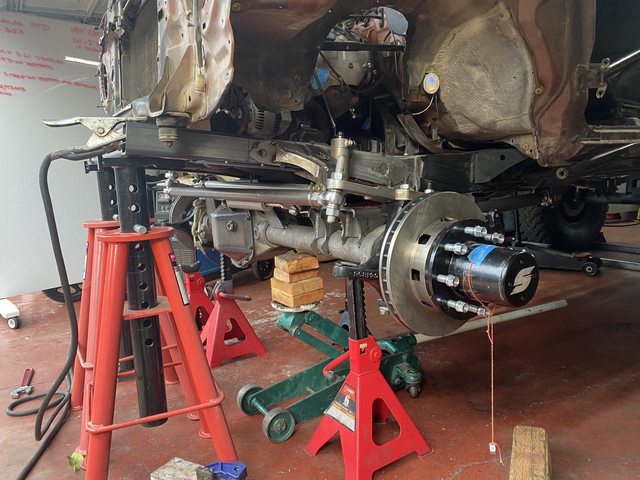
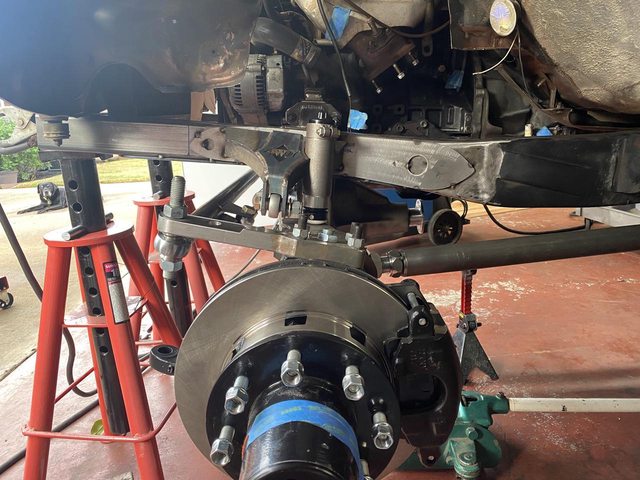
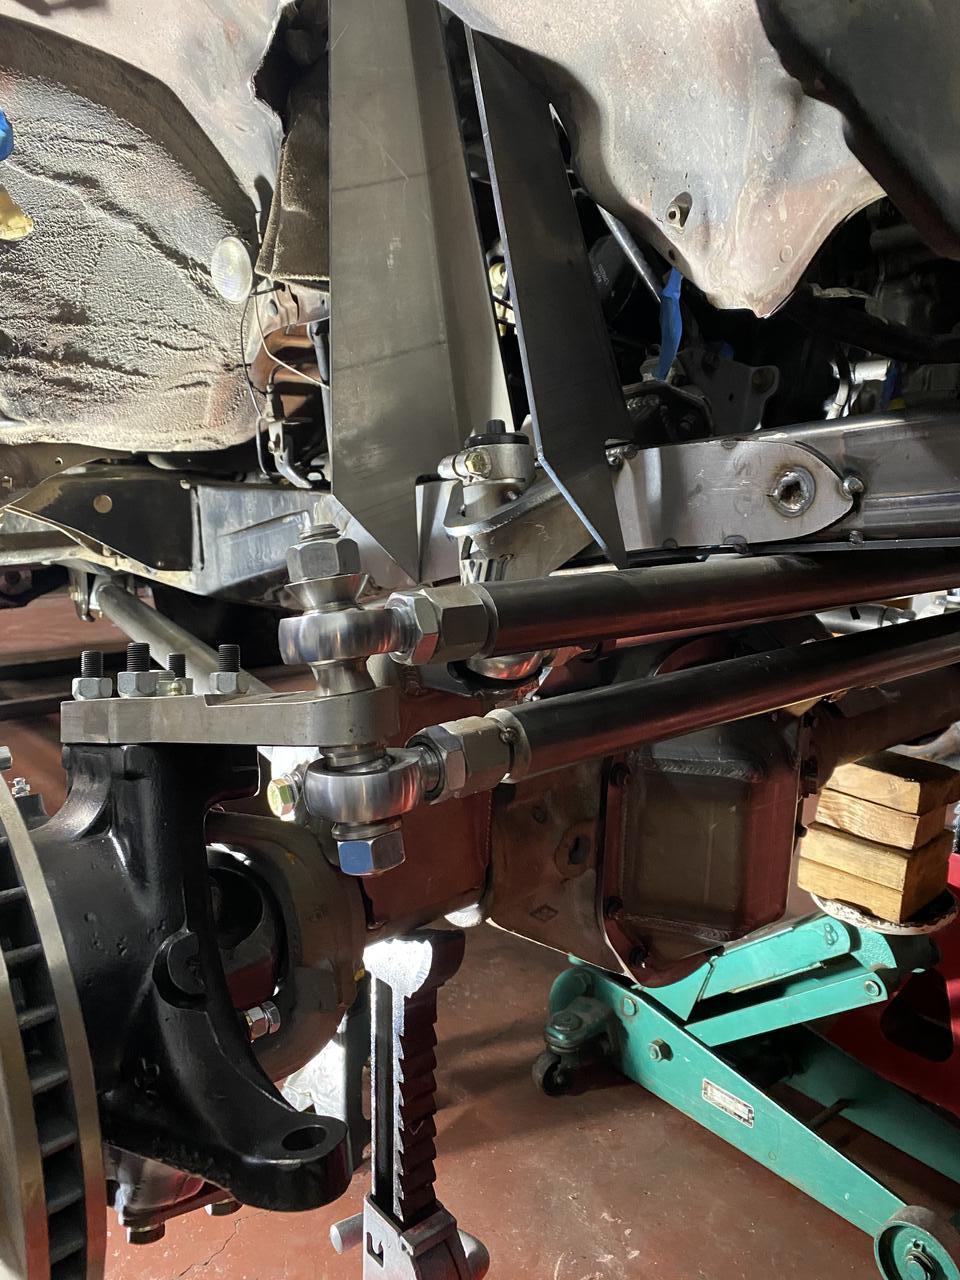
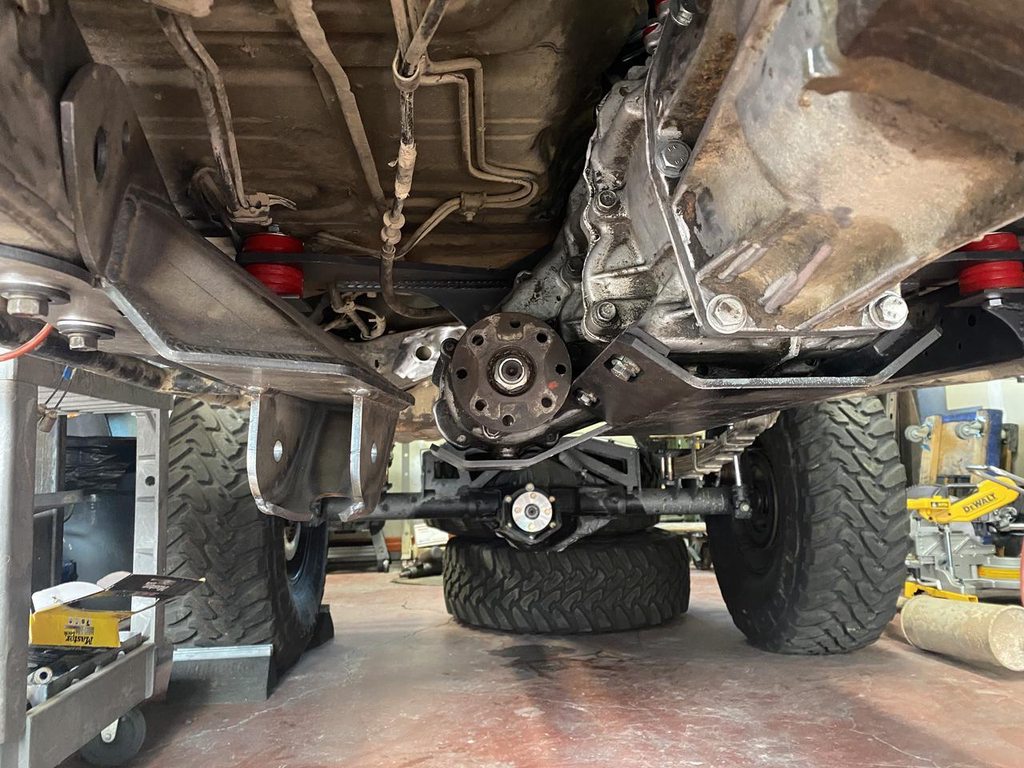
-not a 10 bolt front end, not sure what it will get replaced or the timeline for this but I would like to get rid of it sooner rather than later. Either back to toyota axle or possibly a 60 or something similar with the goal to keep it close to toyota width
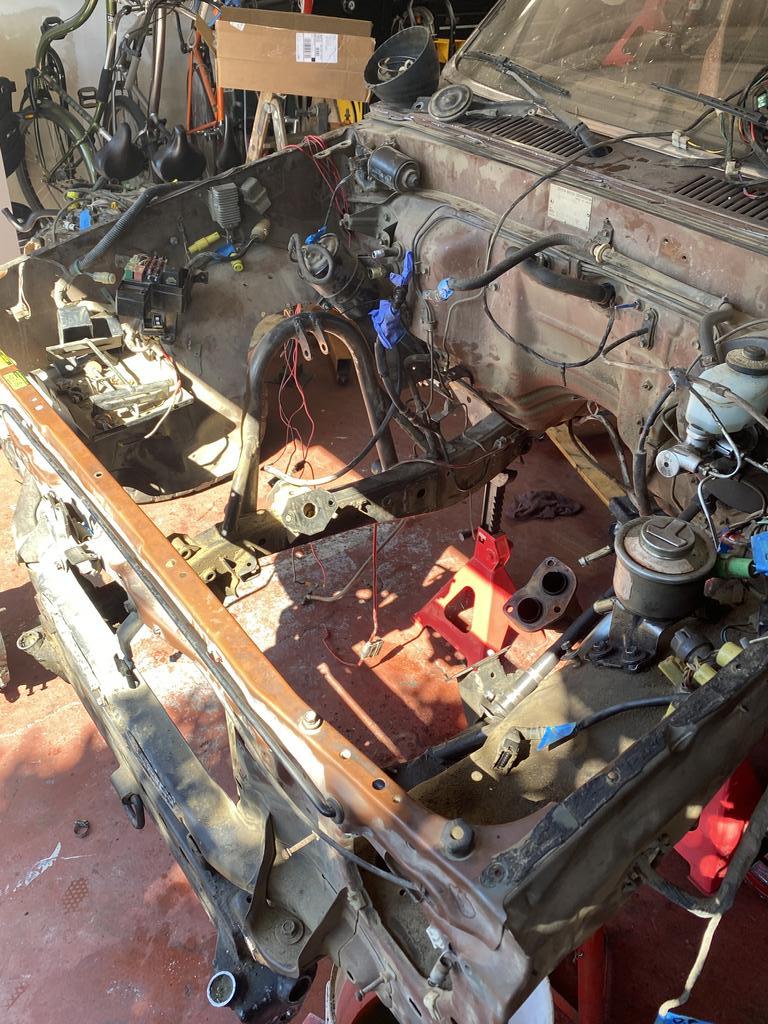
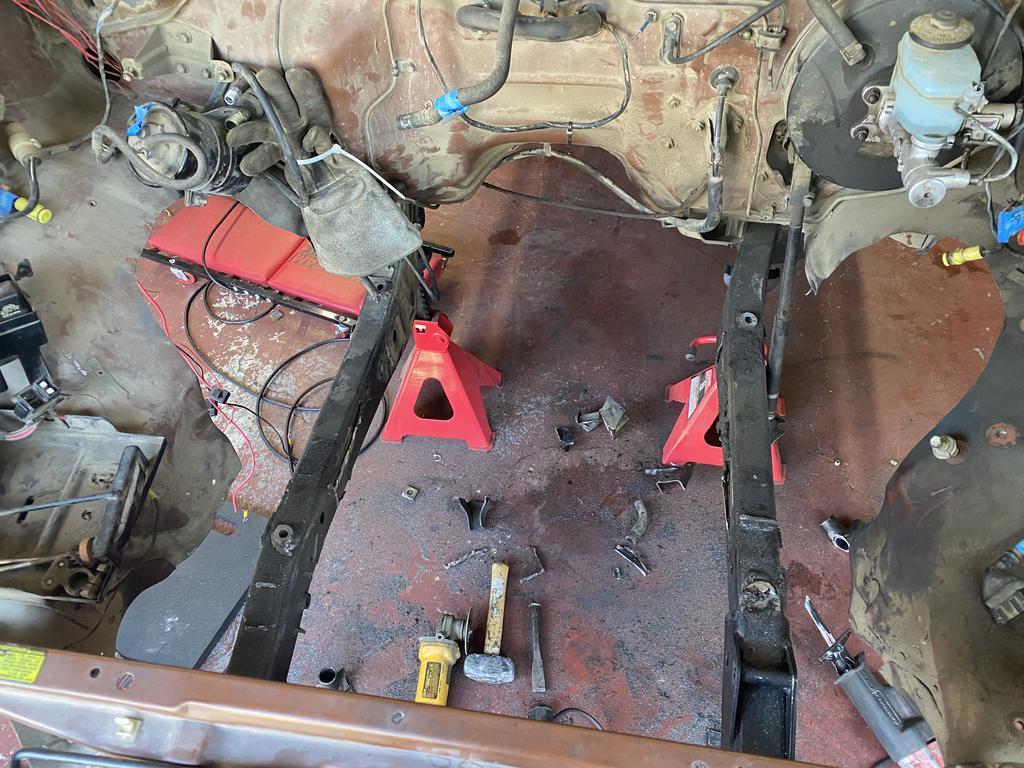
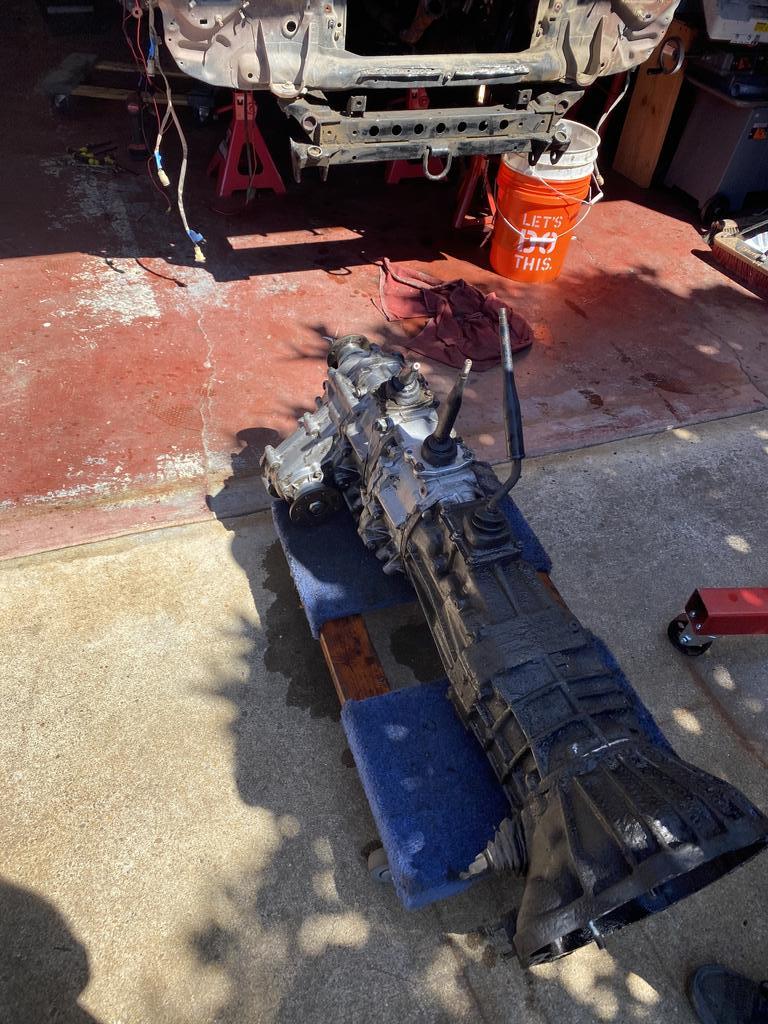
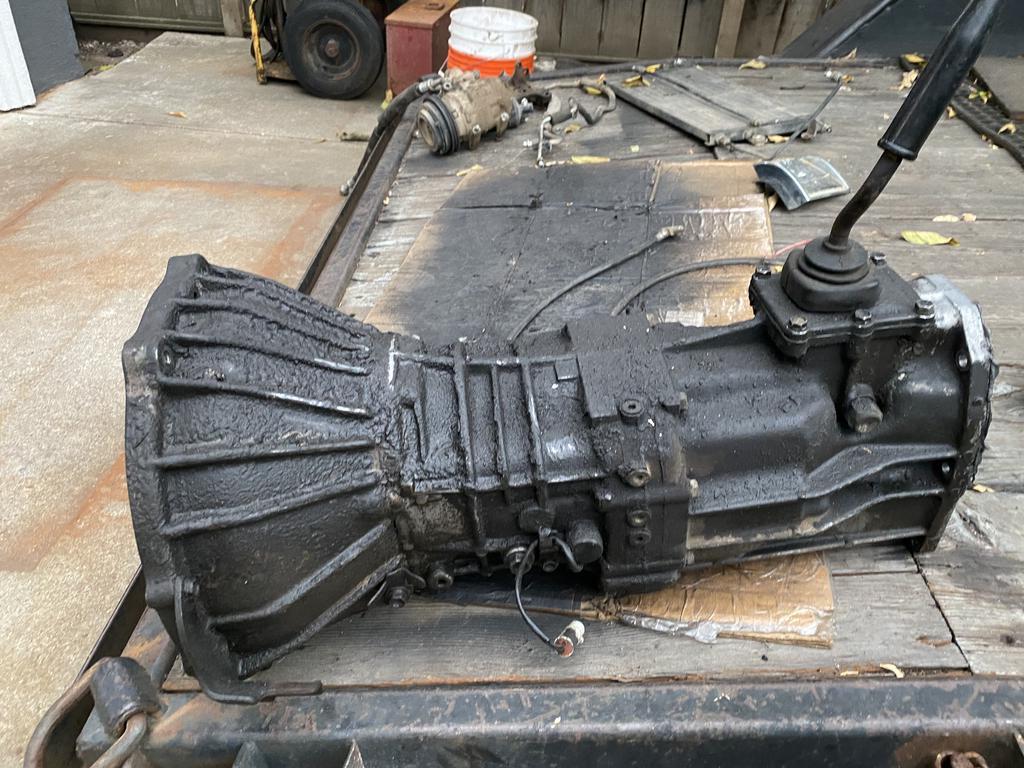
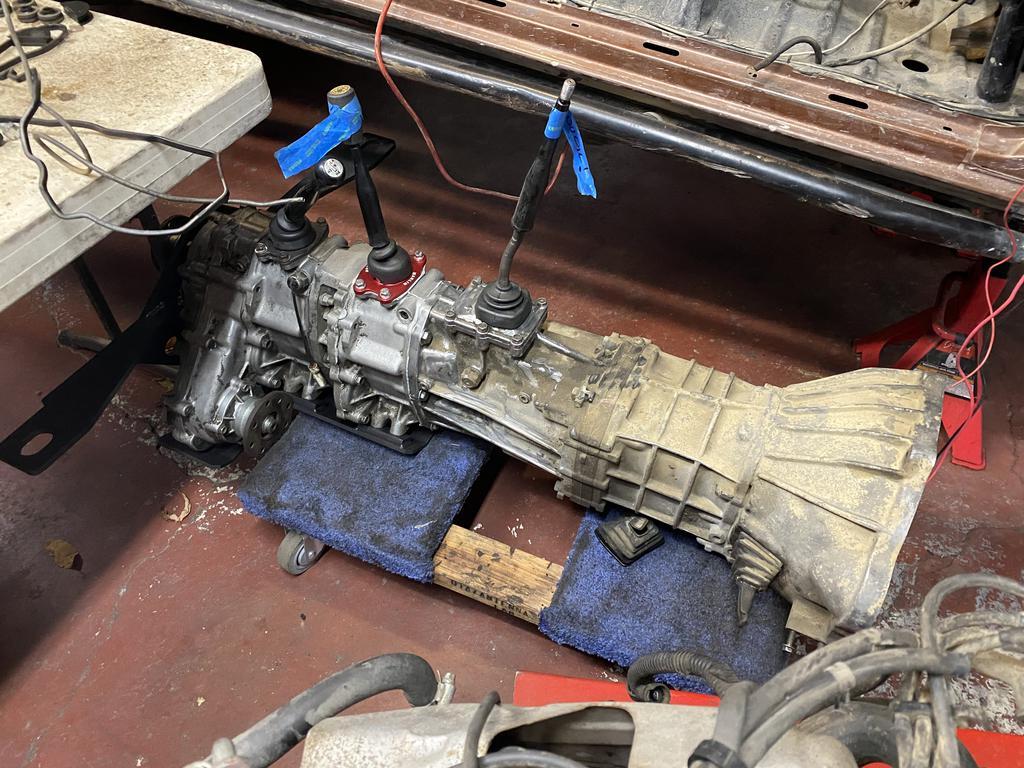
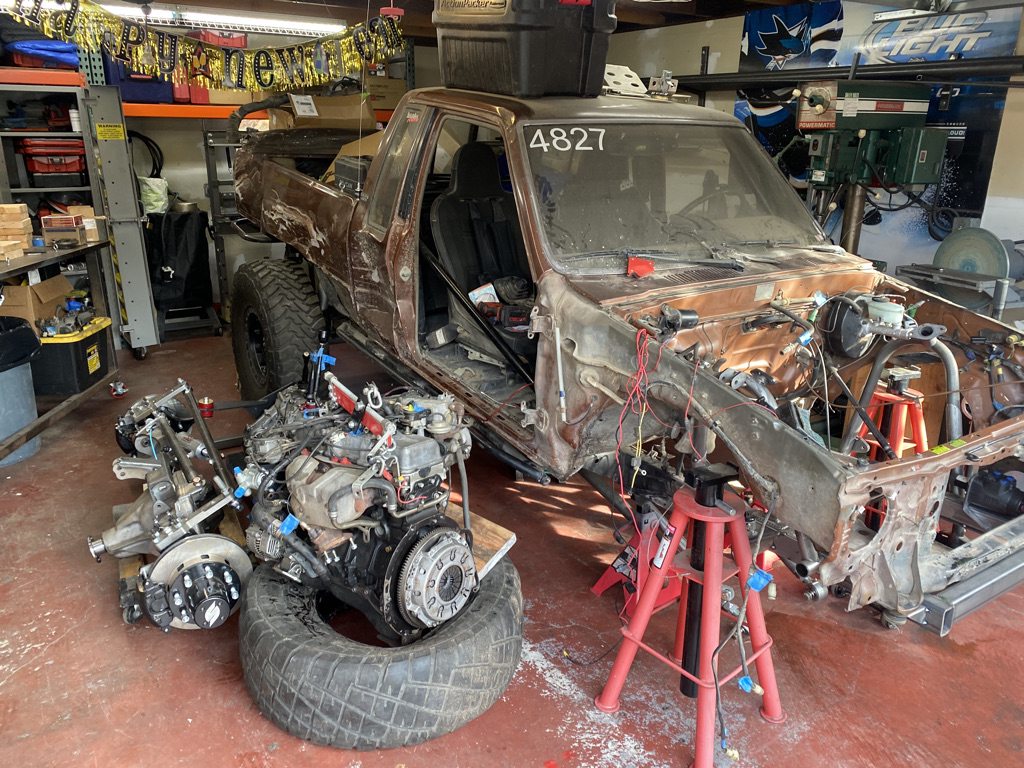
-transmission needs some loving, countershaft bearing is pretty much shot and getting louder each trip, hoping to make it out of KOH this coming weekend and have it be a problem before summer wheeling starts
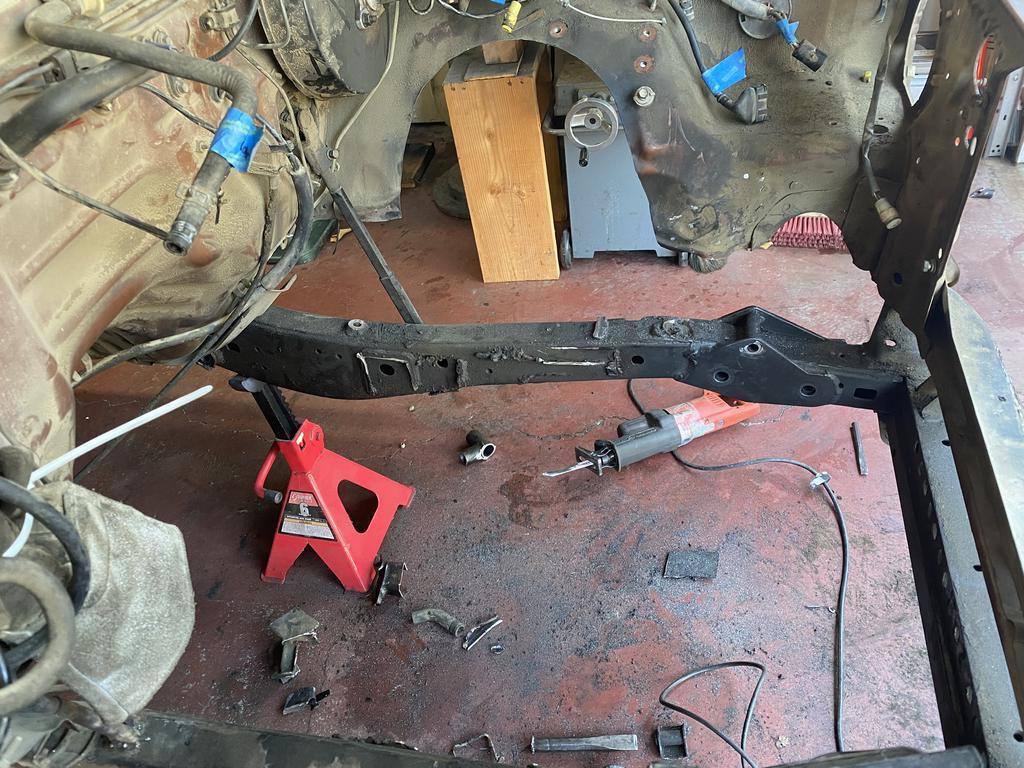
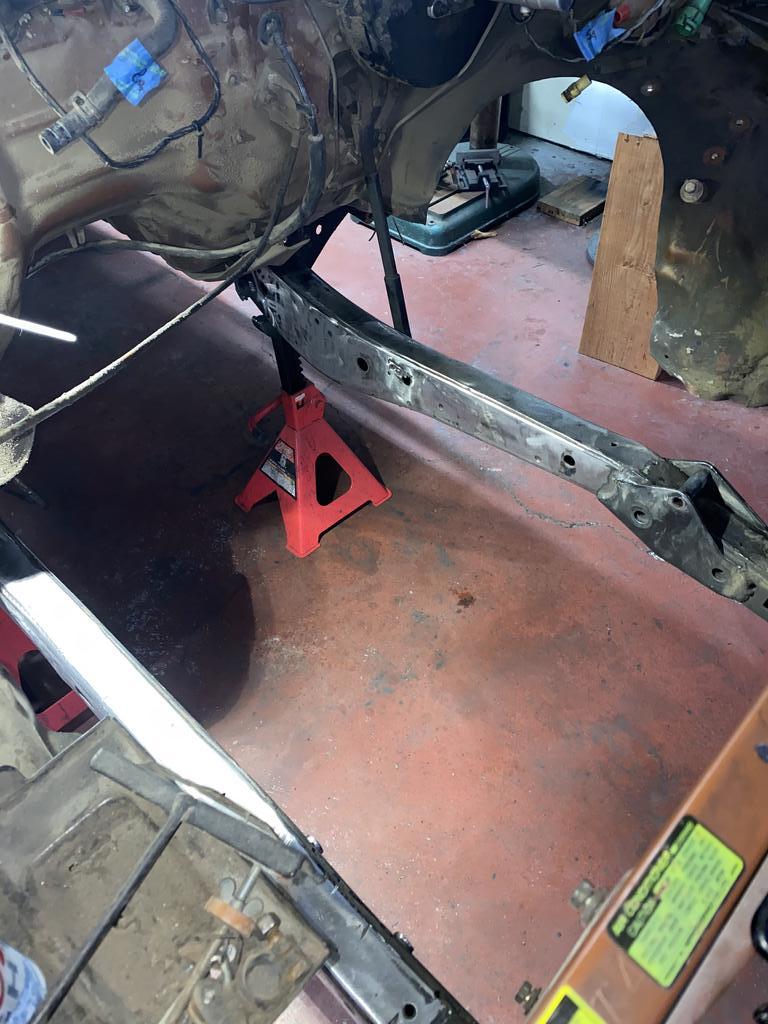
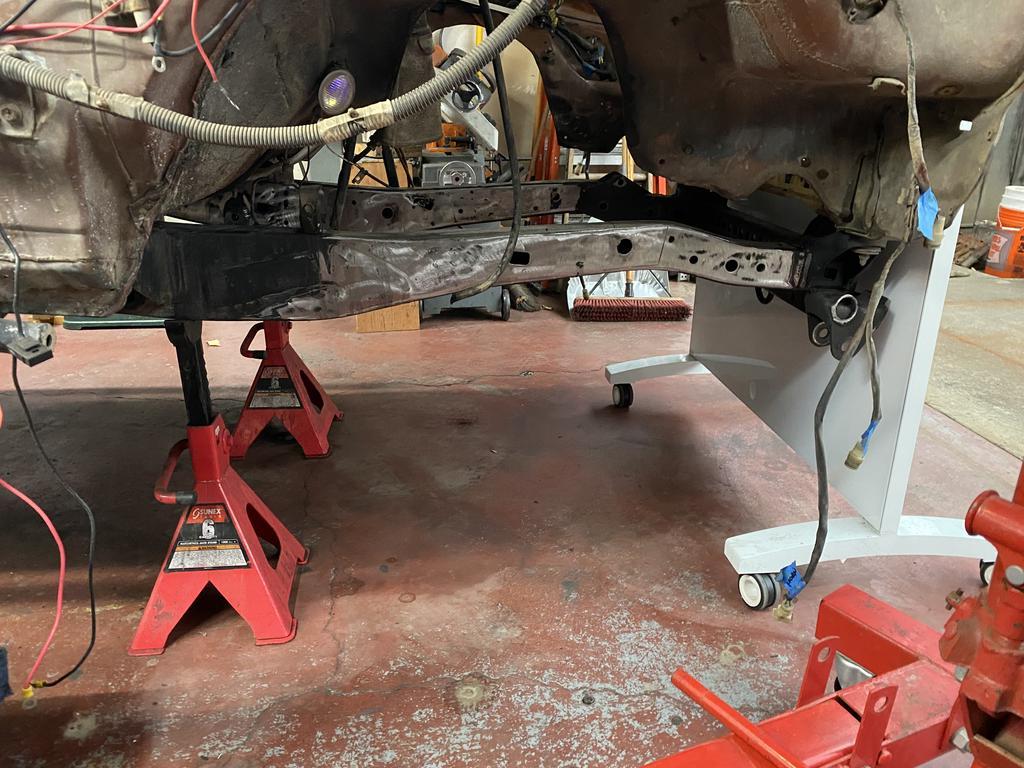
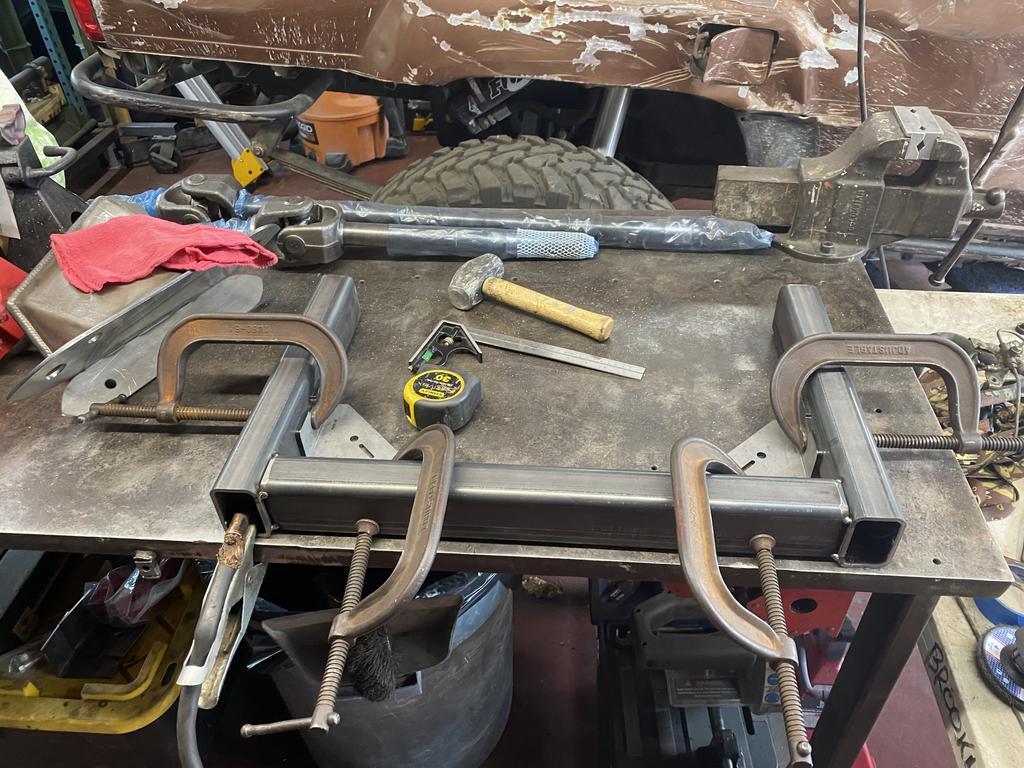
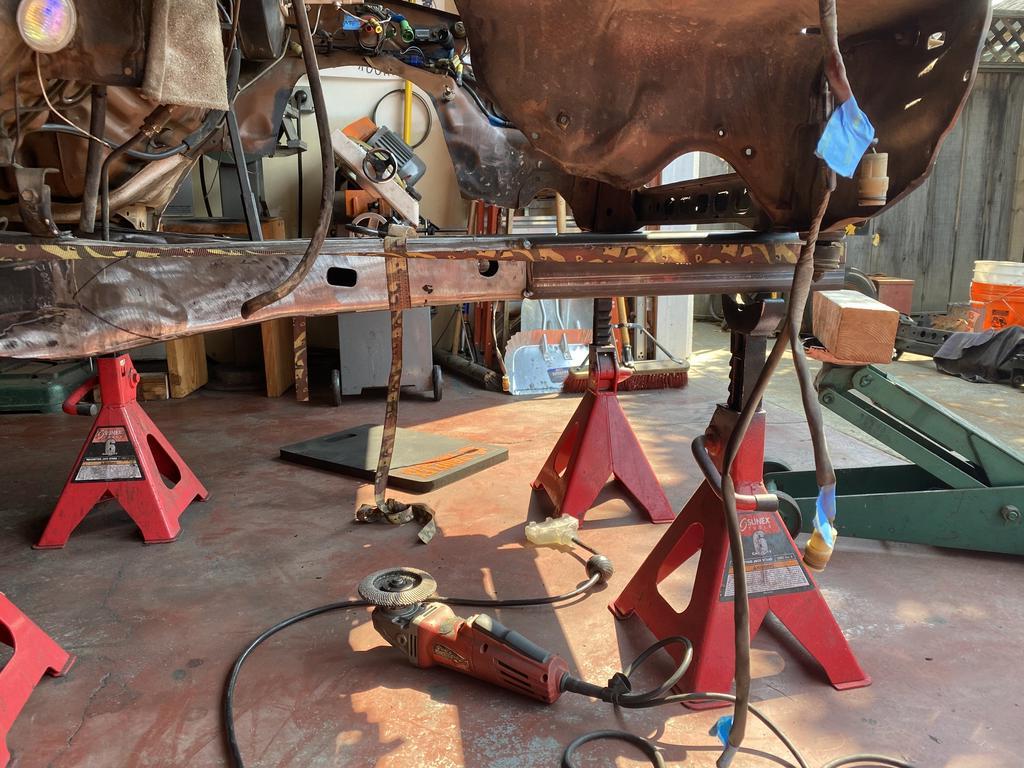
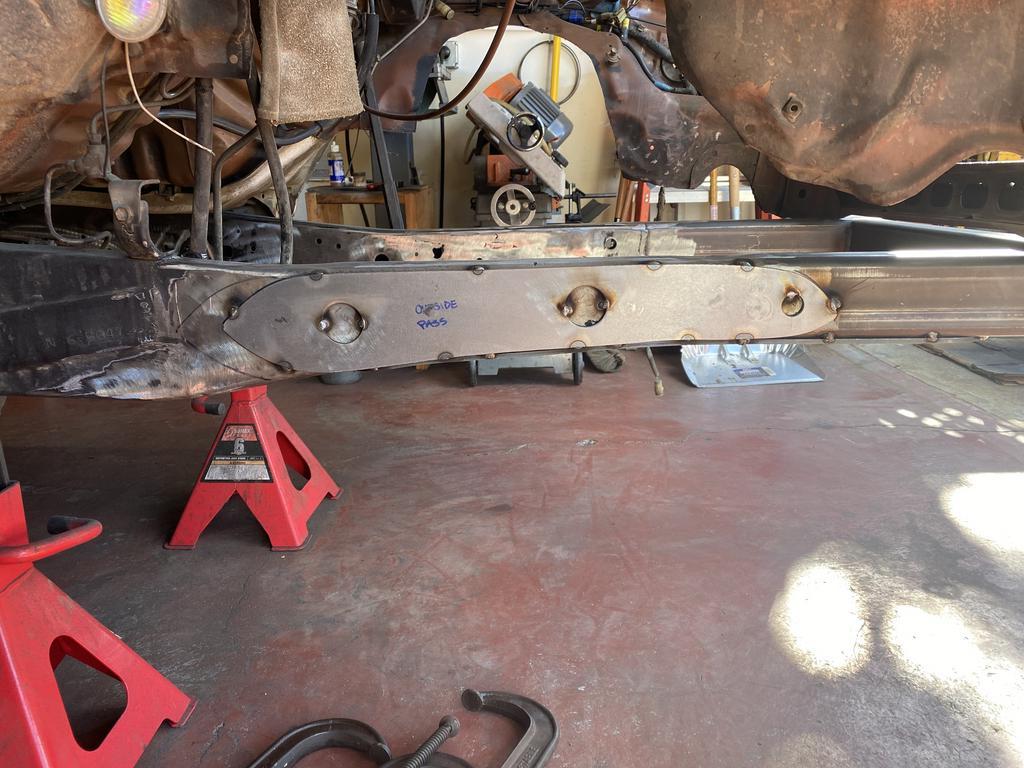
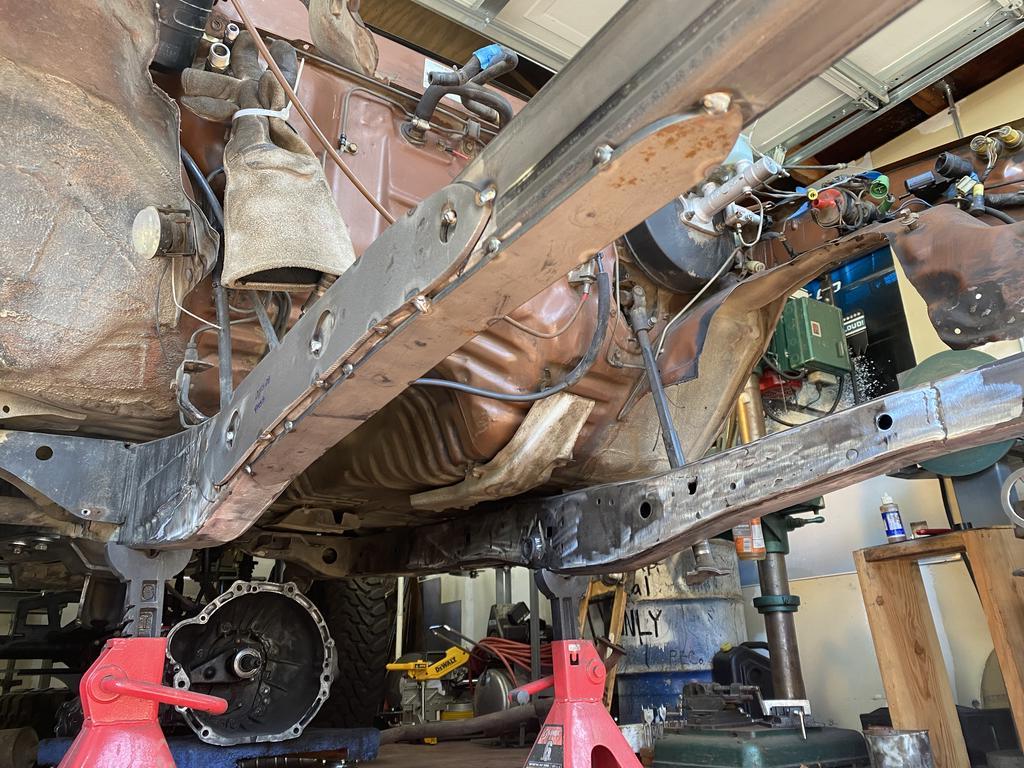
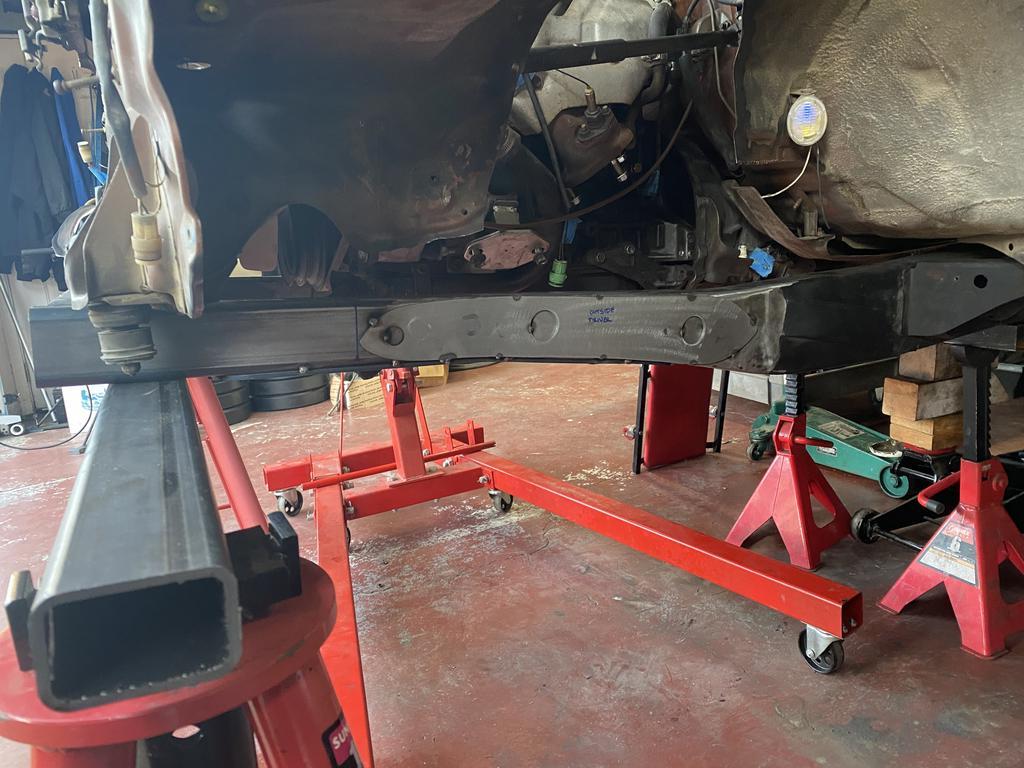
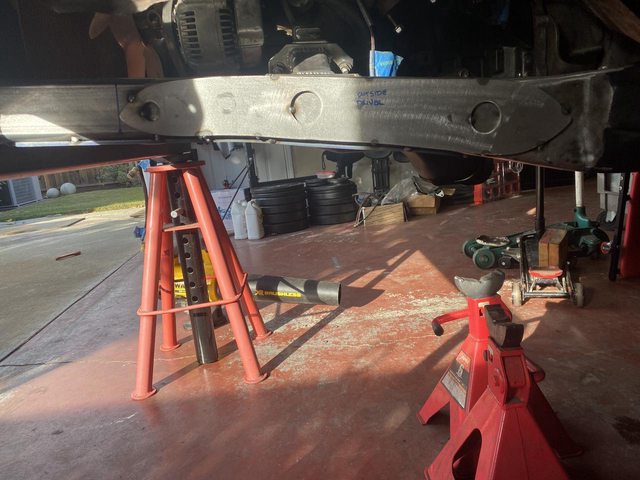
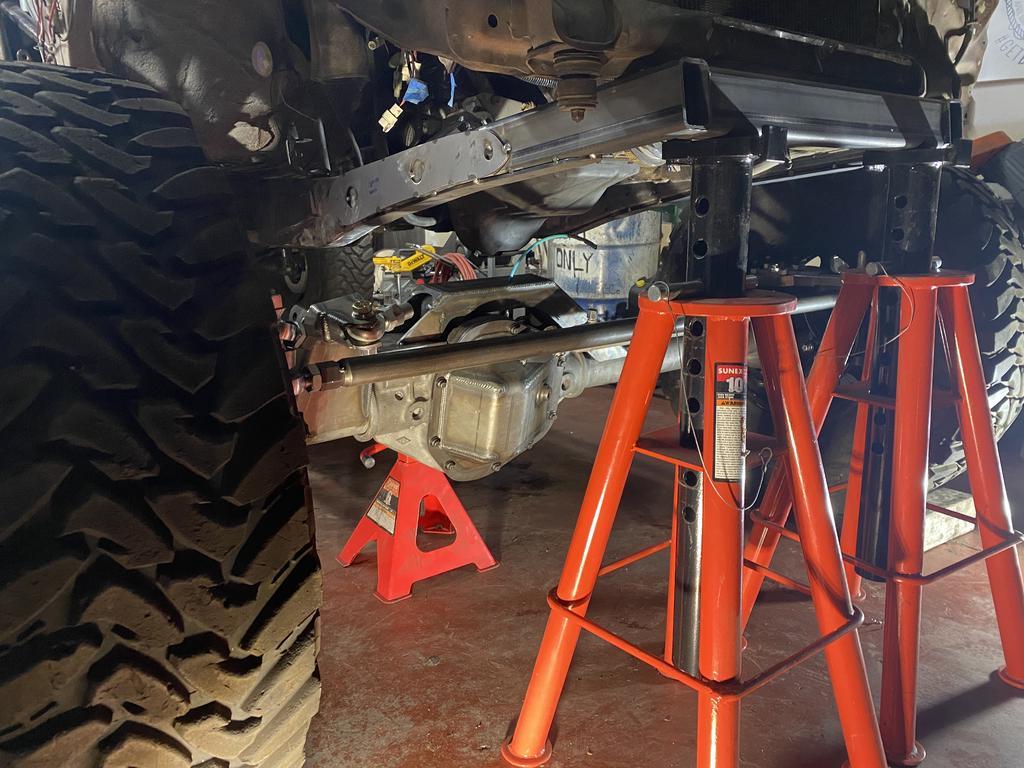
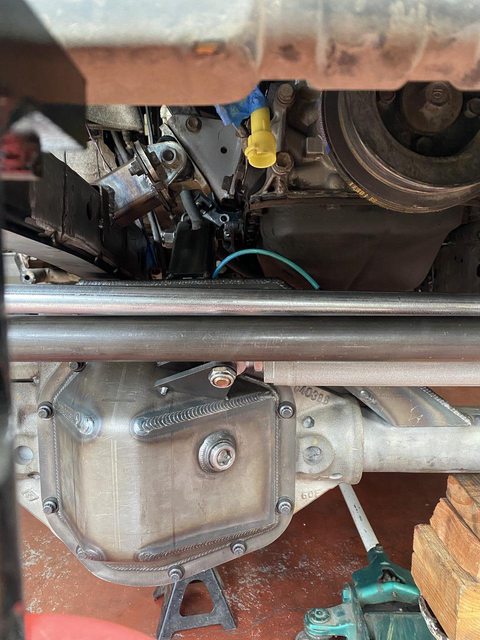
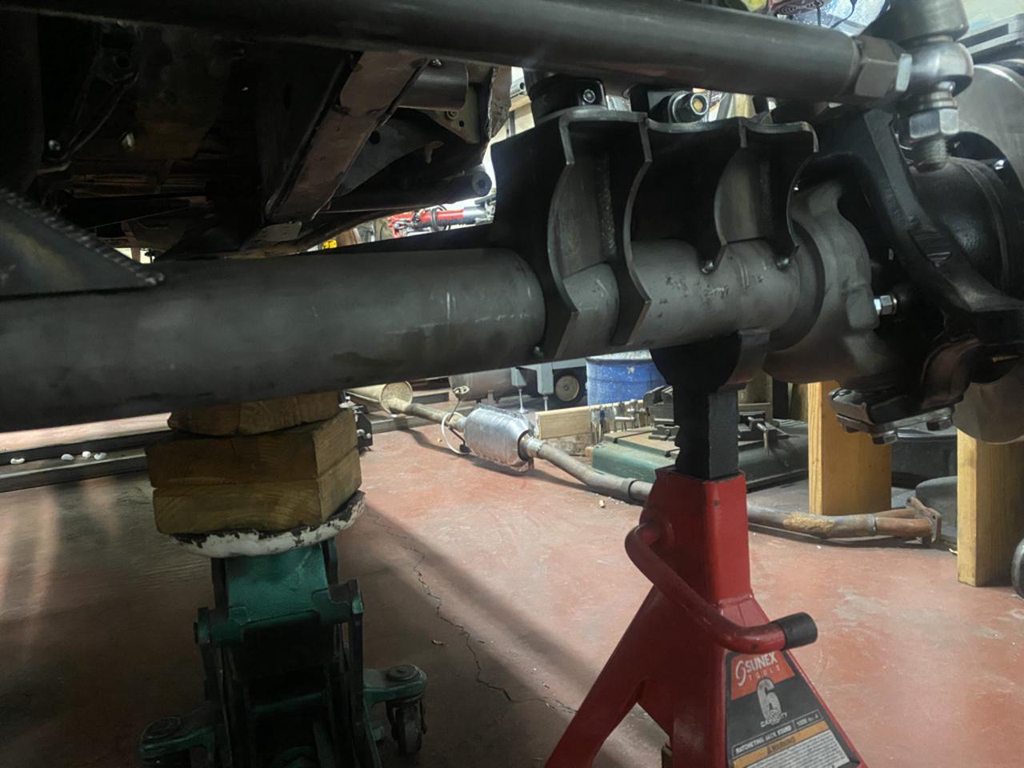
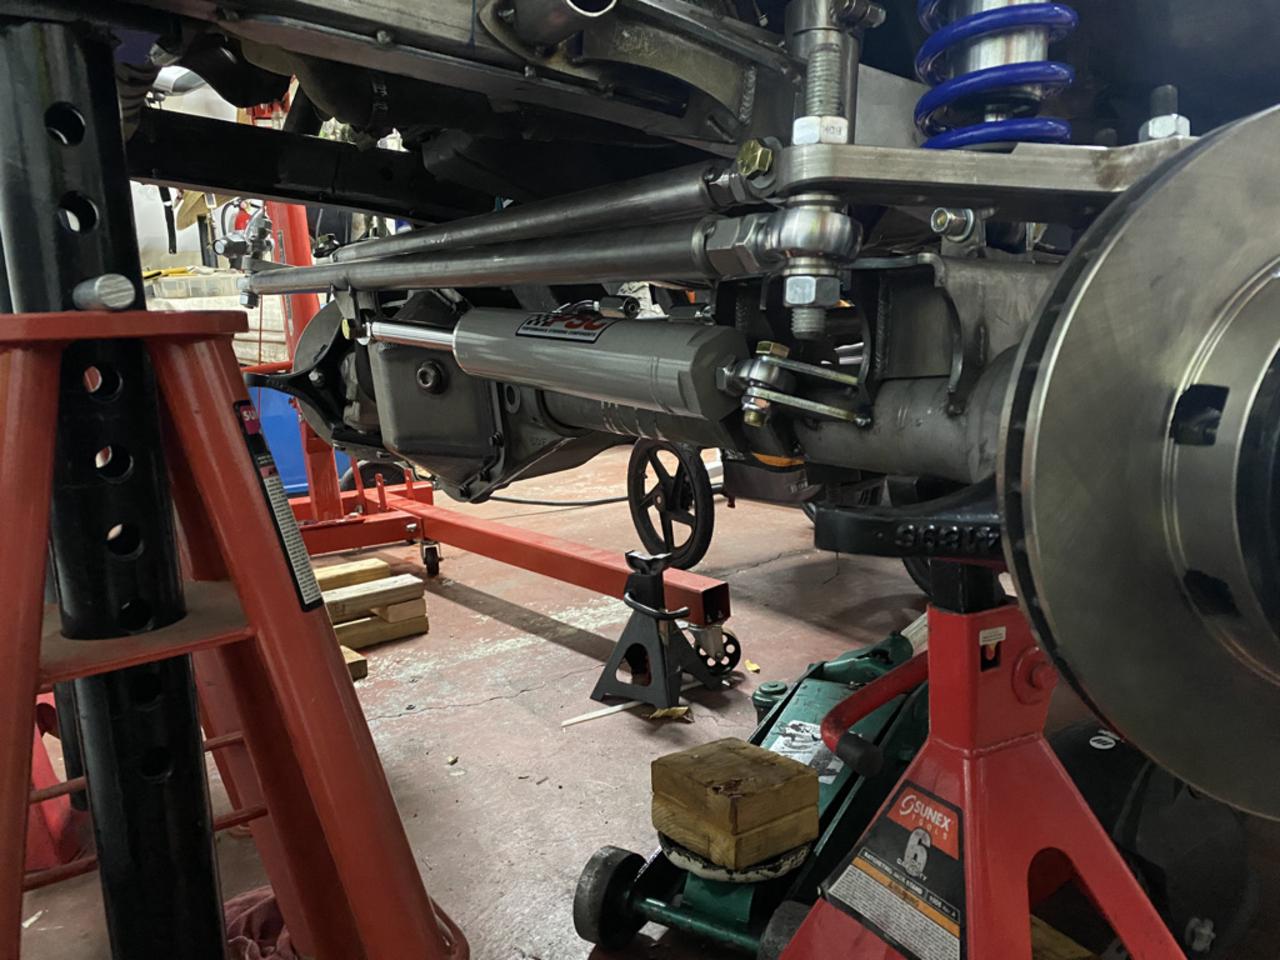
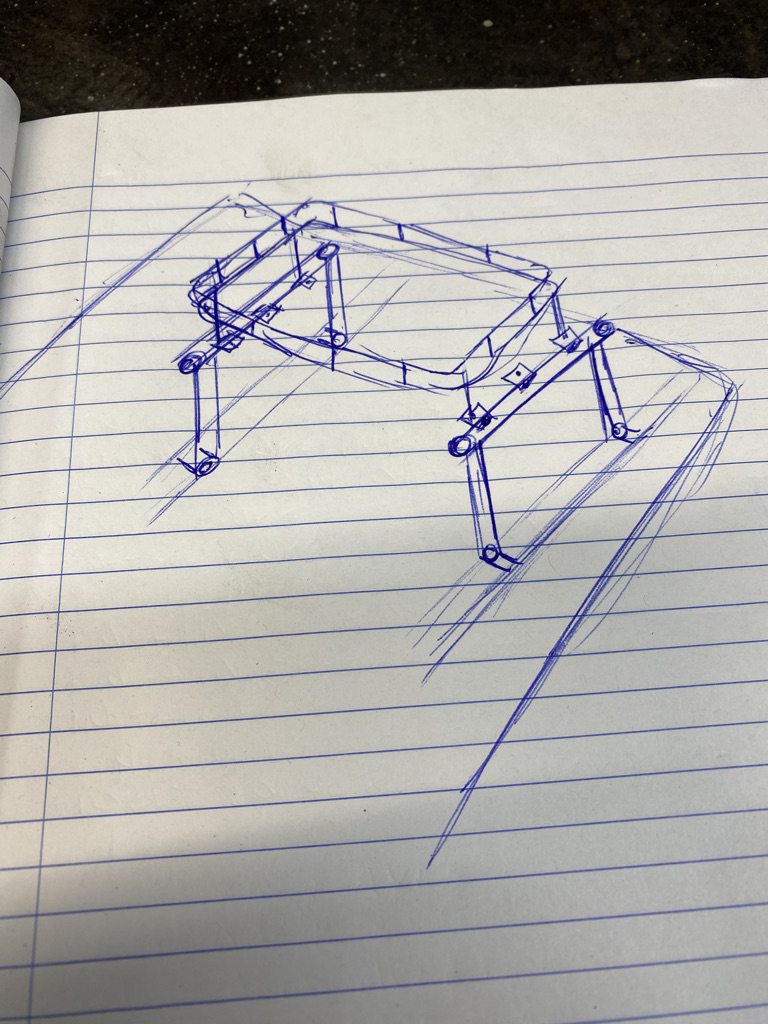
-new tranny/transfer case crossmember, current one hangs pretty low so I would like to get something up a little higher and build some skids off of it
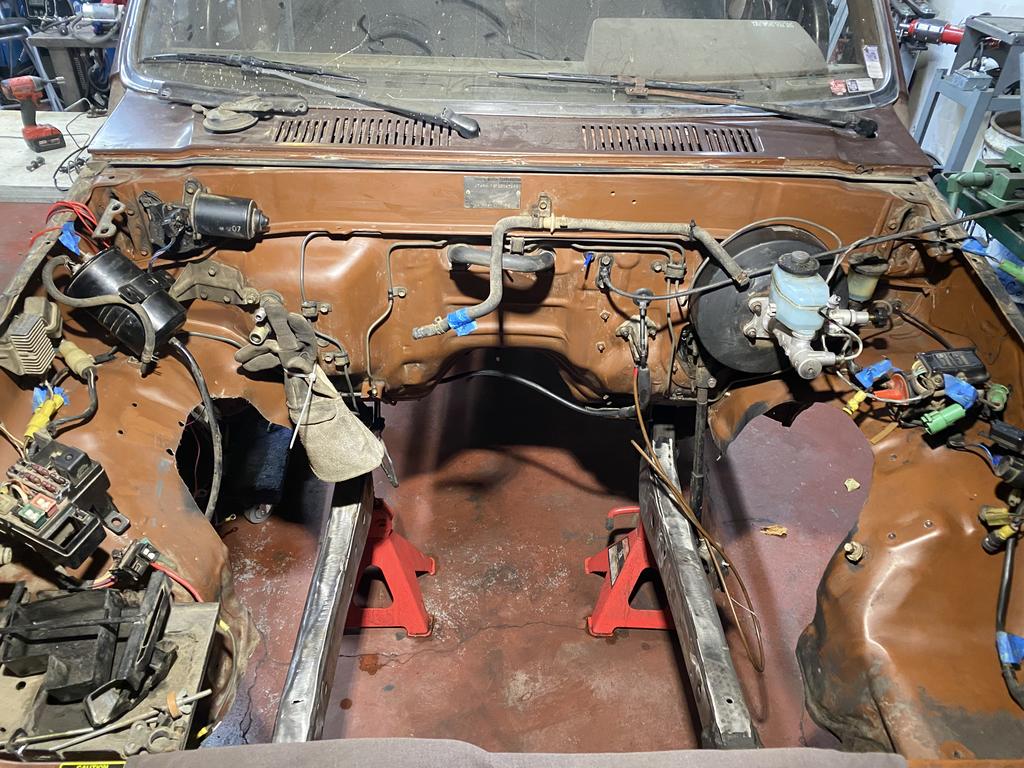
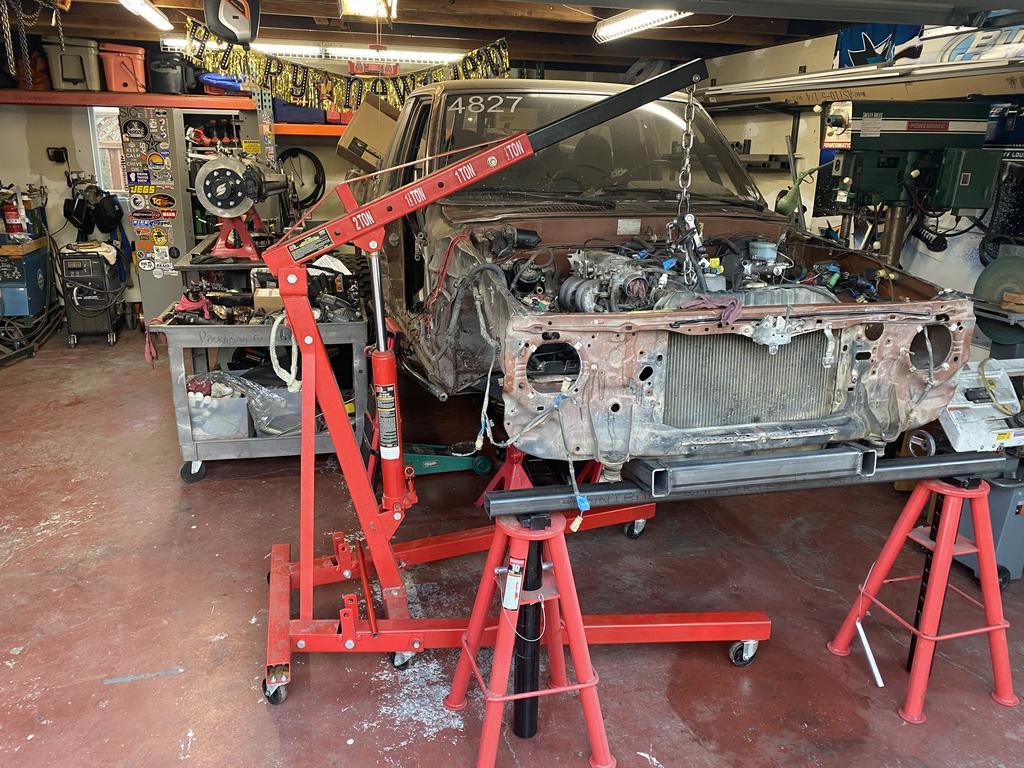
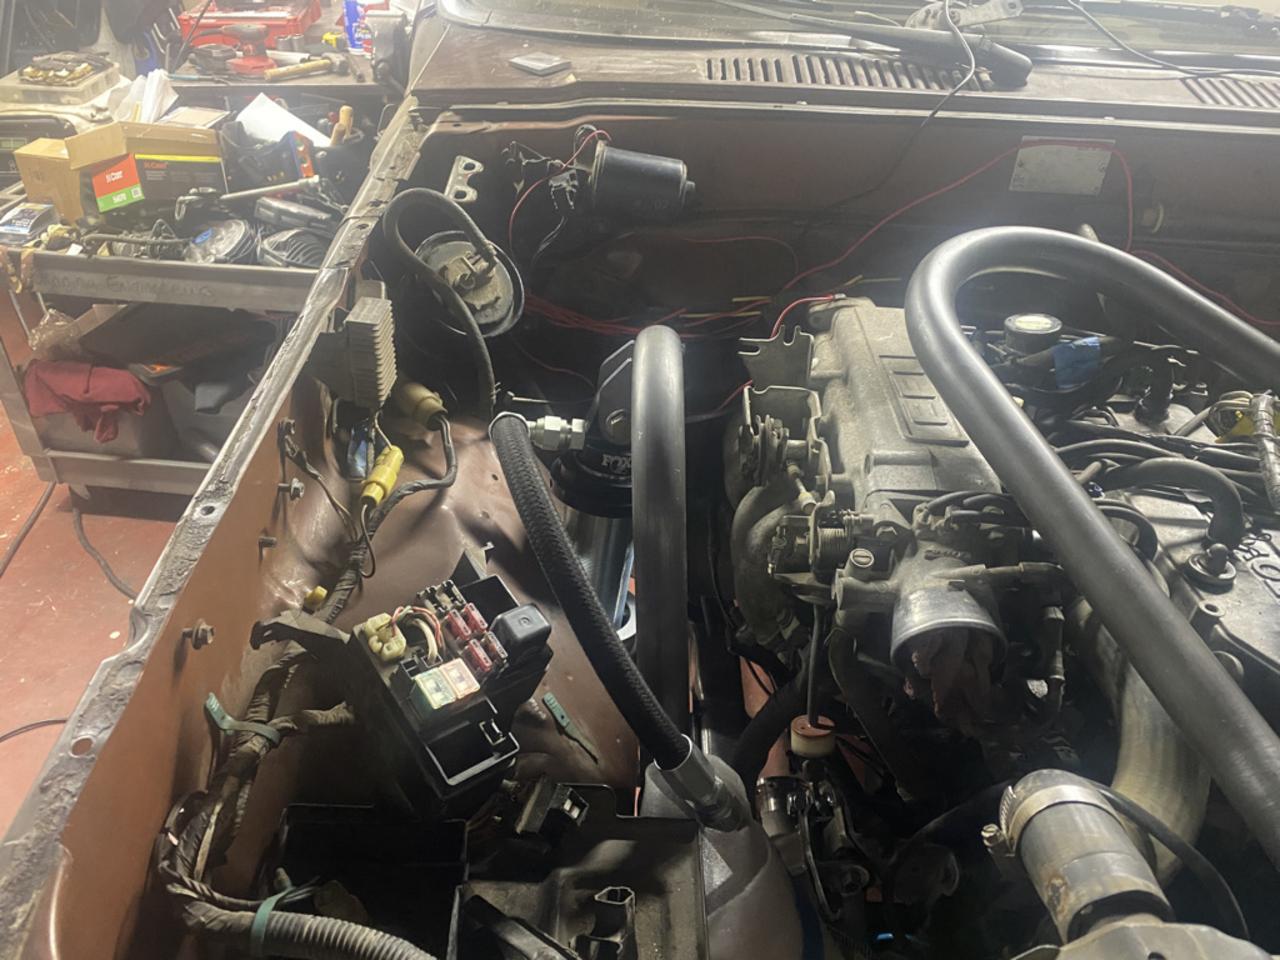
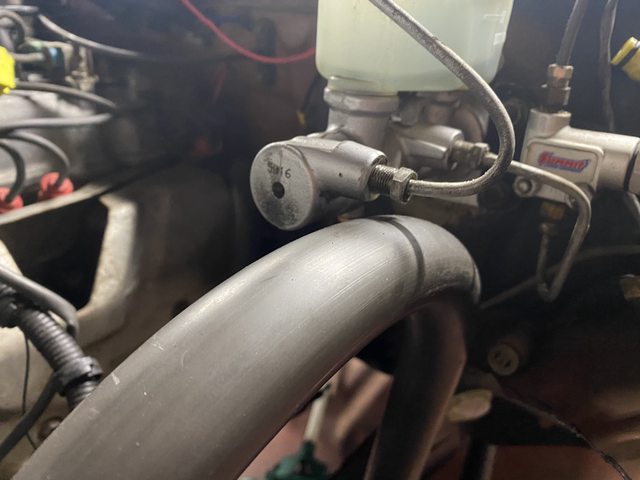
-clean up electrical, engine bay and interior
-this list is pretty much endless and will continue to grow with every trip.

QtsqPCe.jpg
9lIpnOy.jpg
oJryIYY.jpg
Fnplj5h.jpg
 
Last edited:
Way over budget and way behind schedule (the original plan was to have the rear done by Scooter's wedding) but the rear end rebuild is complete and ready to go into its new home. What started as a maintenance focused rebuild snowballed pretty quickly. There isn't a whole lot that isn't new outside of the housing, pinion carrier, hubs and axles. this was my first real go at an overhaul of this scale and leveraged the :pokinit: out of the billa vista 14 bolt bible (http://www.billavista.com/tech/Articles/14-Bolt_Bible/index.html), especially helpful with setting up the gears.
had plenty of hiccups along the way but overall im pretty stoked with how everything came out.

build list includes:
Barnes 13 bolt diff cover
Barnes 14 bolt truss
Barnes pinion guard
Ruff Stuff u bolt eliminator kit
Ruff Stuff disc brake brackets
new calipers, rotors and pads (auto-zone special)
new 5.38 thick cut gear set
new carrier (thick cut gears are not compatible with a 4.56 carrier)
new mini spool
all new bearings, races and seals
Before:
3YXEf72.jpg

j8gKpRc.jpg

After:
cz2lEGZ.jpg

y3mcfOq.jpg
 
Last edited:
Making some headway on the front end of this thing. Brought Russ out of retirement to help me pull the motor out of this thing. The frame was littered with remnants of the old ifs brackets from the original solid axle swap. Couple that with a cracked passenger side motor mount and small crack developing below the core support on the driver side, pulling the motor to clean the frame rails was the only way I was going to be happy and confident with the end result of linking this thing.
IL3Pnbz.jpg

INZyqR8.jpg

Jb9K60p.jpg


Got the motor pulled followed by the trans and t cases, everything was pretty well cover in oil from a few power steering mishaps as well as a constant leak from the motor. Separated the trans from the t cases to slide the new to me transmission in. The counter shaft bearings in my current trans were going/gone and I scored a replacement for cheap. did a pretty thorough cleaning and once over of the cases, installed a new push and turn shifter base on the front case to make things a little more serviceable as well as a new seat and socket for the transmission. got the new trans mated to the old cases and the new t case crossmember.
WHV6qAl.jpg

sT8fP7g.jpg

P9j5qz7.jpg


Between Pat, Russ and myself we spent about 8 hours grinding away on the frame rails. removed all the existing motor mounts and ifs mounts, shock hoops, stock t case and fabricated mount that was a install for the dual cases. we debated cutting the frame at the body mounts and building all new but given the rarity of long, consecutive days in the garage, cleaning the stock frame and leaving the auxiliary electrical components in place (fuse box, battery, ignitor coil, resistors, smog equipment) was a better decision. The frame rails are as clean as they could be and ready to be plated. While everything is out I degreased and cleaned the entirety of the engine bay.
pU850xI.jpg

kQrQn8d.jpg

gsSjK9f.jpg

XOTFSCB.jpg

wowHpUo.jpg


With the motor out, it seemed like a good time to install a new clutch and flywheel. Russ spent a good hour degreasing the motor in an attempt to locate the oil leak. initially we thought rear main seal had given out filthy the transmission was but after cleaning everything up and pull the valve cover we found water seeping in. the half moons on either end had not been properly sealed whenever the motor was initially installed and were pushing oil out the anytime it was running.
TqOfihC.jpg

RWDew0u.jpg
 
Rather than deal with trimming away the existing spring hanger and cleaning up what was there from the previous bumper, decided it would be best to just lop the front 16" of the stock frame off. This also gets the frame about 2" higher than stock and should net me some more favorable up travel numbers. I am planning to push the front axle forward a few more inches than what was there before which should get the 39's out of the way of the firewall. Next up is to finish welding and plating the frame rails and get the motor set back in place to start mocking up motor mounts.

QXsZbJO.jpg

q26hAQr.jpg

JWFI5zK.jpg
 
Looking good. You've done a TON of grinding to get the frame looking that good.
 
continuing to crawl along...
Got the axle back from Rear End Specialities last week. ARB and 5.38's are set up and installed. Installed the shafts and hydro assist ram to verify clearances for steering. Need to tack the truss back in place but otherwise the axle is ready to get mocked up under the truck.

Fit up the frame plates for the outside and bottom of the frame rails. These plates came from 4WU but needed a bit of love to make them fit and tie in with the new section of frame. got the motor and transmission back in position and ready for mounts to be fabricated. Once I have a landing spot for the frame side motor mounts, I will mock up some additional fish plates for the top and inside frame rails where the 2x3 frame mates to the existing frame.

JZh6zsv.jpg

g2vfxqG.jpg

iX8FPcM.jpg

Av7rMdh.jpg

yRvJvy2.jpg
 
Motor and transmission are back in. I don't love the mounts that came with the FROR T case crossmember. There is a fairly large span between the motor mounts and the T crossmember so once the links are in I may try to come up with another crossmember that can tie into the front side of the skid. that being said, I'm not the first person to run this crossmember so it will probably work just fine. Pretty happy with how the motor mounts came out and should be plenty strong enough for that powerful 22re...

VNBad9Al.jpg

BGuGMaXl.jpg

jT1ckqUl.jpg

QsHQmeSl.jpg

r9sdU4Ml.jpg
 
Not that I have a ton of variables available for adjustment, this is how things are looking. Having pretty limited experience with linked vehicles, happy to hear any feedback on items I should tweak.
YtFWWue.png
 
Frame side panhard bar mount is tac'd in with an EMT panhard hard for the time being. making some progress on setting bump stop locations, driver side is integrated with the panhard mount. Pushed that assembly back as far as possible in an attempt to make some more room for the steering box and pitman arm. Drag link is going to be a chore to stuff in there and will probably need to clearance the frame to make it fit (I know I should just go full hydro). Need to get the passenger side bump mocked up and start cycling and checking clearances. Upper link mount has a cozy home between the frame rail and the oil pan. A little concerned that it may hit either of those when articulating so going to need to spend some time figuring those clearances out.
lMxYxVGl.jpg

ygCyYOsl.jpg

Gqx1RAil.jpg

ySVRGZFl.jpg

uDVsVBnl.jpg
 
Bumps are set. Drag link is just laying in there, at full bump it "fits". It will come down a bit on the driver side once it is actually set in place as its currently sitting on top of the pitman arm. End of the day I will likely need to notch the frame to make room. need to spend some time getting the steering box in it's new home and see where all the components will actually land. I have both a flat and drop pitman arm so I have some different options.

The towers I purchased with the 4WU kit are not going to work. Since I pushed the axle forward from the intended location with this kit they are pretty much in the way of everything, steering, bumps, panhard mount, you name it, it interferes with it. I order some 1.5" hoops from RuffStuff which should be a much cleaner solution. So if anyone wants some unwelded cobra towers from 4WU let me know.
1kzyuo9.jpg

CoY3rSD.jpg

MXCtnCy.jpg

RHKpdJD.jpg
 
Looking good. I'm surprised you're not just going full hydro while you're at it.
 
Looking good. I'm surprised you're not just going full hydro while you're at it.

Full hydro components should arrive from PSC tomorrow. If someone is looking for a 8" stroke PSC hydro assist ram and a tapped toyota IFS steering box let me know. Passenger side shock hoop is mocked up. Need to clearance the fender well some more but overall I'm pretty happy with the "adjustable" shock hoop. Made things pretty easy to get set up in a happy place. Will build an engine crossover brace to support the top of the mounts and provide me with a location to mount the resi's on. Picking up a cab over camper this weekend so i will likely be throughly distracted for a bit.
8fnR8cL.jpg

LU6S3HR.jpg

GWy4cuo.jpg
 
Hey man it’s Keith, I’m digging the build thread man! I’ve been keeping up you progress on IG. Are you going to make it to KOH this year?
 
Hey man it’s Keith, I’m digging the build thread man! I’ve been keeping up you progress on IG. Are you going to make it to KOH this year?

Unfortunately I will not be at KOH this year. Was hoping that this would be done in time but wasnt able to make it happen.
 
Shock hoops are tacked in place and coilovers are mocked up. I am pretty happy with first pass at cycling everything. All clear on the firewall side but needs a fair amount of trimming on the core support below the headlights and need to double check steering angle and see what it is. it seems to have significantly more degrees of steering than i would have expected out of non clearance shafts. I am hoping to get 40-42* out of it. Also, very happy to be going the full hydro route. Zero percent chance a drag link would have cleared the frame without significant notching. Single ended ram mount on the axle side should end up being nicely incorporated to the driver side lower link mount. hoping to get that built this weekend. Building the engine crossover brace tonight to add some strength to the upper shock mounts
aWk8izI.jpg

Ew7LgHGl.jpg

nPfdT6dl.jpg

RTi8vZdl.jpg

tM3VUC6l.jpg
 
Looks good. I might have to steal some measurements off of you once I get my D60 put together as I'm going to 3link the front of mine as well at that point.
 
Looks good. I might have to steal some measurements off of you once I get my D60 put together as I'm going to 3link the front of mine as well at that point.

let me know. Happy to share whatever i can. Been keeping a notebook in the garage trying to document as much as i can along the way.
 
Engine crossover brace is in with the reservoirs zipped tied for mock up. hood still closes so i am pretty happy with that. i could have added about an inch in between bends and gotten it to sit a little closer to the engine but the throttle assembly is pretty tight to the brace as is. havent bent much tube in about a year so i was a bit rusty on figuring out all my measurements and notches. first time using the air/hydraulic ram with my JD2 and i should have bought that about 3 years ago.
Ram mount off the link mount is next.

j0yFr2Oh.jpg

J3HweE6h.jpg

01qbptdh.jpg

h35Bgeah.jpg

KSW9f5th.jpg
 
Ram is mocked up in about the only place that it could live. The link mount was conveniently radius'd allowing the ram to sit pretty tight to the brackets while still having clearing through the entire throw of the steering even if the tie rod ends up floping a bit in the heims. Thinking that making some sort of skid/ tube structure to protect my nice shiny ram would be a good idea. The axle isnt heavy enough yet so i might as well throw some more tube at it.

Cycled through full bump to full droop, articulating either side. with the the driver side at full bump and passenger side at full drop i have about 1/4" of clearance between the coil and the bump stop mount on the passenger side. going to try to move the lower mount out another 1/4 - 3/8" but its already about as far out as it can go. May just be something that i have to live with. Other than that, I'm really happy with how everything is packaged. Need to modify the orbital mount a bit but outside of that, nearly all the big ticket items are accounted for. Lots of plumbing and wiring to sort out. I want to get the hydraulic lines made up and cycle everything one last time before tearing everything back down to finish weld and paint. I do need to figure out a bumper/ winch mount but that is not really affecting any of the suspension components.
S87ObIM.jpg

RD5mvoi.jpg

aMy123s.jpg

zPwFfuV.jpg
 
Heck yeah. Now that the hard end is almost done when are you going to tackle the rear?
 
Orbital is in place as well as some new body mounts. Tried to mount the ram off the driver steering arm but panhard pretty quickly eliminated all possibilities of that. going to bend up an 1 3/4" tube hoop to protect the ram. Plumbing the hydraulic lines is going to be a bit of pain, in particular making the reservoir the highest point of the system. I pulled the fan off the motor in favor for an electric fan to help free up some space and give me some additional options for plumbing. Need to pick up an electric fan and build a shroud.
At this point, this thing is ready to be broken down so that i can finish weld everything (i think...). Im going to pull the motor and trans to in order to give me some room to work and bench weld as much of this as i can. Once its back in place and all the electrical/ fuel connections are made i can get a better sense of where the hydraulic lines can get routed.
vW5BUnYh.jpg
 
full droop with limit straps set. the lower mount isnt in my favorite spot but is doesnt interfere with anything and it was one of the only places that worked with the double shear mounts i have. It would be nice to have a little adjustability as well so i may pick up some clevis mounts which would give me a few other options for mounting locations but this will suffice for the time being.

xyRblJlh.jpg

SATvJrNh.jpg

7GAnbC9h.jpg

vxPlw3ih.jpg
 
Fairly productive weekend. Got the stock toyota steering shaft onto the new column stub shaft. Drilled out the splines of the stock u joint to fit over the 3/4" stub shaft. Ground out a key in the stub shaft to allow for the bolt to pass through and clamp the u joint to the shaft as well as key it to the shaft. Pulled the gas tank to make welding the frame side link mounts a little less stressful. Lots of room for activities under there with the tank gone. leaning towards mounting the tank in the bed and building a baja rack above the tank for lightweight bags and a small cooler. Still able to fit the Pelican cases on either side of so it would be an efficient use of the space. Long term i would like to get an actual fuel cell but need to do some research on running a cell with the stock filler neck (or at least having a means of connecting the stock filler neck for smog checks).

Electric fan mount is complete. I know its not very shroud like but i have not been running a shroud with the previous fan and have not had any issues with over heating. If I run into some cooling issues, i can work on building an actual shroud and put an actual motor that makes heat aka power in place of that huge 22re.

Pulled the motor, trans and axle out of the truck in preparation for a lot of welding. I'm not a very big fan of the frame side mounts of the Front Range T Case crossmember. the crossmember sits on top of the frame side mounts so the entire transmission has to slide back while staying at the same elevation, which presents clearance issues with the firewall. I am thinking about looping off the frame side mounts and integrating a more traditional bushing style mount with horizontal mounting bolts instead of the current vertical configuration. I dont intend to being pulling the transmission very often, but it seems significantly easier to do now instead of later. With that being said, the durometer of the bushings style mount is significantly higher than the current mount. Given that the crossmember mates to the Tcase via the aluminum housing, a more rigid frame side mount could be prone to cracking the housing.... probably pulling a Halper and overthinking it but its seems worth at least considering.
r2bYQ7uh.jpg

aiQ6HOch.jpg

ZIJFGpkh.jpg

9EfLaV7h.jpg

9f8ISvhh.jpg

VNBad9Ah.jpg
 
Top Back Refresh