here's a copy of a thread I had on my pool/tanning ledge
Poured some cement. I was going to mix it in my little mixer, but I figured out it was like 45 bags. So I called a cement truck. I also poured a little walkway at the front of my house.
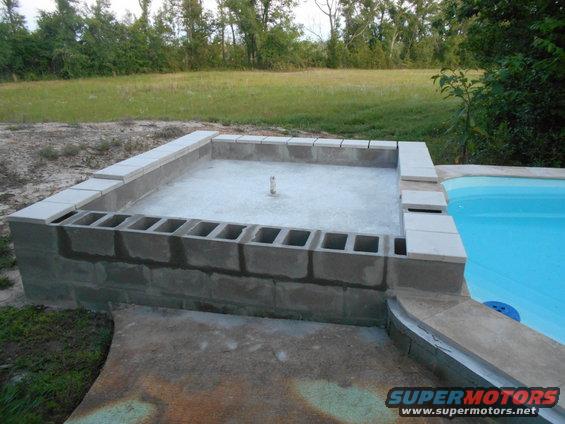
I laid the rest of the block. The reason I left the two sides open before was to "screet" the concrete.
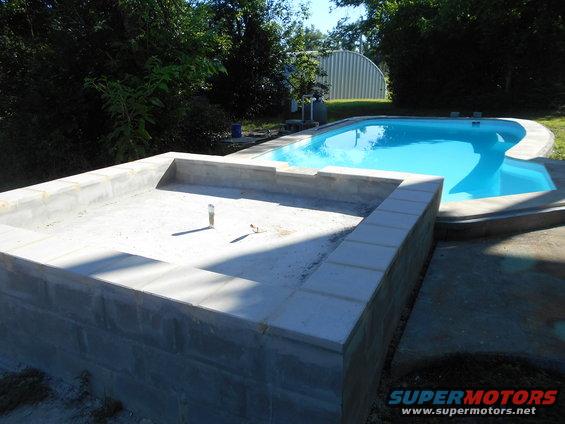
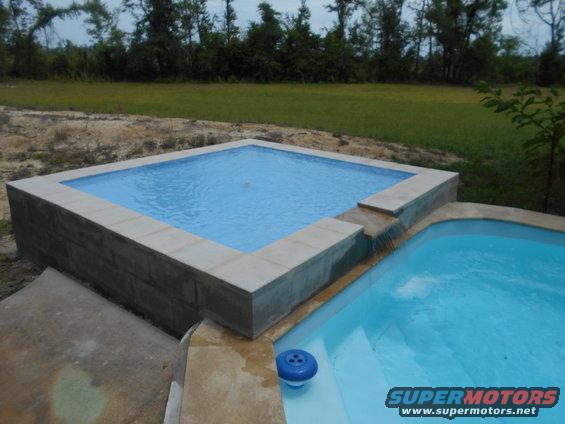
Sides in and the stepping stones on the top edge.
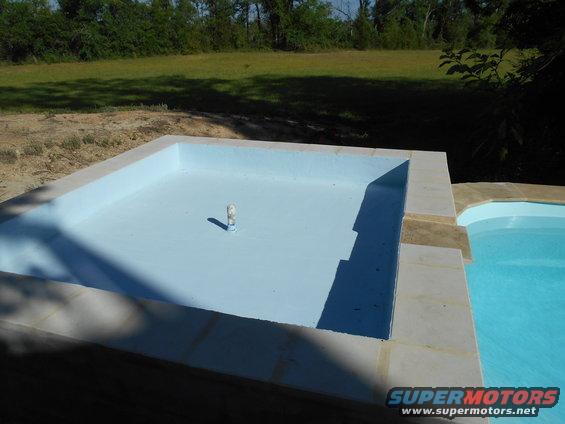
Next, I coated the inside with "sider crete". It is a pool plaster. It's basicly real thick paint/cement kind of stuff. It was very difficult to work with. They have a video where they just roll it on and smooth it with a squeegee. All I have to say is BS.
Of course, the second coat will go easier than the first, right? Wrong, it was harder. I have to say, this was the most disappointing part of this build. This stuff just wouldn't smooth out. They say in the video to smooth out all imperfections in the pool before applying this stuff. What a joke. I had the bottom cement way smoother than this stuff.
Anyways, Here is the second coat waiting for water.
Next update, HEMTT drives through tanning ledge. Um......maybe not.
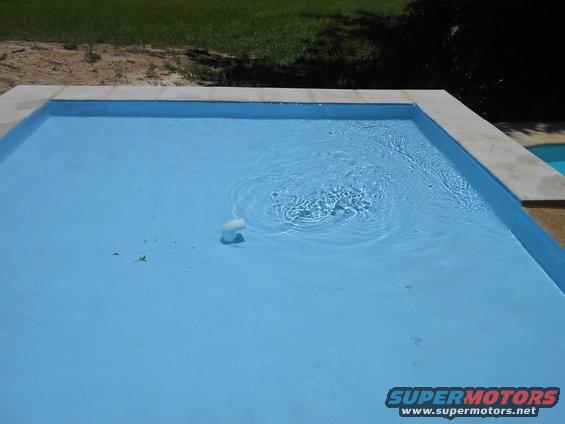
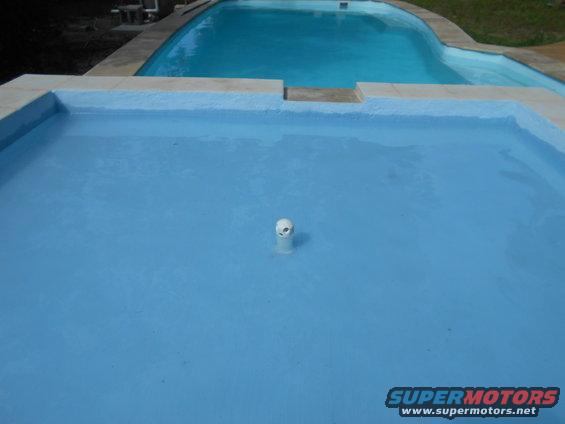
Ok, I'm ready for water. First thing to do is measure water level in the main pool. I'd like to know how much it drops to fill the tan ledge.
Next, open the valve from the pump.
I checked my watch to see how long it takes to fill. The pool blowers are still on. It would fill faster if I closed them, but this is the way it will operate normally.
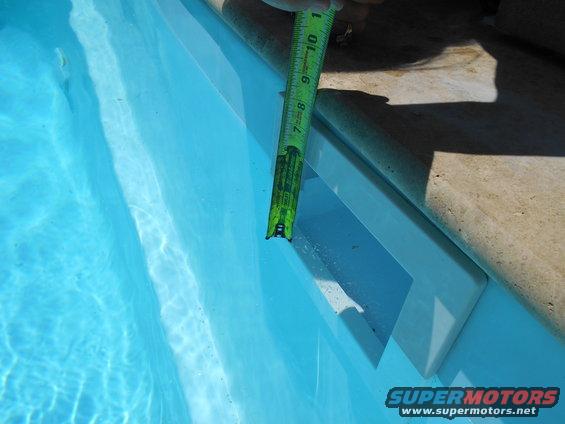
After seven minutes, pool dropped 1 1/2" And I had this.
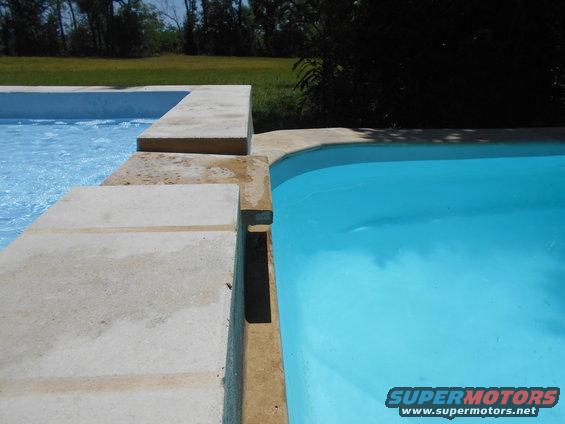
First problem- the stand pipe makes enough waves on its own to splash some water out the corner. The height of the stepping stones are only about an inch over the spillway and 1/2" over the water. I knew it would be easy to make waves that would go over the side, but I didn't think the inbound water was going to do it by itself.
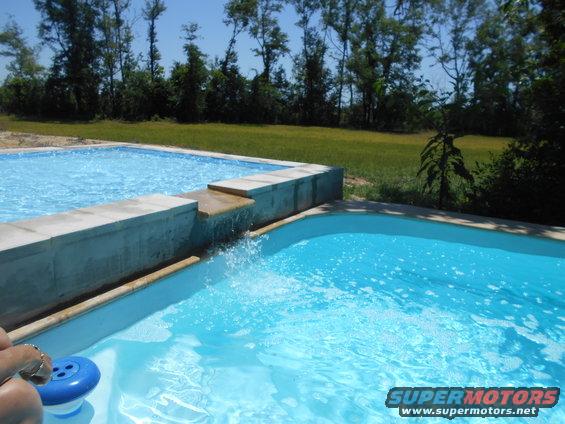
Second problem- the spillway is made from an extra piece of the pool coping. It has a bull nose to look cool, but the water "attaches" it self to the nose and follows it right around instead of a water fall.
So I drained it down a bit and took a saw to the bull nose. I only sawed the very tip. It's still alittle rounded.
This small change in profile made a big differnce in the way the water comes off the spillway.
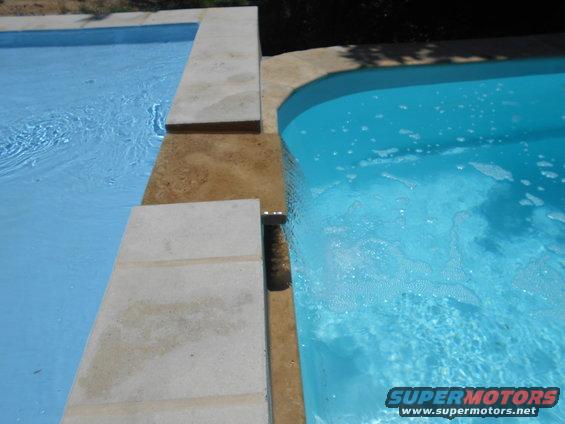
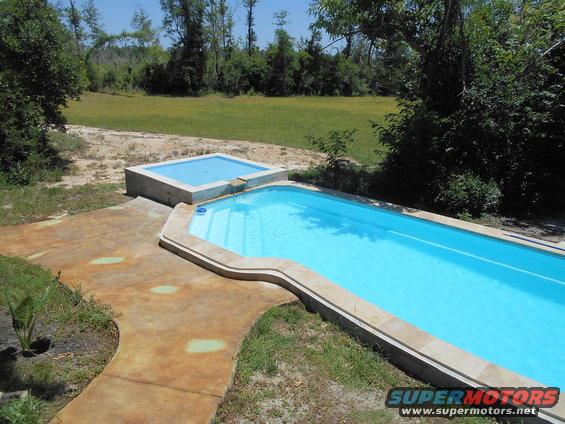
The next thing I did was to change the stand pipe to an elbow to reduce waves.
This solved the wave problem, but it looked like sh$t. So I made a cap with multiple holes. Note, this pic is with the pump off. You can see the pool drains backwards through the stand pipe to this level.
The multiple hole pattern makes just the right amount of waves so it looks good and doesn't splash out.
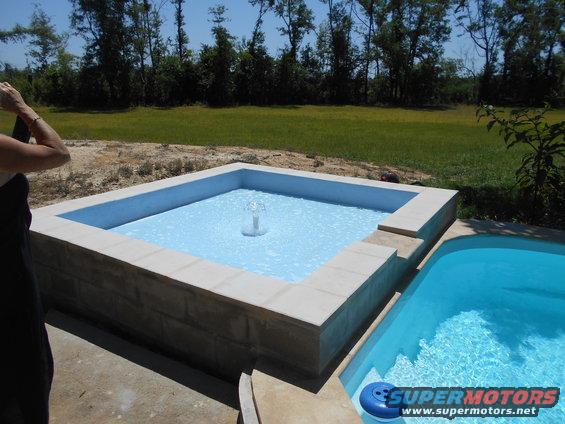
So I'm pretty happy with it now. These tanning ledges cost about 5 grand and I got about one grand in this.
After doing it, I got to wonder if I built the whole pool like this, I could have saved about 12 grand. The spill way is a way better skimmer than the one on the main pool. If you had that go into a big wash tub with a laundry basket to catch leaves, you would get that nice "waterfall" sound and you would only need to empty the leaves once a week instead of every day.
This sounds like a project for 2BigBroncos.
[/