What's new

Dirt Squirrel 3.0 - The 2nd Mortgage

the_white_shadow

Well-known member
Joined
May 27, 2020
Member Number
1565
Messages
404
I figured i would start a build thread on the new buggy, mainly to ask questions to those with more experience, and to document parts, dimensions, thought process, etc. for the build. I just sold version 2.0 which was also a tube buggy, but built around a 79-83 first gen toyota Cab. It had 2x3 frame rails and was built to be beat on. Consequently when i built it 6 years ago, weight wasnt much of a factor and building buggies smaller/lighter and with portals wasnt a thing. Now my goal is to be around 4k lbs with water in the front tires which is about 1k lbs lighter than the old one.

Here is the old one in all its glory wheeling in AZ last year. It was converted to rear steer Summer of 2021 and was by far the best change i made to the rig.

img_1113-jpg.jpg

Enough with the past. The new buggy will be built as follows (at least for now). I am in the process of building out the chassis. More on that later.
  • 50" wide tube chassis (52" at my shoulders) of my own design (based off all the buggies i love and wheel with) Im not re-inventing the wheel here. A mix of .188 wall (sliders/lower subframe), 1.75/1.5/1.25" x. 120 DOM. Going for minimal and strong.
  • 114" wheelbase
  • Fab 10" Axle housings from TTR Axle and Fab with 05+ SD outers.
    • Gearworks 5.83 thirds high pinion, spool front, spool rear.
    • 74" WMS
    • Drivers drop front and rear (Built to use the same shafts)
    • 40-spline 300m shafts (Branik)
    • 14" brakes Branik up front; HAD driveline break on rear output only.
    • 3x9 PSC rams
  • Late model GM 4.3l LT LV3 v6 engine from a 2015 silverado
    • Shaved oil pan
    • Radial Dynamics CBR-X pump (these engines didnt come with a PS pump)
    • LV1 (2018+ express van 4.3L) water pump
    • BTR Truck Norris Jr. Cam to delete the DOD/AFM
    • Stand alone harness from Howell
  • 700r4 Trans with reverse manual valve body
    • Winters Shifter
    • TCI breakaway torque converter
  • Atlas 4.3
  • PRP low back seats
  • Ruffstuff Heims
    • 1.25" lowers with 2.25" aluminum lowers
    • 7/8" uppers with 1.75"x.120 DOM uppers
    • 7/8"x3/4" for steering with aluminum tie rods
  • 43" SX on 20" Trailready Beadlocks (5.5" BS)
  • Misc
    • Minimal gauges (oil pressure, water temp, trans temp)
    • Maybe a digital display of some kind to check/clear codes
    • Entire rig to run off a Switch Pros panel
    • Radial Dynamics Electric solenoid valve for the rear steer
    • 2.5" Radflo Air Shocks
    • Manual brakes (individual pedals for front and rear)
    • Some speaker pods for the 90s rap tunes
    • Baja Design Pods for headlights
    • Rock lights Lux
    • Front Radiator
    • Runva knockoff warn 9500lb winch
    • 1410/1350 driveshafts
Current design of the chassis. Red is 1.75" x .21, Grey is 1.75X.120, blue is 1.5"x.120. Green is 1.25 x .120.

9Gp0xD0mNAfgOsIN3B0mhRrQ=w754-h565-s-no?authuser=0.jpg


BijSemNvPYCM2B2aaTZlDnpg=w754-h565-s-no?authuser=0.jpg


PX0gXHvkgLo0RT2PKTZB07FA=w754-h565-s-no?authuser=0.jpg


Drove to Austin to pick up the LV3 in the shit box beater.
ZqBO-fxG6UI9o6nXeulJ8gGw=w754-h565-s-no?authuser=0.jpg

fS8vlHwPVgkTVsV6or_HOqDA=w754-h565-s-no?authuser=0.jpg


to be continued
 
Last edited:
Continued. Trying to get yall caught up.

Axle Housings from TTR (Not mine, but will be similar)
4nlbVcIRsyh2pW2jMQMKheMW5d=w167-h256-no?authuser=0.jpg


Seats. Im going with an 80s theme paint job on this one, so Teal and black camo should do the trick for the seats. Oh and gator.
6YE42O4adq-5y=w453-h565-s-no?authuser=0&authuser=0.jpg

LRI-mBVacxenjX697LasFEnA=w453-h565-s-no?authuser=0.jpg


Picked up a couple more parts for the build.

700r4 4wd to use for mockup then have it rebuilt.

m568CfJJqS8HU0ZcUkJs-jGg=w754-h565-s-no?authuser=0.jpg


Going with a Coleworx driveline brake on the back of the Atlas. im thinking two pedals one for front and one rear. I have a few friends that have used them in the past with success and amazing brakes.
TJHN4oTbf1DlyPMzVs684ong=w424-h565-s-no?authuser=0.jpg
 
Picked up the tube. Some assembly required.
5C7AXf3p_EDM1-HVubCRKDzA=w424-h565-s-no?authuser=0.jpg


Picked up a set of wheels from a street queen. Trailready 20s with 5.5" BS
0Km4QWeLFVFf7L0eZmL4bZvxsN=w293-h220-no?authuser=0.jpg


LV3 before with LV3 accessory drive components.
K6dFm7EvqxQ6g=w754-h565-s-no?authuser=0&authuser=0.jpg


LV3 with LV1 water pump and PS bracket. The LV3 doesnt have power steering and the LV1 out of 18+ Express vans does. Its a much more compact arrangement.
-x55YTX84SqwvFV2WckGX_LA=w424-h565-s-no?authuser=0.jpg


Belt routing plan without the stretch belt.
cod7Xyi2QVnves7APKg1jPJQ=w261-h565-s-no?authuser=0.png
 
Bolted the 700r4 to the 4.3. The top bolt for the trans isnt there on these new engines, but 4 of them line up fine. Dowel pins too. Here you can see how it looks with the stock uncut pan. Way too high.
pVHGh3HNqhIHDzb0VnL_kPFw=w754-h565-s-no?authuser=0.jpg


Did a little oil pan slicing, which for some reason looks a little like texas. Chopped off 3". Ill have to modify the oil pickup and run a remote filter but overall mo better.

G4Z_WFROd2IJjosm9_3Aotfw=w754-h565-s-no?authuser=0.jpg

OakQ0lbIqHm2WskhuYiP1d9Q=w754-h565-s-no?authuser=0.jpg


My mockup atlas im borrowing from a buddy.
AgPXg-Y6faH7JIdexQcUc_Qw=w754-h565-s-no?authuser=0.jpg

1Gmh6SviJmrlqP3pB1JnaW6Q=w424-h565-s-no?authuser=0.jpg


Based on the placement of things, i lengthened the belly a couple of inches to end about the midpoint if the atlas tailhousing or about 28" long from front to rear crossmember.
 
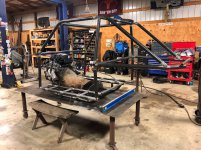
Dash bar and harness bars are tacked in. 50" wide at the A-Pillar and 52" wide at the B-Pillar. Dash bar raked back about 5 degrees.
DtOOCDLpzdy6U01t9jSEsqbA=w754-h565-s-no?authuser=0.jpg

aKk7CMdv7Tqlir13QZ4xhvHQ=w424-h565-s-no?authuser=0.jpg


Set the A-Pillars and moved them back about an inch so i could get the dash bar down tubes to clear the head on the passenger side.

7eZw0wi-YnNZS3YHcRrGCxzA=w754-h565-s-no?authuser=0.jpg

FXMvCC5DToRHBU7Kc0Djr0jw=w754-h565-s-no?authuser=0.jpg


8aOmrKaq3P9xARpUFdUFfJVg=w754-h565-s-no?authuser=0.jpg


cut and spliced in the C-pillar tubes.
LeyOtfUvgw-v8FaLWQYX9Eiw=w754-h565-s-no?authuser=0.jpg

Next was the roof bar and the start of the X at the B-pillar. I raked them back some for a little extra room for my noggin. i plan on adding some tube gussets throughout the chassis.

iRDkQTNvNnHY5R5BX57tGHJw=w754-h565-s-no?authuser=0.jpg

4MjPuzNTFeB__roq-4ZPE7PQ=w754-h565-s-no?authuser=0.jpg
 

Attachments

  • LeyOtfUvgw-v8FaLWQYX9Eiw=w754-h565-s-no?authuser=0.jpg
    LeyOtfUvgw-v8FaLWQYX9Eiw=w754-h565-s-no?authuser=0.jpg
    184.5 KB · Views: 16
Finished up the X. Its finally starting to look like something.

KH22wsQ2k8H5DgdNTewjCRMA=w754-h565-s-no?authuser=0.jpg

LRN90n9NeQs6ploGpsDpnw8g=w754-h565-s-no?authuser=0.jpg


Windshield bars and first iteration of the dash down bars were next. Also made some axle mounts at full bump (5" of up travel). My plan is have the lower links horizontal to the ground or slightly negative at ride height. I want a ~20" belly on 43s. Last buggy was 16" and it sucked. Wheelbase is set at 114" for now. I used the center line of the belly crossmember (lower link mounts) and the center line of the axle to set the position 5" up. I used some left over spring perches and some driveshafts to set it all up. Hopefully my axles come in soon, so i can get those mounted.

bguRU95-sxqCAm5yZ55Zmh4Q=w754-h565-s-no?authuser=0.jpg

cplY8Y9DAuclU1rC1Di5_A1w=w754-h565-s-no?authuser=0.jpg
 
Mocked up the seats to check head clearance and foot room. The down bars from the dash tube made my natural seating position very uncomfortable. It needed a change inboard.
3UogGDBzil9SuyBr7HLrvoYw=w754-h565-s-no?authuser=0.jpg


jrTrf0z0d3KSKGC9ibGkpz8g=w509-h678-s-no?authuser=0.jpg


Atlas clearance to the seat is tight.
0JWz2surv__UTOOLQdChiujw=w754-h565-s-no?authuser=0.jpg


Decided to make some outriggers out of 1.5" tube to move the down bars in a few inches on each side. Also changed them out to 1.25" diameter. Much much better seating position and a comfortable foot placement. I am going to run the exhaust out the front on the drivers side, under the crank pulley, then merge in to the passenger side. At least thats the plan.
5ZQJngHtW2tsme9aZJppiQpg=w509-h678-s-no?authuser=0.jpg
 
5ZQJngHtW2tsme9aZJppiQpg=w509-h678-s-no?authuser=0.jpg


ZfyveAGLJO_KAn3x74ElvIJg=w904-h678-s-no?authuser=0.jpg


With my helmet on, i have about 2-3 fingers of head room to the roof and a full fist to the nearest tube. Without the helmet, i have plenty of room in all directions. My mockup atlas is about 1/2" off the table and i dont think i can lower it or clock it anymore.

Ive been taking my time and getting the copes as close to flush as possible. Its been a fun process and has been a while since i built a buggy. So far so good.

Next up will be getting some upper/lower link mounts cut for the chassis side in anticipation of my housings coming in soon. Once i get those set up, i can order lower aluminum links and get the axles in position. Lower frame rails can be bent up next out of 1.5". Then i can bend the front belt/hood tubes. Its coming together.
 
My axle housings came in from TTR after about 10 weeks (quoted a 4-5 week lead time). I was a little disappointed there. My order was exactly as ordered and missing some key parts to set up the Cs, i.e bushings to fit a stock 05+ Ford C (~2.75" inner diameter) on a 3.5" OD housing. They are apparently in the mail.

The housings are beef and the quality of the fab work is nice.
60ZI7Y79ZTnnznDjF1cpB1ZQ=w904-h678-s-no?authuser=0.jpg


-PowTnKz2-t5A7SeoL5zaC-g=w904-h678-s-no?authuser=0.jpg


The knuckles he sent me apparently were found in the bottom of the ocean. Cleaning them up will be fun.
tP4dCyssXQLFH-2gP7eb-IRQ=w509-h678-s-no?authuser=0.jpg


I mocked up the housings at full bump. Wheelbase is now 114"
GhfFApX9kPS79WzuepVA5G5A=w904-h678-s-no?authuser=0.jpg


A friend cut out some link tabs and weld washers and i got the front and rear lowers mocked up. They are the same length front and rear at about 40" eye to eye.
SWTqTMT6bAO7-xoyndpaXg1w=w904-h678-s-no?authuser=0.jpg


About as far inboard as i could move the front passenger lower and still have room for the bolt/nut and third member. I could maybe get it another 1/2" inboard.
InwhDrUqGd43GmkUHEAfuplA=w509-h678-s-no?authuser=0.jpg


I know you cant feel a picture on the internet, but if you could, this one would melt the screen. IYKYK. Jesse Haines full hydro arms and a upper BJE welded on one knuckle.
02PM4SC566SHdekuzi0coRvw=w904-h678-s-no?authuser=0.jpg
 
Finished welding the final SD knuckle this weekend and got them all painted pretty. Pressed in new lower ball joints and mounted them up with the OG Nick Barna BJ eliminators. With the unit bearings temporarily mounted, you can see how wide its going to be. I still need to redrill the pattern to 8x6.5.
fs5axUozEiOAxeBJYe_4tKIw=w904-h678-s-no?authuser=0.jpg

ugg5kW3Pg_ZJ7bDtGkeBHFhA=w904-h678-s-no?authuser=0.jpg

cfemVkfQ3-3QjgqMNqzOB10A=w904-h678-s-no?authuser=0.jpg
 
Ive been messing around with the new version of the 4-link calculator to see where things end up. Thoughts on these numbers? I like have a low anti-squat in the rear and a low anti-dive in the front. I guessed on the COG number but i set it as the centerline of the camshaft. I can increase the AS/AD numbers by increasing the vertical separation of the links at the axle. Currently its at 7.5" front and 8" rear. I am seeing a lot of the new buggies with greater horizontal separation at the axles as well, so i tried to play with those numbers as well. The natural place for the upper mount to sit is the flat spot on top of the third member, so thats where i started. The front has to be somewhat wide at the axle anyways to clear the engine/exhaust/etc.

Thoughts? I know not to look too much into this, but i like numbers.
1677591571542-png.png

1677591612743-png.png

1677591659073-png.png
 
The rear links are tacked into position. I copied Jake Boen's upper frame mounts as i loved the way he incorporated them into the chassis.
hnohcwXTMaeHEd2gh_7IgZDw=w904-h678-s-no?authuser=0.jpg

B--a1llQgsWYoUkzRzEXx7kg=w904-h678-s-no?authuser=0.jpg

T_I9Uz4fxpn8qPqVytlXm_Hw=w904-h678-s-no?authuser=0.jpg


Rear links cut and tacked up but like a dumbass i cut them about 1.5" too short. Ill redo them.
fEn1jw7gMj7rs7PT9X5JPAHw=w904-h678-s-no?authuser=0.jpg
 
CGvtNhcLPCfo8K3uqZ0Qssvw=w904-h678-s-no?authuser=0.jpg

Link mount mockup complete. Now to build the lower frame rails and finish out front tube work. Atlas supposedly shipped on Friday so it should be in this week. Starting to take shape.

Lower fame rails mocked up front and rear. Started to play with the front tubework a little with some scrap tubing. It will be 1.75. Lowers are 1.5.
vCkwtssinsfktwToX7Gpf_5A=w904-h678-s-no?authuser=0.jpg


Front tubework in place. Along with my knockoff Warn 9.5
UXw5bwBIqu2AqG9QhXqZpSNA=w904-h678-s-no?authuser=0.jpg


v8wMIMGC3gwV0-e6nh7sArBA=w904-h678-s-no?authuser=0.jpg


LymNXlxBRVe2fIIqcHbu6WBw=w904-h678-s-no?authuser=0.jpg
 
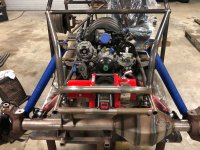
Out with the old and in with the new. The mockup case served me well. I am going to have to delete the oil site tube to get the case to clear my subframe tube. I deleted on my last atlas with no ill effects.
DVNWtLWq7RW72RnMSNmH02MA=w904-h678-s-no?authuser=0.jpg


The seat is as low as possible and basically resting on top of the case. I have plenty of headroom though even with a new not broken-in seat. so im happy there.
P3iN_RIZeYXC_S9Ae-Anj0Sg=w904-h678-s-no?authuser=0.jpg


FIevvliMh6b1Z4pcQkuc1dDw=w904-h678-s-no?authuser=0.jpg


g7TGovkjp561N9RSROVWLexg=w904-h678-s-no?authuser=0.jpg

Front lower shock mounts at the axle. Due to limited space i decided to weld them to the C itself. They will be boxed inside and out for additional strength. A bonus is that i can still remove the lower link bolt.
s_0fT4tqFrS3Ol4ySXTkS5YQ=w509-h678-s-no?authuser=0.jpg


Front Shocks mounted

b0EUZM3YoJik2alC4242Yudw=w904-h678-s-no?authuser=0.jpg


A38Q_1BsH3K9D-Taj1_SiJLg=w904-h678-s-no?authuser=0.jpg
 

Attachments

  • A38Q_1BsH3K9D-Taj1_SiJLg=w904-h678-s-no?authuser=0.jpg
    A38Q_1BsH3K9D-Taj1_SiJLg=w904-h678-s-no?authuser=0.jpg
    168.9 KB · Views: 11
Some planning forward.

1. Solid mount vs poly mount? And if poly mount, would the tailhousing mount on the Atlas be enough or would i need one at the transmission as well? Whatever i choose the mounts will be same front to back solid/poly.

I am leaning towards solid mounting everything this time around. Chassis will be rigid enough and i dont care about the minimal vibration.

2. Transmission removal out the top of bottom of the chassis? Im leaning towards trying to see if i can design the interior tubing to be removable with interlocking tube clamps and then just fully welding the AR400 skid plates under the engine and on the belly. Or should the transmission drop out the bottom with a removable skid plate?
 
Love this build. Great detail.

How'd you hear about the Runva winches? I'm looking for something small like that and don't want to spend $2500 on a Warn RC 9.0. $600 is very affordable, but I am sort of concerned that if it's poor quality, the only other option that size is really the Comp Warn or maybe their Axon 5500 lb.
I was at werock last month and heard some of the guys talking about them with good results. So far a few of my buddies have bought them just based on the price. I’ll buy 4 before I get a warn. Hopefully for a suck down and the occasional pull it will be fine.
 
Ive been messing around with the new version of the 4-link calculator to see where things end up. Thoughts on these numbers? I like have a low anti-squat in the rear and a low anti-dive in the front. I guessed on the COG number but i set it as the centerline of the camshaft. I can increase the AS/AD numbers by increasing the vertical separation of the links at the axle. Currently its at 7.5" front and 8" rear. I am seeing a lot of the new buggies with greater horizontal separation at the axles as well, so i tried to play with those numbers as well. The natural place for the upper mount to sit is the flat spot on top of the third member, so thats where i started. The front has to be somewhat wide at the axle anyways to clear the engine/exhaust/etc.

Thoughts? I know not to look too much into this, but i like numbers.
1677591571542-png.png

1677591612743-png.png

1677591659073-png.png
For a crawler, nothing stands out as being an issue.

Looking forward to the build.
 
I was at werock last month and heard some of the guys talking about them with good results. So far a few of my buddies have bought them just based on the price. I’ll buy 4 before I get a warn. Hopefully for a suck down and the occasional pull it will be fine.
Looking at Runva's site...it appears they've dropped the 9.5 and have gone to a larger 11K. It's not a lot bigger...18.5" wide instead of 17.2" of the 9.5Xs.....but as they go up in size, I'm wondering if I shouldn't just plan on a 'normal' size winch and foot pattern (10 x 4.5") in case it ever needs replacing. Really, I'm just trying to narrow the front up enough that the upper links of the XX 4 link are outside the frame rails on compression and articulation. The smaller winch means a smaller nose and more triangulation on the uppers if needed.
 
BTW, are all those tricked out Toyotas yours? I'm a Toyota guy and those look awesome! :smokin:
 
Badass, I have followed your other builds. How much weight would be added with Toyota skins? :flipoff2:
 
Top Back Refresh