What's new

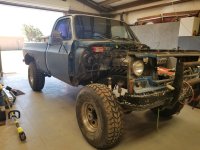
Big Blue - 1975 C20

If high hp is your goal I would be getting splayed main caps installed while at machine shop and it will be stronger than a factory 4bolt main block. No real problem with 454 block unless your going for big stroke crank in future where tall deck would be preferred.
Stronger than a 4 bolt block, sure. At the point of trying to make that much power, I'm ok with spending the extra coin on a block that I know can take the abuse. Stock stuff can work, but at the end of the day, that's a method to avoid spending money. I'd rather spend the money to avoid weak links.
IMO you still need to deck the block to get good quench. The idea is to push the mixture away from the edges of the cylinder, into the chamber.
A dome piston and the outer crown down 0.065 is not ideal.
See how much it adds to the bore/hone machine cost. Plus the deck will be flat.

That cam at 227/241 is a bit high in duration for a big heavy 4x4, IMO.
I'm a bit lost on the .065 down part. Is that what you came up with assuming a .035 compressed gasket thickness? The old forged set were .032 down the hole, and had .020" compressed thickness shim gaskets.

The compression height on the new hypers puts the tops at .025" down the hole.
Basically my options are buy a set of .017" compressed thickness shim gaskets to give me a .043" quench gap, or deck the block.

That being the case, if decking the block is less than or equal to $60, I'm money ahead to deck the block and not have to run shim gaskets. What's your take?

Far as cam goes, I don't really disagree with that at all. It has 4.88s and a 3000 stall converter though, so I have a bit of wiggle room for messing with cams that are a touch too aggressive normally. I have some more reading to do on that part and we'll keep that conversation going:beer:.
 
Bore/hone, installing new pistons, and polishing the crank is going to run about $500.

Which machine shop are you using? I need to get the 5.0L for the race Bronco bored and I was a bit upset with the quality of the work Budlong did on my 4.0L.
 
I'm a bit lost on the .065 down part. Is that what you came up with assuming a .035 compressed gasket thickness? The old forged set were .032 down the hole, and had .020" compressed thickness shim gaskets.

The compression height on the new hypers puts the tops at .025" down the hole.
Basically my options are buy a set of .017" compressed thickness shim gaskets to give me a .043" quench gap, or deck the block.
assumption was 0.020-ish down and a 0.045 gasket. if you can get a 0.017 head gasket that works too.
 
Which machine shop are you using? I need to get the 5.0L for the race Bronco bored and I was a bit upset with the quality of the work Budlong did on my 4.0L.
Dad and I used Doug Anderson for years and years, but he closed up shop within the last year or so, so I'm just as in the dark as you are.
Budlong said about 3 week turnaround and Automotive Head Exchange quoted 2-6 MONTHS.
Danco's phone number is disconnected, and I'm pretty sure Knighton's is dead too.

I have one or two more shops to call and see what the timeline is looking like, but I'll let you know what happens on that if you want. PM me about Budlong if you would please.

I have heard somewhat positive things about Empire, but I haven't talked to them yet. I send you a PM about Budlong.
 
Alright, gonna be doing the waiting on parts dance for a long time from the looks of things, but have tons of suspension parts on order, and getting the engine ready to drop off for machining.

I will need some help figuring out a little snag with my steering though.

A long time ago, I bought a set of Avalanche Engineering flat high steer arms from a PBB member for $125 shipped. I felt like that was a screaming deal at the time. Here's the thing with them, I don't have any idea how to actually run these things, since they're just a big open hole on top. Since Avalanche is defunct I'm also having trouble finding info on how to run them. Pics:
20221005_171930.jpg
20221005_171938.jpg

So, my question: Were these designed to just slap a springless kingpin cap right over the top of them to handle that part of the install? Would it be retarded to install this on top of a springless KP cap?
Requires custom Avalanche parts I don't have and are as good as scrap metal?

ORD is selling some springless high steer arms out of the bargain barn at the moment for like $110/ piece, so that's an alternate option as well.
Forgive my ignorance of kingpin tech, I never really planned on owning or modding one till this truck came about.
 
I have heard somewhat positive things about Empire, but I haven't talked to them yet. I send you a PM about Budlong.
We've used Santa Fe Auto Machine for the engine work we've had done. Had subaru heads and a chevy 327 done through him. Turn around was about 3 weeks for the heads and I want to say 6 weeks for the 327 work we had done.
 
Alright, gonna be doing the waiting on parts dance for a long time from the looks of things, but have tons of suspension parts on order, and getting the engine ready to drop off for machining.

I will need some help figuring out a little snag with my steering though.

A long time ago, I bought a set of Avalanche Engineering flat high steer arms from a PBB member for $125 shipped. I felt like that was a screaming deal at the time. Here's the thing with them, I don't have any idea how to actually run these things, since they're just a big open hole on top. Since Avalanche is defunct I'm also having trouble finding info on how to run them. Pics:
So, my question: Were these designed to just slap a springless kingpin cap right over the top of them to handle that part of the install? Would it be retarded to install this on top of a springless KP cap?
Requires custom Avalanche parts I don't have and are as good as scrap metal?

ORD is selling some springless high steer arms out of the bargain barn at the moment for like $110/ piece, so that's an alternate option as well.
Forgive my ignorance of kingpin tech, I never really planned on owning or modding one till this truck came about.

They don't just bolt over your existing caps like the WFO ones?

We've used Santa Fe Auto Machine for the engine work we've had done. Had subaru heads and a chevy 327 done through him. Turn around was about 3 weeks for the heads and I want to say 6 weeks for the 327 work we had done.
Thanks for the info :beer:
 
They don't just bolt over your existing caps like the WFO ones?
Nope. That's what I figured they did before I got them, but they don't seem to fit over the spring cap. I suppose I don't have an issue keeping the kingpins sprung either, so I can also take a few measurements and just make a cap plate with a grease zerk on it if the height is right.
 
Alright, pardon the lack of updates, Been waiting quite awhile for parts to come in.
Got the frame up on the pipe stands and pulled the 52s out of the back and got rid of the lift blocks. Originally the plan was to just run 52s front and rear, but it turned out that '84 Bronco II accidentally pulled a set of 56s out of upull for me to use in the rear. No harm no foul, that's basically an upgrade as far as I'm concerned :flipoff2:

It would appear that the dudes on other forums are incorrect about using 56s with the ORD shackle flip kit though. They say that you can swap sides with the ORD brackets, meaning that the shackle hangers are closer to the rear. Here's what my shackle angle looks like sitting with just the bed's weight :homer:
20221111_171249.jpg

Probably gonna finish with the swap in the front and see how level it sits and determine where to go from there. Either lengthen the shackle or move the shackle hanger back seem to be the best options, but I'll burn that bridge when I get to it.

Speaking of the front, today I got out and gouged all of the rivets out of the front spring hangers and front upper shackle hanger. I bought some DOM tube and a few bushings to fab up the front upper shackle hanger, so now I gotta get around to finding some time in the fab shop for that.
20221111_171210.jpg

Anybody need stock K20 brackets or a really shitty 4" lift kit? :flipoff2:
20221111_171232.jpg
 
Alright, pardon the lack of updates, Been waiting quite awhile for parts to come in.
Got the frame up on the pipe stands and pulled the 52s out of the back and got rid of the lift blocks. Originally the plan was to just run 52s front and rear, but it turned out that '84 Bronco II accidentally pulled a set of 56s out of upull for me to use in the rear. No harm no foul, that's basically an upgrade as far as I'm concerned :flipoff2:

Accidentally? I am a Chevy retard and sent you a picture of what I was pulling and you didn't stop me :flipoff2:

Nice to see you putting them to use :beer:
 
Speaking of 52s, I got a good half day in on the truck this weekend.
Disassembled the front 47" lift springs that ride like concrete, and threw out the vintage traction bar/ lift block thingies.
20221120_110558.jpg
20221120_110608.jpg


The leaf spring studs on the housing side seemed to be custom turned so that they could run that dorky 2"block setup, so I had to take a little bit of length out of each stud.
20221120_122023.jpg
20221120_122506.jpg
20221120_121946.jpg


Got the 52s I pulled out of the back of my truck on the bench and knocked the rubber bushings and outer tubes out. i always hate this job, but at least the air hammer made pretty quick work of it with the sheetmetal cutter. All that's left for these is to break the packs down and remove the add-a-leaf. Then they should be good to reinstall with the new bushings.
20221120_161721.jpg


Also got the B52 brackets bolted up on the front. Nice to have those big beefy bastards off my desk.
20221121_162414.jpg

20221121_162418.jpg


Footnote about the B52s: I got a random call from DIY4x right as they were about to ship saying they accidentally powdercoated the parts even though I ordered them bare, and asked if that was an issue. I didn't have an issue with it, but only if I didn't have to pay the difference.
They said "Nah that was our fuck up, so you're good, no extra payment needed."
So big thanks to Kert for being solid as hell and giving me upgraded parts with no extra charge. You're a good dude. The powdercoat looks snazzy:grinpimp:
 
Last edited:
I saw the ORD front upper shackle hanger upgrade kit and figured I could just make it myself. I didn't do it to exactly the same dimensions, but I'm not super concerned about it.
20221123_134715.jpg
20221123_140122.jpg
20221123_170533.jpg
20221124_123021.jpg


Had to get new center bolts, good riddance to that add-a-leaf. Found a few cracked leafs in one of the packs though, so looks like I have another trip to the jy ahead of me.
20221202_153721.jpg


Sitting back on it's own suspension finally :emb:
20221202_164548.jpg
20221202_164522.jpg
 
I would want a couple of threads coming through the nuts on shackles. Nice work.
 
Small update: Finished my steering box brace. Stupid looking and heavier than the ORD one, but I made it out of scrap, so it cost me about $11 in hardware.
20221210_134235.jpg

20221217_122834.jpg

20221219_165546.jpg
20221219_165558.jpg


Removed a bunch of unnecessary brackets and crap off the side of the frame, wire wheeled the bitch and threw a coats of paint down. Also ran the wheel on the inside of the frame to clear out the years of ATF grime among other things.
20221219_165604.jpg
 
Any progress I've made for awhile has all been stuff that takes a lot of hours without much to show for it, mostly prepping and painting things that shouldn't really need that kind of treatment but whatever.
Finally got the block and pistons back from the machine shop. It looks great and the bores cleaned up very nicely.
Last weekend I managed to get the block masked, primed, and painted mere hours before a snow storm hit NM. Worked out decently for the cold temps.
20230120_103502.jpg
20230120_105254.jpg


My scissor lifting moto stand turned out to be a real handy tool to get the block up on the engine stand by myself:laughing:
20230129_113631.jpg


Got the crank polished to knock down any high spots. With new bearings we came out to .003" for mains and .002" for the rods, on the money. I'll take it for a battered old crank.
20230129_154137.jpg
20230129_170831.jpg
20230130_181455.jpg
 
I had a good weekend of awesome weather and got a bunch of stuff knocked out that's been on the list for weeks.
20230303_143854.jpg
20230303_143905.jpg

I found these little date stamps on both heads. I'm assuming that was the company/dude that did the porting. Only happened 10 years before I was born! :flipoff2:
20230304_100448.jpg


20230304_092907.jpg
20230304_100555.jpg

I did go ahead and fix the spring alignment issue I was having in the front end by cutting the passenger spring perch off and mocking it back up. After measuring everything out I could not figure out for the life of me why that misalignment was there, but part of me thinks it's always been there and it was contributing to the death wobbling.

20230304_144525.jpg

Got the rest of my wheels and tires mounted up and installed too. Can't wait to see it all put together with these on. Checked steering clearance, have miles of room. :smokin:

Also blasted and painted the headers, finished cutting out some unnecessary booger welded support plates from the middle of the frame, and straightened out some aluminum tube to start running fuel line. Need to order some P-clamps and hardware from Mcmaster to mount that up properly. Next step is get the engine back together, mate it to the drivetrain, swing it in and start running all the plumbing and fun stuff.
 
Last edited:
Finished up assembling the engine a few weeks ago, at least enough that it could be hauled out of my work space, mated up with the waiting 4L80 and tcase, and throw it in the frame, finally! Also threw in some poly clamshell refills because the old ones were duh-stroyed. That's why the pan was hitting the crossmember :lmao:
20230323_195238.jpg
20230326_144630.jpg
20230326_144639.jpg
20230325_172641.jpg
20230325_170746.jpg
20230326_145813.jpg
 
Last weekend and this weekend I focused on the trans crossmember. The stock TH350 mounting foot hangs down a lot, and the factory member's mounting surface is about 2.5" below the bottom of the frame. Even with the big poly mount bolted onto the new 4l80 adapter, it still wanted to be mounted exactly flush with the frame, and about 6" backwards to maintain ~7* of output shaft angle. Went ahead and fabbed up an easy little cross bar from .188 1x2 rectangle tube with a dip in one side for driveshaft clearance.
20230409_133137.jpg
20230409_133110.jpg
20230409_133104.jpg

I try to put at least one half decent weld on every fab project :flipoff2:
20230409_133152.jpg


Also got my aluminum fuel lines run this weekend. They are far from pretty and tbh they're kind of a pain in the ass and I'll likely run stainless next time around. But they're in!
20230409_132933.jpg
20230409_132939.jpg
 
Had a really good weekend not too long ago and got most of the exhaust run.

20230429_114906.jpg
20230429_114916.jpg
20230429_130103.jpg
20230429_151921.jpg
20230429_151932.jpg
20230429_192105.jpg
20230429_192145.jpg


The summit grommet style exhaust hangers are pretty sweet, Liked the way they worked a lot. For the $15 price tag though, I think I'd rather buy the grommets, get the hardware separately, and cut my own plates. Here's a link to them.
Send it
 
Exhaust was Saturday. On Sunday I got it looking like an actual truck again. Seeing it start to come together was a hell of a feeling
20230430_090206.jpg
20230430_100728.jpg

New cab mounts, Really needed those!
20230430_101342.jpg
20230430_104848.jpg


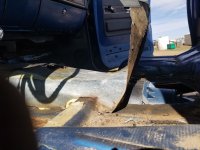
Time to start addressing some stuff happening in the cab now that it's back on. Pulled the nasty ATF soaked and rotted carpet, along with the old sponge insulation that was kinda rotting the floor pans. The work done to the trans tunnel originally was... interesting. Not a lot of metal work, just a few rivets and a whole fucking lot of spray foam and silicon :lmao:
20230507_160227.jpg
20230507_160236.jpg
20230507_163829.jpg
20230507_163856.jpg


So next I'll be cooking up some new transfercase shifters and making a doghouse for the floor under the seat. From there I'll likely make a console type of thing to house the Winters shifter and cover up the rest of the hacked off trans tunnel cap.
 

Attachments

  • 20230507_160311.jpg
    20230507_160311.jpg
    3.9 MB · Views: 6
  • 20230430_103718.jpg
    20230430_103718.jpg
    3.6 MB · Views: 7
Well it's been like two months. I've done quite a bit of piddly things over that period of time, but I've basically been working toward getting the engine fired up and the cam broken in. Front accessory drive is figured out and installed, new radiator is installed, new trans cooler and lines are installed, and everything's filled up with fluids.
Started messing around with the wiring, and to be honest it's not all that bad. Having a hard time deciding what needs to go and what needs to stay in some instances, but as I get the EFI kit in and start hooking that up, I think a bunch of those questions will be answered.

Anyway, I got the cam broken in with no flat lobes! I'm pretty happy with the sound. Sounds like an average turdly big block running through glasspacks :smokin:
IMG_0258.jpg
IMG_0259.jpg


I made sure to wish my neighbors a very happy 4th of july at 9:30 this morning :usa::flipoff2:
 
Last edited:
Side note: is Lugnut 4x4 still the go to for a complete disc brake kit on the 14b? I could save money using someone else's caliper mounts and a trip to the jy but I can't be bothered at the moment.
 
Top Back Refresh