What's new

YJ unlimited build

figured I'd stop by and give a quick update. I have been chipping away at this thing a little at a time. Its mostly an hour here or an hour there. A lot of time spent taking measurements of things.

The next step I needed to start was working on my cage. I first added some braces to the middle part of the cage so that when I cut off the rear none of the tube would move on me. After that I chopped off the rear. These pictures really suck but it's all I took at the time.


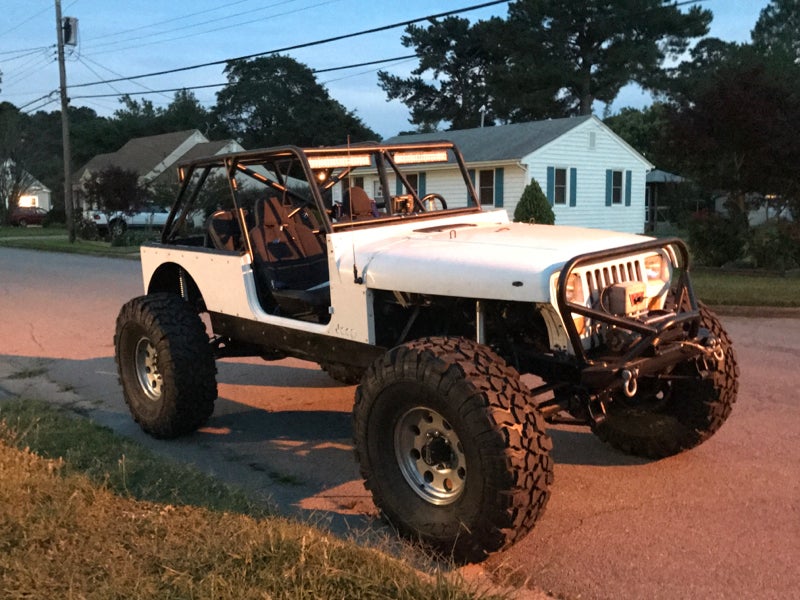
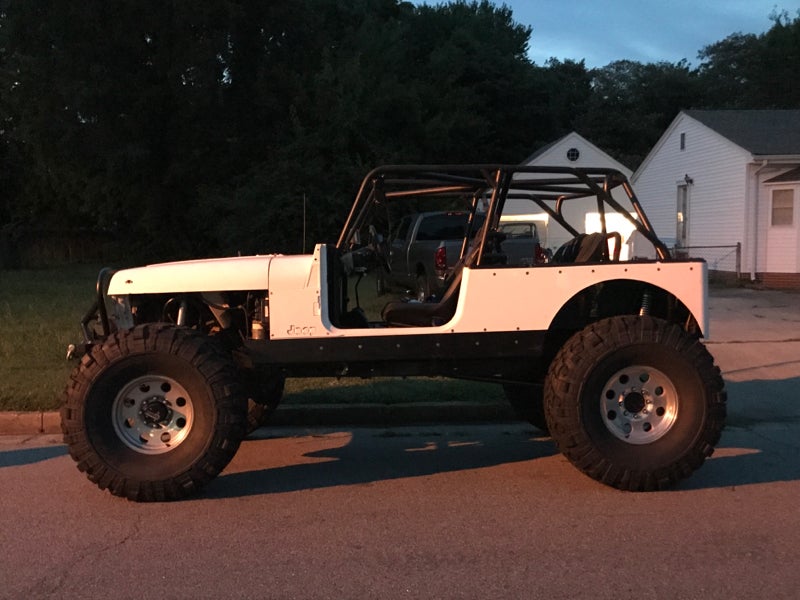
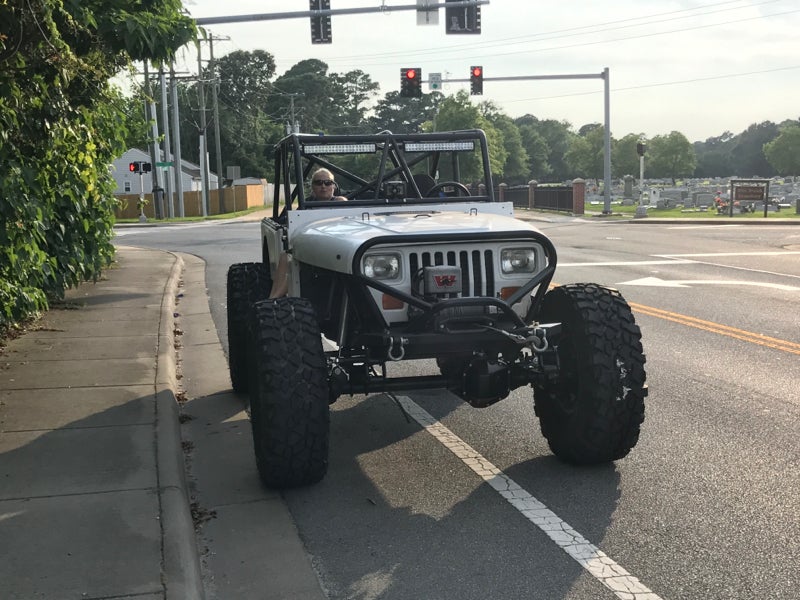
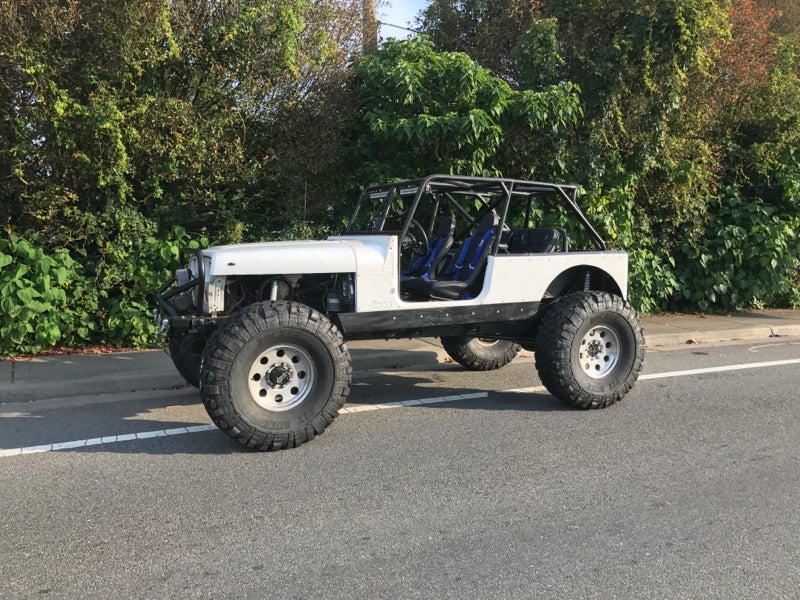
Then I rolled it out of the garage and the wife and I threw the front half of the cage in it. You get get a pretty good look at the stance in these picture too. The rear suspension is still just tac'd in place with PVC links and some tube holding the frame up.


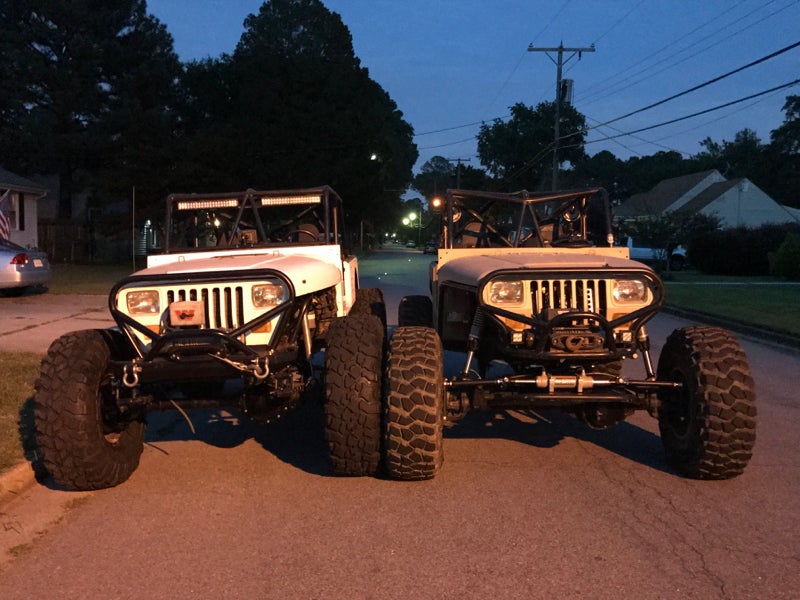
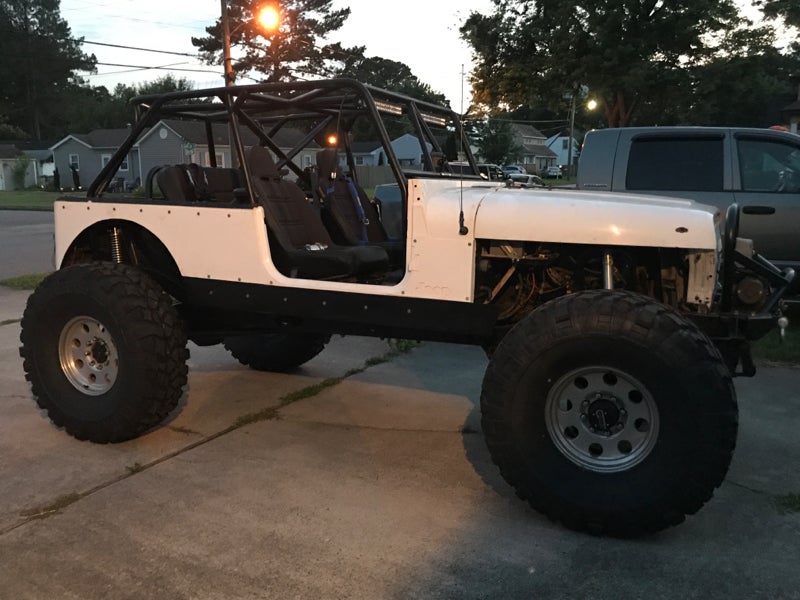
And I've been slowly knocking out the rear pieces throughout the week. Making my internal slugs is what takes the longest. They are 1.5x.250" DOM that I have to shave down to press fit into the main cage. You can really start to see this thing coming together when you see it with the rear bars of the cage sitting in place. I will still be adding a halo to the rear to give more overhead cover for the back seat.


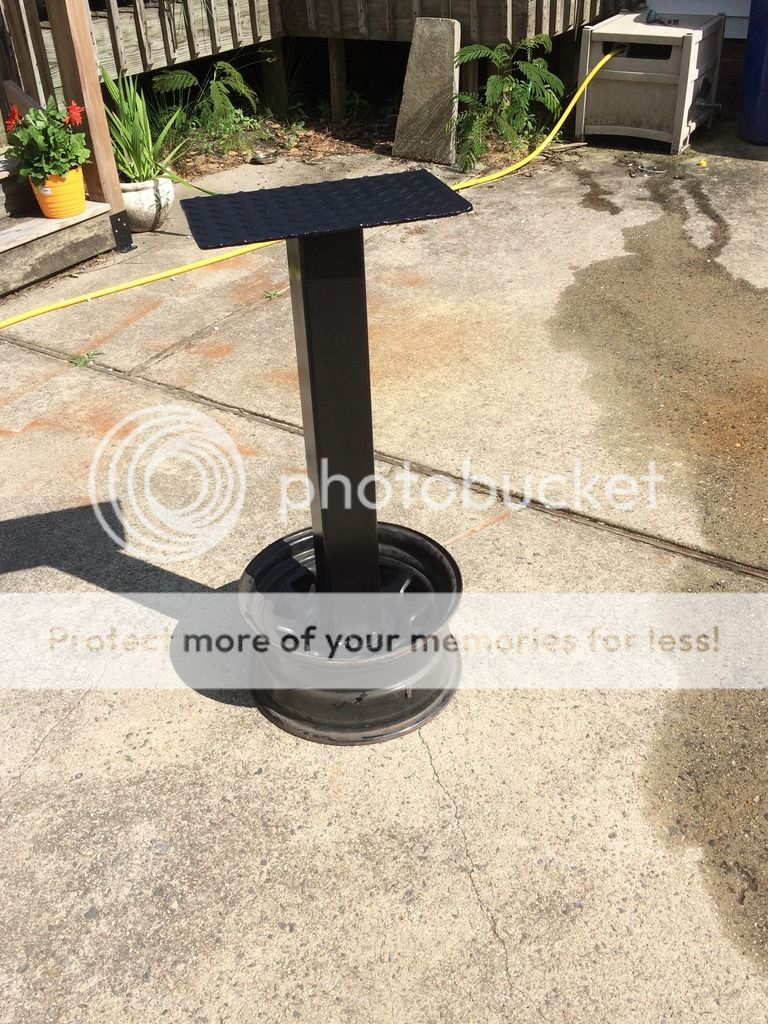
I also got myself a couple other items for the garage to make life easier on myself. The first thing I picked up was a cheap HF benchtop belt/disc sander combo. I didn't want to take up anymore room on my workbench though and I didnt want ANOTHER tool that I'm tripping over in the center of the garage so I made a pretty low profile stand for it. It now sits on the stand up against the wall right next to one of my outlets. Not in the way at all.


This thing has been awesome for tube prep and shaving down my slugs. I thing it'll work pretty good shaping brackets as well. Its not the strongest motor in the world but its working well for what I need it to do right now.


The stand I made out of a spare wheel I had, some of the 3x4x.25" box tube that I made my frame extensions with and some 1/4" diamond plate I had laying around.


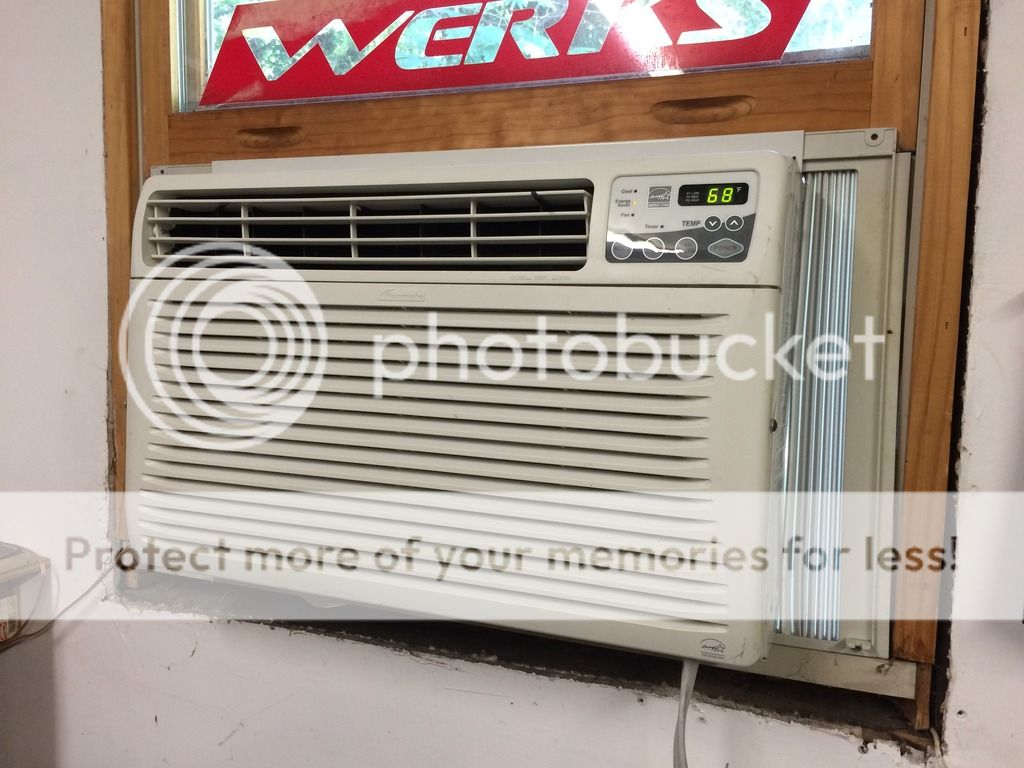
The other item I got for the garage has made the last couple days a dream. I picked up a window AC off of CL for about half what they retail for. Ive been working in that garage all week with the doors shut and not sweating AT ALL. Its freaking AMAZING.


Well thats all for now. I will keep plugging away on this Jeep. Hopefully get some good time in this weekend.
 
Worked a little more on the rear seat mount today. I made it removable so that anytime Hayden isn't with me I can pull it and have more interior room. The only thing that sucks is the only way to actually get it out is to remove the seat from the bracket and pull the seat and seat bracket/frame separately through the side of the cage between the B and C pillar.


So I have an old bikini top that a buddy gave me about 4 yrs ago that I was really hoping would still fit. I used it before with the stock cage but couldn't use it with my last cage because it was a fastback cage and this bikini top is the type that extends all the way to the rear. I really like it though because its super heavy duty and is even padded so it helps keep it from flapping a lot like most bikini tops. I threw it on today to see if it'll work with the 15" stretch and new cage design. I'm happy to say that it fits great. It stops a little past the rear seat so it'll provide great shade for Hayden.


You can see it on my old setup in these 2 pics


And on the new setup


Also gave my trailer a good pressure wash and a some new paint yesterday. Looks brand new now.

 
Been working on the rig a lot lately. I finish welded the side pieces and have spent the last couple weeks doing body work. I hate body work and really suck at it. I also cut out the rusted windshield mount area on the tub and welded in some new pieces as well at bolted up the new windshield mounts I got.

I decided to roll it outside to get a better look, as well as clean my garage. With the body work going on the last month my garage is DISGUSTING. There is dust EVERYWHERE.

I have some Genright LJ blanks in the mail hopefully. I ordered them from a company called "knowwhere2jeep", they had the cheapest price and cheapest shipping. Well that was a mistake. I made the order 3 weeks ago and it still says my order is "processing". I emailed them 2 weeks ago about it and they emailed back saying they are being shipped out soon and I should see them in 4-5 days. Still nothing. Im gonna wait a little bit longer before I cancel the order. It wouldn't be so bad if they just gave me updates. I got the initial email thanking me for my order and an order number then that was it. No shipping notice or anything.


After I rolled it out of the garage and took some pictures it decided to rain cats and dogs. A mad dash to the shed, I was able to throw some tarps over it real quick.


I still have to lot left to do. I have just a couple more things to do on the cage and that'll be done. Then I will work on my ORI mounts. Once I get those fitted good I will pull the cage and body again to finish up the rear suspension. Probably paint the body while its off then I start putting everything back together. Ugh I'm tired thinking about all of it
 
I received a phone call today from Knowwher2jeep. They said Genright told them 2 weeks ago that the LJ blanks would be in the mail soon. Apparently Knowwhere2jeep called them to check the status and Genright said the corners are out of stock and it'll be another 2 weeks. They asked if I wanted to cancel my order and get a refund or just wait it out. I told them I will reluctantly wait it out as Genright is the only company that sells LJ blanks to begin with. Soooo now I just play the waiting game some more. By the time the corners get here the tub will probably be pulled from the frame again.

Also ordered some stuff to make a ORI dual charging setup. I still need a bottle and a couple hydraulic lines. This build has drained my bank account. Im just trying to push through and get it done. Wife tried to say it had to be done by the end of the summer. that's not going to happen.
 
Turned my focus back to the rear suspension again. I went to the junkyard yesterday and grabbed a Cherokee CV driveshaft for $19 to cut up and use as a mockup and trail spare shaft. Every other time I've used an XJ shaft I have had to significantly cut it down. Well to my surprise (really shouldn't have been a surprise) I had to lengthen this shaft. It almost fit without modifying it at all. I ended up lengthening it 2.75" to fit my application. I need to call a local drivelineshop next week and see if they have any 1350 yokes I can buy and I also want to see if they'll balance it for me.

Here was the process.

first thing I did was draw a line down it to make sure it was phased correctly when I put it back together. Then I threw it in the bandsaw and cut it in half.


The shaft diameter ended up being 2" x .120 wall. Perfect I have plenty of 2x.120. I cut a piece off at 2.75" and also found a scrap piece of 1.75x.120 to do an internal sleeve with. This piece was about 9-10" so it goes about 3" or so on each side into the existing shaft. I also drilled (2) 5/8" holes in the extnsion piece to do plug welds.


after that I tapped(with some force) the pieces together with a mallet.


Then I welded it up. I welded it in about 4 small sections on each side, making sure to rotate sides and let it cool for a bit before I ran another pass.


After the driveshaft work I went to town replacing the PVC links with DOM. I am using 1.75x120 for my uppers and 2x.250 for my lowers.


Heres one of my lowers before I tac'd the tube inserts and installed it


Then it was time to check for clearances again. I think I'm gonna raise my ride height about 1/2" and get 6" of up travel in the rear. As is I can only get 5.5" before my upper axle link mounts hit the tub. I don't want to clearance the tub right there in the cargo area because I plan on mounting a fuel cell basically right where they would come into the cargo area.


I did have to cut out the crossmember where the body mounts are and where the stock fuel tank mounts. It was really restricting my travel


you can see where it used to be in this pic. As you can see I cut it out while doing my links. The reason for that is I couldnt even get my upper link out with the crossmember in place.


With about 1/8" until I hit the tub I was still hitting what was left of the crossmember on my truss. I just trimmed it up another inch or so and was good after that.


upper links go slightly into the floor. I will make a tunnel/cover for these


full bump


Driveshaft at bump. I know everyone is jealous of that driveshaft length. The angle at ride height is sweet too. No steep angle like with a lifted stock wheelbase YJ.


Then before I called it quits I clamped up a shock tower to the frame to see what I'm working with. Im trying to keep the shocks out of the tub and its proving to be slightly difficult. I will be frenching these towers into the frame. I "wanted" the ORIs to be vertical at bump but that's not going to happen. I will have to angle them back a little bit. The collapsed length of a 14" ORI STX is 21.825" and I have about 21" until I hit the wheel well.


I also have some fittings and a regulator in the mail for my ORI dual nitrogen fill setup. Holy cow getting a nitrogen setup is expensive. I have about $400 into it so far with regulator, hoses, manifold, ball valves, fittings, bottle etc....

The good part it refills on my bottle are only $17.
 
Got the frame notched and the towers frenched in. I was trying to stay under the tub but it just wasnt going to work the way I wanted. I ended up cutting a hole in the wheel well and pushing them up a little bit. I think I will weld a little raised cover over these. I need to air up the ORI's and start flexing it out to check clearances. I need to cut some more out of the upper wheel well as well. I plan on running wheel spacers in the rear to add a little width to the narrow 65" Eaton, hopefully the ORIs will clear now though without the spacers. If not I will make up some mock spacers for now just to see if they clear.


Heres a couple pictures.


Sorry for the lack of updates lately. I've been real busy at work plus I kinda got burned out on the Jeep. Im trying to keep slowly picking away at it.

A few weeks ago I decided I wanted to roll it outside and flex it out to check clearances again. Here are just a few pictures. Also I put some wheel spacers on the rear to push out the 65" rear WMS a little closer to the front.


Also after 2 months of waiting on my Genright LJ corner blanks I cancelled my order. I ordered them through Knowwhere2jeep.com and Eric kept telling me they were shipping soon and they never shipped. I got tired of playing games with him. I was then going to just order straight through Genright but they want $140 for shipping, screw that. I ended up just ordering a set Poison Spyder Daddy Longlegs corners. I called them and got a military discount plus shipping was pretty cheap. All in all I got these corners delivered to my door in less than a week for less money that Genright's blanks are without shipping.


So the Poison spyder corners are built for the Daddy Longlegs build which has a 4" rear stretch and has wheel cutouts for a true 40" tire. I figured this would be a good start. I knew I would still have to move the wheel cutout just a bit.


Here is the driver side mocked up. Turns out I have to move the wheel cutout more than I thought


So the first step was to cutout the radius on the back portion where it needs to be.


Then I had to cutout some 3/16" to extend the frontside of the wheel cutout.


Tac it up and cutout the shape. For the passenger corner I just used the piece that I cut off the rear portion and welded it onto the front. It kept the 40" tire shape and just moved it back about 3-4".


Then I pulled the corner guard and cut the excess off the bottom, welded it up and sanded it smooth. Looks good as new.


The other thing I needed to do was extend my rockers guards. I worked on the drivers side today. I will do the passenger another day.


I cut out a piece of 3/16" that measures 21"x11".


After that I cut a slice all the way across that was 6" down from the top. After I slice it I bent it up to match my current rockers and welded them together.


Now it was time to start welding and sanding. I forgot to get a picture after it was fully sanded. I'll snag one later.


Then it was time to mock everything up again. I still need to make more adjustments but I'll do it another day.

 
Not too much to update. I finally got my armor mounted up on both sides.


I snagged these side pieces from the clearance section on Genrights website. I had a big dent on my other tub on the passenger side in this spot so i figured it was worth the $50.

 
First thing today was to clean the darn garage. It was a complete pig sty and I kept tripping over things trying to work on the Jeep. After that it was time to work on the next phase of the project. Now that the armor was all good I wanted to start patching the holes I cut in the tub for the ORI mounts and my upper links. I knocked out the holes for the ORI mounts today out of some 16G. didn't take too long.


Also knocked out a air/hydro kit on my bender yesterday. I have a buddy that lives down the street that is building a one ton YJ with a 5.3l and we decided to go halves on the swag setup. He bought the mounting kit and I bought the ram. Win/win for both of us. I let him use my bender whenever he wants and I've wanted to do the upgrade for a while. I knocked out a quick rolling stand for it out of some scrap 2x4 steel I had and he welded up the ram mount. Turned out pretty slick.


I wanted to add some gussets to my rear halo bar to prevent it from collapsing or deflecting in a certain area so I spent a couple hrs in the garage yesterday and got those knocked out.


Heres how my halo is built. You can see how that bend/corner just kinda sticks out with no support.


last week I bent 2 pieces at a 90 in preparation for these gussets. Did I tell you how much I hate notching on a bend?

Mocked up


and welded


Buddy and I bent some more tube today. He wanted to bend up a grill hoop and winch guard for his buggy. I bent myself a winch guard and will probably bend up a grill hoop tomorrow. We still need to bend his ram mount tomorrow that is made from 1.75x.250 DOM. I also bent my harness bar for the rear seat. Got that notched and tac'd in today. Tomorrow I may fully weld it in.


I also checked clearance for the overhead cross bars in the rear for my son. With him sitting in his booster seat he has 6.5" to the bar directly above his head. When he starts getting closer to it i'll remove the booster seat and he'll shrink back down again. I figure I can get a couple years out of it before I need to figure out another way to route the overhead bars.


Trump wins the election and my wallet is already lighter than it was yesterday. I stumbled across a FB post from Pitbull tire that said they made a promise that if trump wins they will do a one time only 50% off sale.


......With that said I now have (4) 41.5x13.5R17 Radial Rockers in the mail hopefully.
 
Sorry for lack of updates. Only thing I've done lately is pull the cage to get it finish welded and I painted it because it's going to be sitting outside for a while, while I finish up some body work and pull the tub again.


pulled the cage on thanksgiving when I had a bunch of guys from work come over.


Painted(rear seat mount is in garage)

 
Been busting butt in the garage the last few days. A lot of things got done but it doesnt look like it though.


I was able to finish weld and patch up the tub. Then I wire wheeled all the bare steel and threw some paint on it until I do some monstaliner or something. You can see I tried to mimic the hump that goes down the middle to try to add some bracing and sturdiness to the stretch panel. didnt turn out too bad seeing that I dont have a press brake.


I also wanted to tie the underside of my rockers into the bottom of the tub or something to keep my rockers from getting destroyed from bending like the old tub. I whipped these little brackets up to tie into the body mounts like most companies do. I added the little brace on the top so the pieces I bent wont get flattened off-road hopefully.


Then I removed the hood, windshield and all the armor again to get the tub pulled.


Only thing left to do is some exhaust. I got my TJ exhaust downpipe today and will work on some of the exhaust before I pull the tub that way I can finish weld it while not laying on my back welding overhead.

Thats all for today. Should be more progress again soon.
 
Got the exhaust figured out today and finally pulled the tub. Once I got the tub pulled I pulled all the rear suspension and the axle in preparations to get everything finish welded. Heres a few pics from today(don't mind the drawings on the chalkboard. Had some friends leave me some nice drawings when they came over on Thanksgiving)


Then I decided to do some work on a 55 gal drum I've been using as a fire pit/burn barrel. I freehanded this with the plasma.

 
Spent some time welding up the rear suspension brackets. I dont think these brackets are going anywhere.


Made some gussets for the rear shock towers. Cut em with the plasma, shaped them up a little bit and drilled some fancy speed holes.


Been a little while since I posted anything. Since the last post I got the frame finish welded, painted and moved back outside. I then brought the tub in and started on the body work again. I got the body work finished then I sanded it and made it ready for paint.First step was prime then lay on some paint. I am using Rustoleum Topside paint as it has UV protection in it and should be a lot easier to touch up seeing that I can buy it at Lowes. I had an internal battle with myself for the longest time on if I wanted to do a real paint job with expensive automotive paint or go this route. I did the first 3 coats by rolling it on but didn't like how much orange peel I got plus it was hard to get good coverage along the cowl area and along the door sill area. After some extensive wetsanding I decided to spray it. The paint lays much flatter and I haven't experienced any orange peel yet. I've done about 7 coats so far(3 rolled and 4 sprayed). I'm gonna do maybe one more coat then I will wetsand and polish.


sanded with the DA sander


Primed


And my makeshift paint booth. I think this is after 3 coats of roll on and one coat of spraying. It looks a lot whiter in person.


Been a little while since I've updated this. I'm still working on her, just don't update this thread very often anymore.

Since my last update I've got the dash and steering column completely reassembled and got some more parts in the mail.


I decided on a fuel cell to run and had that delivered recently. I've been hearing and seeing a lot about the aluminum RCI 2161a cells cracking the last couple years and definitely dont want that in the back of my mind everytime I go out, especially with my son in the back seat. I decided to get the RCI 2161jd which is a bladdered cell. It is a plastic cell inside and aluminum can. It is the same dimensions as the 2161a except the outter rim.

This was the best packaged part I have ever received. There is no way this would have ever been damaged during shipping.


One problem though, I already bought the Artec mounts for the 2161a a couple months ago when thats the cell I thought i was going to run

Easy fix hopefully. I plan to cut up this RCI cell mount


and make it so it bolts to the cell flanges like their Jazz cell mounts.

 
More parts....

I've been looking for a set of 5.14 gears to replace the 4.56 gears I currently have in my Eaton HO72 for a while now. You cannot buy new gears for these axles so you have to search the U.S. for the parts you want or need. I finally found an entire 5.14 3rd member on Ebay and got that shipped all the way from MN. The crazy thing is even after shipping I was able to get this 3rd member to my door cheaper than a brand new d60 or 14B ring and pinion alone.


Heres my beautiful unicorn. the 5.14 Eaton HO72 3rd member with load bolt


More parts......


So after almost 4.5 months of waiting I finally got my Pit Bull Rockers. I could talk about them all day or I can just put up a bunch of pictures of me playing around with them. I took them this morning to get the rims swapped out from the old tired MTRs. I also put a picture of how tall they measure and a picture with a level on the tire to prove i was measuring it level.

Pictures


Chipping away at the build.


Finished closing up the cutouts in the wheel wells


Then I rolled on the monstaliner


After letting the monstaliner cure for about a week it was time to continue the reassembly. I painted my rockers and got them installed then I installed my corners so I could do the final wheel cutouts for the 41.5's. I also installed my hood off the old Jeep and was surprised by how well the color matched. Im going to run this hood to save time by painting the other hood.


Then it was time to install the cage. The cage was A LOT heavier than I remember. I did it with an engine hoist and a friend to help out. I really should have invited about 5 more people over.


The corners have been removed again and I welded up the TJ fuel filler hole and will get them painted tomorrow then reinstalled.

I still need to order my fuel fittings and hoses, everything to regear and build my front axle and my steering. After that it should really just be little things like wiring switches and running brake lines. VERY busy work schedule so I will knock things out a I have time but this wont be finished within a month or anything
 
Corner guards and cowl armor painted and reinstalled


Then I started working on my grill hoop. I still need to notch up the connecting bar for the drivers side. My hole saw took a crap on me and I was too tired to go buy another one. I just have a piece of PVC mocked up on that side.


Been a little while since I've updated this. Been out of town(out to sea) a lot with work but I am still knocking things out.

Since the last update I finished the addition support for the bumper. It is all finish welded and sitting off to the side until I'm ready to mount it back up.

Here it is all tac'd together


Then I focused my attention to my fuel cell mounts. Again remember that I have a bladdered cell from RCI so the standard Artec 2161a mount won't work. So i did what any sane person would do. I cut up the Artec mount and made it fit to what I needed. I used the sides and the bottom from the Artec kin and fabricated new top pieces out of 3/16" plate and used some angle iron to tie the sides into the top. I think it turned out pretty sweet looking.


After that I went on a Navy paid vacation to Key West, FL. I was gone for almost 3 weeks but only in Key West for 3 days. We rented bicycles and went around the whole island in about 2 hours.

Heres my Ship moored up in Key West


some of the Island looking from the top of a lighthouse


And finally a shot of us doing an underway replenishment with a refueling ship while out to Sea.


Once I got back it was time to hit the ground running again. I started the day off by staying in the garage all night and getting my front axle pulled from under the Jeep and completely torn apart to regear it. The following morning I took it to a friends house and we started the regear and ARB installation. This was my first time doing a regear so we took our time while he showed me what to do.


From the angle of the last pic the SOLID diff cover looks good but from all the other angles it isnt. As soon as we bolted it up we noticed that it wasnt a good fit at all. In some places the cover didnt cover part of the sealing surface and in other places the cover was overhanging the housing by about 3/8" or so. I called Solid and they said to ship it back and they'll refund my money. I've used Solid covers in the past and had great fitment but this time I wasn't as lucky. Instead of shipping it back and having them send me another cover I decided to capitalize on Ruffstuff's weekend sale and I ordered a cover from them.

Heres are a couple pictures of the fitment


This is the top of the housing where the cover is overhanging


And this is the bottom. If I went out wheeling like this I would probably end up ripping the cover off


Here's a couple spot the cover isn't covering all of the sealing surface


At some point I still need to do my rear 3rd member. I need to switch my welded carrier over to the 5.13 third then reset my backlash on it. Here they are patiently waiting on me


After the regear I focused my attention back to my fuel system again. I spent all night Sunday night plumbing my fuel lines. I used Russell twist-lok hoses and fittings for everything. I ran all new line from the fuel cell to the fuel rail and back. Also ran new vent/rollover line from the cell to the charcoal canister. I am running an e2000 fuel pump and small Russell inline filter right after the pump. I was able to mount the pump in the bracket for the stock fuel filter. I did move the bracket aft a little bit.

Today I was able to go out to the garage and wire up my fuel pump using the stock YJ fuel pump/sending unit wires.

quick glimpse at the setup.


Then I was finally able to start it.This is the first time in over a year that she has been started. Took a while to prime the new pump and lines but she didn't let me down. during the build I completely redid my exhaust from the manifold back and installed a smaller muffler to fit with my 4 link and it surprised me how much quieter my new setup is. I like it. I have a small video but it wont let me upload it for some reason.

And a closing shot for the evening. Next thing is to probably roll my front axle under her again then install my new 35 spline inner and outter chromo shafts and 35 spline drive slugs. Also in this picture you can see my hydro assist steering setup in the box by my rear axle. I picked up Carey's(bgredjeep) old assist setup when he went full hydro.

 
Got some more work done today. First thing I did was change out my steering arms studs with ARP studs. Im not sure what kind I received with my steering arms but they just looked like a piece of all thread and I really didn't trust it. Heres a comparison to an ARP stud


After that I got my front axle back under the Jeep and started installing all my fancy new parts. Yukon 35 spline inner and outer chromo shafts and 35 spline ECGS drive slugs.


Assembled


New 35 vs old 30


No more lockouts for me


Alot more low profile than the stock lockout

 
today was a really big milestone...

3372562d1499050847-project-white-squid-one-ton-yj-image-420069510.jpg

3372578d1499050927-project-white-squid-one-ton-yj-image-2321208677.jpg

3372586d1499050951-project-white-squid-one-ton-yj-image-3535766389.jpg

3372594d1499050991-project-white-squid-one-ton-yj-image-3509237618.jpg
 
Well this sucks..... stopped on the side of the road about a mile from the house. My rear brakes have been locking up on me. Did some research and it looks like my proportioning valve is the culprit so I gutted the internals and will try again later.

3373514d1499125253-project-white-squid-one-ton-yj-image-3829658853.jpg


She does look good in the sun though

3373538d1499125470-project-white-squid-one-ton-yj-image-311303435.jpg
 
Top Back Refresh