What's new

The Bodywork Thread before you get to Fleckers Paint Thread

So, explain to me the differences in body fillers.

At the last swap meet I went to a guy was selling Evercoat fillers. He had Rage and Rage Gold for sure, but probably others as well. There is another swap meet this weekend and I'm sure the same guy will be there. I'd like to pick some up but I don't know what I need.
All depends on application.

Evercoat is my go to brand for pretty much everything. Rage Gold is REALLY easy to sand and lays on like butter. Typically the lower grade stuff takes a bit more sanding and may get some pops/ holes in it. The Rage Gold tends not to have that issue and is finer. That's pretty much it.

I will use this as an initial pass, may have a pinhole here and there, but sands easy enough:


And this for a final pass:


There are other fillers for specific needs like "metal glaze" and whatnot, but the above mentioned will pretty much do everything. Only time I break out metal glaze is for filling scratches or knicks.
 
So, explain to me the differences in body fillers.

There are other fillers for specific needs like "metal glaze" and whatnot, but the above mentioned will pretty much do everything.

Yeah, the answer depends on how far down the rabbit hole you want to go. If you're just looking for good general purpose fillers, flecker pretty much covers it.

If you're looking for special applications, there's the fiberglass reinforced options for "structural repairs," extended work time fillers, glazes and putties for final finishing of scratches and small imperfections, aluminum fillers to reduce shrinkage, flexible fillers for "plastic" panels, and more...
 
IMG_20220601_165217407.jpg


We're getting closer. My wife has taken an interest in finishing this thing and she LIKES sanding. WTF? Nobody likes sanding.

.
 
IMG_20220605_150022584.jpg


And I hate these fucking doors. I wish we would have bought some. I was unhappy with the result of the patch panels on the front. Probably put too much heat in them and they were wavy as shit. I cut out everything between the bumps and bent some 18 GA sheet steel and glued it in with this

61spbbEauZL._AC_SL1500_.jpg


They're much better but they I still hate them. It'll look fine at night. . . or really far away.

.
 
Bumpity bump
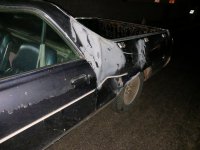
My Uncles car has a lot of sentimental value to him and got rear ended by an uninsured wet back.
I've got questions, figuring I'll probably post this in here versus "other builds " since I'm hoping for a 1 day quarter panel replacement, then give it back to my uncle to sand obsessively before a car port single stage paint job

20220925_185600.jpg
20220925_185524.jpg
20220925_185535.jpg

20210426_135751.jpg

I'm looking for pointers, and do I need to buy a nifty flange maker tool? The inner panel is kinked some, the car seems to track straight. My tentative plan is to remove the bed trim, tailgate bumper and back window because I don't want to twist it and pop it. Maybe cut the B pillar low, like at the belt line, remove the outer entirely, then pull on the inner anchored to my service truck, backhoe, heat it and beat it till its in place, weld it inside the door seam, at the pinch weld at the bed trim, maybe use a flange tool on the B pillar and over lap and tack tack tack low and slow?

I have a harbor freight spot weld drill bit, is there a nifty method for peeling the cut panels off? I'm looking to save some time here.
 

Attachments

  • 20220925_185548.jpg
    20220925_185548.jpg
    5 MB · Views: 9
Woof. Good luck with that.

Spot weld drill or a 3/8" drill ground with a real real shallow point works great. Rotabroach set is the best though.

Once the spot welds are cut I use a chisel or scraper to split it. Nice and slow.

Shouldnt need a flange tool if you cut the panel out to the original stamping. It will be flanged and spot welded, or but welded/brazed, or welded underneath, all the way around. Finding the seams can be tough.
 
20221203_135219.jpg
/attachments/20221203_135250-jpg.617040/?hash=870bc7d538bf953172a590d7dc90adbc
20221210_093833.jpg
20221210_104855.jpg
20221210_104919.jpg


We got some heat and beat time in this week.

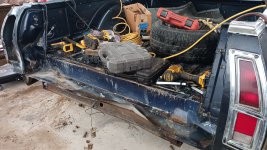
We started by cutting off the outer skin/ and drilling spot welds, then pulled straight back on the left side, the front frame anchored to my backhoe, and the left quarter straight back to the service truck, while heating and tapping the wrinkle out behind the cab. This was working, but it was still pretty fuckered.

The left hand side was hit so hard that the right side was pulled over probably an inch at the back, with a weird pressure dent on pass b pillar. I'm managing expectations on the clunker, and frame straightening isn't in the time/ money budget.
This morning I cut up a chunk of mobile home frame and welded it to the bed.

Using a ratcheting chain binder for the controlled pull.

The angle pull was very effective, all in all, the bed floor was probably 2.5-3" forward on the driver's side to start with, now it's even. Next go around is slicing and dicing the donor quarter.

The donor quarter looks like was spliced onto the car we cut it off of:laughing:

Our car has some rust in the inner wheel well.

The quarter install might not be by the book
 

Attachments

  • 20221203_135250.jpg
    20221203_135250.jpg
    3.4 MB · Views: 7
So I managed to cut the B pillar right below the factory seam, and apparently they were still using lead in 78. Between the lead, and running my little Flux welder off an ext cord (I have a nice big mig, but don't have my work area wired yet) I have a lot of grinding to do:laughing:


All in all, for a hard as it was hit, I'm pretty happy with the progress so far
 
Working on the Ford today. The box had some previous bondo in it.
1.jpg

It was almost a half inch thick.
2.jpg

3.jpg

I did somebody's trick with the welded washers and a homemade puller.
4.jpg

5.jpg


and Bob's your uncle

6.jpg

It's not perfect but it's a whole lot better than it was. It's like they didn't even try.
7.jpg


Whoever mentioned the washer trick in here. . . Thanks :beer:

.
 
After that post ^^^ , I discovered that the panel was bowed out at least 3/8" from the metal being stretched. I watched a shit ton of YouTube to figure out how to shrink the metal. Nothing seemed to work and only made shit worse. After much trial and error, I figured it out and shrunk the panel enough to be tucked in so I needed less than 1/8" of body filler. It goes like this.
Heat tiny area to 'not quite orange' with propane torch, you can see the area bulge out as you heat it, body hammer around and very close to the heated area to move the metal toward the heat. Then cool rapidly with wet sponge. Repeat 10,354 times.

IMG_20230415_114744030.jpg
IMG_20230415_141708226.jpg

When the bondo is cold and rubbery, use one of these to shape it so you don't have to sand for fucking ever.
IMG_20230415_142404598.jpg

Much sanding later, I have the epoxy primer on.
IMG_20230509_165545782.jpg

The inside of the bed is taped off because we did POR15 inside the whole thing, covered it all with black rustoleum, and will be doing bedliner later. because overkill.
 
Now, Seamfill for the seam above the bump. I used the caulk tube kind. That went very poorly. It went in like caulk, but you can't tool it like caulk. Nobody mentioned that. It turned instantly into a chewing gum consistency that took two hours to clean back out. I'm forming a new plan. I think taping the edges and pushing brushable seamfill in there cause that seems to go in smooth. Not like gum. Oh, and "Cleans up with mineral spirits". It fucking does NOT!

56.JPG

Loving your work, thanks for posting


When you get a seam fill that works, please post it up
 
Yesterday we dropped ours off for a $700 scuff and shoot. I would have liked to have done it at home, but not in the cards right now

20230513_122252.jpg


Edit: sought off topic

I'd like to have done something with the wheels. Nothing really looks cool on the car, as it has no style, and my grandfather had a thing for "use later model ford alloys on older fords" so I'd like to clean these, or paint these

I have a tire machine, so dismount is easy

Oven cleaner? Paint them silver? Sand blast?
 
I'd like to have done something with the wheels.
[snip]
Oven cleaner? Paint them silver? Sand blast?

We send them out for sand blasting despite having the equipment in house to blast - although not at the level of the place we send it to. It's not worth our time to mess around with them. We get them back and powder coat them.
 
20230522_142236.jpg


Well, it's one color, good from far, far from good:laughing:
How far? :laughing:
When I saw $700 scuff and shoot, I thought "How the fuck do they do that? I have more than that in just paint, hardener and reducer for the Ford."
And I can easily pick out 100 or more things I could have done better on the Ford. Hmmmm. "Could have done better" :question: Someone else could have done better. I could have wasted a ton more time on them and still end up with the same quality. It'll look good from 50ft at 50MPH.
Earl Sheib shop that got sold and renamed
It's single stage crappy paint that'll peel in 3 years of sun, guy actually lays it down nice though

The flaws were lack of prep on my uncles part, he had a bad tbi when young and is kind of stuck at 15yo. So it looks like you tried to tell a 15yo know it all how to prep it:laughing:
 
Well. This is about complete. I can pick out maybe a thousand things I wish I could have done better while learning. The guy is 82 now and I want him to drive this thing. Still needs somebody to do exhaust, alternator, and some other mechanical bits. But I'd prefer it not be me. I'll do some if I have to, but I already have a full time job and It'll be faster if he pays a shop.

A cherry picker and six ratchet straps will help you move a box by yourself.
IMG_20230610_155725144.jpg


Done Ish

IMG_20230614_165703851.jpg

Still have to do the tailgate.

And mirrors. . . but my door is only 9ft wide. I'll do those outside.

.
 
Last edited:
Well. This is about complete. I can pick out maybe a thousand things I wish I could have done better while learning.
It looks amazing.

My uncle told me once that I would ever be the only person to see all the flaws in the things I build.

Have to say he is pretty much right on. That is true for a lot of things in life.
 
That looks amazing, I'm sure he'll enjoy it!

My grandfather built a 71 highboy as a plow truck, but sold it when he moved to the desert. Later on he was probably 80 or so and asked me to leave a pickup at his house so he could fill it with stuff for a dump run. So I backed in my cummins highboy on 35s. He told me to leave the keys:laughing: When I picked it up, it was turned around. I have no idea where he went but I'm sure he had fun:laughing:
 
Top Back Refresh