First thing was to buy all of the seals and bearings. Most of these are available from retailers, but that may change in the future.
The bearings I used were:
Back Top: 30309
Back Bottom: NJ210EG15
Front Top:30306
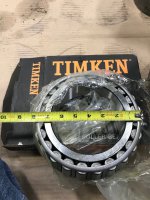
Front Bottom:C36215
There are some variants of the above that are also probably acceptable. I tended to stick with brands I have had good luck with (SKF, FAG, and TIMKIN).
With these in hand I began to reassemble.
First thing to note is that the only precise bearing freeplay in the portal needs to be on the two taper bearings on the top. So if any dimensions are adjusted between the front of the housing and the rear seal holder then you are supposed to check and adjust this distance. In one version of the Unimog manuals I have they go so far as to say that just replacing the seal requires you to measure and use a similar thickness gasket to not throw off this measurement.
Well I was replacing all the bearings, all the seals…..
So they want you to use fancy Mercedes tool number 401 589 00 21 00 to find out what the total height of your input shaft is from the back of the rear portal housing in order to determine what shim is required under the front bearing race to establish the correct "bearing free play". Clear?
So I got it out of my tool box……
No, no I did not. Who has one of those? Anybody? I actually looked around thinking maybe someone somewhere had one or a reproduction. Could not find it.
What I did was to reassemble the input shaft with the two bearings and portal gear.
Then I put a new gasket with some Curil T2 coated on both surfaces of the rear seal carrier, and bolted that down.
I then inserted the front race into the front portal housing without any shims, and the rear race until it firmly butted up against the rear seal carrier
It’s also interesting to note, that if you actually have that fancy Mercedes tool you also need the depth of the front portal housing to figure out what the "bearing free play" number will be. Stamped on each casting is the measurement from the factory right below the bearing race to be shimmed.
That is a little hard to see, but it is a “50” indicating the total depth is 78.50mm. Anyway, that’s totally useless to me, but interesting.
So, I carefully inserted the input shaft into its bearing race on the rear, through the rear seal (using some grease to prevent damage to this), and installed the main housing gasket.
I then torqued the front housing on to the second “uuungh”, flipped it over and slapped my dial indicator on it.
Then I jiggled it up and down to see what the lash was. The "bearing freeplay" number you are looking for is around 0.08 +/- 0.02 mm. I was around 0.15mm so: 0.15 – 0.08 = 0.07mm. So I needed to add a 0.05mm and 0.02mm shims to get to the prescribed "bearing freeplay" on these bearings. Coincidentally the only ones I had! What a life. So I pulled it apart and added the shims, and permanently installed the front bearing race in the front housing.