What's new

Maverick Max 1000R build

CarterKraft

Red Skull Member
Joined
May 21, 2020
Member Number
892
Messages
3,153
Loc
DFW
This is a buddies 2016? Maverick Max I built for trail riding.

Many of you know I suck at build threads but I will bore you with my terrible pictures and poorly put together ramblings. :flipoff2:

The focus is cooler space, stereo, spare tire storage, and dry locker. We quickly found out there is not much storage space in the Maverick and that would be the focus for most of the build.
A important detail was must be fully street legal (impossible in Texas but more on that later).

While trying to fit this Yet cooler full size spare etc. I realized there isn't enough room. I also found the little wings that hold the tail lights are way to fragile to be hit by limbs, trees etc. It looked a rear bumper need to be made to protect the light housings and wings and provide some structure. After the rough shape was bent up it just didn't look right and so I sort of slept on it.

1634610951819.png

1634610994165.png

1634611060938.png
 
Last edited:
This buddy is really my first paying customer (1998) I ever had and he trusts me to not fuck up too bad and lets me have some creative license to just do what needs to be done.

So after looking, studying and measuring I said this isn't gonna work like I planned, so plan B started to take shape. I had made some hoops to circle the rear lights but there really wasn't anyway to still be able to see the lights from the sides and that was going to bother me from a street legal standpoint, also this SXS will have his family in it so was worried about stuff like that.

1634611424515.png

1634611459586.png
 
Last edited:
So the idea hits me to just shit can the factory tail wings and light buckets and re-mount the light housings in the tubular guards I made. I made some sheet metal filler panels to mimic the OEM and it worked like a charm. I could then trim the wings back inside the envelope of the rear tube. The swiss cheese Quick Attach bed floor was removed and I determined I would fabricate a real bed from aluminum with sides so random cargo at the deer lease would not just roll out on the ground.
That made room for everything and I could start mocking up the spare tire mount and the Swag Offroad Action Packer/Baja Bins. I was able to it all back in the rear subframe and even though it's a bolt on deal it is hell for stout and doesn't interfere with approach/departure angles at all.


1634611890303.png

1634611932991.png

1634611955519.png

1634611987494.png

1634612048567.png

1634612076198.png
 
Thanks, it came out pretty good I think.

Yes, everything orange in these series of pix is the OEM stuff. He wanted me to do a full cage but since hadn't ever messed with a sxs cage I talked him out of it.
In hind sight, I should have built a full cage because I am no longer a fan of the double C pillar...:rainbow:
 
Now I am committed to building this bed structure out of aluminum. At this point in my career I had welded a lot of aluminum and built plenty of smaller pieces from tube/sheet but nothing this large in a single weldment. It started out going great, I like aluminum because it is so easy to cut, grind, drill etc. but after getting the base structure welded up and the sides all welded out basically complete except for some welds tying the floor to the structure. I didn't give it much thought just flipped it over and prepped to weld and started welding. I could tell something was not right as it seemed like the sheet was pushing away from the tube. I built a giant clamp so I could keep the sheet on the tube and continued adding welds where I thought they needed to go. Happy with my progress I flipped it back over to find I had majorly fucked up. The floor sheet had shrunk/expanded from the weld sites and was oil canned up to 1/2" in the various quadrants. I was crushed. This was the finest piece of aluminum fab I had ever constructed and it was trash now. I tried to channel my inner Jesse James and flame shrink the sections but that seemed to make it worse and there was so much tension in the whole thing it rang like a bell.

I don't have any pix of this debacle and I was able to salvage everything but the floor sheet.
If I do this again I think I might just use urethane adhesive to bond the sheet to the frame instead of welding.
c3XPH_ou4cNV6bWdoJdw_HP2Q=w1605-h903-no?authuser=0.jpg
hfMJMLW4nC6G2uaN90aAgh-5A=w1605-h903-no?authuser=0.jpg
r1tBm5_oDKOXfiEx42JBVzkcA=w1605-h903-no?authuser=0.jpg

Rb0E5PYZWTLESq0CuYEVN7PSw=w1605-h903-no?authuser=0.jpg

lnqHpTczSDZNZdfAAgf6psMxQ=w1605-h903-no?authuser=0.jpg

BB8NYRaSgE1R0KmHK6l-FiQ2g=w1605-h903-no?authuser=0.jpg

y5-rDQxlIF8SpNYddSnXzcGXw=w1605-h903-no?authuser=0.jpg

vOfvIEMqDYSR5FvUJBTMYWooA=w1605-h903-no?authuser=0.jpg
 
Ended up putting the spare on the right side at the bottom sandwiched to the bed with a 3/4 all thread, wing nut and locking pin.
No tools to remove it and the same bolt secures the @swagoffroad baja bin mount. Again no tools to remove any of it.
You can see I fucked up on the top wing nut I made the "wings" way too tall and they hit the bottom of the action packer so I had to knock a new one out real quick, it didn't get powder coat though. :homer: The frame has some UHMW pucks screwed to it so it sits hard on the lip of the wheel and the tire interference makes it hold in what ever position it is locked in.

Otm3wBzWpbgZVZ68Sqyr-hUKg=w1605-h903-no?authuser=0.jpg

c0DodVgq5AVxP3k6ugzQrDHLWw=w718-h404-no?authuser=0.jpg

X4xowxiuKy5Sgi8r0kn70rhtw=w1605-h903-no?authuser=0.jpg

PIyHl-9oMEDNB-FIaqqBi_nsg=w1605-h903-no?authuser=0.jpg
 
That rounds out the bed pretty good. I found the ridiculously priced Yeti tie down kit at Gander Outdoors when they were having closing sale.
Line-x'd the bed and added some LED whip mounts just in case. You can see the rear winch on a mount I welded to the EMP rear 2" reciever hitch mount. The color is not exact but it's really hard to tell in real life. No one ever even knows it was added, they don't even notice how much was changed (my goal on this one).
aKI45G_-4TBDUYRJ-1ybZTjTA=w1605-h903-no?authuser=0.jpg

I8fIb-f14Vg-HdFOnJE1T8m2w=w1605-h903-no?authuser=0.jpg
qIp8cvFUYrHqPQ9_9bm9lfwVQ=w1605-h903-no?authuser=0.jpg

fcbLNACJYDBTd4LnGtVGmDv-g=w1605-h903-no?authuser=0.jpg
 
The front bumper sucked as much as the rear did. It had some tubes that supported more plastic "wings" but even a small sapling on a trail edge would wreck out the plastic front, radiator etc. Just going through a pasture might make me nervous.
This is a stock photo but you can see what we started with.

-am.maverick-max-dps1000r.grey_.front-right.studio.jpg


A front winch was always the plan and he had this little 2500 lb cable winch he never put on a four-wheeler so we tried to use that but I told him we better get something bigger due to the total weight of this thing. He needed a front recovery point, snatch block etc. point so I added this 1 1/4" reciever tube and clevis (not shown) to take care of that and provide a deer corn spreader attachment point if needed.

pX4rSYQX8DUX_padB1PQvYyvQ=w1605-h903-no?authuser=0.jpg
hoZC4ITzvineoJZCAQQa_KQ9A=w1605-h903-no?authuser=0.jpg

ZhESdfjm2pBMcAUh-8UuF8SIA=w1605-h903-no?authuser=0.jpg
Di5xDlM92UoLiot7Az3d-nFRg=w1605-h903-no?authuser=0.jpg

6_T6Slf-AFFt4TS2yLsGhoN7w=w1605-h903-no?authuser=0.jpg
 
Before I could even get started on this project he called me and asked " how big of a asshole am I going to be if I come get it to go to New Mexico next weekend". It wasn't a big deal fortunately but he wanted a sound system in it for that trip. With basically 4 days to purchase, receive and install everything that didn't leave us with a lot of options.

The Wet Sounds Stealth 10 Ultra HD would be a easy all in one solution that I thought would sound good. I ordered it from WS directly and received it the next day. I threw it in the place I figured it would go (the A pillar cross bar) wired it up and nothing.... It was DOA. WS sends a new one and this one is G2G. He picks it up and everything is golden but when he brought it back from NM, he had some gripes. He's a big dude and with the sound bar in that location it was WAY too low in his line of sight. Mounted to the rear of that bar it is WAY to close to his head. Fuck.

Playing around with location I found if it was on the dash it would be perfect, better sounding even and out of the way of everything.
I started trying to figure out how to mount it there from the end mounds but then realized the T slots would allow me put the mount in the middle and still have plenty of beef to attach it.

I incorporated the JL Audio subwoofer amp mount and two RAM ball studs for Cell phone/GPS cradles.
It came out bitching I think and is another one of those mods people don't realize.
10YZqSv962NQEqrl9SynUfuSw=w1605-h903-no?authuser=0.jpg

6wkk4KLccoSYRU_pQWX3kvgNw=w1605-h903-no?authuser=0.jpg
D6RKPK9vRFzb4nn6IQyi1JHxw=w1605-h903-no?authuser=0.jpg
v9IbNZ4u35ydV0g8sVTs2-byA=w1605-h903-no?authuser=0.jpg
t3J9dQaJN_YWi23RVY-i4sInQ=w1605-h903-no?authuser=0.jpg

6nt6SnhY2PZRerTUTCyuKjJ-A=w1605-h903-no?authuser=0.jpg


I dig the bed and tube work but don't care for that sound bar location at all. I would much prefer some speakers up tight to the roof. That sound bar looks very out of place (based on this picture).
 
I dig the bed and tube work but don't care for that sound bar location at all. I would much prefer some speakers up tight to the roof. That sound bar looks very out of place (based on this picture).
I guess it's a you had to be there moment.
There is not enough headroom for the size of the driver to put it in the headliner.

There was not enough time to build a fiberglass enclosure so we got what we got. I think you will find with the 1/2 tinted windshield he wanted and the sound bar in that location works good. It takes up zero room in the cockpit, and does not inhibit the drivers vision in anyway.

I also think you will find that I will give you a full refund for the funds you paid if you don't like it in that location.:flipoff2:
 
Moving on to the street legal, wiring phase. There is very little room to add switches for accessories in the MAX and I didn't want to use a switch pro or other device. I found on either side of the steering wheel the dash has some flat areas perfect for switch mounting.
I made plates for both sides and though there no pics the turn signal and horn switch are on the left panel and the OEM switches that were previously in the center stack are moved to the right panel and the commonly used switches are in the center stack. This allows the passenger to easily operate the winches if needed or they can be operated by dual wired remotes.

All new wire is GXL with heat shrunk terminations weather they are soldered or crimped. I was able to add the functions I thought should be key operated via the factory fuse box using empty slots.
KYxCnyM5n7P-OOrI4U56t8gfA=w1739-h788-no?authuser=0.jpg

nVYGh_aNOrWHVArNX0j54FvDg=w1605-h903-no?authuser=0.jpg

rZPMpjXcsqMMWMfwhNQh4HPZQ=w1605-h903-no?authuser=0.jpg

BePFjUTj2abNw83_CP5jrHvKQ=w1605-h903-no?authuser=0.jpg


pV7YvzGhlIIJ_fcIEmQtqjTUg=w1605-h903-no?authuser=0.jpg


nVQulCB1VpXa_MQawcxwEIjQhQ=w509-h903-no?authuser=0.jpg
 
To power the winches and stereo gear I wanted to do a dual battery setup. I have been putting dual (isolated) battery systems in this customers service vehicles for years and he always loved the redundancy.
I used the Blue Sea Mini Add-A-Battery system with VSR and combiner switch. This lets him turn the battery OFF for storage and have automatic operation or manual combining if needed, all operated from the drivers seat in case of fire, roll over etc.
30AH battery in the OEM location with the OEM 20AH battery piggy backed.

All GXL battery cables with braided loom.
m31_gVguvCbLpG07zXjdXbHaQ=w1605-h903-no?authuser=0.jpg


ygb0F5homDRxFDbp5jYS-MADw=w1605-h903-no?authuser=0.jpg

AQU5noN8u5O0A8xqmR0AqwdtQ=w1605-h903-no?authuser=0.jpg
 
I used a EMP roof due to time constraints. I had plans to build a awesome roof but lack of time and onsite cnc cutting ability slowed me down so I said F it and ordered a EMP roof. I wanted dome lights and EMP offered them as a option. When they arrived I found they were sort of :rainbow: and I didnt care to use them. They were AAA powered tap lights. They might have been awesome but they really seemed like a forever headache so I swapped them for some clear 2" LED marker lights. I wanted driver control over the passenger in case of night hunting, distraction etc. with small kids. So the dome lamps are powered from a central stack mounted switch accessible by the driver and passenger. The lamps themselves then have switches to allow them to be turned off/on.

This includes the lighted rear license plate frame for the street legal part of the operation.
Don't get me started on SXS legality in Texas, it's not technically possible to due but in this case it has been done and I'll leave it at that because I think several people would be in trouble if the wrong person cared.

ORfzaWAoEuGN217rgTgEKlbvw=w1605-h903-no?authuser=0.jpg


f4FD9SeTUloUw2mKQvLTnvOGw=w1605-h903-no?authuser=0.jpg


1636469318914.png
 
Looking through the pix I think that pretty much brings the build to a close.
There are some details I don't really have pix of but little stuff like all the added marker/turn signals are DOT Grote branded with the sealed push lock connections. I hate building stuff like this and having to hardwire lights or even installing connectors on bare wires, it makes it easier if you use connectors but the customer still has to have new connectors installed on the lamp itself. so I used all Grote pigtails to build the harnesses so the lamps themselves are plug and play.


lua2_oqkEwC2OaRkvC6HaM1yg=w1871-h856-no?authuser=0.jpg


huHu48AOr7JzORMoTZZWKLSlfg=w509-h903-no?authuser=0.jpg


gte-66200_yj_xl.jpg
 
Last edited:
love this build.. I had forgotten all about the Swag Offroad Action Packer mount. Been looking for a way to carry camping grub box in the RZR for an upcoming trip. this helps :beer:
 
love this build.. I had forgotten all about the Swag Offroad Action Packer mount. Been looking for a way to carry camping grub box in the RZR for an upcoming trip. this helps :beer:
Thanks, think they are a good solution for secure but portable cargo storage.
I wish the action packer containers were cheaper and better sealed but some weather stripping can solve the latter.
 
Thanks, think they are a good solution for secure but portable cargo storage.
I wish the action packer containers were cheaper and better sealed but some weather stripping can solve the latter.
I was gonna ask how weathertight they are.. I need something to put in the RZR for a camping trip. Gonna put my grub box stuff in it and would prefer not to have dust in my cooking stuff. Looks like REI is about the only place local to me that has them in stock.
 
I was gonna ask how weathertight they are.. I need something to put in the RZR for a camping trip. Gonna put my grub box stuff in it and would prefer not to have dust in my cooking stuff. Looks like REI is about the only place local to me that has them in stock.
They have a vertical lip that goes inside the lid, if you put some weather-stripping around the lower flange they get really sealed but I would hesitate to call them waterproof.

In my wife's MavTrail we are using Engel Dry box's for food and gear. They are near waterproof and useful as coolers.

I am building a aluminum box for hers this year and will divide it somehow to two sections for gear and food. Another shitty build thread to follow...:lmao:
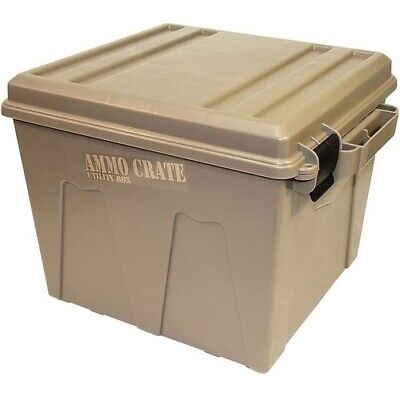
I like the MTM cases but I think it's about an inch or two too deep to fit in the space I have.. width and height is perfect though. I like the fact that it would be pretty much dustproof with the o-ring seal as well.
 
I like the MTM cases but I think it's about an inch or two too deep to fit in the space I have.. width and height is perfect though. I like the fact that it would be pretty much dustproof with the o-ring seal as well.
there are a lot of different sizes on their website. maybe a different one fits better? they do stack nicely too.

if you have a TON of space, i really like the used hardigg cases on ebay. my end goal is to foam pack on hardigg case with my entire kitchen set up, one day...
 
Top Back Refresh