What's new

LINE-X Patriot Jeep

LINE-X

Well-known member
Joined
Jan 21, 2022
Member Number
4726
Messages
76
Used Jeep CJ.png
Since I have found Irate4x4.com I decided to cross post our build with the hope of not losing it like has happened on other forums. Over the years I have gotten most of what I know from watching other people building their stuff, unfortunaly lots of this info is gone due to system upgrades, so I'll do my part to share what I know in the places that may help someone else.

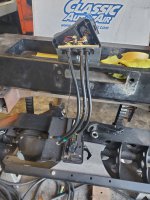
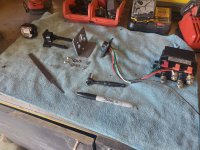
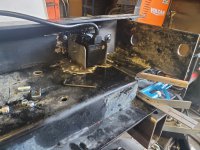
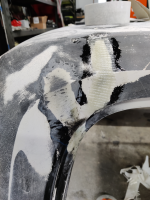
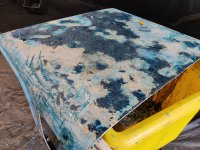
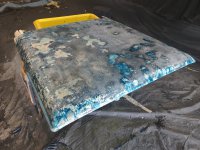
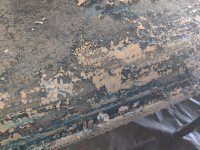
So for the next several post's I'll add an original date. Several things here have changed I'll do my best to capture the changes as well as post where were at today once I get caught up.

July 26, 2020 (Original Post)

So last year (2019) LINE-X Corporate started a competition for LINE-X Franchises to build a vehicle for a competition resulting in two winners. “These two vehicles were selected from several vehicles submitted by franchises as part of a special SEMA contest. Twelve finalists were placed in two groups as part of two different contests that allowed LINE-X fans to vote for their favorite vehicle on social media, while LINE-X franchisees voted for their favorite in a separate contest.” (See: LINE-X Franchise Builds Stun at 2019 SEMA Show | LINE-X).


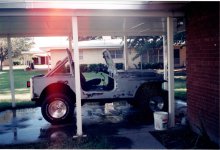
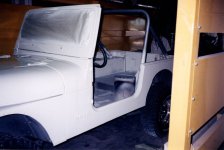
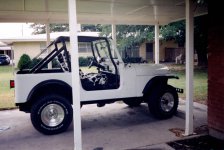
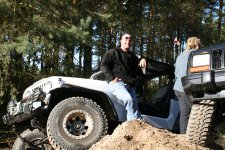
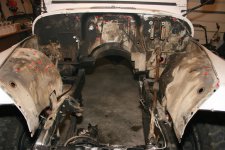
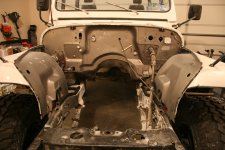
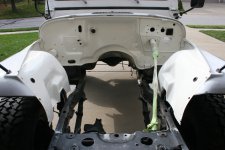
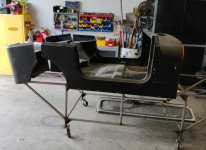
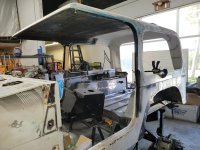
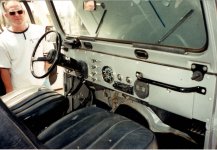
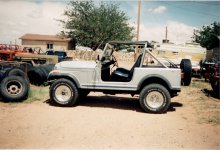
So let me start by saying we are a LINE-X FRANCHISE and do not represent our corporate office in any manner. All opinions expressed in here are solely mine. Now like all builds, they have a story, sometimes you know the history sometimes you don't. In my case, I bought this CJ-7 back in 1996 as a second owner in EL Paso, TX as a young Soldier.


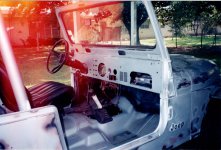
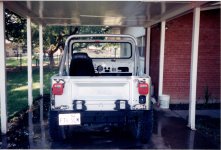
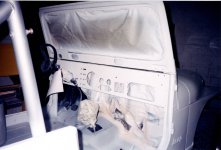
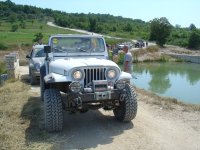
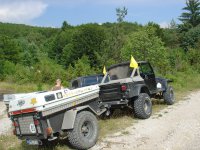
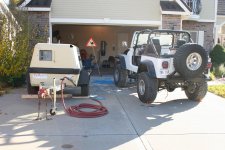
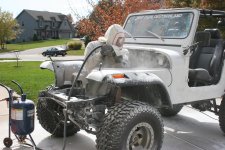
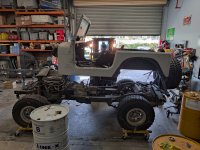
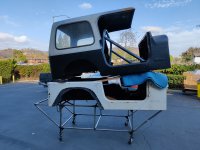
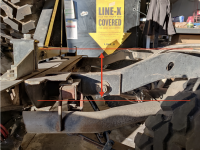
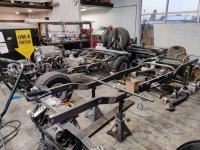
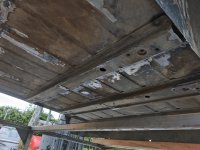
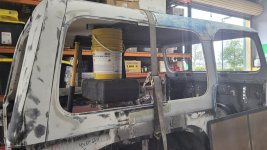
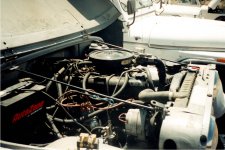
In the 24 years 'she's possessed me', she's had three major retrofits with this being her fourth. I will cover as much as I can for historical perspective as well as technical. One thing that has always been important to me is that I wanted a Jeep that I drive in and drive out. With that, my intent was not to build a trailer rig although I have gone home on one more than once. Berlin to Grafenwoehr being my longest tow, thank God for the “Allgemeiner Deutscher Automobil Club” ADAC and if you've been to Europe you know it's one of the best tow/insurance services out there.


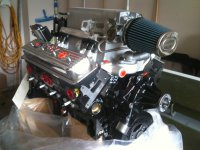
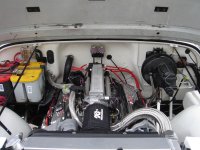
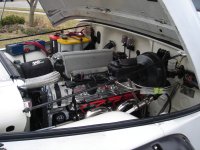
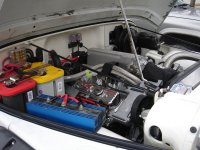
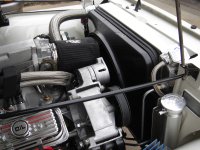
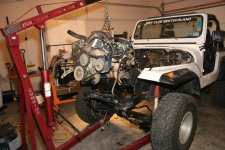
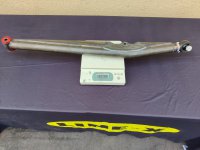
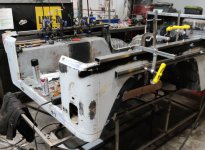
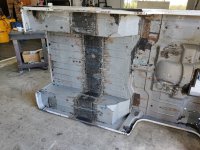
My intent was to build a garage D.I.Y Jeep. I'm not saying I don't use good parts, just like to figure out how to make things work they way I want them. What this means is my Jeep has drawn inspiration from Jeep's and trucks all over the place. I am not claiming to have invented anything here, only to assemble the way I wanted it. Someday it will go to my kids to build Version 5.0 but for now, I am starting Version 4.0.

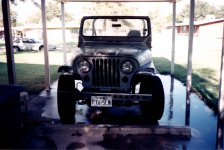
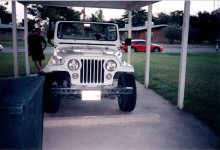
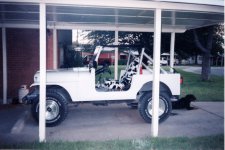
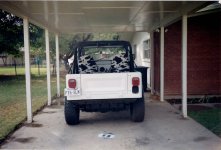
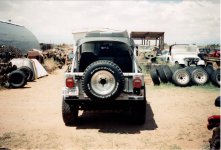
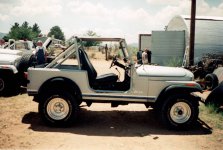
So below is how I bought it back in El Paso, Texas from Roger Little of “Little 4x4” (See: little 4x4 elpaso - Google Search) Yes as I recall I paid full price, Roger wouldn't budge.

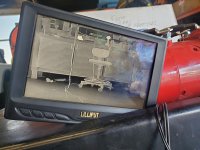
Update: LINE-X's new CEO told me they're not going to go to SEMA anymore. So my friend at Speedir asked if he could use it in his booth since I have one of his camera's going in, I have a post showing it as we tested the mounting.
 

Attachments

  • Used 1983 Jeep CJ-7 Dash.jpg
    Used 1983 Jeep CJ-7 Dash.jpg
    848.3 KB · Views: 10
  • Used 1983 Jeep CJ-7 Engine.jpg
    Used 1983 Jeep CJ-7 Engine.jpg
    769.3 KB · Views: 10
  • Used 1983 Jeep CJ-7 Rear.jpg
    Used 1983 Jeep CJ-7 Rear.jpg
    230.4 KB · Views: 11
  • Used 1983 Jeep CJ-7 Passenger.jpg
    Used 1983 Jeep CJ-7 Passenger.jpg
    796.9 KB · Views: 13
  • Used 1983 Jeep CJ-7 Driver.jpg
    Used 1983 Jeep CJ-7 Driver.jpg
    830.1 KB · Views: 12
Last edited:
July 7, 2020 (Original Post)
SANDED CJ7.png


Version 1 (Part 1 of 3)

As a young newly married Soldier I didn't have allot of money so my first order of business was to make it look a little nicer without breaking the bank. Keep in mind this is 1996 in El Paso, Texas while I was stationed at Fort Bliss.
The original color was silver which the old film camera scans lost, sorry I don't have time for photo corrections. The first thing I did when I got the Jeep home was to sand off the dried out and faded paint. The body and the hood had a few dents, nothing a little Bondo couldn't handle.

So I learned a few lessons here. Whenever you're working with Bondo, back in 1996 we didn't have YouTube but we certainly do now. If you are working with Bondo for the first time, make sure you block sand it so you feather it out properly. I sanded too much material from my hood, right in front of the driver window. This has been a thorn in my side for 24 years. Time to get that corrected but that's for a future post. Check out this video from Eastwood.Com. [See: Beginner’s Guide to Sanding Body Filler - Basics of Body Work - Eastwood]. I have been using Eastwood for years, they've got good products, advice and videos. The only modification at this point was trimming off the front 4" of the front fenders as well as scowling a line to cut with a jigsaw where the factory rubber fenders flares outer lip touched the body. This gained 2" as I recall to the rear opening. For the SEMA build we decided that we wanted to keep the factory look of a CJ while allowing it to fit a 40" tire inside the wheel well. Since the factory stock tires were 27" snd we wanted a 40" tire to fit inside the wheelwell we determined the stretch should be 12" +/- 1". In the end the fron will be a CJ-5, the middle a CJ-7 and the rear a CJ-8. In total a CJ-578
 

Attachments

  • Sanded 1983 Jeep CJ-7 Passenger.jpg
    Sanded 1983 Jeep CJ-7 Passenger.jpg
    872.4 KB · Views: 7
  • Sanded 1983 Jeep CJ-7 Hood.jpg
    Sanded 1983 Jeep CJ-7 Hood.jpg
    747.6 KB · Views: 7
  • Sanded 1983 Jeep CJ-7 Dash.jpg
    Sanded 1983 Jeep CJ-7 Dash.jpg
    892.1 KB · Views: 8
  • Sanded 1983 Jeep CJ-7 Rear.jpg
    Sanded 1983 Jeep CJ-7 Rear.jpg
    902.3 KB · Views: 9
Last edited:
July 7, 2020 (original Post)
3108015


Version 1 (Part 2 of 3)

So after I knocked down the bad paint and did some minor body it was off to Earl Scheib Paint and Body (Now Closed). So for those that are considering a budget paint shop for a project you're working on, I can say I am more than happy. The only complaint I would say is don't ever expect to find matching touch-up-paint. Budget paint shops tend to get random colors, so I was told.


Back when I had this done, they charged $99.00 for the paint, plus $99.00 for the Ultra Shine (whatever it was called) topcoat and an additional $150 to shoot under the hood and the dash which I dissembled to help keep costs down. So for $400 after tax I had a 10 foot paint job which I ended up touching up with rattle can whenever I needed to, making it a 20 foot truck. Bottom line their paint job has lasted (not beautiful) me for 24 years, I will post photos latter when I get to where my Jeep currently sits. If you are considering going this route with a budget paint job and can find a shop like Earl Scheib in your neighborhood, go for it.
 

Attachments

  • Paint 1983 Jeep CJ-7 Driverside.jpg
    Paint 1983 Jeep CJ-7 Driverside.jpg
    738.8 KB · Views: 7
  • Paint 1883 Jeep CJ-7 Dash.jpg
    Paint 1883 Jeep CJ-7 Dash.jpg
    692.9 KB · Views: 9
Last edited:
July 10, 2020 (Original Post)

TEASER3108065

So as I work my way through old photos and notes I thought I would share a picture of what we will be doing with this upcoming build, Version 4. I have a junkyard GM 14 Bolt Rear Axle and a Dana 60 Front both with full Artec Truss'. We have a stretched Throttle Down Customs frame allowing us to go the 10" to 12" I'm looking for. We have a a set of Trail Worth Fab rims. A set of 40" Pro Comp MT2 from our friends at 4WheelParts. I also have the donor 1981 Jeep VIN# 1JCCM87E2BT005878.
  • 1 - Made in the U.S.A
  • J - Jeep
  • C - MPV (Multi-Purpose Vehicle)
  • C - 258ci
  • M - 4 Speed Manual
  • 87 - CJ-7
  • E - 4,150 lbs.
  • 2 - Check Number (Security Code)
  • B - 1981
  • T- Toledo Plant
  • 005978 - SSN (Sequential Serial Number)
Sorry I always find the small details interesting. We will be using this 1981 CJ-7 tub and hardtop for the stretch as well as some other parts to keep my tub as original Jeep as possible since it's the only thing original part left by the time I complete this build. We will also be stretching the donor hardtop on the tub with a second donor hardtop not in the picture. In all cases the donor parts I am using are from wrecked or damaged vehicles, as a Jeep lover I feel bad chopping up older rigs since the CJ-7's aren't around like they used to be. Also, if there is anyone local that wants to use any of the remnants for their project please get in contact with me, I would like to see these parts go to good use.
 
Last edited:
September 7, 2020
Capture1.PNG


Version 1 (Part 3 of 3)

Being a young Soldier in the Army this was all I really needed or wanted. But this was only the beginning as I grew to really enjoy a Jeep over any other off-road vehicle. As for the furry cow skin seat covers, this is back in 1998 while I was stationed at Fort Bliss in El Paso, Texas. I think the end-state for my Version 1.0 build was appropriate.

Upgrades:
  • Front Roll-Bar (Little 4x4)
  • Cow Skin Seat Covers (JC Whitney)
  • Herculiner (That's right I said it!) I will discuss this as we strip it and LINE-X it.
  • Grant Formula GT Steering Wheel (Summit Racing)
  • Frame Mount Steering Brace (JC Whitney - Now CarParts.com)
Modifications:
  • Cut the fenders 2" using the original flares as a guide.
  • Trimmed off front fender lip by approximately 4".
 

Attachments

  • 1983 Jeep v1.0 Front.jpg
    1983 Jeep v1.0 Front.jpg
    857.7 KB · Views: 7
  • 1983 Jeep v1.0 Driver.jpg
    1983 Jeep v1.0 Driver.jpg
    830.7 KB · Views: 7
  • 1983 Jeep v1.0 Passenger.jpg
    1983 Jeep v1.0 Passenger.jpg
    823 KB · Views: 8
  • 1983 Jeep v1.0 Rear.jpg
    1983 Jeep v1.0 Rear.jpg
    856.6 KB · Views: 8
November 8, 2020 (Original Post)

3111263

Version 2.0

In 2000 I was assigned to Ansbach, Germany so I placed my Jeep in a storage unit in El Paso with my tools and left it there until 2003. Having completed Battery Command and extended my tour in Germany, I decided to ship the Jeep in 2014. I flew into El Paso after pre-ordering several parts to a friends house in advance. I flew into El Paso, stayed a few days and fixed the Jeep up in preparation for it's journey driving to Baltimore where I put it on a ship to Bemerhaven, Germany. The cost was $2500 each way (returned to the U.S. in 2010.) I had a few photo's on an old film camera that if I ever find I will add to this post of me fixing the jeep up in the parking lot of the storage unit. Basically I added the following upgrades. The attached photo although far more recent shows what I did in Build v2.0.

Upgrades
 
November 16, 2020 (Original Post)
Kroatien 2006_144.JPG


JEEP CLUB DEUTSCHLAND

Off-roading in Germany is limited to designated off-road parks, private farms if you know the owner or on the military base tank trails. There are no public lands per se like in the States with B.L.M. Land or federal lands. In 2006 I decided to attend the Euro Jeep Fest in Umag, Croatia. In order to attend I had to join an EU Country Jeep Club. I tried to join the British as my German is not so good. but I had to join the club of the country where I lived. When I arrived into Umag for the event I followed the signs to the Jeep Club Deutschland parking compound. Being military I tend to arrive early to be on time. In the parking lot were two members of the German Jeep Club who I back in next too. As I would latter find out and who became lifelong friends, Mattias and Andrea were driving a 1991 Jeep YJ and Nico and Nadine were driving a Jeep Cherokee. Mattias walked over and in better English than my German asked if I was from America and how I came to be there? I was stopped numerous times by people as I was the only American in attendance. Apparently Poland has an off-road magazine I was in, sort of cool, really fun, some of the best times! Germans know how to party and off-road hard.
 

Attachments

  • DSC04397.JPG
    DSC04397.JPG
    1.4 MB · Views: 10
  • DSC04604.JPG
    DSC04604.JPG
    1.4 MB · Views: 9
  • DSC04364.JPG
    DSC04364.JPG
    1.4 MB · Views: 10
  • received_286352559370978.jpeg
    received_286352559370978.jpeg
    82.6 KB · Views: 11
November 18, 2020

Off-Roading Europe

Flag Flag of the united states Leaf Tree Plant

Over the next 4 years from 2006 to 2010 I had the opportunity to go off-roading at some really cool places with some cool people. The German Jeep Club had a monthly run with events at each run. They had an obstacle course at each event using PVC Pipe as gates to go through (like slalom skiing) with a golf ball on top (string attached), if you knocked the golf balls off you lost points, if you backed up you lost a point, it was a non-timed event for technical driving. At the end of the year the Jeeper with the most points would win cool gifts donated by the industry. They also had games for kids like using a mirror to keep a pencil between two lines. They had driving tours which would tell you to drive 5km and make a right turn at the red mailbox, this was a timed event. Most of the off-roading in Germany is done on designated off-road parks like old mining quarries as there is little unused land. The benefit is these parks often go above and beyond to make obstacles and events like the seesaw in the photos below. Bottom line, if you have the chance to take your Jeep to Europe, do it! Sorry it's taking me so long to get the build Version 4.0, I promise I am almost there.
 

Attachments

  • Peckfitz Oktober 2006_109.JPG
    Peckfitz Oktober 2006_109.JPG
    4.2 MB · Views: 14
  • Peckfitz Oktober 2006_054.JPG
    Peckfitz Oktober 2006_054.JPG
    5.1 MB · Views: 16
  • Peckfitz Oktober 2006_112.JPG
    Peckfitz Oktober 2006_112.JPG
    4.5 MB · Views: 13
  • DSC04829.JPG
    DSC04829.JPG
    1.3 MB · Views: 12
  • DSC04876.JPG
    DSC04876.JPG
    1.4 MB · Views: 14
November 30, 2020
3112023


Version 3.0

Hope everyone had a nice Thanksgiving weekend if you're Stateside. Trying to get caught up on the build before we start assembly. While I was attending the Command and General Staff College (CGSC) full-time I started taking an adult course in Industrial Welding at Northland Career Center in Platte City, MO. I have to admit, the knowledge gained from the welding course has been used far more than the knowledge I gained at the CGSC. I remember the first day my classmates all had to introduce themselves, I explained my goal for the year was to learn how to weld while all my classmates were working on their Master's Degrees and Doctorates, I have no regrets. Mike Rowe is onto something.

The assignment lasted 1-Year which proved to be just enough time to rebuild my tired and worn out 4.2 Liter inline 6 motor.

At first I wanted to rebuild my motor into a stroker. I evaluated buying a turnkey rebuild with my motor being the core turn-in. In the end I decided I wanted to go with a small-block Chevy due to the parts availability and aftermarket support. I had found someone on Pirate or the Jeep Forums that had done the RamJet 350 swap with a TJ, and he provided allot of information which helped me. Unfortunately that was 10 years ago and I can't find his build now, if I do I will certainly link it. The biggest challenge was getting it all to fit within a CJ engine bay. Advanced Adapters had the engine mounts which helped by placing the motor as close to the engine hump in the tub with about 1" clearance for the bell housing.

Once the motor was out I used Eastwood Soda Blaster to strip the metal down to bare metal. It worked well but trying to run it off a 80 gallon Sears Air Compressor was taking way too long so I had to rent an industrial air supply. I made quick work of it, cleaned up easily, what was left I hosed into my grass. Once the metal was nice and clean I used a MIG to fill in unwanted holes. Next I setup a small paintbooth in my garage, primed and painted everything white. What you can't see is I added a 1" x 1" mandrel bent tube to each frame rail in the engine compartment to run all my wires through so everything wired forward of the engine like headlights and fan wires were hidden. If you can't tell I like the underhood to look more like a hot rod than a muddy old Jeep.

Back when I did this build one of the thing I wanted to address was the lighting. In 2010 LED headlights were just coming out as I recall. I had done a retro kit from Quadratec with HID Xenon bulbs which worked well but ran really hot. After doing some research I found a gentlemen on the forums who was a guru with lighting and had written extensively about reflectors, glass, and bulbs. He had a package he assembled for a few hundred dollars which included the headlight in the photo. The glass used in this lens was by far superior to the one that came with the Jeep originally, I will post a part number when I get them back from being wrapped in Clear Bra. Now we have LEDs I will upgrade these headlights with a bulb from my buddy who owns OZG Powersports.

Upgrades
Video:
The first video is of the sound of the factory the 258 cu in (4.2 L). The second video is how the 350 cu in RamJet (5.7 L).
 

Attachments

  • 1 RamJet 350.JPG
    1 RamJet 350.JPG
    1,005.2 KB · Views: 10
  • DSC01295.JPG
    DSC01295.JPG
    1.9 MB · Views: 11
  • DSC01296.JPG
    DSC01296.JPG
    2 MB · Views: 11
  • DSC01297.JPG
    DSC01297.JPG
    1.9 MB · Views: 10
  • DSC01298.JPG
    DSC01298.JPG
    1.9 MB · Views: 11
  • DSC01299.JPG
    DSC01299.JPG
    2.1 MB · Views: 10
  • IMG_0783.JPG
    IMG_0783.JPG
    1 MB · Views: 10
  • IMG_7166.JPG
    IMG_7166.JPG
    3.4 MB · Views: 10
  • IMG_7171.JPG
    IMG_7171.JPG
    3.4 MB · Views: 9
  • IMG_7190.JPG
    IMG_7190.JPG
    3.8 MB · Views: 11
4 More Photos
 

Attachments

  • IMG_7197.JPG
    IMG_7197.JPG
    3.8 MB · Views: 9
  • IMG_7203.JPG
    IMG_7203.JPG
    3.1 MB · Views: 10
  • IMG_7227.JPG
    IMG_7227.JPG
    3.1 MB · Views: 9
  • NV4500 & Atlas II.JPG
    NV4500 & Atlas II.JPG
    2.9 MB · Views: 9
December 2, 2020 (Original Post)

When I bought my CJ in El Paso it had some battery acid rust but otherwise it was clean. Originally from El Paso it had around 60,000 miles in the dry arid environment. These are the badges in my toolbox

1643497668599.png
 
December 2, 2020 (Original Post)
Capture.PNG


So as we continue to source parts we finished building the axles for "Version 4.0." So as we get ready to start the build I didn't think I needed to show everyone how we put the axles together since axle building information is readily available on the Dana 60 and GM 14 Bolt. I will share the weights as I wanted to know what the front and rear unsprung weight is. So we went down the street to our local Recycling Center and for $35 got three weights.
Weight #1 Truck Weighed (Tare) 5540 lbs.
Weight #2 Dana 60 6120 lbs.
Weight #3 GM 14 Bolt 6020 lbs.
* Scale accuracy +/- 20 lbs.
Dodge Dana 60 (580 lbs.)
  • ARB Air Locker
  • Spicer Gears 5.13
  • Yukon Axle Shafts
  • Reid Knuckles
  • Artec Truss
  • Solid Axles Forged Hub
  • Solid Axles Brake Kit
  • Steel Differential Cover
GM 14-Bolt (480 lbs.)
  • ARB Air Locker
  • Spicer Gears 5.13
  • Yukon Axles Shafts (Have to cut down.)
  • Artec Truss
  • Factory Brakes
  • Steel Differential Cover
I plan on readdressing the brakes in a future 4.1 Build but for now I need to get this built.
 

Attachments

  • IMG_20201202_101549.jpg
    IMG_20201202_101549.jpg
    4.7 MB · Views: 7
  • IMG_20201202_104656.jpg
    IMG_20201202_104656.jpg
    2.5 MB · Views: 7
December 3, 2020 (Original Post)
Capture.PNG


Version 4.0 "SEMA Build"

On your mark, get set, go! So this is the point I wanted to be at November 1st giving us a year to SEMA. So the foundation of this build is a custom stretched Throttle Down Customs (TDK) mandrel bent frame. When I ordered it I requested a 10"+ overall stretch with the steering box mount pushed 1"+. I'm less concerned about wheel base and more concerned about the balance of aesthetics with functionality while achieving a 40" rear wheel-well opening.

I have to tell you that the craftsmanship of the frame is spot on, on a scale of 1 to 10 it's a 10. If anyone is considering using a TDK frame as a foundation, go for it you won't be disappointed. So the first order of business is to get the engine mount holes sleeved. I had planned on doing this when ordered the frame and then saw another build where the guy did the same thing. Is it required, no probably not, but I like know that it's done. You can view the video by VideoStar07 on YouTube if interested. If you're wondering why the frame is not shiny and new looking it's because it's been in my shop for almost two years. I started collecting parts for this build in 2013, seven years later it's time to "get-R-done."

Having done what seems like an endless amount of research on the best way to stretch the Jeep I decided on going with the same technique Harry Johnson did in his build titled, "Project: I Have No Idea What I'm Doing. YJ Stretch" as it best achieves the effect I am going for, which is to make enough room that a 40" tire can stuff in the wheel well on full articulation, in the end, much like Harry's Jeep, it's more of a CJ-7.5 than a CJ-8.

Sources:
 
December 4, 2020 (Original Post)
Capture.PNG


Yesterday's goal was to figure out the rear lower angle in order to assemble the RuffStuff Ultimate Rock Crawling (URC) Trailing Arms. The URC Trailing Arm is 40" center bore to center bore. I will not know the rear lower frame bracket location until I get the drive line and body moved over. Currently the outbound angle is 6°, now I don't claim to know anything other than what I have read both in the Pirate 4x4 Forums as well as watching copious amounts of YouTube videos on the subject. So anyone reading these words that know what they are doing feel free to inject your ideas and recommendations!?!?

So I am a great metal grinder which I will show you in latter images, and I can certainly stick metal together, but when it comes to welding suspension parts I think I will defer to a professional. As a small business owners I know the importance of supporting small business and fortunate for us, we live in one of the off-road epicenters in Southern California and have some of the best fabricators within 1 mile of me! One such shop is JP Designs who has been an intricate part of the Glamis off-road scene where they take 1000+ horsepower sand cars and go really fast. I'll be honest I don't get it, but I am a crawler from the east coast so what do I know. Everyone tells me I have to give it a try, then I point to the pile of Jeep parts which has been growing for seven years and tell them I can't afford another hobby right now.

After returning from dropping these off today, we decided that Jesse is going to mount the DOM Bushing 5° toward the rear axle and I will make up the remaining 1° at the axle by grinding out the inner Artec Lower Link Axles Bracket mounting point slightly.

Sources

UPDATE: Final Measurement was 5.5 Degrees, not too shabby for a drone estimate!
 
December 7, 2020 (Original Post)
Capture.PNG


So we're pretty busy today so the only thing I managed to do is pickup my trailing arms from my buddy Jesse at JP Designs. He did two passes on the DOM to support and a single pass on the side plates. Not sure on the bung and the bushing. I'm thinking a silver powder coat to finish them off. I plan on running 7075 Aluminum uppers so that should look good no? Thoughts?
 
December 8, 2020 (Original Post)
Capture.PNG


So today was another busy day, were applying LINE-X to the floor tiles for the Predator Control Vans (We're so much more than Truck Beds) so let me give an update on something that I completed a few weeks back before I got the thread updated (I'm OCD as F#%k, chronology is important LoL). The M.O.R.E. Off-Road Stubby Bumper I upgraded in version 2.0 got a few modifications with a few more to go. To start we removed the older Warn XD9000i Winch. This has proven to be a great winch although I only used it a few times, it worked without issue up until the day I sold it. This build is getting front and rear Warn 9,0 RC winches which weigh 54 lbs. and since I seldom had to do a pull over 50 feet, I decided to try to offset some of the high center weight by lowering the wight on the winches. Since my future off-roading will most be in Southern California (sand / rock) I will be packing a land anchor (TBD).

The first thing we did was take the Winch relays cover apart to get the relays out. Next we mounted them inside the bumper to lower the winch profile. We did this keep the front of the Jeep look a little less cluttered. We also added the Warn Wireless Remote which will also be added to the rear when we fabricate the bumper. Next we added a Speedir camera which is another local company that we wanted to support.
Infrared is a really cool technology that has all sorts of uses. Needless to say as this build continues and we share more of the final design details, IR is an awesome added capability. In order to protect the expensive lens of the camera we decided to use some really cool hexagon wire mesh. We also added this to the front grill, more on that latter.
The next thing we did was cut in some emergency flashers we purchased from our friends at American Emergency Products (AEP). As a LINE-X dealer we help them make stuff durable and cool as their customers are law enforcement and emergency vehicles. The flashers we are adding are amber only due to legal issues with flashing white (front) or red and blue. Next we will be adding cameras.

We will be installing three front bumper cameras. One will cover the center road and will be used to record video for accidents, don;t laugh! California drivers are the third worse drivers in the world!!! Only Kuwait and Saudi Arabia drivers are worse. I have been hit twice within 5 miles of my house and in both cases the other driver tried to blame me. In both cases witnesses proved them liars! I'm not sure what I am going to use on the video feed to record the feed but the solution is out there. The other two cameras will be tire cameras as I tend to off-road without a spotter.

Sources:

M.O.R.E. Off-Road Stubby Bumper
Speedir Camera
Warn XD9000i Winch (Old)
Warn 9.0 RC Winch (New)
Emergency Flashers (EMPS1SLS3A)
Cameras x3
Warn Wireless Remotes
Hexagon Grill Mesh
Additional Images:
 

Attachments

  • 20200925_141813.jpg
    20200925_141813.jpg
    1.6 MB · Views: 10
  • 20200929_135444.jpg
    20200929_135444.jpg
    4.6 MB · Views: 9
  • 20201001_120133.jpg
    20201001_120133.jpg
    1.8 MB · Views: 11
  • 20201001_120153.jpg
    20201001_120153.jpg
    3.6 MB · Views: 10
  • 20201001_133234.jpg
    20201001_133234.jpg
    3.8 MB · Views: 10
  • 20201001_172342.jpg
    20201001_172342.jpg
    3.1 MB · Views: 10
  • 20201110_102352.jpg
    20201110_102352.jpg
    3.1 MB · Views: 9
  • 20201110_154216.jpg
    20201110_154216.jpg
    2.7 MB · Views: 10
  • 20201110_173205.jpg
    20201110_173205.jpg
    4 MB · Views: 9
December 10, 2020 (Original Post)
Capture.PNG


So we finally finished the Predator project so I can get back to work on Project SEMA. Going to jump back a few weeks again since I have nothing new to report from yesterday and share what we are running for tires.

My buddy Micah at our local 4Wheel Parts helped us out on getting a set of 40" Pro Comp MT2 as I mentioned in an earlier post. In order to keep them balanced we added 12 oz per tire of Equal Flexx Tire Balance Powder. Equal is often used in roadside repairs for semi-trucks tires and reportedly works well once you get up to speed. There are several videos about how well it works, I'll let you know how it goes once were road worthy again.

Were mounting the tires on a set of Trail Worthy Fab Double D rims. When we ordered the rims I asked that that they don't logo them, as I am not a fan of badging and logos, I find them aesthetically unappealing. I also knew we were going to LINE-X the beadlocks, the idea behind this is I can beat the hell out of the rims and repair the LINE-X easily if the beadlock gets damaged. As a LINE-X dealer we have had several customers ask us about LINE-X wheels and have had a few do it. The concern is always balance which can be overcome easily. With my project and using Equal Flexx, I don't foresee any issues and if I do I will certainly share them.

One concern I had and maybe unfounded due to centrifugal force, but each one of the inner PVC pipes had two holes on opposite sides in order to allow air to flow from the valve stem to the inner tire. My concern was that as the Equal Flexx breaks down from a paint flake into dust over time, this dust could get caught trapped in the inner cavity of the rim and PVC tube, which could potentially cause the tire to go out of balance. In an attempt to remedy this I used a forstner bit to open up the hole and epoxied in brass pipe screens to help keep residue out while still allowing air to flow.

We did have one issue where the LINE-X bulged out when we torqued the the rim half's together. Due to the LINE-X cut line on the inside of the rim being so close to the edge and a little on the thick side, it caused the LINE-X to squeeze out on the corners outer edges of the drain holes. So we already had the chance to strip a rim and redo it. The process took me 2 hours and it sort of sucks but on the other hand, I know I can beat the hell out of the rims, repair them to new and put the Jeep in a car show, mission accomplished.

Once we go the tires all mounted and "balanced" we took one down to out recycling center to find out the weight. Each tire weighs in at a staggering 156.5 lbs., so when we calculate the axles unsprung weight were looking at nearly 300 lbs of tire per axle. In the end we got them all done and if you haven't had a set of 40" tires laying around your shop, let me tell you they take up some room. So I decided to bring them to a friend of mine Steve at Brightside Detail. He's doing a ceramic coating on them to help keep them looking good. More importantly they are in his shop taking up space and not mine, double win!

Sources:
4Wheel Parts (Pro Comp MT2)
IMI Equal Flexx
Trail Worthy Fab (Double D Rims)
Pipe Screens
Brightside Detail
 

Attachments

  • 20200817_121025.jpg
    20200817_121025.jpg
    1.5 MB · Views: 8
  • 20200818_151319.jpg
    20200818_151319.jpg
    5 MB · Views: 7
  • 20200824_163952.jpg
    20200824_163952.jpg
    3.8 MB · Views: 7
  • 20201008_182400.jpg
    20201008_182400.jpg
    4 MB · Views: 7
  • 20201009_094842.jpg
    20201009_094842.jpg
    2.5 MB · Views: 6
  • 20201009_100244.jpg
    20201009_100244.jpg
    1.5 MB · Views: 7
  • 20201009_142436.jpg
    20201009_142436.jpg
    1.5 MB · Views: 8
  • 20201102_174647.jpg
    20201102_174647.jpg
    1.6 MB · Views: 6
  • 20201106_084027.jpg
    20201106_084027.jpg
    3.6 MB · Views: 7
Capture.PNG
December 12, 2020 (Original Post)

As a LINE-X dealer in Southern , California, we tend to get allot of classic restorations, hot-rod builds and of course off-road vehicles. Often. Well get just the body or tub on a rolling frame or on a auto body rotisserie. Depending the job we often do the interiors for sound and under-body for rust.

So back in October we welded up a 1"x 1" frame and put some Harbor Freight wheels on it and voilà, we have cart. So today with the help of the forklift we got the body off and on the cart so we can move them around and eventually well use this to spray the tub.
 

Attachments

  • Frame.jpg
    Frame.jpg
    392 KB · Views: 8
  • IMG_20201211_123720.jpg
    IMG_20201211_123720.jpg
    3.2 MB · Views: 7
  • IMG_20201211_143523.jpg
    IMG_20201211_143523.jpg
    3.4 MB · Views: 9
Capture.PNG
December 15, 2020 (Original Post)

So yesterday we got the GenRight 20 Gallon Fuel Tank out and set inside the new frame. It's much clearer now on what modifications will have to occur to get the tank in place. To start the factory Jeep frame bends down after the axles as it reaches back to the rear bumper. GenRight did a great job as this tank fits into the factory Jeep frame without issue; however, with the Throttle Down Kustoms (TDK) the frame continues straight back to the bumper without dropping back down. I believe we will axtend the botton side of the rear crossmember to address not only the 2 7/16" gap on the rear mounting plate but it should help us with the monting of the winch.

In Build 3.0 I ran the dual exhaust inside the frame. This is important to me as I like the look and the clearance. In order to to this we will be inserting a 3" OD .125 wall DOM in the rear frame cross member as well as the body support cross-member. Next, we will modify the top corners of fuel tank by notching out the top 4" (Deep) x 4" (Inward) corners from front to rear. This should give us the room we need to allow the exhaust the space it needs to slip by the fuel tank without causing any heat issues near the fuel. I am assuming we will lose 1 to 2 gallons of capacity. This will create an issue with how the current fuel filler necks work. If I have to I will put a fuel door in the bed of the Jeep but I am trying to keep it DOT legal.

Another concern with doing this is being able to thread the body bolt into the body without the exhaust interfering. We will likely use 2.5" 3 bolt exhaust flange in order to remove the tail section of the pipe to get to the body mount screw.

Has anyone seen this done on a Jeep?

To Do:
  • Modify Tank
  • Cut in 3" DOM Tubing
  • Create a 2 7/16" spacer to mount the bottom of the fuel tank to the frame and support the forward bolts on the winch.
  • Modify rear-exhaust pipe so it can be removed.
 

Attachments

  • IMG_20201215_080454.jpg
    IMG_20201215_080454.jpg
    3.2 MB · Views: 9
  • IMG_20201215_093945.jpg
    IMG_20201215_093945.jpg
    3.3 MB · Views: 8
  • Screen Shot 2020-12-15 at 9.24.42 AM.png
    Screen Shot 2020-12-15 at 9.24.42 AM.png
    8.4 MB · Views: 10
  • Screen Shot 2020-12-15 at 9.37.32 AM.png
    Screen Shot 2020-12-15 at 9.37.32 AM.png
    8.4 MB · Views: 10
  • Screen Shot 2020-12-15 at 9.45.23 AM.png
    Screen Shot 2020-12-15 at 9.45.23 AM.png
    10.9 MB · Views: 7
Capture.PNG
December 17, 2020 (Original Post)

So yesterday we received the trailing arms back from my buddy Jesse @ JP Designs. He TIG'd them together with the upper busing at an approximate 5°. Additionally I asked him to upgrade the busing bolt sleeve from 9/16" to a 3/4" because for some reason I did not see the option when I made my order. He machined a set of Autofab bushings to fit.

Additionally we received our box of EMF Heim Joints from EMF Rod Ends and Steering Components. So if you're asking why I went with EMF, I like the black on silver as that will be the color throughout the suspension. I believe Canadian Made is as good as American Made and honestly, they look bad ass!

We also received our order from McMaster-Carr a box of 3/4" x 4" zinc-aluminum coated within 24 hours of ordering them (they have a warehouse up in L.A.) As stated earlier I wanted the suspension to be black and silver as if it came new from a dealer. With most Grade 8 bolts being zinc coated and yellow in appearance it wasn't going to work. We sand blasted a few zinc plated bolts and applied clear POR-15 Direct to Metal (DTM) which works but I am unsure of the durability over time. That's why we decided to go with zinc-aluminum.

One of the numbers we were waiting on for the 4-Link Calculator was the actual weight of the rear trailing arms assembled which was 31 lbs. 9.4 Oz. RuffStuff advertised them at 32 lbs. 5 oz which is pretty damn close.

Resources:


Attachments

  • IMG_20201217_095225.jpg
    IMG_20201217_095225.jpg
    4 MB · Views: 3
Capture.PNG
February 22. 2021 (Original Post)

So we sort of took a break during Christmas, then we started working again and taking pictures and obly now have I had time to upload them. So I hope to get back on track with a near daily update. Over the past six weeks we managed to get the engine out, transferred to the Throttle Down Kustoms (TDK) Frame. During the engine swap we noticed that the factory OEM Chevy Bushing had failed. The rubber had separated from the metal so the engine was effective just resting on the pad. As a result we decided to upgrade the engine mount pads to thicker more substantial Prothane ones from Speedway Motors.

Due to the mounts being nearly twice as thick we had to modify the original Advance Adapters V8 Engine Mount Kit. Although this worked in the end I did not feel that it was going to be substantial enough and decided to remove the Advance Adapters Mounts and install a set of M.O.R.E. Bomb Proof Engine Mounts. We should get those installed latter this week once they arrive.

Other updates are we removed the old CJ-7 Tub, cut it at the wheel-well, had a father son team come pickup the old CJ-7 roller-frame to take back to life in Yuma AZ. We also purchased a Langmuir CNC Plasma System and started fabricating the rear bumper. I'll get those post up soon.
 

Attachments

  • 3.2.22.21.jpg
    3.2.22.21.jpg
    862.5 KB · Views: 4
May 13, 2021 (Original Post)

Capture.PNG


So when I started doing the research on stretching my Jeep I had a few goals one being to fit a 40" tire in the wheel well. So based on the size of my 33" tires and the room they had and where I wanted to be my target was approximately 12" to add. When ordering the TDK that leaves allot of unknowns. So they left the rear of the frame for me to finish off, they approximated the length to add where bracing would need to go based on their experience. So based on what we had and where we are trying to go we added 12 5/8" into the tub.

Prior to doing this I did allot of research to see how others have undertaken this. Lets face it, there isn't much that has not been done to CJ these day's. One thing I noticed was lots of before and afters both with images and video. It would seem most people choose to use sheet metal or new aftermarket reproduction metal to accomplish this. We choose to use two Jeep tubs to keep this as factory looking as possible.

The greatest challenge we have found in doing it this way is the variances in metal. We used a cutoff wheel to make our cuts, I would suggest a body saw if you have one for more consistent straight lines. We cut out a 12 5/8" section our of the 1984 Jeep CJ-7 black tub and inserted it into the 1983 Jeep CJ-7 white tub which was cut at 24 3/4". Next we used Butt Welding Clamps from Harbor Freight to hold it all together. Initially when we mocked it up it looked to me 99% exact fit. We noticed right off that the ridges on the inside driver rear fender did not line up, it was as if the ridges were wide, as if they changed the stamp mold which likely did not happen, were not sure why only those ridges were visually off.

Update: The reason we choose this length stretch was due to the factory tire was approximatly 27 3/8 inches tall, I wanted a 40" tire to fit the same space so we added 12 5/8" to keep the Jeep looking as factory proportion as possible.

Once we started spot welding the panels together ensuring that we did not warp the metal we noticed that nothing would stay lined up. After several attempts of aligning, tack welding, cutting we finally figured out that the crossbars which support the tub and all its weight (i.e. on top of the body bushings) were all uniquely bent differently due to years of off-roading and added weight. Since the tub and all the supports are just corrugated 20 gauge steel they were not designed for lasting 40+ years and getting beat to hell. This is why people just go buy new steel. I wanted to try to keep the tub all original Jeep and keep the lines.

To overcome alignment issues we had to do some relief cuts to allow the metal to lay flat after sections got tacked together. We had to shrink some metal bulges using a Harbor Freight Dent Stud Gun without the studs. Simply place the gun on the metal, pull trigger, count to a few seconds before circuit breaker trips, place cold wet clot on glowing metal, repeat in circle and the bulge is gone. Throughout the stretch we are within 1/8” tolerance on length and dips in metal. The good thing is we know a LINE-X shops and if nothing else, LINE-X makes ugly look good.
The truth is were going to add between 60 and 80 mils of LINE-X under the tub and around 100 mils to 120 mils (aprx. 1/8”) inside the tub. Since the imperfections height is less than the thickness of the LINE-X voilà perfect floors! On the outside we will be applying LINE-X Ultra which is a flat color near texture-less LINE-X coating. For reference we found a using .023 wire running at 140 ipm / 13.8 volts worked best welding the halves together. Next were weld filling all the holes that we don't need anymore.
 

Attachments

  • 1983 Jeep CJ-7 Cut Line.jpg
    1983 Jeep CJ-7 Cut Line.jpg
    269.3 KB · Views: 9
  • 1984 Jeep CJ-7 Donnor Tub.jpg
    1984 Jeep CJ-7 Donnor Tub.jpg
    194 KB · Views: 8
  • Floor.jpg
    Floor.jpg
    330.9 KB · Views: 11
  • Bracing.jpg
    Bracing.jpg
    143.5 KB · Views: 9
  • Jeep Side.jpg
    Jeep Side.jpg
    404.9 KB · Views: 10
  • Shrink.jpg
    Shrink.jpg
    399.7 KB · Views: 11
  • Stretch Set in Place.jpg
    Stretch Set in Place.jpg
    183.6 KB · Views: 10
  • With hardtop.jpg
    With hardtop.jpg
    307.6 KB · Views: 9
  • Welds.jpg
    Welds.jpg
    190.9 KB · Views: 10
Capture.PNG
May 14, 2021 (Original Post)

So just after COVID hit when we slowed down and pulled this project into the shop I started doing research on a Plasma CNC to enable us to make some cool stuff. I knew that I wanted to make the rear bumper, dashboard, cold air intake, and a few brackets. I figured that the cost of the machine would pay for itself on the bumper alone (not really but that's what I told myself). So after doing some research I found out that a local company makes one and I am all about supporting local businesses. So we placed our order and I am not going to lie, it took a few months before we were able to pick it up but it was well worth it. Langmuir Systems now offers three different sized systems, we purchased the Crossfire Pro. There is more than enough information out there on it if you're interested we have been cutting 1/4" plate with no issues. It took a weekend to setup with the only issue being getting it to cut straight which ended up being a damaged nozzle due to my carelessness.

So one of the first things I wanted to accomplish was to cleanup the firewall more than I had in Version 3.0 soda blasting in my driveway (Earlier Picture). I have always liked how clean Hot Rod engine compartments are. The wires are all hidden, the firewall is clean with no necessary holes or brackets hanging off. So with that goal in mind we took measurements of all the holes that needs plates cut, designed them in Fusion 360 and cut them using Langmuir FireControl software. Next we tack welded them into place, ground down welds and that's one less thing to do.

Earlier on we mocked up the air conditioning box inside the dash which we will go over in another post, but what we realized is in order to get the lines to run cleanly from the engine through the firewall we will need all 4 lines to be in a row. In order to do this we had move over the corner perforated bend just below the upper battery tray bolt. We needed to move the bend over 1" in order to get the HVAC lines through the firewall. You can see the lines in and the aluminum plate in the last photos. About 6" to the left of the HVAC lines we put a slit we put in the firewall where the new bracket needs to go inside.
 

Attachments

  • 3116527-3f40ae585b0bdc6a737ca83c082681c3.jpg
    3116527-3f40ae585b0bdc6a737ca83c082681c3.jpg
    6.8 KB · Views: 3
  • Cut Plugs.jpg
    Cut Plugs.jpg
    375.3 KB · Views: 4
  • Firewall.jpg
    Firewall.jpg
    721.1 KB · Views: 4
  • Firewall Spot-Welds.jpg
    Firewall Spot-Welds.jpg
    342.5 KB · Views: 3
  • 3116525-463da568a6f14f45a17abc398e577a09.jpg
    3116525-463da568a6f14f45a17abc398e577a09.jpg
    4.4 KB · Views: 4
  • 3116526-5bee3859f837ac5876dd4882bdf219a0.jpg
    3116526-5bee3859f837ac5876dd4882bdf219a0.jpg
    4.8 KB · Views: 3
  • 3116527-3f40ae585b0bdc6a737ca83c082681c3.jpg
    3116527-3f40ae585b0bdc6a737ca83c082681c3.jpg
    6.8 KB · Views: 3
May 22, 2021 (Original Post)
1643502416963.png


So I thought I would do a post on Herculiner vs. LINE-X. I think in an earlier post I mentioned that when I first bought the Jeep (Version 1.0) I applied Herculiner. After looking up the link I think the price has come down from $99.00 back in 1998. As I recall it took a Saturday afternoon. You scuff the surface with a scotch bright pad, mix it up to evenly distribute the aggregate, roll it on and try like hell to not get it on yourself as it doesn't come off your skin easily. I did a second coat in 2010 (Version 3.0) to fix some worn spots on the drivers and passengers floor board but remained satisfied with my efforts. As we prepare the Jeep for sandblasting we had to remove the Herculiner as any sandblaster will tell you, bed-liner material is difficult to remove with normal dry blasting media as it likes to make the material molten and pushes it around.

So the good, the bad and the ugly. Herculiner is a great solution for DIY and to keep costs low. It performed as advertised and met my requirements. The first photo below shows the beginning of the removal process. The first thing I noticed was although I used a scotch pad on the floor the peeled relatively easily compared to if I had to remove one of our LINE-X floors (See last photo). The reason was as you can see from the image to the right, the backside of the Herculiner is white. This is due to the over-spray from having Earl Scheib paint the car, they never prepped the inside nor did they tape it off allowing the over-spray to coat the inside tub. If we allowed this to happen with LINE-X the same thing would occur. If this were to occur on a customers truck we would not warranty it, it's one of the discussion we have with our customers when they ask us to coat aftermarket paint. It's certainly something to be aware of, the top coat is only as good as everything below it and prep work is 90% of the job. In total we removed the floor in about 2 hours. The LINE-X floor took just north of 8 hours.

The next thing we noticed is that the primer and paint on the factory Jeep was about 13.5 mils thick. Measurements through the Herculiner showed about 41 mils, therefor the Heculiner was about 27.5 mils thick. In comparison we will apply about 60 to 80 mils (1/8") of LINE-X XS-350 in the tub and underneath when the time comes the body will have 20 Mils of LINE-X Ultra. More on on this in future posts.

The other thing I noticed was the rust I had by drilling my Bushwhacker Fenders into the rear tub. The hole allowed water to permeate the inside and started rusting the seam out. Although I had planned on reusing these holes we decided to weld them all up and redo them in a more appropriate and safer location. Lastly, we noticed that the lower B-Pillar and the high side of the passenger floor board had the best adhesion requiring us to use other tools we typically only need for really stuck on bed-liner material. You can see the reddish primer in the images below. This was due to no over-spray and good prep, again that is 90% of the job, the quality of the material is the other 10%.

Herculiner is a polyurethane which when rolled on gives you a rubber coating. LINE-X is a polyurethane and polyurea (think plastic) which is sprayed at high temp (165 degrees+) and high pressure (2500 psi). The technology between the two is night and day but I have to say, after having Herculiner in my Jeep for 20 years I am happy with it's performance in a Jeep tub which has minimal impact. If any of you are looking for a simple to use, affordable protective coating for light duty use Herculiner will work just fine.
 

Attachments

  • Bedliner1.jpg
    Bedliner1.jpg
    400.7 KB · Views: 8
  • Bedliner2.jpg
    Bedliner2.jpg
    254.6 KB · Views: 6
  • Bedliner6.jpg
    Bedliner6.jpg
    396.1 KB · Views: 6
  • Bedliner4.jpg
    Bedliner4.jpg
    339.6 KB · Views: 6
  • Bedliner3.jpg
    Bedliner3.jpg
    382.4 KB · Views: 6
  • Bedliner7.jpg
    Bedliner7.jpg
    231.2 KB · Views: 6
  • Bedliner8.jpg
    Bedliner8.jpg
    217.9 KB · Views: 6
  • Capture.PNG
    Capture.PNG
    1.6 MB · Views: 8
  • LINE-X-Removal-LINE-X.jpg
    LINE-X-Removal-LINE-X.jpg
    291.7 KB · Views: 11
Last edited:
Capture.PNG
June 3, 2021 (Original Post)

So we finally got the motor mounted back in the Jeep. As I mentioned in a earlier post on Version 3 of the build I installed the Small Block Chevy (SBC) using Advanced Adapters Motor Mount #713089 which served me well for the past 10 years. However when we removed the motor I noticed that the rubber pad had separated from the metal backing plate. So we attempted to replace the OEM ones with an upgraded version from Speedway Motors Prothane Mounts #7-504-BL but due to the Advanced Adapters mounts being designed for OEM pads not the thicker Speedway ones, we had to modify the mounts. After cutting and hacking on them for a few hours and having issues getting the holes lined up we scrapped them for a set of upgraded to M.O.R.E. Off-road "Bomb Proof" Motor Mount Kit #JM200.

So just when we thought we were good to go on dropping the engine in we had an issue with the "Engine Side Passenger Mount" not wanting to go down on the frame post squarely. The driver side worked fine, but when we would try to get the bolt through the hole on the passenger side it kept kicking the transfer case rear output shaft over to the driver side 3" to 4" which is obviously not right. After some thought we decided to cut the bracket apart and re-weld it in to the position we need it. After cutting the welds off we bolted the plate to the engine and slowly set everything in down in place where it should have gone the first time. It was when the plate came into contact with the frame side mount and you see that the bracket had a bad bend in it. The techs at M.O.R.E. Off-road said they use a jig to make these so I am not sure how it made it to me bad but we got it corrected after some careful thought.

The longer you off-road the more you learn. Over years of off-roading I have always disliked using a screw driver to brake clumps of dried mud from ever corner of the frame and body. As such it's something I am going to address in this build even if SoCal doesn't see much mud, I will make sure the Jeep does. So we used the Langmuir CNC to cut some fitted plates and welded them on the bottom of the "Bomb Proof" mounts to keep mud from gathering trapped inside plus it nothing else they're no "Nuclear Proof." Yes I know. the final image still shows we need to finish welding the bottom plates up, we'll get that done today.
 

Attachments

  • IMG_20210312_135512.jpg
    IMG_20210312_135512.jpg
    3 MB · Views: 5
  • IMG_20210522_155137.png
    IMG_20210522_155137.png
    500.6 KB · Views: 6
  • IMG_20210522_155505.png
    IMG_20210522_155505.png
    282.1 KB · Views: 7
  • IMG_20210603_102444.png
    IMG_20210603_102444.png
    385.1 KB · Views: 5
  • IMG_20210312_134955.jpg
    IMG_20210312_134955.jpg
    2.5 MB · Views: 5
  • IMG_20210127_091228.jpg
    IMG_20210127_091228.jpg
    2.6 MB · Views: 6
  • IMG_20210124_152826.jpg
    IMG_20210124_152826.jpg
    3.3 MB · Views: 4
  • IMG_20210107_150607.jpg
    IMG_20210107_150607.jpg
    2.8 MB · Views: 4
  • IMG_20210107_150600.jpg
    IMG_20210107_150600.jpg
    2.5 MB · Views: 7
Last edited:
June 7, 2021 (Original Post)
Capture.PNG


The fiberglass top stretch is the one thing I could find little to no information on other than fiberglass videos and boat videos. I watched several videos on fiberglass and boat stretching which lead me to believe that the more I distribute the cut locations the stronger it will be. Next we identified the center point of the window marked in "Blue" From there we marked out the lines which would tentatively get us to the 12 5/8 stretch that we added to the body in "Red". You can see in the image to the right the green line is where we ended up needing the line. Fortunately when we did the cut we added about 1", this barely gave us what we needed. The point of this exercise was to over cut the tops so once we placed the front half on the window and got the doors all squared up, we could slowly trimmed the seem until they came together perfectly by sliding the rear top forward. We noticed the white top is made from a thicker fiberglass which was .185" thick while the black top was .135. In order to keep the exterior looking like it should we took some scrap pieces from the old tops to make battens.

I am using West System due to the simplicity, effectiveness, and no smell. We're using the 105 Epoxy Resin with the 106 Hardener which gives about 20-30 minutes to work the patches. We ordered some biaxial fiberglass cloth that we are cutting up to fill the hole. I am using their Six10 caulk gun adhesive to bond the battens I cut for the top left and right corners. I will use these to provide the structural reinforcement by bridging the both the inner and outer gaps. I also offset this seem by 6" to distribute the weight over two offset seems. We also offset the seem on the bottom edge by cutting a V-groove in it to again distribute the weight load over a longer distributed seem. The previous owner drilled a hole for a light in the top of the cover, we tried the Six10 to fill the 1/2" hole, sanded it and now it's gone.For nicks, scrapes, and general bondo type filling were adding 404 High Density Filler to the 105 and 106 to the consistency of peanut butter. I will add more pictures as we work through the process but the first crack is filled and now needs a little filler and some sanding.

In all honestly I hurried the cut and should have kept the back half of the white top and the front half of the black top, the opposite of what I did. The black front had a clean break through the Passenger B-Pillar which at the time I didn't want to deal with, but It wasn't until after I cut em up that I realized that the back half of the white top has several cracks which although not clean breaks they all needed to be ground out and repaired.
 

Attachments

  • IMG_20210605_162344.png
    IMG_20210605_162344.png
    1.6 MB · Views: 5
  • IMG_20210605_154719.png
    IMG_20210605_154719.png
    1.6 MB · Views: 4
  • IMG_20210607_112346.png
    IMG_20210607_112346.png
    1.8 MB · Views: 3
  • IMG_20210607_112354.png
    IMG_20210607_112354.png
    1.8 MB · Views: 4
June 9, 2021 (Original Post)
Capture.PNG


So I am continuing on the fiberglass repair. I really should have paid closer attention on what halves to use, I think I will be doing repair on the rear/black section most the week. There were numerous places where the fiberglass was craked, the rear corners edges were pretty chipped up as well as the inner upper corners of the hatch back. It looked as if someone had overloaded there CJ with camping gear and it scrapped it up pretty good. just going to show you some of the repairs. to give you an idea what's involved. When at all possible I am trying to keep repairs and sanding on one plane so as to not round off corners or overfill inner bends. As with everything my coat applies LINE-X too, 90% of the end product is based on the prep you put into it. We will be using LINE-X Ultra v2 (black or blue) on the outside. It's a thinner version with a much finer texture than normal LINE-X. It's been on nearly every LINE-X SEMA truck due to it's flat finish and durability.

The problem is like paint, it shows all the imperfections (if there are any) once we spray it, unlike paint, if we need to touch it up we basically have to sand it back to a natural break line so we can do a seamless repair, bottom line it's far less forgiving than regular truck bed material. On the inside we will use a standard truck bed material, XS-350 for durability and it's ability to go on with much less attention to detail. LINE-X XS-350 will cover up any imperfections on the inside due to it being a thicker build product which can be used to fill and sand.

For the repairs below, were grinding out the fiberglass until we find the bottom split. Were doing this with a 90 degree 60 grit air grinder (wear a mask). The little twist lock disc creates a nice 1" to 1.5" valley. From there I am cutting 4 to 5 patch layers making the first the smallest and incrementally making the next larger. The coaxial cloth and resin make cutting them to the exact size unnecessary, I stack the layers until its flush with the final layer going over the entire trough I created. Next day I sand it down flush using Eastwoods 7-Piece Durablock Set. Since it's not for paint, I will only take it from 120 grit to 320. then prime it with our XPM primer. After I completed a patch I would mix some of the 406 High Density Filler into the rest of my cup and look for bad edges, nicks, old bolt hols to clamp it down and use it to fill them in. This creats a seriusly hard edge or fill that I am confident can't easily be nicked off or damaged, especially since it will be under LINE-X.

One thing we did was try to keep one of the lights from either cover, both of them were pretty dry-rotted and rusted. We just happen to have a 3-way switch from the rear door of a ProMaster we sprayed foam in and LINE-X over (we will be foaming the inside of the jeep walls for insulation ~ more to come) so using a little Dupli-Color Black. So not only will we have a door trigger but we can control it independently.
One of the issues we had with the black top is all of the screws broke off due to rust on the rear hardware. We've got a solution which we will address in a future post but needless to say we will be inserting a new metal strut plate inside the fiberglass.
 

Attachments

  • IMG_20210608_173545.png
    IMG_20210608_173545.png
    1.3 MB · Views: 2
  • IMG_20210609_114126.png
    IMG_20210609_114126.png
    1.3 MB · Views: 3
  • IMG_20210609_111316.png
    IMG_20210609_111316.png
    1.5 MB · Views: 2
  • IMG_20210608_141201.png
    IMG_20210608_141201.png
    1.5 MB · Views: 4
  • IMG_20210607_112354.png
    IMG_20210607_112354.png
    1.8 MB · Views: 4
June 22, 2021 (Original Post)
Capture.PNG


So the fiberglass is taking longer than expected. We completed all the glass repairs on the rear half, about nine spots were roached. I really should have been less hasty when I choose the half's to keep. The front half had some paint applied over textures which in the beginning I had planned to sand, fill with 2k Primer, sand smooth then apply our XPM Primer and LINE-X Ultra and then off to paint. Well after further inspection we decided to take the top all the way down to fiberglass. Rather than risking peaks and valleys stripping the paint using sand paper we decided to use paint stripper. It took about 1.5 gallons which was allot more than we had anticipated.

In the end the top went through a few colors. Starting from new the top was white and severely weathered. At some point it looks as if someone sprayed Aerosol Bedliner giving it a slight texture. Next it looked as if someone took an grey oil based paint to it as the stripper reacted a little different with the grey than the other colors. After the grey someone applied a coating of white automotive paint, likely from a HVLP as it was pretty thick and even. In the pictures the blue pigment was leeching out of the black bed liner coating.

In the end much like the Herculiner discussion earlier in the thread, it's all about how good you prepare the surface. After seeing all the layers under the white paint it was a good thing we removed it. One issue we can have when you apply a high pressure bedliner over other coatings is off gassing. When we apply LINE-X we are doing it at a machine temperature of 160- to 180 degrees. When the chemical lands on the substrate it raises the temperature due to the catalyzing process. In the end, if you have multiple layers of paint, Bondo, glue or anything that "may" contain moisture which can off gas causing a bubbles. Since we are going to apply LINE-X Ultra on top and then were having a distressed American Flag airbrushed over the LINE-X, if we had a bubble pop up it could get expensive and difficult to repair.
 

Attachments

  • IMG_20210618_150423.jpg
    IMG_20210618_150423.jpg
    4.4 MB · Views: 2
  • IMG_20210618_142256.jpg
    IMG_20210618_142256.jpg
    4.3 MB · Views: 3
  • IMG_20210618_081005.jpg
    IMG_20210618_081005.jpg
    4.2 MB · Views: 3
  • IMG_20210617_155126.jpg
    IMG_20210617_155126.jpg
    4.6 MB · Views: 3
  • IMG_20210617_151038.jpg
    IMG_20210617_151038.jpg
    3.4 MB · Views: 5
  • IMG_20210617_150828.jpg
    IMG_20210617_150828.jpg
    4.7 MB · Views: 3
  • IMG_20210617_150318.jpg
    IMG_20210617_150318.jpg
    3.5 MB · Views: 3
  • 20210621_155917.jpg
    20210621_155917.jpg
    308 KB · Views: 3
  • IMG_20210618_151713.jpg
    IMG_20210618_151713.jpg
    3.7 MB · Views: 3
September 4, 2021 (Original Post)
Capture.PNG


Fiberglass Stretch Part 1 of 2

So the past few months we've been busy jumping around on the project addressing different parts based on time, space, and whatever else. In order to make some space we completed all of the bodywork on the hardtop lift-gate, tailgate, windshield and the grill. I will address these latter on what we did but I needed these parts finished and ready for the LINE-X Coating. So the first thing we did was align the rear half to the corners. We also re-spaced all of the original 4 interior rail screw holes.

Once we had the rear aligned we installed the windshield and aligned the interior 5x screw holes. Next we installed the scrap top plate. Prior to screwing it down we coated it with packing tape. Using wood screws screw the top plate to help ensure that the top was level on the top level. One thing we noticed between the two tops, the 1984 Top (Front) was made from thicker fiberglass than the roached rear half that we used. This leads me to believe the rear half is newer as that tends to be the way things go, the newer they are the cheaper and lighter.

We also used steel flat bar to pull the outer bottom edge cuts level for the same reason as above. The first bond we did was on the inside lower edges due to us know the rear corner and door seal were perfectly flush and level. In order to do this we router 1/2 way through the fiberglass with a 2" grinders and then started stacking 3-4 layers of the binomial fiberglass. Next we did the same thing on the outside ensuring that we cut all the way to the new fiberglass we did the day before on the indies.

In all cases we went with the West Marine System due to YouTube videos and the simplicity of use. I have no regrets and highly recommend their products to anyone looking to do some fiberglass work. Once we had the lowers hardened we mixed some resin and added in 404 High-Density Colloidal Silica for high load gap filling. We used this from the inside to fill the gap between the two tops. We only applied this between the mold lines on the inside. We did this so we could address preloading the outer corners last as they were 1/4" to 1/2"spaced after everything was assembled. Next I will show the the final step which was the corners.
 

Attachments

  • 20210807_161927.jpg
    20210807_161927.jpg
    458.1 KB · Views: 2
  • original-3e892fc1-0cd3-4c0e-82c4-2db4620dcdbf.jpeg
    original-3e892fc1-0cd3-4c0e-82c4-2db4620dcdbf.jpeg
    1.1 MB · Views: 4
  • original-7e38fc73-fd9f-4580-98b9-770cc3e1cabc.jpeg
    original-7e38fc73-fd9f-4580-98b9-770cc3e1cabc.jpeg
    1.2 MB · Views: 2
  • original-21ab3648-a776-4995-b40c-d1ba4f0214a9.jpeg
    original-21ab3648-a776-4995-b40c-d1ba4f0214a9.jpeg
    981.6 KB · Views: 3
  • original-951bf19c-663c-4a0e-bdfc-4fd1626c3a4c.jpeg
    original-951bf19c-663c-4a0e-bdfc-4fd1626c3a4c.jpeg
    1,004.4 KB · Views: 2
  • original-952ac941-f6fc-40b5-b73b-e2b0a2d4cd48.jpeg
    original-952ac941-f6fc-40b5-b73b-e2b0a2d4cd48.jpeg
    1.1 MB · Views: 3
  • original-b1151434-8bfc-4b6f-aa0b-347601feb908.jpeg
    original-b1151434-8bfc-4b6f-aa0b-347601feb908.jpeg
    1.3 MB · Views: 2
  • original-c6fb0eee-f76e-496d-86f2-4dae107647c7.jpeg
    original-c6fb0eee-f76e-496d-86f2-4dae107647c7.jpeg
    920.8 KB · Views: 3
  • original-e94ada0c-8bc7-458f-86a5-74c7a5ed349b.jpeg
    original-e94ada0c-8bc7-458f-86a5-74c7a5ed349b.jpeg
    1.2 MB · Views: 6
O.k. so I transferred it, now to start working on getting you caught up to where were at. I stopped posting on Pirate4x4 when I logged in and saw half the photos missing, it would appear that it has since been fixed but I will feel better with having the thread here.
 
Top Back Refresh