What's new

44x40 Shop Build

tsm1mt

Well-known member
Joined
Jun 5, 2020
Member Number
1854
Messages
105
I started This thread three years ago.. and I shelved the idea for a bit, added a 34x10' lean-to on the current shop, and tried to make do but ultimately I finally pulled the trigger this spring when COVID arrived and so did sub-3% interest rates.

A 34x28 is bigger than a lot of people have, and I've been spoiled in filling it full of crap to the point where I have to clean a bunch and re-arrange to get a second rig inside to work on, and then mostly limit myself to one end or the other at a time - you all know the drill (and the 10 year racer project occupying the official work bay doesn't help)

I have a 14 year old in the family who will want to drive next year, and given her track record on waking up for school, she'll be driving with a frozen windshield.

Plus my wife complains about parking outside, too..

So I'm fixing that.

I wanted 60x40 like everyone else, but pulled back. I wanted an attic truss, for "free" space, but found out that was as expensive as a second building.

I downsized to 40x40, thinking that would be a reasonable compromise between "heating way too much space" while still having room for a lift-bay and a non-lift bay without getting frustrated.

I picked 16' for the walls, but it took a while to settle on that - I had a few factors for it. One, you can put in a 14x14 door and bring in a motorhome, and while I don't have one like that, maybe that'll change - or I'll buy a semi.

The other was thinking of expansion and what I could do as far as a lean-to or addition. With 16' walls, if I switch from the 5/12 pitch of the main roof to a 4:12, I can get 24' out and still be at 8' of height - or stick with the 5:12 pitch, only go out 12', and still be at 11' walls for a one-car bay with a 9' door.

I started down the path of a pole-building, and while that's what I'm going to do, I probably should have asked more about sitck built.

One of the oddities of the pole-building is the outfit I selected does 4' spacing on the trusses.

One of the things I wanted to add on this building was more solar (I have 6kw on the current shop, last summer's project) - you need to have 3' on either end and the peak for firemen to walk around, so that limits you, and then the truss spacing, so after running some numbers I stretched the shop to 44x40.

One extra truss lets me add another row of panels.

With 44x40 and a 5:12 pitch and 2' overhangs, I can get 6 rows of 5-wide on each side, for 60 panels.

The building runs north south, like my house and my current shop, which means the panels are not facing south, but it also means I can undersize the inverter a little because the east array makes more power in the morning and the west array in the evening - with a big fat broad spot on the curve from 8-10 to 4-6 but never reaching theoretical max.

My current shop has 12 245w panels on the east, and another 12 on the west. Just under 6kw. I have seen peak production of just a bit over 5kw, and that's only on the peak days.


I went with a single 14x14 door. A drive-through has appeal, but I live in Montana, and I'm on the plains - the wind blows. Predominantly from the west. We spend a lot of our time in front of the current shop using it as a wind break.

So I put a single 14x14 door on the east side, to one side. A man door is next to it.
The west wall has zero openings. The south wall will have a single window (facing away from the road and into my field).
The north wall has a man door as well - that was originally going to open into the old shop, but circumstances dictated a change for the better.


So, back in March and April I had to deal with some of the, uh, treasures hidden against the old shop.

G0032797-0009-me.jpg


I moved them about and lined them up next to my property line, begging someone to turn me in..

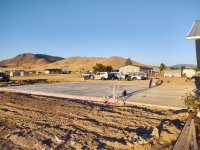
But along the way, I heard my neighbor beating on his truck one night and wandered over to see what was up and ultimately found out he does concrete and his brother does excavating. Score.
 
Relatively recent draft of a proposed layout.

garage_40x44_5-me.png


I did mark out the space on the ground with some tires to mark the corners and the doors and drove some rigs in and out a bit to "see" if I could live with it.


I had too many people ask if I was putting in a second story, so I've rethought that some and I think I'll add a second floor on the "top" of the diagram (which is the south wall).

I'm leaning towards the full 40' across. I'm also thinking 8' is the right depth - 4' would be easy, but just a storage area. 6' could be either, but at 8', it might be useful for more than just storing crap.

Conceptually:

garage_40x44_6-me.png


The diagonal bay into the SW corner is intended to be the "work bay" - and having a post right there could suck if I hook the loft around the corner.

Otherwise, when you have toolboxes and/or workbenches along the wall, an 8' ceiling for that edge isn't a big deal, and even coming out 8' - there's still plenty of room to open the hood.


North (bottom) wall is adjacent to the old shop. The man door will be about 24 or 25' from the SW corner - I need that wall space for steel storage. I get the stuff delivered and they drop it in the driveway - so open the door, drag it inside, and rack it.

The bandsaw sits on the other side of the man door, so after you take down a stick of tubing, you can just walk it down the wall to cut it. The grinder and drill make sense in the same "dirty corner" as well - though I think I need to move the parts washer and/or blaster - to keep the washer from the sparks at least.

With stairs to go up, that might make a nice place to hide the mill/lathe under. I could even see a curtain.

Not shown - back in along those stairs, and I plan to hang my hardtop from the ceiling.


I'm not sure I'll be able to get two vehicles end to end in the "lift bay" but it's a nice thought.
 
A few more details before we get to the dirt work.

I wanted a bathroom, but didn't hear back from the State on whether I could or not - conflicting opinions on whether it would be an additional bathroom, and I'd need a bigger tank AND a bigger drainfield.

Plus there was some concern if I had enough drop or not.

So.. fine.

I did get water run to the shop - 200' of hose to fill the camper or wash a rig had me towing the camper to the well head, and dragging extension cords over to use the pressure washer. No more.

We ran a 1" water line to the NW corner of the building, 6-7' below grade.

We also trenched from the house to the shop, and I put in a 1" gas line (just in case), along with 2" conduit for 200A service, 1" conduit for the ethernet, and an extra 2" just for fun (perhaps some coax for more ham antennas..).

Side bar - I wound up upgrading the house service to 400/320A from the previous 200A. Partly because I wanted to backfeed more solar, but then also since I'm producing power, I want to try heating the shop with (free, I hope) electricity.

In any case.. they got serious about the dirt work in August.

IMG_20200805_210919856-me.jpg


Dug out an 18" mono

IMG_20200806_142037922-me.jpg


Then eventually framed it up
IMG_20200810_202312715_HDR-me.jpg

shot gravel, and compacted
IMG_20200810_213321408-me.jpg

IMG_20200811_195541144-me.jpg


You may notice it doesn't share a wall with the old shop.

The builder informed me it would cost more if I built right against the old shop (or even a few feet away), because they couldn't use their lift to do the high walls - they wanted 8' of clear space around the building.

I wanted it against the old shop, so I would have room enough to still drive around my drainfield. But 8' would cost me that, so if I had to space it 8', I opted for 12 or 14'. I actually decided on 14', but after we found out the septic line didn't run parallel to the old shop (sorta parallel, but not) things changed again.

The new shop isn't square to the old - we turned it slightly, and the gap between buildings is more like 12' or 13' on the "front" end and 14-15' on the back (west).

I've been calling it my bonus room - next year's project will be to box it in, and I'll have a long 1-car garage sandwiched between the two - among other things, so I only have to brave the -20F wind tunnel once to go from the house into the old shop, then stay indoors.


Everyone talks about how nice radiant floor heat is.

We'll see.

IMG_20200811_202947865-me.jpg


I goofed on my measurements - well, I was right, but I failed to account for the mono. In the end, I had 8-10 pieces left over, as I had planned (for damage) but also an extra FOURTY because of the mono-slab. D'oh.

These are R-10 panels.

Panels went down one night, and I got 3 or 4 of the 7 tubing runs in that night, and finished the next.

Then I hauled a TON of rebar and the guys got to work. 2x2 grid of #4 rebar, 60kpsi plus the mono. We also used rebar in the bonus-room slab later, and my wife wanted a new patio and a few other bits and I have 28 pieces left over that I think the other neighbor will need when he pours a floor in the 30x40 shop you see across the road.

A few things on this last picture.

Not enough bracing. Not enough stakes. Had some challenges with the pour.

We eventually put 2" foam around the perimeter, down 24". I had lobbied for making the forms +2" per side and putting the foam in, but my neighbor had a different idea (he's since re-thought that). Putting the foam in would have helped distribute the load across the forms better, and we wouldn't have had to dig out the "footings" afterwards to place it.


I forgot - why the mono slab? Among other things, the single door screwed me on doing the pour afterwards - we would have needed a pumper truck, so I was convinced to pour the mono-slab first, rather than set poles and pour it later. Why would we need the pumper? The radiant heat makes it hard to wheel-barrow the mud, or back the concrete truck inside like you otherwise would.

One thing that I didn't anticipate, and everyone else might watch out for - the price for my building, originally with 16' walls (with 20'+ posts I presume) with posts set in holes drilled in the ground with concrete went UP in price when they switched to "just" 16' posts and added the floor mount brackets.

No discount for shorter posts, no discount for no hole drilling, just an added cost for the brackets.

IMG_20200816_101428634_HDR-me.jpg

IMG_20200816_202355238-me.jpg


7 runs of 1/2" oxygen barrier pex. I bought 3000' of the stuff. I needed 1760 for the main shop, and while I was at it, we put heat in the bonus room floor, so another 400' was needed there - so 2150' would have done it, but that assumes zero waste and perfect length runs - so 3000' it was.

I'm thinking of putting the rest in the approach and toy with ice-melt later.

The 2 2" conduits (4 total) are for the main shop floor - two are the out, two the returns. I wanted something to bunch them up and hold them in place for the pour.

The four 1" conduit elbows are for the heat in the "bonus room" - I thought 1/2" pex would go into the 3/4" conduit, and it did, but not the elbow. :)

I have two manifolds - one is a 7(x2) and one is a 2x2. They'll both be in the shop. The bonus room won't be heated this year (it won't even be a room).

IMG_20200816_203129373-me.jpg


On the end by the door, I put another group of 2" conduit for the ice melt expansion.

IMG_20200816_203059430-me.jpg


The 14x14 door will have a 5' wall section to the right of it, which is where these conduits are. A nice little spot for a heat exchanger.

Also visible on the right side of that trench, is a run of 1" PEX to feed the (eventual) manifold for the nice melt. I figured I might as well run it in the slab that's already heated so I wouldn't have to worry about heat loss.

There's also a run of 1" conduit in there. I ran it around three sides of the building - I will stuff my 1/2" pex water lines in there later to run water around the shop, but mostly in the floor - rather than (entirely) in the walls.

I plan on water on the short wall by the door, and on the two southern corners.

No drain the shop, so these will be mostly outdoor water fixures.

I am thinking when we pour the approach, of putting a "wash basin" / trough below this corner with a drain pipe running south out into the field.

I'm also thinking of an on-demand water heater for a hot spicket.

I'll put an in-door water faucet too in at least one spot - I just need to be careful what I do with it. Fill a water jug. Pressure wash the floor before pushing the water out..
 
Mud!

They did wind up coming at it from three sides.

IMG_20200820_102042245_HDR-me.jpg


The mini-ex had to come in to hold the wall - but underneath still bowed out and was later chipped away.

IMG_20200820_102610019_HDR-me.jpg

IMG_20200820_120427014-me.jpg


And you can see some of the overall bow in the wall here.
IMG_20200820_121757012-me.jpg


The builder wanted a lip in the edge of the pad for the skirt board to rest down/in, so we wound up cutting a new straight edge later and chipping out the overage.

IMG_20200820_121848718-me.jpg

IMG_20200820_122026219-me.jpg


Things didn't go as smoothly as you'd hope - the wall tried to blow out, the other walls bowed, the new power screed they had bought for the job wasn't assembled right, the extra help didn't show up, the 48" power trowel should have been a 36..

But all in all, it worked out.

IMG_20200820_122145329-me.jpg

IMG_20200820_145703595-me.jpg


Couple of low spots..

IMG_20200820_204105283-me.jpg


I kept water on it for a week or so.

IMG_20200821_145127584-me.jpg


My youngest decided to dance in the "rain" and got soaked having fun.

IMG_20200821_170351141_HDR-me.jpg


Then a week later, the "bonus room" was poured. I decided to only insulate the slab to the 28' mark where the original shop ended, not the extra 10' of lean-to I had added. The lean-to isn't insulated. This way, the bonus room will have two insulated (R-21 for the old shop, that or better on the new) walls already in place - just need to add the rear wall, a roof, and a garage door..
IMG_20200828_153115550-me.jpg


IMG_20200828_155657160_HDR-me.jpg


Because the new shop is a little bigger and wound up sitting "in front" of the old one a little, we wound up with about 2' of concrete "in front" of the bonus room. I put 2" foam to cut the two sections of concrete, and ran a single loop of PEX in the little itty bitty approach.

IMG_20200828_172333063-me.jpg

IMG_20200828_172336372-me.jpg


Then the forms were pulled from the main shop and the foam installed on the perimeter
IMG_20200901_110536149-me.jpg


In a week, they're supposed to come put the building up on the 40x44 pad to the left.

Then I have more fun to finish it..
 

Attachments

  • IMG_20200911_073857350_HDR-me.jpg
    IMG_20200911_073857350_HDR-me.jpg
    115.3 KB · Views: 50
Last edited:
A few spec/notes.

The insulation under the slab is R-10. The PEX really does just walk into the nubs.
The nubs end up consuming 1" worth of concrete to fill in the voids. We put 5" of concrete on top of that on the main shop, 4" on the bonus room.

I have a 23kw electric boiler. 95A current draw.
I am thinking of buying a couple of suspended forced air electric heaters too - so I could keep the slab at 40 or 50deg, and use the forced air as needed to warm it up a bit more.

I said I should have gone stick after going mono-slab - well, to finish the interior, I have to just about frame it out anyways. The one good thing is I can avoid thermal-bridging. The posts are 8' or 10' apart (end walls are 8', long walls are 10') and 4.5x5.5. I can frame out 2x4 walls and the 2x4 won't reach the outside, so less thermal bridging.

I'm going with Corbond in the walls - vapor barrier and good insulation all in one. 3" minimum for R-21. I'm mulling over going to 4" - it looks like it could be a 9 year back back, while the extra inch to go from 4-5 is at least 12 years.

R-50 in the ceiling. Ceiling will be steel liners, because of the 4' spacing you can't hang sheetrock.

Walls will be 'rocked with 5/8 for the fire barrier over the foam.

I may find some 3' sections of steel siding/roofing and do an interior wainscot.
 
Sweet looking start, very jealous of the radiant heat. :smokin:

Did I miss what part of the world your in? Temps?

Also, sounds like you need to take that neighbor a few cases of beer and have him trench a loop around the property to throw a few hundred feet or pipe in for geo-thermal. A simple pump would keep that pad heated that low. I realize thats over simplifying it but ... if you've gone that far
 
Where did you get those R10 panels from?
Im about to do a 4000sqft floor and those look pretty cool
 
Sweet looking start, very jealous of the radiant heat. :smokin:

Did I miss what part of the world your in? Temps?

Also, sounds like you need to take that neighbor a few cases of beer and have him trench a loop around the property to throw a few hundred feet or pipe in for geo-thermal. A simple pump would keep that pad heated that low. I realize thats over simplifying it but ... if you've gone that far

I'm in Helena, MT - where it gets cold. :D

Dang! I had been researching Air to Water heat pumps because the high cost of geo-thermal put me off with the need to drill - or trench, but now you have me rethinking that as a possibility in the future.

I do have some land I could cut the trenches into for horizontal loops. Hmmm.

Too bad the budget is shot for a while.

Thank you for the good idea.
 
Where did you get those R10 panels from?
Im about to do a 4000sqft floor and those look pretty cool

Home Depot

Looks like the cost is $15 now for 8 sq ft. or $60 for 4x8 equivalent, while the 4x8 R-10 Foamular is $45.

I think the Amvic panels were a little cheaper when I ordered them.

Free shipping, which was nice. They're not heavy, but I had 7 pallets delivered. I hauled one stack of left over 20 panels into town for my mom to think about doing radiant in an out building - they had a tendency to try to fly out of the pickup above 35mph, even when bundled together. :D

I might've been better off with more insulation under the slab - perhaps a run of 2" blue board, then this stuff for R-20 under the slab.

The Amvic panels did make installing the tubing easy - just bend over and walk it in.

I previously installed insulation and PEX in my mom's 30x30 about 20 years ago. I think the insulation value was less, and it was a mostly flat board with some stiffening ridges. The tubing went in with staples into the foam. Harder to get the spacing right and to keep it neat.

There is a down side to putting the tubing so far into the slab - heat response won't be great, but if you're just going to maintain a constant temperature, probably not a big deal.

On the plus side, I have 5" of concrete above the tubing, so I can still set anchors without too much fear, as long as I don't go down past 5"
 
Part of this setup is adding solar to the shop (I have 6kw on the old garage) and to add more I needed to upgrade the house panel, and upgrade the service and so forth.

On the plus side, there's still a 26% Federal Tax Credit for solar work, and since the power had to be upgraded as part of the install..

It started with replacing the transformer..
IMG_20200827_080809092-me.jpg


and a big hole through my yard.

IMG_20200901_144136392_HDR-me.jpg


Power company power goes straight out and under the photographer to the main power feed down the property line and the transformer.

The stuff that turns to the right is the feed to the new shop.

2" conduit to the new shop with 4/0 wire for 200A feed to it.

2" conduit to the new shop for.. dunno yet. Probably some coax.
1" conduit with ethernet.

Plus a 1" natural gas line.

Running out ot the transformer is the 3" conduit for the 400A service.

The white is the sewer line from the house to the septic tank.

Getting to be a big busy on the back of the house.

IMG_20200827_163618556-me.jpg

IMG_20200901_144044366-me.jpg


New 400A panel. Then the 100A shut off switch that feeds the garage (so the power company can shut off the 40A backfed solar fed from the old garage), and then the 200A shut off for the new shop (again, to make the power company feel safe).


A note on the solar rules.

In addition to the shutoff switch requirements, there's also something called the 20% rule.

You can backfeed 20% of the rated power of your panel.

So for my old 200A service and 200A house panel, that is 40A I can backfeed before they get worked up about overloading the bus inside the panel.

So going to a 400A service, I can back feed 80A.

But the way the 200A service comes in, and is then divded into two 200A feeds (and in this case, some "local" breakers that include the 100A feeding the old garage), I can manage to back feed a bit more.

The service is called 320. It can go to 400A, but they don't want you to exceed 320A on a regular basis. Weird, but that's that.

Consider for a moment a single 200A panel. To keep things simple, let's say I have a 50A range, 40A drier, 40A water heater, 20A A/C unit, and then we'll add a 50A welder and a 50A plasma.

250A of possible draw out of a 200A panel. I don't use the plasma and the welder at the same time, so it all works out.

If I did have a buddy over, we'd throw the breaker.

Now introduce a 40A back-feed of solar power, and I could have 200A from the power company, and another 40A from the back-fed solar, for 240A on the service panel. Within the 20% rule, but what if I added another 40A of solar, for 80A total?

I could draw 250A given the above loads (plus you have some lights, compressor, etc) which would then exceed the bus capacity in the panel and burn the thing down.

So with my new setup, I have 200A feeding the house and that's that.

I have a 100A breaker feeding the old garage, with a 40A backfeed, so I could add in 40A of power to the main panel, but with just the house drawing 200A max, it's hard to do - if I back feed 40A, the power main only see a 160A draw.

I'm in the green.

But now, I add 200A feeding my new shop.

I'm wiring the new shop with a 200A panel outside and another inside. All solar in the exterior panel.

What that means is the interior panel can only draw 200A through its main breaker. The exterior panel can only draw 200A from the house panel through the 200A house panel breaker OR the 200A main on the sub panel.

If I back feed 80A of power into that external 200A panel, EITHER it goes back up the line to spin the meter backwards, OR it gets used in the shop.

If I use it locally, I only draw 120A over the feed from the house. If I don't use any of it, 80A goes back up and perhaps back to the power company.

Work the math a few other ways, and I'm still protecting everything from exceeding its max power rating.


OK.. back to the solar..

I stacked some pallets on my gooseneck (to help the forklift operator deal with the wheel wells and edge lips) and went to the freight yard to pick up my 60 400w solar panels.

If you do this, and you see the banding loose like this, that's a bad sign - make sure you mark up the bill of lading with the damage.

IMG_20200911_121118889_HDR-me.jpg


Most of the panels were OK, but some had the backsheet pushed out of the frame.
IMG_20200912_145644277-me.jpg

Some had backsheet damage from the panel above gouging it.
IMG_20200912_190515278-me.jpg


Some were scuffed..

But then some of them were beyond question.
IMG_1055.jpg

IMG_1060.jpg

IMG_1082.jpg


One was so badly shattered AND the backsheet separated that every time you try to move it, you get glass shards in your hands and the whole thing is ready to collapse out into a pile like a safety glass window from a car..

Working on replacements.

Meanwhile, I've been working on prepping the panels for installation.

Each one needs a TS4-R-F rapid shutdown device (thank you, NEC 2017 adoption..) installed and the wires tidied up.

IMG_20200912_131658626-me.jpg
 
Work finally got started on the actual building today.
72.jpg

2020-8-22-6-me.jpg


They didn't quite finish standing up three walls today.

I kept telling the girls that the new shop's walls would be as high as the old shop's roof peak..

Today it became real.

IMG_20200922_174509973_HDR-me.jpg

IMG_20200922_174624896-me.jpg

IMG_20200922_174632789-me.jpg

IMG_20200922_174707011-me.jpg

IMG_20200922_174713531-me.jpg


Audrey was asking about the collection of tubing.
IMG_20200922_175003727-me.jpg


The two tall uprights are there to protect the 1/2" PEX from the sun, and the PEX feeds the tiny pad in front of the bonus room for ice melt.
Not planned to be live any time soon.

The shorter 1" conduit is actually an empty run under the slab where I'll put in the 1/2" PEX for a water feed to here. I think this is also where I'll put the on-demand electric water heater.

No drains, so while I'll have a faucet inside, it won't see much use - but I'm thinking of a small basin outside this corner of the shop, witoh a drain pipe in the (eventual) approach slab that runs off to the far end of the shop and into the field. Hot and cold water because I can.

The two big conduits are actually a 1" PEX feed from where the boiler will be. Eventually they'll feed a water-to-water heat exchanger that will feed the approach's ice-melt system. The 2" conduit in the slab is for the 1/2" pex into the approach when that comes.

IMG_20200922_174736727-me.jpg


Posts are 5" thick. The walls as much as 6.5" from the steel to the inside face.
IMG_20200922_181316095-me.jpg


I'm doing Corbond. Probably just 3", but I keep trying to over-engineer it to 4"..

Couple of 360 photos.. break out your Google Cardboard..
360_20200922_174827059-me.jpg

360_20200922_174849509-me.jpg


Revisiting this photo
IMG_20200922_174632789-me.jpg


The wide span is where the 14x14 door goes. The eastern man door will go just to the left/south of it.

On the near/right side (North), I think I concluded today that the man door will go just west of the second post (first non-corner).

That would put the door roughly 11' to 14' from the eastern wall where the big door is.

More importantly, it puts it 26' from the west wall.

It also lines up about 3' off from where the window is on the old shop - that window comes out for a door next year.

My next hurdle is the plumbing along that wall - that's where the PEX comes out for the radiant heat, and the boiler and expansion tank and pump have to go somewhere near there, but hopefully I can package that to minimize the loss of space.

I want the 25' of wall space for my steel storage.

A keen eye might see the 2x4 aluminum tubing laying in the driveway. I called up on Monday that I needed it, and it was delivered Tuesday, uncut (I cut it later) at 24' in length.

I like being able to open the door, drag it inside, and rack it.
 
Last edited:
Early view from the back yard - showing how the new shop is taller than the old, and how I need to rehabilitate my lawn..
IMG_20200923_123523616_HDR-me.jpg


And from the south end looking north, before the south wall was done
IMG_20200923_182631403_HDR-me.jpg


Trusses arrived (built by a fellow wheeler in Butte)
IMG_20200925_114752311-me.jpg

IMG_20200925_131807278_HDR-me.jpg


On Friday they got the trusses up, and I had the weekend to look around and so forth.

IMG_20200925_181924532-me.jpg

IMG_20200925_181930766-me.jpg

IMG_20200925_182111016-me.jpg


On the one hand, it looks like a lot of space to maneuver around in there. On the other hand, it's 16' up and the trusses are 4' apart.

So, I heaved some lumber into the attic.

The 2x12x16s I had bought a few years back to use as ramps to load a lawn tractor onto a 53' flatbed.. they've been outside and in need of a home ever since. Now they'll live in my attic.

I was able to use chunks of 2x6 to make a flat surface for the 2x12 to rest on. That got me another 5.5" over the bottom chord and the existing stringer they ran front to back, which should give me about enough space under the new permanent cat-walk for the insulation.

IMG_20200929_172325124-me.jpg


I threw a few other 2x8x16s up - left overs from the concrete forms - that I'll position over a few trusses and stand upright. I have some F350 SD U-bolts coming - they happen to be 15" or so long. I intend to run them up through the steel ceiling and around the 2x8, to give me lift points.

No, no engine swaps with these lift points, but I do intend to hoist up my hardtop and store it out of the way.

I did find an oopsie on the purlins. I had asked that they be installed at 20" spacing not 24" - non-standard for them, but necessary if you're mounting 39" wide solar panels with 1" wide mounts.

Monday they go tthe man doors in

IMG_20200928_171143838-me.jpg


And on Tuesday, after adding the extra purlin runs, they started on the roof. Got all of one half, and about 1/4 of the other.

IMG_20200929_153455420_HDR-me.jpg


From a little earlier in the day, trying to show the height difference between the old shop and the new one.

IMG_20200929_120757493-me.jpg


I ordered the lumber to build something close to "bookshelf girts" inside. Where true bookshelf or commercial girts would either have replaced the exterior wall girts, or become a "T" girt into the wall girts, I'm thinking just 2x4 (and in some cases, 2x3) between the posts, but against the interior face, leaving about a 2" gap between it and the exterior wall girt.

That should allow insulation in between and reduce thermal bridging.

Blocking will go against the posts to then rest the girt on, then more blocking.

I'm thinking of some blocking in the unsupported middle just because as well.

All of which then has me researching what I need to do to build a loft/mezzanine. Now thinking of a beam at the 8' out mark between posts, but actually build the floor at 10' depth.

Digging into what to put on the exterior walls (I have a bunch of 2x8s that need a home) and if I need to add any cripples to the existing posts, and/or how many posts and where, do I want to add them.

Slightly confusing since I want to angle park into the corner but I'm not entirely sure on the rest of the details yet, or where the right next-post spot would be.

I may just put the headers in and then wait and see - lumber is a bit high right now, so waiting could be advantageous.
 
Picking back up in October..

IMG_20201001_074622544_HDR-me.jpg

They started hanging the ceiling liner. It had to be steel - $5500 worth - to span the 4' spaced trusses.

IMG_20201001_182023511-me.jpg


I went for a walk with my wife, and we stopped across the field to look back..

IMG_20201001_182904437-me.jpg

IMG_20201001_182909649-me.jpg


A pair of cheap lights finally got hung for some interior light..

IMG_20201005_205605510-me.jpg


And I started cutting a lot of 22.5" tall blocking..

IMG_20201005_205624077-me.jpg

IMG_20201005_205634441-me.jpg


First the big horizontal spans and blocks, then I started to fill in the field.

10' spans on the end walls, 8' on the side walls.

IMG_20201011_202240893-me.jpg
 
Still had a mess of PEX coming out of the floor for the heating..

IMG_20201011_202248915-me.jpg

IMG_20201011_202309.vr-me.jpg


After I mounted the exterior power panel, I wound up hiring an electrician to move it, based on their recommendation - both to raise it a bit, but mostly because they have the conduit heater to bend the right swoop. We had to use some Morris splices to extend the 4/0 wire since it came up just a bit short after the panel was moved higher.

Power goes through 2" conduit right through the wall into the interior panel.

IMG_20201021_172558794-me.jpg


The extra conduit is just extra - I figure I'll wind up putting an HF antenna up or something and wanted some conduit to get the coax back to the 'shack.

Speaking of ham.. I had to climb the tower and took some pictures.

Old shop
IMG_20201022_181832819-me.jpg

new shop
IMG_20201022_181837628_HDR-me.jpg

IMG_20201022_181839286_HDR-me.jpg
 
You can see the solar system was mostly installed in the previous picture.

I used S-5! PV-47 brackets into the roof, and their PV-MID panel mounts on the old shop and the new.

One problem with the new, I read too much of the paperwork for the solar panels, where they wanted to be off the roof deck 5" for their ULS fire rating to be met.

Fine.

One stick of 4x2x.120 aluminum and a LOT more time on the bandsaw that I thought possible, and I had cut and drilled 70 some lift blocks.
IMG_20201003_185250630-me.jpg


Shipping company damaged some of my panels, so I wound up making a quick trip back to Butte to haul home one more partial pallet of replacements - they fit better in the back of the truck and was a lot more convenient than using the GN like the first time.

IMG_20201004_154218754-me.jpg


Some of the replacement panels were cosmetic blems - the A-grade panels were gone and all I could get were some Bs.. this is an example of a "B" with the white slash on this one cell.

IMG_20201004_154741284_HDR-me.jpg


When it came time to put them on the roof, the imperfect ones went at the top of the west side - hard to see, but also easiest to replace if I had to.

I hired the pole-barn builders and their man lift to install the panels. I thought one day, tops. It took them three, but it's done.

IMG_20201005_154036095-me.jpg

IMG_20201005_154038062-me.jpg

IMG_20201005_154040633-me.jpg

IMG_20201006_155631810-me.jpg


IMG_20201009_115557229-me.jpg


Electrian time again to install the two 7700w inverters and run the conduit and so forth.
IMG_20201022_161421226-me.jpg


They're on the north side of the building, away from direct sunlight for longevity.

While I plan to box in the space between the two buildings, I don't plan on coming all the way to the rear - the 5:12 roof slop makes that difficult, combined with the need to tuck under the existing building's 10' walls.

I did the roof top conduit. A run of 1/2" from the south end to the north end, one run on either side of the peak for the 3 12g wires coming from that end of the arrays, then a run of 3/4" bent over the peak (the JD2 bender did OK even with a 1" die with 3/4" conduit) - that allowed the 3 wires in the 1/2" to join with three more from the north end of the east array to then go up and over..
IMG_20201107_162146796-me.jpg


The electricians had to get in some work on the roof with the rooftop junction box and roof penetration.

IMG_20201113_141338419-me.jpg


I installed the lay-in ground lugs on the panels and ground wire to connect each group together.
 
Last edited:
Almost done here - there are six strings of panels, 10 each. 3 on the east roof, 3 on the west.

They all run into this gutter, and then the first and third string on the east side go to one inverter (left) along with the second west string, and then the 1st and 3rd west string with the 2nd east go into the right side inverter.

That means I have 8kw of east panels with 4kw of west, and 8kw of west mixed with 4kw east.

In theory, I could produce 12,000w DC into each 7,700w inverter, but that won't happen like that because a) they're not south facing so b) one side of the roof gets more sun in the morning, and likewise the opposite is true in the evening, so all 12kw tied to one inverter don't see full sun at the same time.

It also means a fatter bottom to the power production curve - it doesn't peak as high, but a lot of area under the curve.

IMG_20201116_171529182-me.jpg


The inverters have a "Secure Power Socket" that produces up to 2kw of 120V juice when the sun is shining and the power is out. This time, I put outlets inside the building wired into the SPS. If the power is out, I do need to throw a switch at the inverter, but then I have two outlets inside the shop that each supply 2kw of power while the sun is shining.

And because of the east/west array thing? Both inverters have a high chance of making 2kw or better for most of the day.

One of my concerns with the new shop was trying to make sure I didn't shade the panels on the old garage - you can see I put them to the north on purpose.

This is from just before Thanksgiving, so the sun is pretty low in the sky - and the shading isn't impacting the old panels.

IMG_20201121_123327790-me.jpg
 
So the good news is, I passed my electrical rough-in.

The bad news is, the inspector did make some comments about "workmanship" but that since I was just a homeowner it was fine.

IMG_20201109_203703557-me.jpg


I did go back and tidy it up a bit, trying to clean up the grounds.

My initial mistake, I think, was starting with the heavy gauge wires and getting them done, thinking they would be the most unruly. I might've started with the 10 and 12g wires first.

Yes, the panel is full. 225A 30/60 slots, and you can see I have a few of the tandem breakers.

I put in two sub-panels, too.

One sub behind the east door supplies power primarily to the 50A welder outlet and 50A 4-prong outlet inside, along with the 50A 4-prong "RV" port on the outside.
There's also a home-run RV plug on the south-east corner.

The other sub is around the same spot but on the west wall - it feeds two 50A welder outlets.

Some wire went into the attic, but most in the walls.

Here you can see my catwalk, which should be higher than the blow-in.
IMG_20201116_185822359-me.jpg


I also put a single floodlight on either end with a pull chain for attic lighting - I only installed those near the end of the project, of course.

Also in the attic, some ethernet and two IP cameras, to keep an eye on whether I have any condensation or lack of ventilation to address.

Other ports are for who-knows-what yet, but there are jacks at the corners on the outside for the exterior cameras, too.

IMG_20201116_185537186-me.jpg


IMG_20201116_195357639-me.jpg


$6k of foam showed up 11/18. Before the foam, I was vacuuming snow out of the wall cavities after every snow - it was not very tight or well sealed.
IMG_20201117_162051160-me.jpg


Now, let me show you how NOT to install 4x12 x5/8 drywall by yourself on a 16' wall.

Start with a HF drywall lift (that maxes out under 12'), modify it so you can put the drywall on vertically instead of horizontally, then wheel it over to the wall.

Then you find out it doesn't go 90-deg so you can't actually walk it to the wall.

IMG_20201123_144544003-me.jpg

IMG_20201123_144557696-me.jpg


Instead, you have to sort of give it a push and let it fall against the wall.

IMG_20201124_163442959-me.jpg


It worked, I did I think three sheets this way, but ultimately, FAIL.

If you look under the last picture, you see a wooden frame under the drywall.
This is what ultimately worked better.

I built a just-shy of 4' tall frame from scrap lumber, with a couple of cross braces for strength.

Just shy, because I could take a 12' piece of drywall, walk it vertically to the wall and stand it up.
I then put the frame in place against it, lifted the drywall until it would rest on one of the braces.
Catch your breath.
Then stand on a stool and lift again, putting the drywall on the top of the frame - and an inch or two from the ceiling.

Now you get the floor jack, place it under the lower brace, and pump it up the last bit.

I used a 16' 2x8 leaning against the drywall to keep it from falling backwards while I raised it up.

Sometimes I did have to coordinate the 2x8 and the jack, to allow the drywall to "unbow" and make it the last bit to the ceiling.

Then get the impact and drywall screws.
 
At first I didn't plan for a loft, but it's grown on me.. so..

I had these 2x8x16 left over from the concrete forms. They went up on the south wall at the 8' mark.

I also put a 2x6 sister against the main posts to help take the load.
IMG_20201125_204634337-me.jpg


I think I'll wind up with a 2x12 on the face before I'm done, with lag bolts into the main posts.

Yes, I'll need a beam on the other end and a few posts - I need to make some decisions on that, but the plan is a beam at the 8' mark (where the posts are) then use 10' floor joists and let them overhang a bit.

It may also be "L" shaped with a little extra on the west wall - I came out 16' on that wall.
IMG_20201129_133031775-me.jpg


I have a buddy I met 20 years ago, because he interrupted my romantic private BBQ with my wife at a small lake not too far outisde of town - in this case, the lake was snowed in, so we took the Scout and had the place to ourselves.

Until we heard something bashing its way over the big drifts.

Finally after Rich and his wife invaded our private BBQ, they got stuck - high centered on a snow drift.

Yes, I pulled them out, but not until after I drove around them once just to show off. :D

They joined the club, we wheeled a bunch, broke a bunch, and so forth.

So, fast forward to this summer, and I'm scratching my head on how to do my radiant heat and such, and I look up Rich - I knew he was a heating and AC guy by trade at times - and whadya know, he's a small business owner now.

That decided it..

IMG_20201125_112256816-me.jpg


He tried to dodge the camera here..

I opted to mount the boiler high on the wall - this wall is my steel storage wall, and it's the wall next to the lift. I didn't want to waste wall space (or floor) on a boiler I seldom have to touch.

I ran 1" pex through the wall from the bottom to the top, before it was foamed.

We didn't finish the install that day, but we got pretty far.

IMG_20201125_204726020-me.jpg


Still needed a few more fittings, and to build up a manifold for the three zone valves - one for the shop, one for the bonus-room between the two shops, and one for an eventual ice-melt / heated driveway (the two big 1" PEX on the left are embedded in the concrete and will feed a heat exchanger before supplying the driveway with heat)

I'll need to build a bump-out here to cover up the manifolds.

IMG_20201125_204734545-me.jpg


Meanwhile, I was plodding along hanging drywall.

IMG_20201125_204709987-me.jpg
 
Incredible attention to detail! Thanks for sharing. I like how you planned out your loft, especially the extra supports. I will be doing the same.
 
Around here we'd do a gambrel roof and have an upstairs. But we also don't have to buy our lumber from half a continent away.
 
Incredible attention to detail! Thanks for sharing. I like how you planned out your loft, especially the extra supports. I will be doing the same.

Thanks!

When you build a deck, no one thinks twice about putting up some posts, then lagging a ledger to the house and away you go.

The moment you say "loft" or "mezzanine" they start scaring you with "But the wall posts were not engineered for that!"

So.. fine. I added the 2x6s as insurance. :D

I will likely add a second 2x6 when I add the second ledger and really pull it off.

Around here we'd do a gambrel roof and have an upstairs. But we also don't have to buy our lumber from half a continent away.

First, we SHOULD have local lumber living in Montana, but... let's let it burn instead of cutting it.

But second - I originally planned attic trusses and an apartment up top. Why not?

When I got the quotes, it was cheaper to build a second shop than to add the second floor.

So I passed on the attic - then decided to build a loft. :P

Original plan was to make a 44x20 attic loft for my wife's new expanded craft room, so I could argue I built it all for her..
 
So the good news is, I passed my electrical rough-in.

The bad news is, the inspector did make some comments about "workmanship" but that since I was just a homeowner it was fine.

please for the love all that is holy, please label all those wires and spend some time tiddying it up.
 
please for the love all that is holy, please label all those wires and spend some time tiddying it up.

Wires were all labeled (though hard to see), and I did pull them out and tidied up after that picture. I'm sure it could still be better, but it was improved.

I had also labeled the wall where various things needed to go - realized halfway through I needed to write inside the boxes, too, to avoid having to reference the photos I took before I sheetrocked. :D

I had started with a wiring plan well before the building went up, but then things changed as I went along - I decided to add the loft, this one wasn't needed, that one could be moved a little wider, and on multiple occasions I moved boxes to allow for an uncut sheet to go up - space two boxes just under 4' part instead of just over. Try to make it so the high pieces had as few cutouts as I could manage, and so forth.
 
a simple p-touch label on the face plate with the breaker number is helpful as well.
 
a simple p-touch label on the face plate with the breaker number is helpful as well.

I've started filling in the panel's labels as I turn up the circuits - part of my problem is when I cleaned things up, the list I had kept on a piece of cardboard next to the panel with the circuit number and description may or may not have been updated as I moved some breakers about.

There's a lot of doubles in there, too, just to make the labeling fun with one breaker slot serving two circuits - several 20/20/20 and a couple 20/50/20. I ran a lot of 20A 220V circuits, along with a lot of 50A - there are three 50A 4-wire receptacles - for your RV, or electric car charger - and at least 4 3-wire welder outlets, plus the 20A 220s everywhere for smaller stuff, or lower settings on the welder.

Labels ON the breakers and doing so to address things before the cover goes on would have been awesome. :D
 
I needed more labels on the wires - I did pass my inspection, but I had some challenges after the walls were closed up, the sheathing removed from the wires, and a few things didn't go as smoothly as anticipated. :)

Got the drywall up in January.
IMG_20201220_184333.vr-me.jpg

And taped.
IMG_20201230_192857.vr-me.jpg


And a lot of mud..

IMG_20210102_125717734-me.jpg


And then two coats or primer and 2-3 coats of paint..

IMG_20210109_092610.vr-me.jpg
 
My buddy made it back over in January to finish up the heat.
IMG_20210111_115506342-me.jpg

IMG_20210111_154414827-me.jpg


There are two manifolds here - one for the shop, one for the "bonus room" - which is currently shut off.

There's also a third zone that is the extra 1" pex that runs into the floor, and comes out in the other corner of the shop. That's where an eventual heat-exchanger and another manifold for the ice-melt on the slab in front of the shop will be attached.

The conduit was primarily there to hold the pipe in place when the concrete was poured.

There's also a 1" PEX run that goes up inside the wall to/from the boiler.


A few things I screwed up on - I didn't think to run 110 for the pump and controls, so I had get that added before I finished up the drywall.

I also didn't realize I should have run cold water to the boiler area for the make-up water. Instead, I run a hose from the one inside hose bib I installed - and I should have put TWO in, one in each corner, so at least the hose didn't have to run across the door.

The hose gets hooked up only when I need some extra water.

I had to do that twice - at first, when the air filtered out, and then not long after two of the gauges that came with the manifold failed and I had to top it up again AND plug off the manifold-gauge ports.
 
Then came lots of cleaning. Sweep. Pressure washer. Acid Etch..

IMG_20210403_000310.vr-me.jpg

IMG_20210403_000448899-me.jpg


Then it was 2-part epoxy primer.
IMG_20210403_123312084-me.jpg

IMG_20210403_123420907-me.jpg

IMG_20210403_191729237-me.jpg

IMG_20210404_105713658-me.jpg

IMG_20210404_202006460-me.jpg
 
And the 2-part 100% solids..

IMG_20210404_202015283-me.jpg

IMG_20210404_202049.vr-me.jpg

IMG_20210404_202141477-me.jpg

IMG_20210404_202149092-me.jpg


Had a couple of boo-boos. A moth fell victim for starters.
IMG_20210406_090041892-me.jpg

And when they say "mix thoroughly but SLOWLY" they mean it. You can tell where I got in a hurry mixing the epoxy and entrapped air bubbles.. vendor said these were cosmetic, and I decided I wasn't diamond grinding the floor for some bubbles..

IMG_20210406_090111389-me.jpg

IMG_20210406_090106485-me.jpg


IMG_20210406_085933013-me.jpg


After this, I also put down the 2-part "Military grade" top coat with the traction stuff in it.. but I seem to have failed to take many pictures of that..
 
IMG_20210406_121418449-me.jpg

IMG_20210406_230343352-me.jpg

IMG_20210407_083824256-me.jpg


After the top coat - hard to see much difference.
IMG_20210411_115102774-me.jpg


What I did discover is I have some strips that are clear and shiny, and others where it's "dull" and hazy looking.

That's the difference between whether I actually got some traction additive down (hazy) or not (clear and shiny)
When I was done rolling it on, I though I had a big chunk of epoxy cured in the paint tray - it was a thick layer of traction additive instead.


I had done the HomeDepot/Behr stuff in the old garage, and it held up well.

This one I moved up to ArmorPoxy

Among other things, it's hidden a lot of the imperfections in the floor finish.

Cleanup is good, though I didn't solve some of the little puddle formers on the floor.

I've since hung pegboard. On the first board, I used a grinder to cut a hole for the outlet behind it, which of course "burnt" the pegboard.

I couldn't sweep up the debris - it was too fine.

I wound up pressure washing the floor to get the streaks of black soot up, which worked out OK - it squeegies out decently, but still leaves a few puddles to contend with.

A LOT easier than when I was cleaning it before painting. :)
 
Top Back Refresh