FleshEater
Ordinary Average Guy
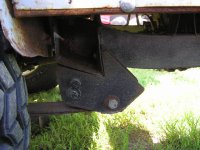
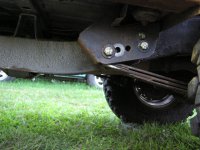
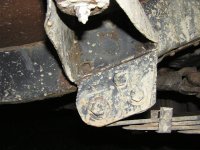
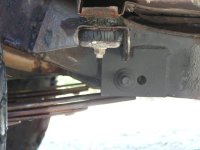
I am running SPUA custom YJ leafs on my samurai. I currently run 34x10.50 LTBs on it. It is a mix of YJ leafs and Blazer/S10 leafs to give it some lift, since I moved the rear spring hangers up and frenched the front spring hangers into the frame.
Moving the spring hangers up made a world of difference on it to keep from getting hung up on rocks/ledges. IIRC, I gained around 4" of clearance at the hanger by moving the rear spring hangers up. Of course the fixed ends of the springs have been relocated, so I am still running the stock wheelbase with YJ length springs and the fenders were cut by approximately following the original fender flare lines (since my samurai was pretty much as rusty as the OPs is).
So your springs are frame rail width? My current stock Sami springs are outboarded. I was going to do the same with the Toyota axles as I assumed wider would be better. Is this not the case?