What's new

1972 F-250 2wd to 4wd build

A friend gave me a 10# CO2 tank and reg for tire inflation. The tank is large and heavy but should be fast so going to try it out. Need some type of mount. Thinking of something like this
https://www.polyperformance.com/poly-performance-co2-bottle-mount

Unfortunately it sticks up over the bed rail. Maybe angle the mount. Also got me thinking where to mount the nitrous bottle. Found a plastic toolbox that also fits in this space nicely for some more storage. Need to think before drilling more holes.
_HkfBUhBuyLAGVS0V9-qAijH4P=w513-h683-no?authuser=0.jpg

That C)2 tank would make for a sweet keezer setup. :grinpimp:
 
Yes my dad and I restored a 69 Mach 1 when I was in high school. He let me build the motor, I learned a lot from the project. He still has the car, I have big plans for it some day.

The cams are from this truck's 460 cam debacle.

haha flecker, that's a good one!
 
Took the truck out for maiden trail voyage. Made it back, so success. Went to closest area, I have avoided dirt bike riding there for last few years since invasion of dip shits in golf carts. I'm guessing there was 100 trucks and trailers at trailhead, plus a swarm of retards shooting guns in same area (the no shooting area).

Trip was about 120 miles, 45 on highway each way. Truck did 70 mph at 2600 rpm. Exhaust is loud in cab even with all the sound deadening, but can have conversation. I was too lazy to air down for short time offroad, left tires at 25 psi. Truck rode OK on washboard sand/roads and rocky/washouted roads. The limited bump stop gap was not an issue like I expected it to be, even without airing down. No surprises or issues after 30 miles of bumping and bouncing around. Traction bar works well in sand, no wheel hop at all. Never shut of the motor, ran for 3.5 hours continuously Water temp stayed in regulation and trans didn't go above 120*. Total mileage on truck is about 600 now.
Departure angle seems like it will be limiting as expected, need to move up priority of rear bumper side extensions to protect the lower sheet metal.

Ji1NwSRpNcDEckqGLQ9suhhXcS=w974-h730-no?authuser=0.jpg


and of course the poser shot
PS570PDIx9EH5cRJNBPFwdBUVH=w548-h730-no?authuser=0.jpg
 
I cheap'd out and picked up some heavier junkyard rear springs. Shipping cost was 50% of spring cost at best, so looked for local options. Found a state-wide recycler parts lookup to locate a set, found the 4+1 leaf, 2025# springs a few miles away. They are out of a 2003 2500, although cross ref to 1500 to 3500 trucks also. $60 each, already pulled so no effort from me.

Will need to build new blocks and modify bump stops. Probably should replace bushings too.
 
so awesome to see it out the in the dirt finally :smokin:
 
so awesome to see it out the in the dirt finally :smokin:

Ya it felt good to achieve that milestone. Almost didn't go, as many things needed to be 'more perfect', but it did fine.

Last weekend was a trip to the dunes, Glamis. I ride a dirt bike, but the group had all kinds of rigs including a mostly stock '78 bronco with a hot 460 and paddles. We went way into the depths of the dunes, the bronco never used 4wd. The guy had recently bought it, didn't know much about it, other than the trans didn't want to move the truck unless it was revved up a lot.
 
Nice to see the truck getting some time out in the dirt, and killer beer fridge setup :smokin:

So how crazy of trails are you planning on doing in this thing? Despite living in New Mexico, I've never gone wheeling in Arizona before, but it might be worth making a trip and checking this thing out.
 
Nice to see the truck getting some time out in the dirt, and killer beer fridge setup :smokin:

So how crazy of trails are you planning on doing in this thing? Despite living in New Mexico, I've never gone wheeling in Arizona before, but it might be worth making a trip and checking this thing out.

Thanks and thanks. Beer is a critical consumable in the fabrication process.

Not to crazy in the near future, need to build confidence in reliability then add winch/rocker protection and whatnot. Then go to next level of trails. If you come out to AZ lets meet up or beers at least.
 
Got the heavier rear leaf springs put in. Also note the overload is curved up on the heavier packs which should allow it to engage sooner. The overload did nothing on the old setup other than add weight.
ACtC-3d4gZJMJ9PZkkeeUUjpv6nfHxm54-d4iOboa53h_gj5_tfK9kX0K-xwvvgrFdFDo4QrkexioaA8xoCFNdHbM5dJsBsRt145lFhSbVmq1afVL2qaHyjJfvxrFS7_BBBo7vA94HnzlhbQgwfjGp0Poje1=w962-h721-no


I installed with the existing 3" blocks to see what mods needed to be done. Given the increased spring rate, the new packs provided about 2 to 2.5" of additional lift. Too much so decided to fab new 2" offset pin style blocks out of 2x6 tube.
ACtC-3eFT6qO6K66ZC3DGxMjRoLblfHKURL3_JQ30qrO7UY34yHem_qba4vs3K1j1qxnUK-I2ZcvReV7VZZc2uGtsG3LMim3m-JXMhEInA5p3Kqp_KcDGYpTRjOHi_9E30X6LTEH1xEFYEK8T-pgF-9RARI9=w962-h721-no


I further modified perches and top plates for narrower 2.5" spring width (from 3") and made blocks a bit over 2.5" wide to match. The new setup will allow more rear up travel from increased ride height. Need to test and make a spacer if needed.
ACtC-3fVWlVyXda208KG4WH_2mkNSsNFU0DbeC8FMNWOLsQnA6PyXJn1MNF35ib-CCzIavi9vC6IFN7GnQKN2BPcHQsV6q3p_ZhZorTQg4NLIdoaWdTNJYVmbMRpqOanV0nxaeGDgA_dV42LBrdQa1ypY0or=w541-h721-no


This yielded about a 1 to 1.5" height increase in the rear, about back to where it was before the bumper & spare with 4.25" block. To level I adjusted front coil overs up about 3/4". This is about as far as I would go before swapping back to the 250/350# springs. Will need to do that once weight of winch and A/C system are added.

Next step is front bump stop mounts. I got another 1/2" or so gap from ride height increase so plan to take quick/easy route for another 1/2 gain. Hoping 3" up + squish of bump will do what I need.
 
Last edited:
At ride height the pack to overload leaf is already close, so as expected up travel is hindered by overload leaf. Doesn't allow it to reach the bump stop, rides like shit.
The 2+1 pack has an almost flat OL leaf, about 1/2" curve, curved down. The 4+1 pack OL has a 1-1/4 curve, going up.

Thinking I should just ditch the OL leaf. Save weight. Build a taller set of blocks.

Other option is to use OL leaf from the 2+1 pack, install curved down. It should be in approximately same position as before and shouldn't hinder travel, but it's not really doing much. Seems like it will be hard to get it configured just right to be useful and any changes may disrupt it. Could also flip it over to engage sooner, so can be tuned somewhat.

Thoughts?
 
Either ditch the overload and use the old blocks... OR flip the overload over on the 4+1's? One of those options could work.

Let us know what ya figured out man! I have always more or less built my own spring packs/ changed them up as needed to make them work.

One other option would be to ditch the bottom leaf, use the over load off the other spring pack and use the old stock blocks/ or new pending on ride height your looking for. Some combination or the other will work.
 
I decided to remove the overloads. Seemed like trying to tune the engagement of the overload would only work for a short time, until I changed something else or added weight. The overload was thicker than I thought, almost a whole inch. So I just threw the ghetto 3" block back in to test. Stripped a u-bolt getting them off, so had a local place make a new set. Rear up travel/bump gap is increased 1" to total of 4".

Going to build some better blocks, that are also narrower for 2.5" springs. So I picked up a 4' remnant of 3x6 0.25 wall tube. $teal is not cheap these days, but I have learned over the years to buy more than I need. It was likely cheaper this time than the next time I need more of it.

I also relocated the front bump stops. Decided to go the quick-n-easy route but it wasn't quick. Right side clearance is really tight so had to design to it at full droop. Was only able to move them out 1.5". Had to clearance the bump itself to clear enough. Was able to increase up travel/bump gap by 1/2", by shortening the upper spacer. Now the bumps hit the center of the lower spacer. With 1/2" ride height increase, total up travel/bump gap is increased by 1" to 3". This helps, can hit a drainage ditch in my hood at 40 instead of 25, but still an issue in the front.
ACtC-3f7GYZwMeVc1Ge1AvOjpwyKdClCPYM3e8GAN_LTQba5nEZH-PrKEGim_PTxxT6SOf-8D7_2bQ69gZn2rDJ5VOLfH2o1JH_RRn7SnD76b2LLnz37JndQp1nyS2CPp4_q3FJseNADs8nWihBjEicI8vqU=w497-h662-no


Worst case is full droop on lift or 'send it'. Massaged until the spring is not bound. Went and tested on dirt pile, put all 4 corners up, plenty of room in normal use. The pad gap spacing was hit and miss although they are symmetrical.
ACtC-3drQrZgQSLK_4pv9lHcZ66sANr7cXqze9e-yR1ckOW8rely-siXuPuwshZfZXkZY1ZgrbYSjPNIbFXAzzdUvhm3Jux6QLGbZ2Y3warzpIwDZDRgZiUP5m1pZdhD4447FU2GYVP-pa9n4o9vw78wOBuV=w497-h662-no


I wanted 3/4 ton truck capabilities out of this thing, so I tested again with the 29' turd tank, minus it's weight distributing hitch. Improved with these heavier packs. I think it will do OK with tongue weight of my other trailers.
ACtC-3exf44lkPPAwKbpT5FxfkcECVxFqEiiS8BfEYg8AS_thsm1aXhUzzFAeFsC_OEj93Z9UEo3IILHOWbbFW0ukvSnmwwjB4RV9m9p-luaLR6PqrpoE5c99AXhFAdxQztrETty-du9gLw5oJATHjG_CnXa=w883-h662-no
 
Last edited:
Another round of blocks. The more I see of Dan 's welding on TrashE, the more mine look like shit. So I tried to slow down and do a better job of fitting and welding.
cr0S1sO2G7QszV_rK-jKd8jsNO=w959-h719-no?authuser=0.jpg


Then hot glued them in. You can tell I'm not a welder by trade. I push keys and do math and stuff. But happy enough, the new blocks are also lighter than the OEM cast ones.
D8nF1UdHYZPiUteA5J5JPZORl0=w959-h719-no?authuser=0.jpg


While I had thing apart I worked the perches and plates again for better fitment of narrower springs. Welded in the outer side of the holes I hogged out in plates to locate the u bolts in tighter. Don't want blocks to twist, the offset pin isn't ideal. I ended up getting the next longer increment of U-bolts (26" blank), but were too much so I cut them to a custom length to not interfere with bump stop, but still allow a 1" taller block if needed.
So here is the latest configuration. 3" tall, 2-5/8" wide block, 4 leaf pack that still has some arch, and 50 lbs less un-sprung weight.
S9N_6t620jUBjHxuAjIQo2Z4E6=w540-h719-no?authuser=0.jpg
 
Put some more miles on the truck over bumps and ditches to evaluate the front up travel. It seems better than I thought. so 3" may be enough.

For some reason I'm not motivated to work on HVAC system. I blew the box apart to see what I had ahead. Needs a blower motor and new foam everywhere.

Would like to get going on front bumper, but need to pick a winch first and decide on mounting scheme for it. So shopping for a 12k synthetic rope unit under a grand;
Warn VR EVO $830
Smittybuilt XRC Gen3 $700
Superwinch Tigershark $730
? other ?

Seems that many of the modern winches are ugly to go with grumpy grills on disco jeeps.
 
those rear blocks turned out mint :smokin:

i just ordered a VR EVO 10 for the buggy and will be picking it up tomorrow. Been winch shopping for a while and after seeing one in person i pulled the trigger on it as seem to be better quality and better sealed then the others. Now its not the winch i want but in my budget and needs it was the best option i feel.
 
Thanks man. Got the rear Dana 60 and 2+1 cheby 63 leaves sold out of my junk pile so have some cash to offset a winch purchase. Been looking at used stuff too but prices are stupid for old stuff with steel cable.
 
Picked up a mount for the C02 bottle and decided on a location and mount scheme. The existing latch mechanism didn't really support a lock, so I modified it. Cut off the small tab and replaced with some heavier metal with a 1/4" hole to be able to use a pad lock or hitch pin style lock
ACtC-3dwaRwtU700kr4zmwYupp1L7kCfnd992YVAzjT9rWWh01fSBOFtH-Iobj0uE7EZsXCQyDWB0unb2FLXj_BCtVogQgaxvL6gNZZMq4wpbwnx9eEgI6qN2Btxy3puzVPtxQZGEocNQkjgLEGVwlhHJ-mH=w940-h705-no


Used riv-nuts to secure mount to bed bulk head. Now I can use a hitch pin keyed alike to all the other stuff. Going to get a shorter version of what is shown here.
Next step is a suitable air hose to reach all four corners.
ACtC-3d12pTDWKVzHr8kDyRMQcBbxVKHNJeXFHPj43AwvwpTjTdhWl5l4o4a3V2R3WxVOSv_RSrieMLsU_KdnTcIvIP_U8zXeuBJSWHtNzRH70EWTL3647LbDFv7aJ4hO2M9jE1ZffPxepUz1vR2KyKFtvtR=w529-h705-no
 
This truck is killer man. Definitely going to copy you on those rear blocks.

I basically had it narrowed down to those same winches and decided on the VR Evo 12S.
 
Thanks Dan. Rec tube seemed easiest way to make a cubic rectangle. Could easily slice on end and put some angle in them if needed.

Well with 2 of you going with the Evo I guess I have to get one too....

I found the best price by far was to order from Austin here on Irate. Quick, easy and I saved a bunch of cash I can use on beer, hookers or whatever.

After seeing discount on the K&N filter here https://irate4x4.com/general-4x4/80382-project-midnight-panic?p=315415#post315415 Figured I would try it out. Glad I did.
 
Got the Warn Evo VR 12S and started making a hole for it. I want it tucked up and in as far as possible to limit degradation of approach angle and to generally hide as much as possible. Remote mount contact box.
Step one was to check fitment and see what needed to be cut out of core support and valance.
ACtC-3fcraNeyB4A5x8kk9nNZqc0F4UXwJxbUTQ6uZltO0H7SMaIuYRj-br3cdGrZJPwrryIw2tvQx6rpgoUXZmvD8Wp0s2wrCnidjMjaYFT4c8fsxJXCZ3pgIsZMKuBnzVOIxXVybYCDqJDrCnAJYeXw-JN=w916-h687-no


Cut off all of the pinch weld and re-welded the seam to restore integrity. This also removed some of the attachment points for valance.
ACtC-3dsd_54qF6QmbhhzjTVzsoPWhg6FYY51SdSgkBoHdVbTii2-HALmPwCLUTYjYCXjBTep-yUzoOnuEAolMDYEWJe2AxifDKFP4gJc64Bp9572_nKlQ0muZnflp_CCONtVwkwboqTZYoE9nNKCtXfYyCU=w916-h687-no


Trimmed the valance as well and test fit it. Wasn't happy with how the 2 mods and winch looked together, so went back and cut the core support further. Should have made a more narrow opening in valance. Looks fine in pics but I guess I am too picky.
ACtC-3fQzW5AMFwbzdEtUfmyeNS_54hEx-l3lOA1bmi16mCk39laRhtKY0pG8B8Cl3iNjSE9FjUiIITA3DWB4bjOXt2BiB708zaaBmYctsbFqqHAM2-3CopMFeGHBqsL6eBDleD_zPFGUUlr-rKBWIbGc746=w916-h687-no


Added a mount in the center of the valance, as there was a conveniently located attachment point on core support. Re-painted the whole thing as the 2nd color match rattle can isn't close to 1st or the right color.
ACtC-3cCxUI51zcrI0WpxPKAbbkiG5VcpII1EKAqSYKBOq28XmfT6HS8oZPdLo7JGXHx1VqnS4UU8V7gxCYI44DSU2zOtiulQuD9lV4mmBqcXDQxoPPMzUSAfcn6hk4vhT-ygOr-0zpzGwrZt1Aoc7e_nzwJ=w916-h687-no


ACtC-3fu5npdtWTo-cFiBJbZxBHOW2xCYAUaFAXn1ey069YfpbIcTfOfNd9SOJJQVaaEKhJAIjLV5Yz35Trxr5_HiTVqZQVz72j3Gpzr49CPPHjqb-sVNNxr5LPKxLLC9-R4ZMB6uzeoiJ_PQTxAnsQvN2vz=w916-h687-no


Now winch is tucked in a few inches further and bumper won't have to stick out so far. Just have to build the bumper...
ACtC-3eUon1Z615uVt7_nfJk80GoFFX-6HjPGiJ64lQBWcX991ZzeAXO_wJielvVKTnFBZNJyRk7mHV4DDs6VLyIr1dfkvDBEndlnn4STWQTo1XOx74Uo46DnMNjhZA4EUZAdmNudPcjhw4yFRkjVTvcR8Mk=w916-h687-no


ACtC-3ccKUb55PoDFaeezBDobceOGKCPi9Lwlz95Ga3roE18xG9ZKzj7ZhXsFTXQbMjsU6bF8LCTd9KGB_4a4uUd82dZpJ93nFebTScxCEMVgLhwDlJrIlz_87tmlnCuX0sGPLybfIJ1DRTvp9sEMdtBHEUP=w516-h687-no
 
Looks good! Thing tucks right in like it's made to be there. Good job.
 
Too nice of work again. The front of the truck looks so nice, properly buttoned up, and the tires and suspension look properly balanced, the quality shows all the way through. :beer:
 
Thanks guys. Decided to make a plate bumper from scratch. well from steel. Considered moding the stocker but I think I wouldn't be completely satisfied with it.

So I bought a half a sheet of 3/16. Wanted to do the mount plate out of 1/4, but had to buy a large piece, so fuck it. Didn't want entire bumper out of 1/4 either, trying to keep it 'lighter'. Plan is minimal, compact. No hoops, bars, lights or any of that stuff. I do want to wrap the front of the fender with the end of the bumper. Will be a challenge to make it not look like shit. But lacking mental ability to do anything with it, so have to wait for now.
 
Last edited:
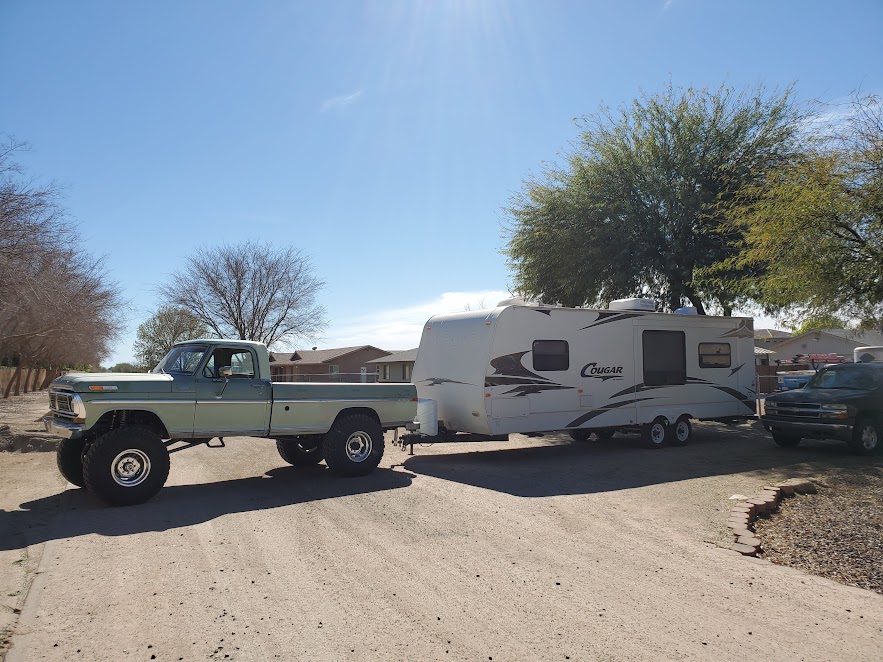
Stalled on several projects so added another, upgraded speakers for the old Ford. Have a connection with Rockford, so went with some T1's in 5.25" size for space reasons. The existing Pioneers were an odd size, 16 cm, 6.25". The original cutout was hideous, and some time ago I made them round and large enough to properly fit, at 5". The grill still hit the cab floor a bit when door is shut. The RF 5.25 have a smaller OD grill assembly, and use a 4.8" hole which was close enough to work.
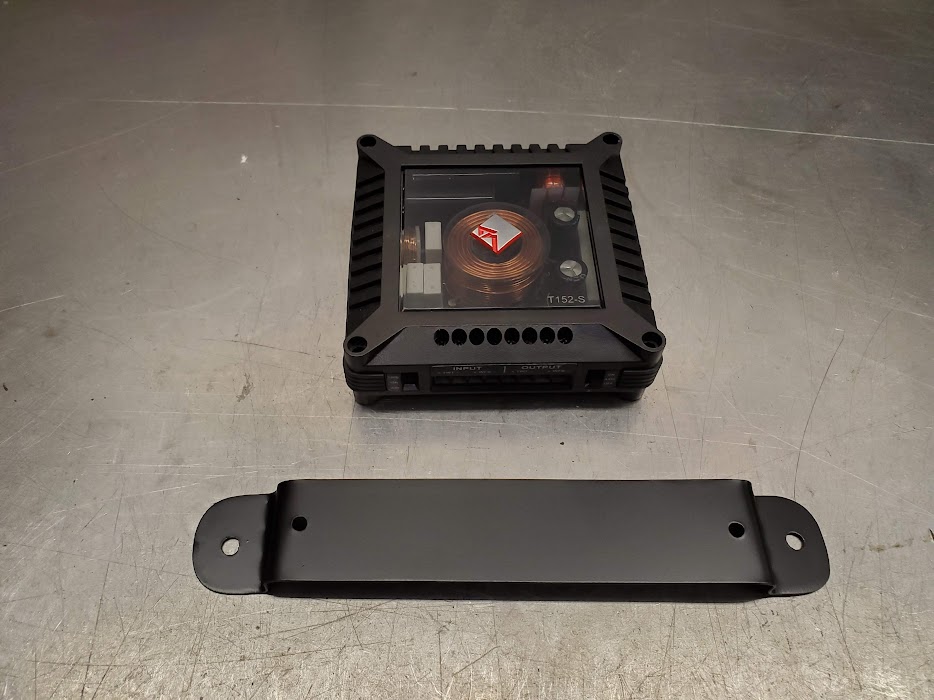
Component system uses external filter assembly so needed a spot to mount. Didn't want to place in door so made a bracket to attach to dash pad.
ACtC-3eJsKG_A9T66g_nyY9GFo71udh5ZjyqEejNWvfAveG2x-VRLqzL4KqwTUqyugK-Fq3YuNPaxhIFW_1CBXVLruzhJ_odSNFChuIWButptL8TR1LMD4UeIo5sdQzzSc2A6tvTj69c-JMqJepL13vYVxt3=w934-h700-no


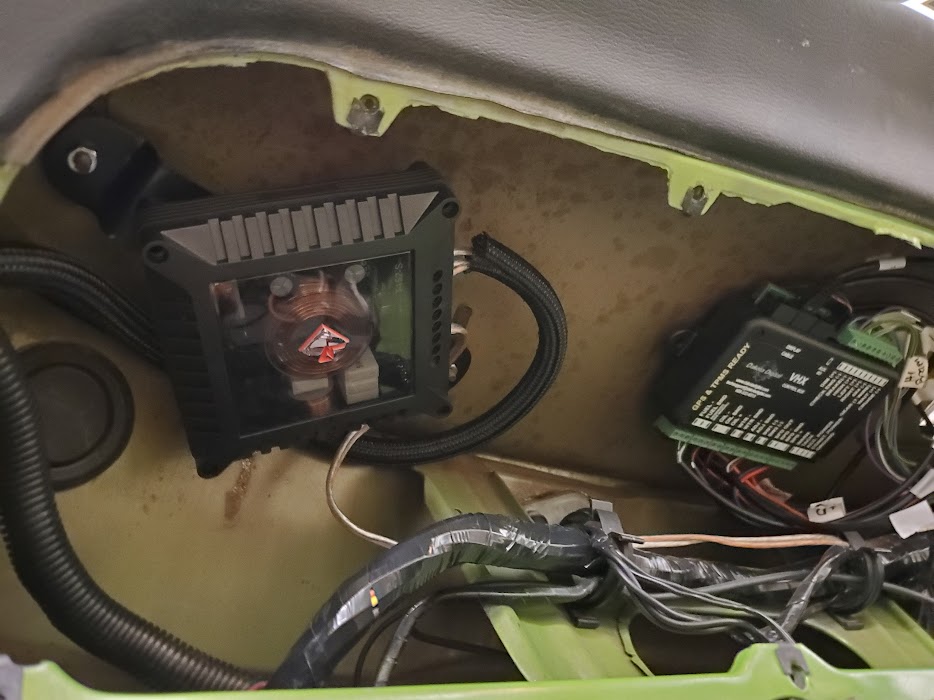
Mounted upside down under dash like the control module for gauges.
ACtC-3dqBgxIbLuH8BPpL6qljNj0zLy_7dtEK9GIHrDFcn7b2al0efs7avPlnUsPiOo3mT8ewPl9pPMcuDxc0FFR0qFCmvyxunx3vI29ZRmdmzEmV4CoRrDk226rNNTQOwRwiNaanwtpsXPNJRW_WmxcAUVV=w934-h700-no


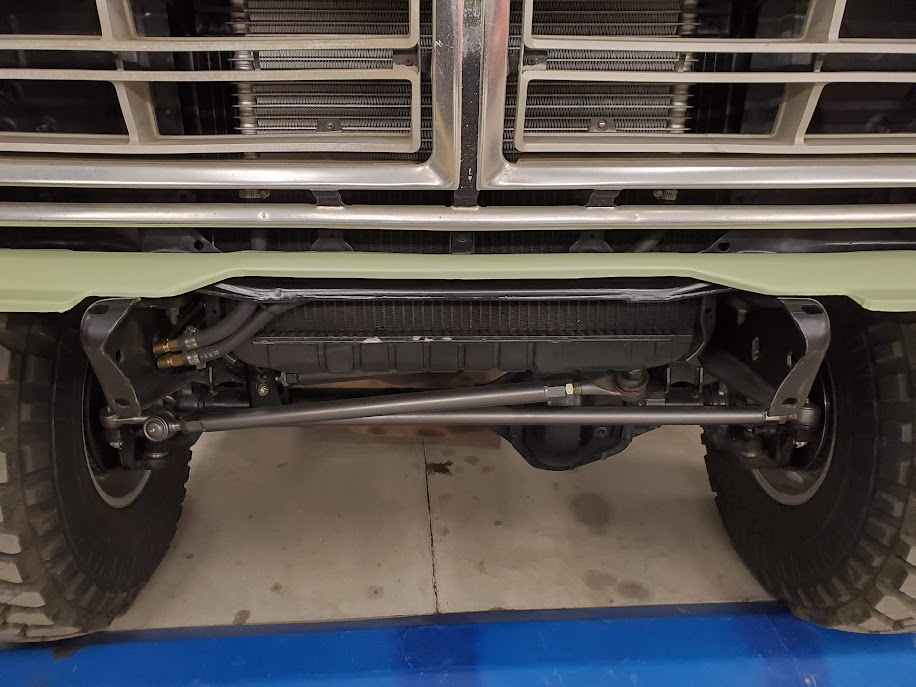
With filter under dash 2 set of wires needed to be run to the doors, so it made sense to put some effort into a jam harness. I drilled a hole in the door for a grommet and used some split sleeve loom that will allow adding wires for lock actuators or power windows later.
ACtC-3eiF3JtBKkdbwnQ-41QTMu28RQaVjUKoOVRk8EOCpb8JX6K7KbwCUV7Y9yMNY6eIDyi0tCkVkYAyA8FidbnxnXBcg5QTLG--lnViwk8knqZn7H-SZiZvSNFno4OurSG1F4aH4k03oTkwmW8ELSgELoH=w934-h700-no


I mounted tweeter up high on door. I didn't feel bad drilling more holes.
While I had door apart I died the avocado door panels black. The seat has been recovered so they didn't match anything anymore. I masked the plastic trim that had originally been chrome, it goes with the rest of the interior trim scheme. Came out OK. Interior has more of a 'Black Bart' feel now.
ACtC-3fIyWt-jG0DhdbxSaH_tm8HmqjkX27BeLqWb6wTQ0oDUUtaKzf6CUTlon7of1vXzuo4OUHCCjbbWcq9-21OT8lF_gi_G7hjqNACXeSj4fk_LAHPr1eqdE_yiy9RPEfZkyPWF9qKTxf45MLN7PCrpZHn=w525-h700-no


But how does it sound? Improved mainly due to placement of tweeters. The soul and balls come from the subwoofer and high power amp, which didn't change. With high pass filter around 120 Hz and 125 W/ch, the amp will never clip driving this component system. The 10" sub @ 500W remains the limiting factor. It rips pretty good, happy with result. Loud as F, clean, cheap. I have under $100 in the whole system, mostly leftovers from previous systems.
 
How's the sound damping material or did I miss it?

I always heard Ford has a copyrighted sound to their door click. Part of that distinctive thunk was the hollow sound of the metal cab. I love the exposed metal but it's a terrible sound stage. Material on the back of that has to help a ton.
 
I did the whole cab in Kilmat, then went back and did the doors more recently. The doors did make a noticeable difference for road noise at speed. I did the entire door skin (was not fun) and also what I could of the interior door shell. It did change the sound. With door woofer filtered to remove low freqs the cone doesn't move much.
 
Top Back Refresh